This site is supported by our readers. We may earn a commission, at no cost to you, if you purchase through links.
When you’re battling uneven stitches or fabric bunching, it’s time to tweak those feed dogs.
Start by removing the needle plate and locating the adjustment screw. Turn it clockwise to raise, counterclockwise to lower the feed dogs.
Different fabrics demand different settings—heavy materials need more height, while delicate fabrics require a gentler touch. Always test on scrap fabric first, and you’ll be creating smooth, professional-looking seams in no time.
Ready to tap into your machine’s hidden potential?
Table Of Contents
- Key Takeaways
- What Are Feed Dogs for Sewing Machines
- When to Adjust Sewing Machine Feed Dogs
- Adjusting Feed Dog Height for Sewing
- Adjusting Feed Dog Angle or Position
- Feed Dog Maintenance and Care
- Troubleshooting Common Feed Dog Issues
- Advanced Feed Dog Techniques and Tips
- Safety Precautions and Best Practices
- Frequently Asked Questions (FAQs)
- Conclusion
Key Takeaways
- You’ll transform your sewing by understanding how feed dogs manipulate fabric movement, raising or lowering them to match different fabric weights and sewing techniques.
- Learning to locate and adjust the feed dog height adjustment screw will give you precise control over stitch quality, preventing common issues like fabric puckering and uneven stitching.
- You’ll need to match your feed dog settings to specific fabric types – delicate materials require gentler handling, while heavy fabrics demand more robust fabric gripping and movement control.
- Regular maintenance of your feed dogs, including cleaning, proper oiling, and checking for wear, is crucial to ensuring smooth fabric feeding and extending your sewing machine’s overall performance.
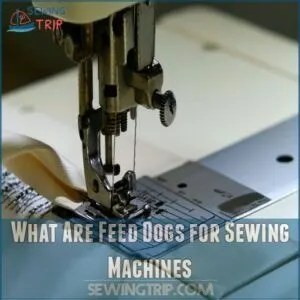
What Are Feed Dogs for Sewing Machines
Ever wondered how your sewing machine magically moves fabric under the needle with precision?
Feed dogs are your trusty fabric guides, gripping and pulling material smoothly.
to guarantee each stitch lands exactly where you want it.
Feed Dog Function and Benefits
Feed dogs are the unsung heroes of your sewing machine, gripping and guiding fabric like a skilled dance partner. These metal teeth beneath the needle plate guarantee smooth, precise stitching across different materials.
- Grip fabric evenly during sewing
- Prevent fabric slippage and bunching
- Control stitch length and spacing
- Enable consistent fabric movement
- Support various sewing techniques
They’re your secret weapon for professional-looking projects, transforming raw fabric into perfectly stitched masterpieces with mechanical precision.
Importance of Feed Dog Adjustments
Mastering feed dog adjustments is your ticket to sewing success – it’s like having a secret weapon for perfect stitches.
Your machine’s performance hinges on these tiny teeth doing their job right.
| Fabric Type | Feed Dog Setting |
|---|---|
| Heavy Denim | High Tension |
| Silk | Gentle Movement |
| Stretchy Knits | Reduced Pressure |
Precision matters, and you’re about to become a sewing pro!
Common Feed Dog Problems and Issues
When sewing machine hiccups strike, your feed dogs might be secretly sabotaging your project. These tiny metal teeth can cause serious fabric frustration.
Don’t neglect regular checks, as even a trip to the resource on broken feed dogs can be beneficial in spotting issues early on.
Watch out for:
- Broken or bent feed dog teeth
- Uneven fabric feeding
- Persistent stitch skipping
- Constant fabric puckering
Recognize these warning signs early, and you’ll prevent major sewing disasters. Your machine’s smooth performance depends on catching these sneaky issues before they snowball into a crafting catastrophe.
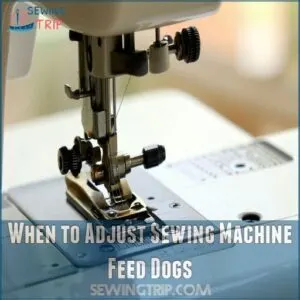
When to Adjust Sewing Machine Feed Dogs
If you’re struggling with uneven stitches, fabric puckering, or just can’t seem to get your sewing machine to cooperate with different fabric types, it might be time to adjust your feed dogs.
You’ll want to learn how to fine-tune these essential machine components to guarantee smooth fabric feeding and professional-looking results.
Learn this to achieve professional-looking results across various sewing projects.
Fabric Puckering or Bunching Issues
Every quilter’s nightmare is fabric puckering that turns a smooth project into a wrinkled mess.
Your sewing machine’s feed dogs might be the culprit when uneven fabric feed creates those frustrating ripples.
Adjust the feed dog height to match your fabric weight, check tension settings, and make certain your presser foot isn’t causing unnecessary pressure.
Test on scrap fabric first to nail the perfect stitch.
Loose, Uneven Stitches
Struggling with loose, uneven stitches can drive sewists up the wall.
Your machine’s feed dogs might be the hidden culprit behind those frustrating tension issues.
Check your stitch length, confirm proper needle positioning, and inspect thread quality.
In some cases, uneven thread tension or incorrect bobbin loading can also cause reverse stitching issues.
Test different settings on scrap fabric, adjusting feed dog height carefully.
Remember, precise fabric feeding is key to those picture-perfect stitches you’re after.
Heavy or Difficult Fabrics
Working through thick denim or leather?
Your feed dogs need extra muscle to tackle heavy fabrics, and for this, you may need heavy duty feed dogs.
Bump up your feed dog pressure and switch to heavy fabric needles to prevent fabric dragging.
Increase stitch length for smoother topstitching, reducing puckering risks.
By adjusting feed dogs strategically, you’ll master those challenging materials and sail through even the toughest sewing projects with confidence.
Lightweight Delicate Fabrics
Sewing silk or chiffon feels like walking on eggshells – one wrong move and your fabric’s toast! Lightweight fabrics demand special feed dog finesse.
Here’s your game plan:
- Lower feed dog height slightly
- Use a fine needle (size 60/8 or 70/10)
- Reduce presser foot pressure
- Choose shorter stitch lengths
- Handle fabric with gentle, consistent tension
Smooth sailing starts with understanding your delicate fabric’s personality.
Sewing Specific Techniques
Want to level up your sewing game?
Different techniques demand unique feed dog adjustments. Free-motion quilting requires lowering feed dogs, while decorative stitches and appliqué need precise height settings.
Button sewing and heirloom techniques rely on perfect fabric feed control.
Master your machine’s feed dogs, and you’ll open a world of creative sewing possibilities with confidence and precision.
Adjusting Feed Dog Height for Sewing
You’ll want to pay close attention to your machine’s feed dog height to guarantee smooth, professional-looking stitches every time.
Adjusting the feed dogs might seem tricky, but with the right technique, you’ll master this essential sewing skill in no time.
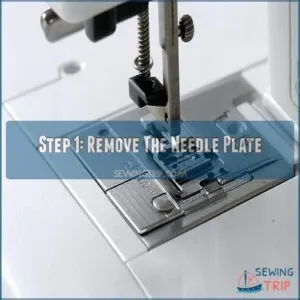
Step 1: Remove The Needle Plate
How ready are you to start with feed dog maintenance?
First things first: unplug your sewing machine for safety.
Grab a flathead screwdriver and carefully remove the needle plate, watching for any tiny screws.
These little metal pieces can easily roll away, so keep a magnetic dish nearby. Take a moment to note the plate’s original position for smooth reassembly.
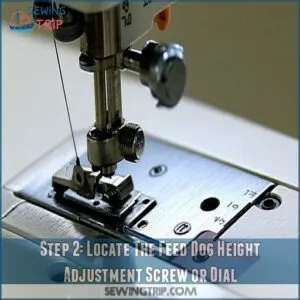
Step 2: Locate The Feed Dog Height Adjustment Screw or Dial
Every smart sewing enthusiast knows that pinpointing the feed dog adjustment screw is like finding a hidden treasure.
Check your machine’s manual first—it’s your roadmap to locating those elusive screws or dials.
Most often, you’ll find them underneath the needle plate or near the bobbin area.
Pro tip: Look for small, inconspicuous adjustment points that might be camouflaged among your machine’s inner workings.
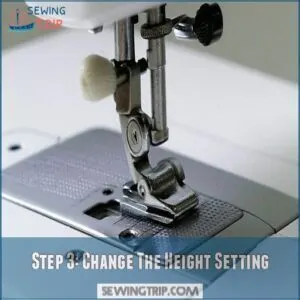
Step 3: Change The Height Setting
When precision strikes, changing your feed dog height becomes an art of subtle manipulation.
Turn the adjustment screw clockwise to raise or counterclockwise to lower, making incremental 1/4 to 1/2 turn adjustments.
Your sewing machine’s feed dog height dramatically impacts fabric movement, so approach this step with a surgeon’s touch and a craftsperson’s intuition.
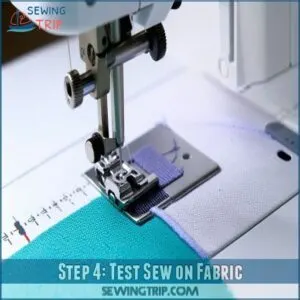
Step 4: Test Sew on Fabric
After adjusting feed dogs, grab scrap fabric matching your project’s weight to test stitch quality.
Refer to your sewing machine’s specific settings for thread tension based on fabric.
Run a few test lines, watching how different needle types and fabric weights impact feed.
Check for smooth fabric movement, consistent stitches, and no puckering.
If something feels off, make tiny feed dog adjustments until your fabric glides like a dream under the needle.
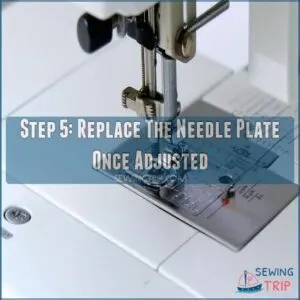
Step 5: Replace The Needle Plate Once Adjusted
Your sewing machine’s needle plate is the finishing touch after feed dog adjustments.
Carefully align the plate, ensuring it sits flush and secure. Tighten mounting screws evenly, but don’t over-torque them.
Give the plate a gentle wiggle to confirm it’s snug.
Test a few stitches on scrap fabric to verify everything’s working smoothly before diving into your main project. This is a crucial final step.
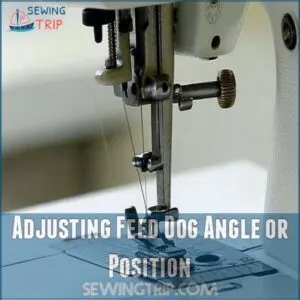
Adjusting Feed Dog Angle or Position
When you’re struggling with uneven fabric feeding or stitch quality, adjusting your sewing machine’s feed dog angle might be the solution you need.
Learning to properly reposition and align your feed dogs can help you tackle tricky fabrics.
smoother, more consistent stitching results are achievable with proper feed dog adjustment. feed dogs
Step 1: Remove The Existing Feed Dogs
A sewing machine’s delicate feed dogs demand careful handling when removal becomes necessary.
Grab your precision screwdriver and safety glasses – you’ll want to power down the machine first.
Locate the needle plate’s securing screws, gently removing them to expose the feed dogs’ hidden terrain.
Work slowly, keeping track of each tiny component.
Step 2: Install New Feed Dogs
Precision matters when installing new sewing machine feed dogs.
Grab your compatible replacement parts and the right tools – typically a small screwdriver and tweezers.
Carefully position the feed dogs, ensuring they’re seated correctly in the machine’s designated slots. Line up the teeth symmetrically, matching the original placement for smooth fabric transportation during stitching. smooth fabric transportation sewing machine feed dogs replacement parts
Step 3: Check Alignment
Now that you’ve installed the new feed dogs, alignment is your make-or-break moment. Ensuring precise positioning means the difference between smooth sailing and a sewing nightmare.
Check these key points:
- Verify feed dogs sit perfectly flush with the needle plate
- Confirm zero wiggle room or misalignment
- Test feed dog movement before final positioning
Nail this step, and you’ll dodge fabric feeding frustrations like a pro.
Step 4: Replace The Needle Plate
After aligning the feed dogs, it’s time to snap that needle plate back into place.
Think of it like closing a well-oiled machine – precision matters!
Here’s a quick guide to plate replacement:
| What to Check | What to Do |
|---|---|
| Plate Fit | Align carefully |
| Screw Tightness | Secure firmly |
| Surface Cleanliness | Wipe before replacing |
Smooth reinstallation keeps your sewing machine humming like a dream.
Step 5: Test Feed Dog Alignment
Once you’ve reattached the needle plate, it’s showtime for testing your feed dog alignment.
Follow these key steps to make sure smooth sailing:
- Select a scrap fabric similar to your project material
- Set up your machine with the correct thread tension
- Run several test stitches across different fabric sections
- Examine the stitch quality and fabric glide
Check for consistent fabric feed and even stitch formation.
Watch for any hiccups in fabric movement that might signal misalignment.
Feed Dog Maintenance and Care
Your sewing machine’s feed dogs are the unsung heroes of smooth fabric movement, working tirelessly with every stitch you create.
Keeping them clean, well-oiled, and in top condition isn’t just maintenance—it’s your secret weapon for consistently perfect stitching.
Extending your machine’s life is another benefit.
Regular Cleaning and Oiling
Every savvy sewer knows clean feed dogs are the secret sauce to a smooth-running machine.
Your maintenance toolkit is your ticket to sewing success.
| Cleaning Tool | Frequency |
|---|---|
| Soft Brush | Weekly |
| Compressed Air | Bi-weekly |
| Lint Brush | Monthly |
| Microfiber Cloth | After Each Project |
| Light Machine Oil | Every 8-10 Hours |
Grab those tools and show your machine some love!
Replacing Damaged Feed Dog Teeth
When your feed dogs start looking beat up, it’s time to swap them out.
Worn or broken feed dog teeth can wreck your sewing game faster than a loose thread unravels a sweater.
DIY repair kits are your best friend here – they’re way cheaper than professional fixes.
Check your sewing machine’s manual for specific feed dog types and replacement sources.
A quick swap can save you tons of headaches down the line.
Checking and Adjusting Needle and Thread Tension
After fixing those worn feed dog teeth, you’ll want to fine-tune your machine’s tension game. Thread tension can make or break your sewing project, turning smooth fabric into a stitching nightmare or a masterpiece.
Here’s your tension troubleshooting toolkit:
- Check your bobbin tension first
- Match needle type to thread weight
- Adjust top tension incrementally
Uneven stitching? Your machine’s whispering secrets – listen close and tweak those settings.
Troubleshooting Common Feed Dog Issues
If you’re struggling with uneven stitches, fabric puckering, or feed dog misalignment, you’re not alone in the sewing world.
Your machine’s feed dogs can be finicky, but with the right troubleshooting techniques, you’ll master those tricky fabric-feeding challenges in no time.
Skipped Stitches and Tension Problems
Ever hit a snag with skipped stitches? Troubleshooting tension problems can feel like threading a needle in the dark. Check out this quick guide to smooth out your sewing hiccups.
To avoid issues, remember that raising your feed dog movement can make all the difference in achieving smooth fabric feeding.
| Symptom | Possible Cause | Quick Fix |
|---|---|---|
| Skipped Stitches | Incorrect Needle | Replace with right needle type |
| Uneven Tension | Incorrect Thread | Adjust thread tension settings |
| Stitch Inconsistency | Feed Dog Misalignment | Realign and adjust feed dogs |
| Poor Stitch Quality | Incorrect Presser Foot | Check and adjust foot pressure |
Don’t let tension troubles unravel your project!
Fabric Puckering or Bunching
Hit a snag with puckered fabric? Those annoying bunched-up seams aren’t your sewing machine’s way of adding texture.
Stitch tension is usually the culprit.
Check your needle type and match it to your fabric weight. Adjust the presser foot pressure and feed dog height to smooth out those fabric feed issues.
Sometimes, a quick tweak is all it takes to transform those puckered seams into silky-smooth perfection.
Feed Dog Alignment Issues
Puckered fabric can signal deeper feed dog alignment problems that’ll make your sewing projects go sideways fast.
- Feed dog wobble throwing off your stitch game
- Misaligned teeth causing fabric to slip and slide
- Bent feed dogs creating uneven fabric feeding
When your machine starts acting funky, it’s time to check those feed dogs. Quick adjustments can save your project and keep your stitching smooth and professional.
Advanced Feed Dog Techniques and Tips
You’re about to discover the secret world of sewing machine magic with advanced feed dog techniques that’ll transform your projects from basic to brilliant.
Master these pro tips, and you’ll manipulate fabric movement like a seasoned seamstress.
Creating everything from intricate decorative stitches to smooth free-motion quilting with professional-level precision.
Adjusting Feed Dog Height for Decorative Stitches
Shifting from pesky stitch problems, let’s amp up your decorative game by tweaking feed dog height.
Your machine’s secret weapon for stunning stitches lies in precise adjustments.
Want eye-catching embellishments? Lower those feed dogs slightly to let creativity flow.
Match your needle to fabric weight, experiment with stitch types, and watch your project transform from basic to brilliant. Precision is your new superpower.
Using Feed Dogs for Free-Motion Quilting
Ready to break free from rigid stitching?
Free-motion quilting frees your creativity by lowering feed dogs, letting you move fabric like an artist dancing across canvas.
Your sewing machine becomes a paintbrush – just flip that lever to drop feed dogs, adjust your needle position, and watch your fabric glide smoothly.
Pro tip: practice consistency and embrace the spontaneity of this liberating technique.
Feed Dog Settings for Different Fabric Types
Fabric weight is your secret weapon when dialing in feed dog settings.
You’ll want to match your machine’s feed dogs to each fabric’s personality – lightweight silks need gentle handling, while denim demands heavy-duty grip.
Adjust your stitch length, needle selection, and tension accordingly.
Pro tip: always test on scrap fabric first to nail those perfect feed dog settings and avoid stitch nightmares.
Safety Precautions and Best Practices
When working with sewing machine feed dogs, your safety is paramount.
Always disconnect the power and wear protective gear before making any adjustments.
By following these key precautions, you’ll protect yourself from potential accidents and guarantee a smooth, secure sewing machine maintenance experience.
Wearing Protective Gear
When you’re working with your sewing machine, protecting yourself isn’t just smart—it’s your first line of defense.
Gear up like a pro with these must-have safety essentials:
- Safety glasses shield your eyes from flying needle fragments
- Heavy-duty work gloves protect against sharp edges and unexpected slips
- Dust masks keep those tiny fabric particles out of your lungs
- Hearing protection dampens the machine’s constant mechanical hum
Stay safe, stay stylish, and keep crafting without worry.
Turning Off Power Before Adjustments
Electrical safety isn’t just a buzzword—it’s your sewing machine’s guardian angel. Before diving into any adjustments, always unplug your machine to prevent unexpected jolts or zaps. Additionally, following proper electrical safety precautions can prevent overloading electrical outlets and guarantee the right voltage matches your machine’s specifications.
| Action | Safety Tip |
|---|---|
| Power Switch | Turn OFF completely |
| Cord | Unplug from outlet |
| Hands | Keep dry and steady |
Your quick second of caution can save you from potential shocks and keep your crafting adventure shock-free and smooth.
Regularly Checking and Maintaining Feed Dogs
Your sewing machine’s lifeline depends on those hardworking feed dogs staying in top shape. Regular maintenance isn’t just a chore—it’s your ticket to smooth, flawless stitching.
Clean feed dogs weekly using a soft brush, removing lint and thread debris.
Lubricate sparingly with one or two drops of machine oil every few months.
Inspect teeth for wear, replacing damaged parts promptly to prevent fabric feeding issues and extend your machine’s lifespan. damaged parts and extend your machine’s lifespan.
Frequently Asked Questions (FAQs)
How to adjust sewing machine feed dog?
Like a conductor guiding an orchestra, you’ll fine-tune your sewing machine’s feed dogs.
by locating the adjustment screw.
raising or lowering them with 1/4-turn increments, and testing fabric movement.
until smooth stitching flows effortlessly.
What lowers and raises the feed dog on a sewing machine?
Most sewing machines feature a lever, button, or switch that lowers and raises feed dogs.
This control lets you drop feed dogs for free-motion sewing or raise them for standard straight stitching.
Giving you complete fabric control.
Should feed dogs be up or down?
Imagine feed dogs as fabric’s guiding hands.
They’ll dance up for standard stitching, gliding smoothly across fabric.
Drop them down when free-motion quilting calls, freeing your creative spirit and giving you total fabric manipulation freedom.
Why is my sewing machine feed dog not moving?
Your feed dogs might be stuck due to lint buildup, misalignment, or mechanical wear.
Check for debris, confirm proper lubrication, and test the feed dog mechanism.
If problems persist, consult a professional sewing machine technician for a thorough inspection.
Can feed dogs affect decorative stitching techniques?
Feed dogs dramatically impact decorative stitching by controlling fabric movement.
When you lower them, you’ll free free-motion creativity.
Letting your needle dance across fabric without mechanical constraints, transforming ordinary projects into artistic expressions.
How do different fabrics impact feed dogs?
Different fabrics demand unique feed dog settings.
Lightweight materials need gentler handling, while heavy fabrics require robust teeth grip.
You’ll adjust height, tension, and positioning to match each fabric’s weight and texture for smooth, precise stitching.
Are expensive machines more precise with adjustments?
Pricier sewing machines typically offer more precise feed dog adjustments with finer calibration mechanisms, digital controls, and smoother mechanisms.
They’ll give you better fabric handling and more consistent stitch quality across different fabric types.
What happens if feed dogs get damaged?
Like a warrior with a chipped sword, damaged feed dogs can’t battle fabric smoothly.
They’ll snag, skip stitches, and make your sewing project look rough.
You’ll need professional repair or replacement to restore your machine’s precision.
Conclusion
Mastering sewing machine feed dog adjustment is like gaining a secret weapon in your crafting arsenal.
You’ve now got the skills to tackle tricky stitches and fabric challenges head-on.
Whether you’re working with delicate silk or heavy denim, your newfound knowledge of sewing machine feed dog adjustment will help you create professional-looking projects.
Keep practicing, stay curious, and don’t be afraid to experiment—your sewing skills will thank you.

