This site is supported by our readers. We may earn a commission, at no cost to you, if you purchase through links.
First, unplug your machine—safety first! Grab a small brush or even a clean mascara wand to sweep out lint.
Check for loose screws or tangled thread, as these are common culprits for issues. Use sewing machine oil sparingly on moving parts, but don’t overdo it—nobody likes a greasy mess.
If your stitches skip or tension’s off, double-check the needle (it might be dull or backward). Still stuck? Look at your manual for specifics—it’s like having a roadmap for your machine’s quirks.
Keep tweaking!
Table Of Contents
Key Takeaways
- Clean your sewing machine often by removing lint and using a soft brush or vacuum to keep it running smoothly and avoid thread jams.
- Use high-quality sewing machine oil sparingly on moving metal parts for better performance and longer machine life.
- Check and adjust the needle, tension, and threading to fix skipped stitches and thread bunching quickly.
- Handle disassembly with care, use the right tools, and follow your manual to avoid mistakes during repairs.
Sewing Machine Basics
You don’t need to be a sewing machine expert to keep it running smoothly, but a little know-how goes a long way.
A little know-how keeps your sewing machine running smoothly, saving you time, frustration, and costly repairs.
Understanding basic maintenance, like cleaning, oiling, and adjusting, can save you from costly repairs and keep your projects frustration-free.
Regular Servicing Importance
Regular servicing is the secret sauce for sewing machine longevity.
It keeps your machine humming like a well-oiled engine while saving you from costly repairs.
Here’s why it matters:
- Optimal Performance: Avoid skipped stitches or tension issues.
- Longevity Benefits: Extend your machine’s life.
- Preventative Maintenance: Stop problems before they start.
- Cost Savings: Fewer repair bills.
- Downtime Reduction: Less time waiting, more time sewing!
Monthly Maintenance Schedule
Think of monthly sewing machine maintenance as a spa day for your machine.
A monthly tune-up is like a spa day for your machine—refreshing, rejuvenating, and ready for smooth stitching ahead!
Focus on scheduled cleaning by removing lint from the bobbin case and throat plate. Check lubrication points, applying sewing machine oil sparingly.
Performance checks help catch worn parts early. These preventative measures keep your machine humming smoothly, saving you from costly repairs.
A little TLC goes a long way!
Cleaning and Lubrication Techniques
How often should you clean your sewing machine? After every 2-3 bobbins!
Use brushes and pipe cleaners for lint removal, and apply sewing machine lubricant sparingly—just a drop where metal meets metal.
Avoid damage by skipping WD-40 and sticking to sewing machine oil. These cleaning tools and techniques keep your machine running smoothly, saving you headaches later.
Repair and Adjustment Procedures
After cleaning and oiling, it’s time to fix sewing machine quirks.
Tension adjustment solves uneven stitches, while timing issues often mean checking shuttle alignment.
Stuck feed dog? Clean debris or adjust height.
Motor repair’s tricky—leave it to pros if unsure.
Regular maintenance prevents many problems, ensuring smooth operation.
These repair tips make sewing machine troubleshooting less intimidating, keeping your projects on track without unnecessary headaches.
Essential Tools and Materials
To fix your sewing machine at home, you’ll need some essential tools and materials to handle the job right.
Think screwdrivers, brushes, and a bit of machine oil—basically, the sewing machine version of a first-aid kit!
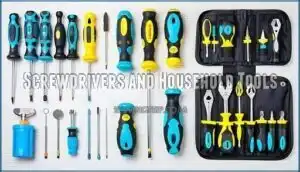
Screwdrivers and Household Tools
Your sewing machine repair kit isn’t complete without the right screwdrivers.
Precision tools make DIY sewing machine fixes easier. Here’s what you’ll need:
- Small screwdrivers for delicate screws.
- Household screwdrivers for general use.
- Craftsman professional screwdrivers for tricky repairs.
- DIY modifications like popsicle sticks for tight spots.
Keep tools organized for smoother sewing machine troubleshooting!
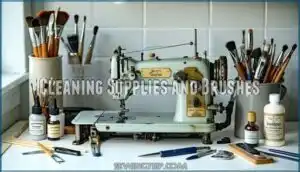
Cleaning Supplies and Brushes
After grabbing your screwdrivers, it’s time to tackle sewing machine cleaning.
A good brush—like a makeup, paint, or sewing machine brush—makes lint removal a breeze.
For tight spots, try a toothbrush or bamboo skewer.
Always use safe cleaners and avoid sprays.
Replacing worn parts like sewing machine brushes can also extend its life.
DIY cleaning keeps your machine happy, so grab those sewing machine brushes and get scrubbing!
Lubricants and Oils for Maintenance
In the context of sewing machine lubrication, using the right oil is key.
Stick to clear, light sewing machine oil—avoid WD-40 or sewing machine grease.
Here’s how to keep things smooth:
- Apply one drop at moving parts.
- Focus on metal-on-metal areas.
- Oil every 8 hours of use.
- Wipe excess to avoid over-oiling.
Using a specialized product like sewing machine oil is highly recommended.
Keep it slick!
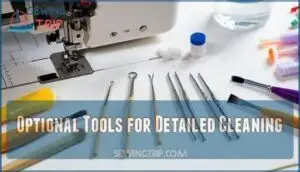
Optional Tools for Detailed Cleaning
For tricky spots, a dental probe or bamboo skewers work wonders, like a detective solving lint mysteries.
Long tweezers grab stubborn threads, while cheap paintbrushes handle loose fluff. Even popsicle sticks can scrape grime from corners.
These sewing machine cleaning tools make sewing machine cleaning techniques easier, ensuring no sewing machine lint survives.
Cutting mats protect surfaces, so using one under your machine during cleaning can also save your table. Pair with proper cleaning solutions for spotless results!
Cleaning and Oiling Procedures
Keeping your sewing machine clean and properly oiled is like giving it a spa day—it keeps everything running smoothly and prevents annoying breakdowns.
A clean, well-oiled sewing machine hums smoothly, turning every project into a stress-free masterpiece.
You’ll just need a few tools, a steady hand, and a little patience to tackle the grease, lint, and squeaky parts.
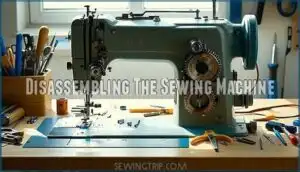
Disassembling The Sewing Machine
When tackling sewing machine disassembly, take photos of sewing machine parts during each step—trust me, they’ll save your sanity during reassembly!
Safely remove covers for internal access to mechanical parts. Use screwdrivers carefully to avoid stripping screws.
Identify components as you go, and handle sewing machine mechanisms gently. With patience, sewing machine repair at home becomes manageable, even enjoyable!
Removing Grease and Lint From Parts
Cleaning your sewing machine? Start by locating lint-heavy areas like the bobbin case and feed dogs. Use lint removal tools, like a small brush or toothbrush, to clear buildup.
For stuck grease, apply grease dissolving agents sparingly with safe cleaning practices. Many sewers find it useful to purchase specialized lint removers for this task.
- **Use waxed tissue for stubborn grime.
- **Avoid spraying cleaners directly.
- **Reach tight spots with skewers.
- **Focus on accessible components.
Applying Oil to Moving Components
Oiling your sewing machine keeps it running smoother than a well-oiled zipper.
Use high-quality sewing machine oil—just 1-2 drops where metal parts rub together. Skip WD-40; it’s not your machine’s friend.
Focus on oil application points like the needle bar and bobbin mechanism. Avoid over-oiling; more isn’t better.
For best results, use high-quality sewing machine oil. Follow your sewing machine oiling schedule for top performance.
Distributing Oil and Removing Excess
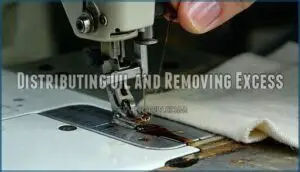
Once you’ve applied the sewing machine oil, turn the handwheel a few times for even oil distribution.
This threadless running guarantees smooth movement without thread getting greasy.
Wipe off excess immediately—too much oil can cause slipping or mess.
Remember, proper oil quantity is key; a little goes a long way.
Regular lubrication frequency keeps your sewing machine’s cleaning process efficient and hassle-free, ensuring a smooth movement.
Troubleshooting Common Issues
When your sewing machine acts up, it can feel like it’s got a mind of its own, but most issues are easier to fix than you’d think.
From skipped stitches to tangled threads, let’s tackle these common headaches with straightforward steps to get you stitching again in no time, and address issues like tangled threads.
Skipped Stitches and Tension Problems
Skipped stitches are frustrating, right? Check needle issues first—dull or misaligned needles often cause them.
Adjust sewing machine tension for proper tension balance; uneven thread tension can wreak havoc.
Test thread quality and fabric type compatibility to avoid headaches. Improper thread tension can also lead to skipped stitches.
Shorten your stitch length for tricky materials. These sewing machine repair tips will keep your bobbin case humming smoothly.
Thread Bunching and Bird Nesting
Ever wondered why your stitches look like a bird’s nest underneath?
Thread bunching often comes from bobbins issues or a tension imbalance. Check your sewing machine tension and the bobbin housing for misalignments.
Use high-quality thread and rethread the machine entirely—it’s worth it. Also, clean the feed dogs regularly.
Perfect stitches? It’s all in the troubleshooting!
Needle Breakage and Incorrect Installation
Needle breakage? It’s likely installation errors or using the wrong needle type for fabric density.
Always check the needle bar and make certain proper needle insertion. The flat side faces the right way, and the needle groove aligns with the shuttle.
Match thread correctly—missteps here lead to sewing machine problems.
Bent needles? Replace them immediately to avoid stress fractures.
Fluff and Lint Buildup in The Machine
Lint buildup sneaks into your machine like dust under a rug, causing stitches to skip and tangling threads.
Regular cleaning prevents frustration, and it is essential to stick to a sewing machine cleaning schedule, especially after thick fabrics.
Use brushes or pipe cleaners for lint removal and never blow—vacuum instead, as this is a crucial step in maintaining your machine.
Follow these best practices during DIY sewing machine service to avoid costly repairs.
Home Repair and Maintenance Tips
Fixing your sewing machine at home might sound intimidating, but it’s easier than you think with the right approach.
By knowing what to avoid and taking simple steps to maintain it, you’ll keep costly repairs and frustration at bay.
What Not to Do When Repairing
When tackling DIY repair, avoid these no-nos to save time and headaches:
- Don’t use WD-40; it’s not machine oil.
- Forceful disassembly leads to costly mistakes.
- Skipping the manual? That’s a fast track to trouble.
- Over-oiling attracts lint, causing jams.
- Neglecting threading precision creates stitching chaos.
Sewing machine problem-solving starts with patience, making a troubleshooting guide your best friend!
Preventing Costly Repairs and Damage
Don’t wait for problems to pile up—regular maintenance is your sewing machine’s best friend.
Use quality thread and avoid forcing any components during sewing or repair.
Store your machine in a dry, dust-free spot, and always oil moving parts sparingly.
Gentle handling, combined with these sewing machine care tips, prevents costly repairs and keeps home maintenance stress-free.
Tips for Long-Term Machine Longevity
For long-term machine longevity, stick to consistent usage and proper care. Avoid overloading your machine with heavy tasks it’s not built for.
Use quality supplies and oil regularly to keep things running smoothly. And don’t forget proper storage—dust covers are your best friend.
- Use high-quality sewing machine oil monthly.
- Store your machine in a clean, dry spot.
- Schedule professional checkups yearly.
Scheduling Regular Maintenance Sessions
Regular tune-ups keep your machine humming and projects stress-free.
Set a sewing machine service schedule with monthly DIY tasks, like oiling and cleaning.
Use calendar reminders to stay on track.
Budget maintenance costs smartly for yearly professional checkups, knowing when DIY steps suffice or a pro’s touch is needed saves money—and headaches.
Consistency keeps everything running smoothly!
Frequently Asked Questions (FAQs)
What is the most common problem of the sewing machine?
It’s like lint goblins take over—thread bunching (bird nesting) is the most common issue.
It happens when threads tangle under the fabric due to incorrect threading, improper tension, or fluff buildup.
Fixing it’s easy!
Is it worth it to fix a sewing machine?
Fixing a sewing machine is usually worth it, especially for quality models.
Repairs often cost less than replacing, and you’ll keep a reliable tool running.
Plus, it avoids waste—so it’s practical and eco-friendly!
What can I do with an old broken sewing machine?
Ever wonder if your old sewing machine can still serve a purpose?
Turn it into a quirky lamp, décor piece, or salvage its gears for DIY projects.
It’s vintage charm with a twist!
How to service a domestic sewing machine?
Start by unplugging your machine, then clean lint and grease with a brush or rag.
Apply 1-2 drops of high-quality oil to moving parts.
Test stitches after reassembling, and avoid over-oiling—it’s a slippery slope!
How can I identify unusual machine noises?
When your machine sounds like a disgruntled robot, it’s likely time for maintenance.
Check for lint buildup, loose screws, or lack of oil.
Unusual clunking or grinding usually signals misaligned or worn parts needing attention.
What are signs of motor overheating?
When your motor overheats, you’ll notice a burning smell, feel excessive heat near the motor, or hear unusual buzzing.
It might even shut off suddenly.
Give it a break to cool down before troubleshooting, as this will help prevent further damage and allow you to troubleshoot the issue more effectively.
How to address uneven feed dog movement?
Imagine your fabric pulling unevenly, like walking a dog that won’t stop zigzagging.
Check for lint under the plate, clean the feed dogs gently, and tighten screws—you’ll have those stubborn movers cooperating in no time!
Can I replace a snapped belt myself?
Replacing a snapped belt is doable if you’re careful.
You’ll need the right replacement belt, a screwdriver, and patience.
Follow your machine’s manual closely—forcing parts can break springs.
It’s tricky, but satisfying!
What to check if foot pedal is unresponsive?
Imagine this scenario: you press the foot pedal, and nothing happens.
First, check if it’s plugged in. Then inspect the cord for damage, and make certain the pedal’s connections are snug.
Sometimes, a quick adjustment saves the day, and this can be considered a simple fix to common issues.
Conclusion
Like tuning a guitar or maintaining a bike, sewing machine repair at home just needs patience and know-how.
With regular cleaning, a dab of oil, and quick checks for common issues, you’ll keep your machine humming like a pro.
Don’t skip the basics—your manual is a goldmine, so use it!
Tame lint, tighten screws, and swap dull needles for smoother stitches.
A little care now spares costly repairs later, making your sewing time stress-free and fun!


