This site is supported by our readers. We may earn a commission, at no cost to you, if you purchase through links.

Getting tension right isn’t magic, but it does take know-how and a dash of patience. Understanding sewing machine thread tension explained in plain terms means you’ll finally have control over those pesky stitches, whether you’re working with denim, silk, or something in between. The secrets to balanced stitches start here.
Table Of Contents
Key Takeaways
- Balanced thread tension is what keeps your stitches neat, strong, and centered in the fabric, with both top and bobbin threads meeting perfectly.
- Most tension problems come from incorrect threading or lint buildup in tension discs, so rethreading and regular cleaning solve most stitch issues.
- Adjusting your tension dial in small steps and testing on scrap fabric helps you match settings to different threads and fabrics without guesswork.
- Using contrasting thread colors and keeping a tension log make troubleshooting and repeating perfect stitches much easier for every project.
Sewing Machine Tension Basics
Think of your sewing machine’s tension system as the conductor of an orchestra—each part needs to work in harmony to create beautiful stitches. Before you can fix tension problems, you need to understand the key players that control how thread flows through your machine.
Let’s look at the three main components that determine whether your stitches turn out balanced or bunched.
Thread Guides and Tension Discs
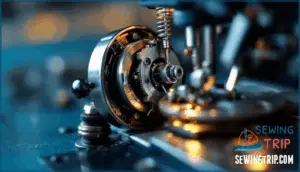
Think of your thread guides and tension discs as the gatekeepers that turn a loose strand into a perfectly controlled stitch. Your thread follows a specific thread path, weaving through several guide materials—usually metal or plastic hooks—before squeezing between two tension discs.
These discs apply disc pressure that creates just enough resistance to control the thread without snapping it. The assembly order matters: each guide gets the thread ready for the next stage. When you’re adjusting thread tension using the tension dial, you’re actually changing how tightly those discs grip.
Proper tension calibration makes certain your stitches lock together right where they should—in the fabric’s center.
Tension Regulator and Bobbin Case
Now that you understand how tension discs work, let’s look at what controls them. Your tension regulator and bobbin case team up to create balanced stitches—top thread meets bottom thread exactly where they should.
The tension regulator is your main control dial, usually numbered 0-9. Higher numbers squeeze the discs tighter. Think of it as a volume knob for thread grip. Regulator calibration affects how much bobbin thread gets pulled up into each stitch.
Your bobbin case manages the bottom thread through a small spring that creates bobbin tension. Here’s what you need to know:
- Spring adjustment is done through a tiny screw on the bobbin case—turn clockwise to tighten, counterclockwise to loosen
- Bobbin compatibility matters because different case designs affect tension consistency
- Case maintenance means keeping the spring and tension slot free of lint and thread debris
Adjusting bobbin case tension screw is your last resort—start with the top regulator first.
Balancing Thread Tension
Perfect tension happens when your top and bobbin threads lock together right in the middle of your fabric layers—not on top, not underneath, but sandwiched exactly where they belong. Achieving perfect stitch balance means understanding thread tension across different conditions.
Here’s your quick reference for balancing top and bobbin tension:
| Variable | Too Loose | Balanced | Too Tight |
|---|---|---|---|
| Stitch Formation | Loops on surface | Clean interlock | Puckered seams |
| Thread Weight | Requires lower tension range | Standard settings work | Needs higher tension range |
| Fabric Type | Loose weaves show gaps | Test stitch looks identical both sides | Dense fabrics pull tight |
| Visual Check | Bobbin thread visible on top | Perfect stitch balance achieved | Needle thread shows underneath |
Recognizing Tension Issues
When your stitches don’t look right, tension is usually the culprit. The good news is that most tension problems show clear warning signs you can spot with a quick glance at your fabric.
Let’s walk through the telltale signs that something’s off with your thread balance.
Visible Knots or Loops
When you spot tiny knots or loops popping up along your seam line, your machine’s telling you something’s off with the thread tension. These visible loop formation patterns signal a tension imbalance between your needle and bobbin threads. Check the knot location—loops on top mean your top tension’s too loose, while loops underneath suggest it’s too tight. Thread quality and fabric influence play a role too, but uneven stitches and loose stitches usually point straight to tension issues needing adjustment.
Quick checks for looping stitches:
- Run contrasting thread colors to pinpoint which thread’s creating the thread looping
- Examine both fabric sides—weaving patterns reveal where the tension imbalance originates
- Test on scrap fabric first to confirm adjustments fix the looping before tackling your project
Bobbin Thread Showing on Top
Ever notice how your bobbin thread sneaks up to the top of your fabric like it’s trying to crash the party? That’s your machine waving a red flag—your top thread tension is too tight, or you’ve got bobbin case issues. This happens when the top thread path can’t pull enough thread through, forcing bobbin thread upward through your stitches. Check for bobbin winding errors or incorrect bobbin insertion first.
| Problem Source | What to Check | Quick Fix |
|---|---|---|
| Tension too loose | Bobbin tension screw | Tighten slightly clockwise |
| Threading errors | Top thread path | Re-thread completely |
| Bobbin issues | Bobbin insertion | Remove and reseat bobbin |
Test adjustments on scrap fabric until both threads balance perfectly.
Needle Thread Showing on Bottom
If your needle thread keeps peeking through on the bottom of your fabric, you’re dealing with loose top tension or overly tight bobbin tension—basically, your machine’s letting too much upper thread slip through the stitch. Turn your tension dial to a higher number to tighten things up. But before you twist that dial, re-thread from scratch—improper threading causes most tension issues. Check your needle size matters for your fabric thickness effect too.
When troubleshooting tension problems, watch for:
- Thread type impact on stitch formation—lightweight threads need gentler tension than heavy-duty ones
- Bobbin case issues like damaged springs or lint buildup disrupting bobbin thread flow
- Fabric thickness effect requiring higher tension numbers for denim versus cotton
- Top thread tension that’s too tight causing the opposite problem—puckering and breaks
Incorrect Threading Causes
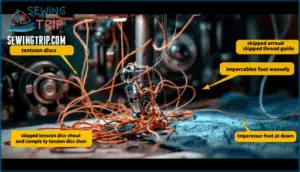
Roughly 80% of tension headaches at your machine trace back to one sneaky mistake—skipping a thread guide or threading with your presser foot down. When that foot’s down, tension discs clamp shut and won’t accept the thread path properly.
Missed thread guides and skipped tension discs let twisted upper thread slide through unchecked, creating chaos in your stitches. Improper spool placement can cause thread to feed unevenly, while bobbin thread snags throw everything off balance.
Troubleshooting tension problems starts with correct threading—completely rethread top and bobbin threads from scratch, foot up, following every guide. Thread tension fixes itself once the thread path is right.
Troubleshooting Tension Problems
When your stitches aren’t coming out right, it’s time to roll up your sleeves and do some detective work. The good news is that most tension problems have straightforward fixes once you know where to look.
Let’s walk through the key troubleshooting steps that’ll help you pinpoint and solve the issue.
Checking Thread Guides and Tension Discs
Your machine might be running perfectly smooth, but those tension discs and thread guides do most of the heavy lifting behind the scenes. When stitches go haywire, start here. Lint loves hiding between tension discs, creating tension buildup that throws off your thread flow completely.
Here’s what to check:
- Inspect thread guides for bent metal or rough spots blocking the thread path
- Use a soft brush for disc cleaning to clear away debris
- Look for scratches or worn edges affecting material impact
Thread your machine from scratch with the presser foot UP to verify guide alignment. This simple step catches most threading mistakes that mess with your thread tension. Regular cleaning keeps everything running right.
Adjusting Bobbin Spring Tension
Think of the bobbin case tension screw as the fine-tuning knob that separates good stitches from great ones—but touch it only after you’ve ruled out everything else. The bobbin spring function controls how much resistance your thread faces, and that tiny tension screw is incredibly sensitive.
Turn clockwise to tighten, counterclockwise to loosen—just a quarter turn makes a real difference. Test your adjusting bobbin case tension with the drop test: grasp the bobbin case by the thread and snap your wrist. Consistent bobbin tension means it drops 1-2 inches before catching.
Specialized bobbin cases exist for heavy threads, but most issues resolve with careful adjustment to your standard case.
Using Contrasting Thread Colors
When top and bottom threads match perfectly, pinpointing the problem is like searching for a ghost—but load contrasting colors into your machine and suddenly every tension hiccup lights up like a neon sign. This Two-Color Thread Test transforms invisible tension imbalances into obvious diagnostic clues. Thread tension problems become crystal clear when you can see exactly which thread dominates each fabric side.
Here’s your visual troubleshooting approach:
- Load bright red thread in your needle
- Insert navy blue in your bobbin case
- Stitch a test line on scrap fabric
- Examine both sides for color combinations showing through
- Identify imbalance by which color appears where it shouldn’t
Red loops on the bottom? Your top tension’s too loose. Blue showing topside? Tighten that bobbin spring or loosen your needle tension. This diagnostic aid delivers stitch clarity that monochromatic thread simply can’t match—recognizing tension imbalances becomes straightforward when color combinations tell the whole story.
Cleaning Lint From Tension Assembly
Lint buildup between those tension discs creates 80% of the mysterious stitch problems that make you question your sanity—and five minutes with a brush can fix what an hour of dial-twisting can’t.
Grab a stiff brush or specialized cleaning tool and sweep between those discs where thread dust loves to hide. Power off your machine first, then follow disassembly methods from your manual to access the full tension assembly. Tweezers pull out stubborn clumps.
Reassembly tips matter—thread everything correctly before testing. This preventative measure beats troubleshooting tension issues later.
Adjusting Thread Tension
Once you’ve identified tension problems, it’s time to make adjustments. Your machine gives you a few ways to fine-tune tension, and knowing which dial to turn makes all the difference.
Let’s walk through the main adjustments that’ll get your stitches back in balance.
Turning Tension Regulator Dial
The secret to dialing in ideal stitches lies in understanding how those little numbers on your tension regulator actually work. Each number represents increased pressure on your thread as it passes through the tension discs. Think of it like a water faucet—higher numbers squeeze tighter, lower numbers let more thread flow freely.
Your tension dial usually ranges from 0-9, with most machines defaulting around 4 or 5 for standard fabrics. Dial sensitivity varies between machines, so incremental adjustments are key. Move up one number if your bobbin thread shows on top. Drop down one if your needle thread peeks through the bottom. Fabric impact matters too—delicate silks need gentler tension settings than heavy denim.
Different thread types also demand attention. Metallic or specialty threads often require looser tension settings to prevent breakage. Always practice test stitching on scrap fabric after adjusting sewing machine tension. Those small tweaks create the balanced stitch you’re after.
- The satisfaction when your tension regulator finally clicks into that ideal setting
- Relief washing over you as puckered seams transform into professional-looking perfection
- The confidence boost from mastering tension settings for any project
- Pride in knowing exactly which number fixes your specific fabric challenges
Loosening or Tightening Top Thread
Once you’ve got your dial adjusted, the real fine-tuning happens with how loose or tight you let that top thread run. Tension dial use is all about incremental adjustments—tiny turns can mean the difference between smooth, balanced stitches and a mess of loops or fabric puckering.
For instance, if you spot loops on the underside, nudge your tension dial up a notch to tighten the top thread tension. If the thread keeps breaking, especially with metallic threads, ease the dial down for a gentler touch.
Testing on scrap fabric with contrasting colors helps you spot exactly where your thread tension needs work. Don’t be shy about making small tension adjustments and watching how your stitches respond. Sometimes, a stubborn issue is solved simply by rethreading the machine—it’s surprising how often a missed guide throws everything off.
Mastering adjusting sewing machine tension is a balancing act, but with each tweak, you’ll feel more in control and confident.
Adjusting Bobbin Case Tension Screw
If tweaking the top thread hasn’t cleared up those stubborn stitch hiccups, it’s time to give the bobbin case tension screw a little attention. Using a specialized screwdriver, make micro-adjustments—just an eighth of a turn at a time. Different bobbin case types may need a slightly different touch, but the effects are immediate.
To check your bobbin tension, try the drop test or use a tension gauge. Careful bobbin thread tension adjustment keeps stitches crisp and balanced.
Using Tension Log for Recordings
Between all those tiny adjustments and fabric swaps, it’s easy to forget what actually worked—so jotting down your tension settings can be a real lifesaver. Start a Fabric Tension Log or Thread Type Log, noting Tension Dial Settings and Troubleshooting Notes. Include Stitch Quality Records for each project.
This Tension log quickly becomes your personal guide to Thread tension, Sewing machine tension, and troubleshooting sewing issues with confidence.
Tension Principles and Balance
Getting your thread tension just right is all about understanding a few key principles. It’s not as tricky as it sounds once you know what to look for.
Here’s what matters most when you want balanced, strong stitches.
Amount of Thread for Stitch Creation
Ever wondered why your stitches sometimes look loose or tight, even though you’re using the same thread? It’s all about how much thread—top and bobbin—your machine lets through for each stitch. Balance is everything!
Here’s what affects it:
- Stitch length impact: Longer stitches use more thread, shorter ones less.
- Fabric thickness needs: Thicker fabrics demand extra thread for strong seams.
- Seam type thread: Decorative or reinforced seams chew up more thread, especially with larger thread spool sizes and waste thread amount.
Default Tension Setting for Straight Stitches
Although every machine has its quirks, most rely on a default tension setting—usually 4 or 4.5—for crisp straight stitches. Think of this as your “factory calibration” ideal setting. It’s where automatic systems and manual tension dials land for balanced results.
Fabric compatibility, thread variation, and regular maintenance impact how well this baseline performs. For straight stitch success, start here and adjust only if your material or thread demands it. Standard tension is often around 4, but adjustments may be needed for balanced stitches.
Picture your tension dial as the anchor for:
- Medium-weight cotton
- Polyester seams
- Denim construction
- Stretch fabrics
- Routine maintenance
Threading Machine Correctly
Think of threading your sewing machine like setting up dominoes—miss a single step, and the whole line of stitches can topple out of balance. Threading Order matters more than you might think: always raise the presser foot before starting, so the tension discs release and let your top thread settle in smoothly.
Guide Placement is next—follow each thread path exactly as your manual shows. Skipping a guide is like leaving a domino out; you’ll see uneven tension or even thread snapping.
Regarding Bobbin Loading, pay close attention to direction. If you load the bobbin backward, you’ll get loose or tight bobbin thread that throws everything off. Even something as simple as spool position affects upper thread flow.
Want reliable stitches? Take a minute to check every threading step. Correct threading is your first defense against tension headaches and sets the stage for perfect sewing.
Balancing Act for Strong Stitches
Ever notice how a well-balanced stitch feels almost simple? That’s the magic of balanced tension—where top thread tension and bobbin tension meet perfectly, giving you strong seams every time.
Seam strength isn’t just luck; it’s about how your machine settings, stitch density, and thread quality all work together. For instance:
- Stitches look identical on both sides, thanks to proper thread tension
- Elasticity holds, preventing seam breakage or puckering, no matter the fabric structure
- No messy loops—just smooth, reliable stitch quality with every pass
To achieve this, it’s important to understand how balanced tension works.
Maintaining Optimal Tension
Keeping your thread tension just right isn’t a one-and-done job. It takes a few simple habits to keep your stitches strong and smooth. Here’s what you’ll want to keep an eye on.
Regularly Checking Tension Settings
Just like tuning a guitar before you play, checking your sewing machine’s tension settings keeps every stitch singing in harmony. Every time you switch fabric types or threads, give those tension settings a quick look. That’s your secret to consistent stitch quality, no matter what you’re sewing.
For instance, thicker fabrics often need a little dial adjustment, while lighter ones might call for a softer touch. Seasonal tension adjustments—especially after your machine’s been sitting—are smart preventative maintenance. Dust can sneak into tension discs, so don’t forget a quick clean.
Keep a tension setting memory log if you want to save yourself time. Regularly checking sewing tension helps you spot and fix problems before they unravel your work.
Avoiding Excessive Top Thread Tension
After you’ve double-checked your tension settings, it’s smart to keep an eye out for signs that your top thread might be pulling a little too hard on the job. Excessive top thread tension can sneak up and cause fabric puckering, thread breakage, or even skipped stitches. Don’t let needle deflection sabotage seam integrity. Try these quick checks:
- Feel for resistance as you pull thread through the needle
- Watch for puckering along your seam
- Listen for that telltale snap of thread breakage
Preventing Messy Bobbin Winding
Even with your top thread tension dialed in, a sloppy bobbin wind can throw your stitches into chaos faster than you’d expect. For consistent thread delivery, aim for an even bobbin fill—no lumps or loose coils.
Bobbin winding speed matters; too fast and you’ll get loose threads, too slow and tension suffers. The bobbin case fit is key, and thread type matters, too.
Clean out lint often, and always double-check your bobbin thread path to prevent messy bobbin winding.
Ensuring Proper Bobbin Thread Insertion
Once your bobbin’s wound neat and tidy, slipping it in the right way is the next step to keeping those stitches smooth and frustration-free. Bobbin Case Type matters—a front-loader needs clockwise Bobbin Thread Direction, while top-loaders rely on threading through guides. Use the drop test for bobbin tension, and always check the thread sits snug in the tension discs. Avoid Bobbin Insertion Issues by following these steps:
- Confirm Correct Bobbin Size
- Check Consistent Bobbin Winding
- Test bobbin thread tension adjustment
- Assure proper bobbin thread insertion
Frequently Asked Questions (FAQs)
What is sewing machine tension?
Sewing machine tension isn’t some mystical force—it’s the careful control of how tight or loose your threads pull as they interlock, making balanced stitches.
Thread tension defined: it’s the backbone of strong, smooth, reliable sewing.
How do you manage tension on a sewing machine?
Managing tension means adjusting the tension dial, caring for your bobbin case, choosing the right thread type, and matching settings to fabric weight.
Consistent tension practice and troubleshooting sewing machine issues keep your thread tension balanced and stitches strong.
What are the four tension devices on a sewing machine?
You’ll find four tension devices at play: thread guides, tension discs, the tension regulator dial, and the bobbin case spring.
Each part in the tension assembly works together, balancing thread flow for strong, even stitches.
What happens if you put too much tension on a sewing machine?
Cranking up thread tension can cause fabric puckering, thread breakage, skipped stitches, and needle deflection. Excessive top thread tension leads to seam weaknesses and machine stress, making your stitches look rough and your sewing experience frustrating.
What is thread tension & how does it work?
Thread tension, defined as thread stretching tight, acts like a tug-of-war between top and bobbin tension.
Balanced stitches happen when thread interlocking meets in the fabric’s center, with tension components guaranteeing smooth, strong seams every time.
Why is thread tension important in a sewing machine?
Thread tension keeps your stitches balanced, boosting seam strength and stitch quality. It prevents breakage, protects fabric appearance, and aids machine longevity.
Balanced tension means fewer tension issues and smoother sewing, so your projects look and last better.
What should my thread tension be set at?
Isn’t it funny how one dial can make or break your stitch? Start at your machine’s default tension—usually 4 or
Adjust for fabric type, thread weight, and stitch type.
Always test sew first!
What does higher tension do on a sewing machine?
Cranking up top thread tension squeezes the thread tighter, leading to Tighter Topthread and sometimes Fabric Puckering. You’ll see Reduced Looping, but watch for Thread Breakage or Stitch Distortion if tension settings go too far—Stitch balance matters.
What does correct tension look like?
Imagine running a line of stitches on cotton—both sides look identical, with no loops or puckers. Balanced tension means the threads interlock in the fabric’s center, creating smooth seams, consistent stitching, and an ideal, even stitch appearance.
Balanced tension on your sewing machine creates smooth, even stitches that look identical on both sides of your fabric
What is the difference between tight and loose tension sewing?
Tight tension pulls the top thread too hard, distorting fabric and risking thread breakage. Loose tension leaves loopy stitches and weak seams.
Unbalanced tension affects stitch appearance, seam strength, and overall results—professional sewing demands precise thread tension control.
Conclusion
Isn’t it remarkable how a tiny twist of a dial can tame wild stitches and turn chaos into craftsmanship? With sewing machine thread tension explained, you’re equipped to spot trouble, adjust with confidence, and keep your projects running smooth.
Each time you hear that satisfying hum, remember: balanced tension is the unsung hero behind every strong seam. So, keep your machine in tune, trust your instincts, and let your stitches tell the story you want to share.

