This site is supported by our readers. We may earn a commission, at no cost to you, if you purchase through links.
Adjust tension settings before each project to prevent puckering and uneven stitches. Store thread in cool, dry places to prevent deterioration, and match thread type to fabric (polyester for synthetics, cotton for naturals). Use proper lighting and needle threaders for accuracy.
These simple techniques eliminate most threading headaches and create professional-quality results every time, by using these methods you will have a better sewing experience with these sewing machine thread tricks.
Table Of Contents
- Key Takeaways
- Why Threading Accuracy Matters
- Essential Tools for Threading Success
- Preparing Your Thread and Machine
- Step-by-Step Sewing Machine Threading
- Mastering Bobbin Winding and Insertion
- Top Thread Tricks and Troubleshooting Tips
- Choosing and Storing The Right Thread
- Frequently Asked Questions (FAQs)
- Conclusion
Key Takeaways
- Follow your machine’s exact threading path – Skip guides or tension discs and you’ll create weak points that cause thread breakage and jamming mid-seam
- Prepare your thread properly before threading – Trim frayed ends at a 45-degree angle and use thread conditioners to strengthen fibers and reduce friction by up to 15%
- Match thread type to fabric and adjust tension settings – Use polyester for synthetics, cotton for naturals, and test tension on scrap fabric before starting your project
- Store thread in cool, dry conditions and keep tools organized – Proper storage prevents deterioration while organized threading tools like needle threaders and self-threading needles eliminate frustration
Why Threading Accuracy Matters
You’ll save hours of frustration and avoid costly repairs when you master proper threading techniques from the start.
Accurate threading prevents thread breakage, guarantees consistent stitch quality, and keeps your sewing machine running smoothly for years to come, which is a result of accurate threading.
Preventing Thread Breakage and Jamming
When you’re threading incorrectly, you’re basically setting up a disaster. Poor Thread Tension Control creates weak points where your thread snaps mid-seam.
Poor threading turns your machine into a thread-shredding monster that devours your patience
Breakage Prevention starts with proper thread preparation—trim frayed ends and use thread conditioner to strengthen fibers. Jam Reduction happens when you follow the threading path precisely.
Skip steps, and you’ll face threading troubles that’ll make you want to chuck your machine out the window, which is why Breakage Prevention is crucial.
Achieving Smooth, Even Stitches
Perfect Stitch Consistency starts with proper threading a sewing machine and Thread Control. When you nail the threading process, your fabric glides like butter under the needle. Poor Tension Adjustment creates uneven loops and puckering that’ll drive you crazy.
Master your Sewing Technique by checking thread tension issues before each project. Smart Fabric Selection paired with correct threading troubleshooting prevents headaches and delivers professional results every time.
Reducing Machine Wear and Tear
Your machine maintenance depends on proper threading more than you’d think. When threads aren’t positioned correctly, they create friction that slowly damages internal parts. Poor thread management forces your machine to work harder, wearing down motors and gears faster.
- Needle replacement becomes frequent with incorrect thread tension issues
- Thread lubrication helps reduce friction in threading troubleshooting situations
- Tension adjustment prevents fabric selection problems that stress machine components
Smart sewing machine maintenance starts with tension control basics. Understanding the correct threading procedure is essential for extending the life of your sewing machine.
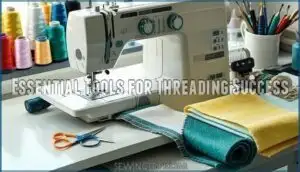
Essential Tools for Threading Success
Having the right tools makes threading your sewing machine faster and less frustrating than trying to squint at that tiny needle eye for five minutes.
These specialized threading tools turn what used to be a tedious task into something you can do in seconds, even with shaky hands or poor lighting.
Needle Threaders and Inserters
Your fingers fumble with that tiny needle eye again – it’s time to grab some help. A Dritz Needle Inserter works like magic, letting you approach threading from the front instead of squinting sideways.
Automatic threaders on machines save tons of time, though they’ll need occasional cleaning. Manual threading aids like silver wire loops make even stubborn threads cooperate. These threading aids transform frustration into smooth sailing every single time.
Self-Threading Needles
While needle threaders work great, self-threading needles cut out the middleman completely. These innovative Schmetz needles feature a tiny side slit that lets you slide thread directly into the needle eye without any fuss.
Here’s what makes self-threading needles game-changers:
- Side slit design eliminates traditional needle threading techniques
- Works with most thread weights for versatile sewing machine threading
- Reduces eye strain from squinting at tiny needle eyes
- Perfect for automatic threading when your machine’s threader fails
- Saves time during complex projects requiring frequent needle changes
Simply pull your thread through the slit, and you’re ready to sew. No more wrestling with threading a needle or dealing with frayed ends.
Magic Round Thread Organizer Tool
Every sewing enthusiast’s Thread Organization becomes effortless with this game-changing tool. This compact thread conditioner transforms frustrating threading sessions into smooth operations by reducing friction and tangling.
Simply run your thread through this non-toxic wax before threading your sewing machine threading guides. The magic happens when stubborn threads glide through needle eyes like butter, eliminating knots that plague Bobbin Control systems and improving your overall threading technique success rate.
Preparing Your Thread and Machine
Before threading your machine, you’ll need to prepare both your thread and workspace for success.
Properly trimmed thread ends and good lighting make the difference between smooth threading and frustrating tangles.
Trimming and Conditioning Thread Ends
Clean cuts matter more than you think. Thread Trimming at a 45-degree angle prevents jamming and boosts threading accuracy by 24%. Sharp scissors beat household ones every time.
End Shaping with moistening or Thread Moistening smooths needle entry. Fray Prevention starts with proper trimming technique.
Tip Conditioning using thread conditioner reduces friction by 15%, making cotton thread glide effortlessly through guides. Proper thread care involves using a thread trimming tool to maintain equipment, which is related to Thread Trimming.
Adjusting Lighting and Visibility
Poor lighting turns needle threading into a wrestling match with shadows. Position auxiliary lighting directly over your needle area, creating an illuminated workspace that eliminates guesswork.
Use magnification tools or vision correction aids to see thread contrast clearly against the needle eye. White backgrounds behind your needle enhance visibility aids dramatically, making even the finest thread pop into focus.
Setting Up Your Machine for Threading
Three simple machine preparation steps transform threading from nightmare to breeze. First, raise your needle to its highest position using the handwheel—this opens up the thread path completely. Next, lift or remove your presser foot to create maximum threading space around the needle area. Finally, turn off your machine to prevent accidental stitches while you’re working through the threading order and tension settings.
Properly understanding the threading process basics is essential for successful machine setup.
Step-by-Step Sewing Machine Threading
You’ll need to follow a specific sequence when threading your sewing machine to avoid tangles and guarantee smooth stitching. Here’s the step-by-step process that’ll save you time and prevent those frustrating thread jams that make you want to throw your machine out the window.
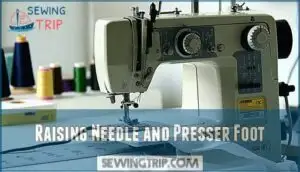
Raising Needle and Presser Foot
Preparation facilitates threading success—proper needle positioning and presser foot adjustment create ideal threading space for machine accessibility. Start with these essential steps:
- Position your needle at its highest point using the handwheel or needle up button
- Raise or remove the presser foot completely to maximize threading space around the needle area
- Turn off your sewing machine to prevent accidental movement during the threading process
This setup improves needle visibility and gives you full control over your sewing machine parts, which is crucial for proper needle positioning and presser foot adjustment.
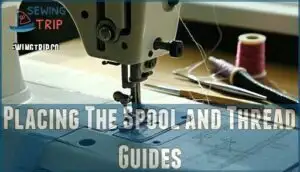
Placing The Spool and Thread Guides
Position your thread spool on the spool pin, ensuring it unwinds counterclockwise for smooth feeding. Guide the thread through each thread guide in sequence – missing one creates tangles faster than you’d think! Proper spool placement prevents those annoying thread snags that interrupt your flow.
Check your machine’s threading diagram if you’re unsure about guide positioning. Understanding the right sewing thread types is vital for superior performance.
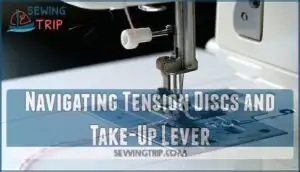
Navigating Tension Discs and Take-Up Lever
Now you’ll slide your thread between the tension discs—these metal plates control thread flow during stitching. Keep your presser foot up so the discs stay relaxed. Next, hook the thread around the takeup lever at its highest point. This lever pulls thread through each stitch, and missing it causes messy bird’s nests underneath your fabric.
Test thread movement by gently tugging—smooth flow means proper tension disc alignment and take-up optimization for reliable sewing machine performance. To achieve perfect stitches, understanding thread tension settings is essential for adjusting the tension discs correctly.
Mastering Bobbin Winding and Insertion
Your bobbin is the unsung hero of every perfect stitch – get this part wrong and you’ll battle thread tangles all day long.
Master your bobbin or face thread chaos every single stitch
Master these three simple steps and you’ll wind bobbins like a pro while keeping your lower thread smooth and perfectly tensioned.
Proper Bobbin Winding Technique
Most sewers wind bobbins too fast, creating uneven layers that cause thread jams. Start slowly with steady tension adjustment, securing your thread through the bobbin hole first. Keep consistent bobbin winding speed while guiding thread evenly across the spool.
Stop before overfilling—proper bobbin management means leaving space at edges for smooth bobbin threading technique and ideal thread alignment. To avoid common issues, check the bobbin thread guide for troubleshooting tips on thread tension and winding.
Inserting The Bobbin Correctly
Once you’ve wound your bobbin correctly, insert the bobbin into its case with the thread unwinding counterclockwise. Drop the bobbin case into the machine’s bobbin compartment, ensuring proper bobbin alignment with the tension spring. Listen for that satisfying click—it’s your machine’s way of saying "perfect bobbin threading technique achieved!"
Check bobbin sizing matches your machine specifications for ideal thread tension and machine calibration.
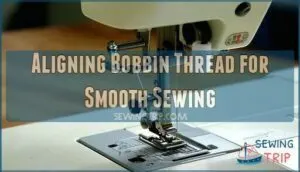
Aligning Bobbin Thread for Smooth Sewing
Once your bobbin’s properly inserted, getting that thread positioned right makes all the difference between frustration and smooth sailing. Pull the bobbin thread through the bobbin case tension spring – this step controls your thread’s flow during stitching. Check that the thread moves freely but isn’t loose.
Proper thread path optimization prevents tangles while bobbin case adjustment ensures consistent smooth stitch formation throughout your project. Ensuring correct bobbin threading techniques is vital for achieving professional-looking stitches.
Top Thread Tricks and Troubleshooting Tips
Even experienced sewers face thread troubles that can turn a relaxing project into a frustrating battle.
You’ll conquer the most common threading headaches with these proven fixes that save both time and sanity.
Solving Frayed and Tangled Threads
Frayed threads can sabotage your sewing project faster than you’d think. Cut damaged thread ends at an angle with sharp scissors, then strengthen them using Thread Conditioning Tips like moistening with water or Thread Magic.
These Fiber Strengthening Techniques prevent future fraying. For Tangle Prevention Methods, compress thread fibers between your fingers. These threading tips keep your sewing machine thread smooth and manageable throughout your project.
Adjusting Thread Tension Settings
Thread tension controls how your upper and bobbin threads lock together inside the fabric. Start with your tension dial at 4-5, then test on scrap fabric using contrasting thread colors to spot problems easily. Turn clockwise to tighten if bobbin thread shows on top, counterclockwise to loosen if upper thread appears underneath.
Your sewing machine’s tension discs need proper threading first—skipping thread guides throws off everything. Match thread weights and adjust stitch length for fabric density. Proper thread tension adjustment is essential for achieving balanced stitches and preventing common sewing issues, such as those discussed in thread tension adjustment, which is crucial for achieving balanced stitches.
Fixing Skipped Stitches and Thread Jams
Skipped stitches often signal your machine’s crying for help with needle alignment or thread tension issues. When jams strike, don’t panic—systematic troubleshooting saves your sanity and sewing machine.
- Check needle alignment and replace bent or dull needles that can’t penetrate fabric properly
- Re-thread both upper thread and bobbin while ensuring proper threading path through all guides
- Adjust thread tension gradually and test stitch regulation on scrap fabric before continuing your project
Choosing and Storing The Right Thread
You’ll get professional results when you match your thread type to your fabric and store it properly.
The right thread choice prevents tension problems, skipped stitches, and that frustrating moment when your beautiful project falls apart after the first wash.
Matching Thread Type to Fabric
The perfect fabric-thread partnership transforms your sewing from frustrating to flawless. Polyester thread works beautifully with synthetics and stretch fabrics, while cotton thread pairs naturally with cotton and linen. Your sewing machine needle size should match both thread weight and fabric thickness for ideal results.
| Thread Type | Best Fabric Match | Key Benefits |
|---|---|---|
| Polyester | Synthetics, knits, blends | Strong, elastic, colorfast |
| Cotton | Natural fibers, quilting | Breathable, matte finish |
| Silk | Delicate fabrics, luxury items | Smooth, lustrous, gentle |
| Nylon | Heavy-duty, outdoor gear | UV resistant, extremely durable |
Remember: choose thread one shade darker than your fabric for invisible seams, and always test stitch on scraps first.
Preventing Thread Tangling and Deterioration
Store your thread in cool, dry conditions with 35-55% humidity to prevent weakening. Thread conditioners like Thread Magic reduce fraying by 700% and eliminate static electricity.
Keep spools away from sunlight in airtight containers to avoid fading and brittleness. Proper thread conditioning strengthens fibers, preventing knots during machine threading. Clean your needle and thread guide regularly to maintain smooth tension flow.
Organizing Thread With Specialty Tools
Beyond protecting your thread investment, smart Thread Organizers transform your sewing space into an efficient workspace. Professional sewers know that proper Thread Management saves both time and frustration during projects. Effective thread storage systems often utilize thread organizer tools to maximize space and reduce clutter.
- Thread Dispensers with built-in guides prevent tangling while feeding thread smoothly to your machine’s spool pin
- Vertical thread racks keep multiple colors visible and accessible, eliminating the hunt for matching shades
- Thread nets slip over spools to stop unwinding and reduce waste from loose ends
- Magnetic thread guides attach to your machine, directing thread flow toward the automatic threader for consistent threading results
Frequently Asked Questions (FAQs)
How to thread a sewing machine needle?
Raise your needle to its highest position, turn off the machine, and lower the presser foot.
Trim thread cleanly, moisten the tip, then carefully guide it through the needle’s eye from front to back.
How do you thread a sewing machine?
Like threading a needle that releases your creative potential, you’ll start by raising the needle to its highest position.
Turn off your machine, lower the presser foot, and follow your machine’s threading path from spool to needle eye.
How do you use a threading machine?
First, raise your needle to its highest position and turn off the machine for safety.
Lower the presser foot, then carefully guide thread through the needle’s eye using proper lighting and a steady hand.
Where does the thread go on a sewing machine?
Thread travels through your sewing machine following a specific path from spool to needle. It passes through tension discs, guides, and the take-up lever before threading through the needle’s eye.
How do you make a good sewing machine?
Building excellent sewing machines requires precision engineering, quality materials, and reliable mechanisms. You’ll need durable metal components, accurate tension systems, smooth feed dogs, and consistent stitch formation.
Don’t forget user-friendly threading and dependable motor performance, which are also crucial for a sewing machine, along with reliable mechanisms.
Do you make money threading a sewing machine needle?
No, threading a sewing machine needle isn’t a paid service. However, professional seamstresses charge $50-150 hourly for alterations where threading expertise matters.
You’ll save money mastering this basic skill yourself rather than paying others for alterations.
How often should I replace sewing machine needles?
Replace your needle every 8-10 hours of sewing or after completing each major project.
Dull needles cause skipped stitches, thread breaks, and fabric damage.
You’ll hear popping sounds when it’s time for a fresh one.
What causes thread to keep breaking repeatedly?
Like a stubborn knot that won’t budge, broken thread usually stems from incorrect tension settings, dull needles, or poor thread quality.
You’ll solve this by re-threading, adjusting tension, and replacing your needle first.
Can I use embroidery thread for regular sewing?
You can use embroidery thread for regular sewing, but it’s not ideal.
Embroidery thread is typically thicker and less durable than regular sewing thread, which may cause tension issues and weaker seams in everyday garments.
Why does my bobbin thread keep jamming?
Your bobbin’s turning into a tangled nightmare! Check if you’ve wound it correctly, inserted it properly, and adjusted your tension settings. Also, clean out lint buildup around the bobbin case.
Conclusion
Like thread binding fabric into beautiful creations, these sewing machine thread tricks weave together to transform your sewing journey. You’ve discovered the essential techniques that’ll prevent frustrating breakage and jamming while creating professional results.
Master proper threading paths, maintain correct tension, and choose quality materials that match your projects. Store threads properly and keep your tools organized for consistent success.
With practice, these fundamental sewing machine thread tricks become second nature, turning every sewing session into smooth, enjoyable crafting time, using sewing machine thread tricks.

