This site is supported by our readers. We may earn a commission, at no cost to you, if you purchase through links.
Check your thread tension like your life depends on it; puckered seams scream "beginner." Change needles every 8-10 hours of sewing because dull needles create skipped stitches faster than you can say "frustration."
Test stitch length and width on scraps before touching your good fabric. These fundamentals set the stage for sophisticated techniques that’ll have you sewing like a seasoned pro.
Table Of Contents
- Key Takeaways
- Essential Sewing Machine Maintenance Tips
- Preparing Fabric for Flawless Stitching
- Choosing The Right Needle and Thread
- Mastering Machine Stitch Selection
- Achieving Even and Professional Seams
- Tricks for Sewing Perfect Circles and Curves
- Seam Finishing Without a Serger
- Buttonholes and Hemming Made Easy
- Preventing and Fixing Common Stitch Issues
- Organization and Storage Hacks for Sewists
- Frequently Asked Questions (FAQs)
- Conclusion
Key Takeaways
- You’ll prevent most stitching problems by cleaning your bobbin case regularly and changing needles every 8-10 hours of sewing—dull needles create skipped stitches and fabric damage faster than you can troubleshoot.
- You’ll achieve professional seams by matching your needle to your fabric type and setting stitch length to 2.0-2.5mm for standard materials—universal needles won’t work for delicate silk or heavy denim.
- You’ll eliminate puckered seams and thread breaks by checking your thread tension like your sewing life depends on it—test on fabric scraps first before touching your good material.
- You’ll transform amateur projects into impressive work by mastering basic maintenance like oiling key machine parts and using proper seam finishing techniques like French seams or zigzag edges instead of leaving raw fabric edges.
Essential Sewing Machine Maintenance Tips
You’ll treat your sewing machine like a car that needs regular care to run smoothly and avoid costly breakdowns. Just like changing your car’s oil prevents engine trouble, cleaning lint from your bobbin case and oiling key parts keeps your machine stitching perfectly for years to come.
Cleaning Techniques for Longevity
Think of your sewing machine like a favorite car – it runs smoother when you take care of it. A little regular maintenance goes a long way toward getting those crisp, even stitches you’re after:
- Bobbin Case Cleaning – Remove lint after every major project using a small brush
- Lint Removal Tools – Use pipe cleaners inserted into coffee stirrers for tight spaces
- Iron Soleplate Care – Clean with heated salt and vinegar mixture on stove
- Regular Oiling Benefits – Quality machine oil reduces wear and prevents costly repairs
- Preventative Maintenance Tips – Dust covers protect from debris between uses
When you keep your machine clean, you’ll notice thread tension stays more consistent and you’ll spend way less time figuring out what went wrong.
Proper Oiling Practices
Your machine runs smoother when you oil it right. Use only quality machine oil at key oiling frequency intervals—generally after every major project or 8-10 hours of use.
Focus on application points like the bobbin case, needle bar, and moving parts your manual specifies. A single drop per spot prevents over-oiling, which attracts lint and causes troubleshooting issues with thread tension.
Oil Type Best Choice
Needle and Pin Care Hacks
Sharp needles make all the difference in your sewing projects. You’ll want to keep those pins and sewing needles in top shape for smooth stitching.
Here are five game-changing needle and pin care hacks:
- Store your sewing needles in a magnetic pin cushion to prevent bent needles and make grabbing easier
- Use steel wool as a pin cushion for automatic pin sharpening every time you stick them in
- Apply a thin coat of wax or oil to needle storage containers for rust prevention
- Replace sewing machine needles after every major project to avoid skipped stitches
- Create a safe disposal system using an empty pill bottle for old bent needles
Preparing Fabric for Flawless Stitching
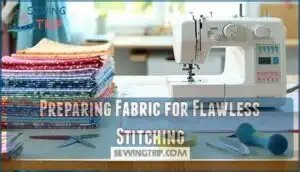
You can’t build a house on a shaky foundation, and the same goes for sewing – your fabric prep determines whether you’ll get professional results or a hot mess.
Your fabric preparation determines whether you’ll achieve professional results or end up with a frustrating mess
Before you even thread your machine, you’ll need to wash, cut, and handle your materials properly to avoid those frustrating puckers, frayed edges, and slippery fabric disasters that’ll make you want to throw your project in the corner.
Washing and Pre-Treating Fabrics
Before you cut your first stitch, washing fabric prevents fabric shrinkage and color bleeding disasters down the road. Pre-treat cotton with washing soda, alum treatment, and fabric softeners for vibrant, lasting colors.
This fabric preparation step separates beginners from pros—your finished project will maintain its perfect fit and appearance after countless washes.
Cutting Methods to Prevent Fraying
Once you’ve prepped your fabric properly, preventing fraying becomes your next challenge. Pinking shears are your best friend here – their zigzag edges cut fabric while sealing raw edges naturally.
For delicate fabrics, try fabric stabilizers before cutting, or apply seam sealants afterward. These sewing machine techniques paired with proper fabric preparation methods will save hours of frustration later.
Handling Slippery and Stretchy Materials
Slippery and stretchy materials can feel like wrestling a greased pig, but the right sewing techniques make them manageable. Your sewing machine needs specific adjustments for stretch fabrics to prevent puckering and skipped stitches.
- Use ballpoint needles to glide between fibers without creating holes
- Install a walking foot to feed fabric evenly through the machine
- Apply fabric stabilizers underneath delicate materials for extra backing
- Select stretch stitches or narrow zigzag for flexible seams
- Adjust thread tension lower to accommodate fabric movement
Choosing The Right Needle and Thread
You can’t achieve perfect stitches without matching your needle and thread to your fabric—it’s like trying to write with a crayon on glass.
The right combination prevents skipped stitches, thread breaks, and that frustrating bunching that makes you want to toss your project across the room.
Needle Types and Their Uses
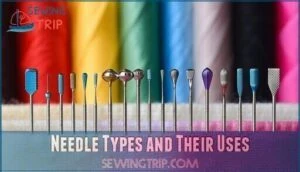
Your fabric’s ready, but Needle Size Matters for perfect results. Universal Needle Uses cover most woven and knit fabrics, ranging from 70/10 for silk to 110/18 for heavy materials.
Ballpoint needles prevent snags on stretchy fabrics, while jeans needles tackle thick denim. Fabric Needle Compatibility determines stitch quality, so match Needle Point Styles to your project for superb Sewing Machine performance.
Check your Specialty Needle Guide—leather needs chisel-point needles, quilting requires sharps.
Matching Thread Weight to Fabric
Thread weight guide starts with fabric thickness matters – heavier fabrics need heavier thread. Match your needle size pairing accordingly: weight 30 for denim, 50 for cotton, 60 for silk.
Blending thread colors works when weights match your material.
Thread tension control becomes easier with proper thread weight selection, preventing puckering and skipped stitches on your sewing machine.
When to Change Needles
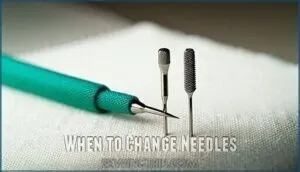
Recognizing when your needle needs replacing saves you headaches and fabric damage. Change needles every 8-10 hours of sewing or after completing major projects.
Bent needles cause thread breakage and skipped stitches. Dull needles create fabric pulls and poor stitch quality.
Regular replacement keeps your sewing machine running smoothly and prevents costly troubleshooting sessions.
Mastering Machine Stitch Selection
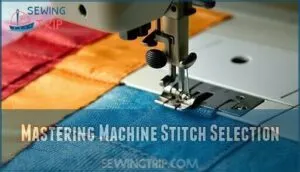
You’ll transform your sewing projects from "good enough" to "wow, did you make that?" once you master your machine’s stitch arsenal.
Choosing the right stitch isn’t just about pretty patterns—it’s about matching your stitch type to your fabric and project needs so your seams stay strong and your hems look crisp.
Understanding Stitch Types
Now that you’ve got your needle and thread sorted, let’s break down your machine’s stitch arsenal. Your sewing machine offers different stitch types for specific jobs:
- Straight Stitch – Your workhorse for seams and topstitching
- Zigzag Stitch – Perfect for stretch fabrics and edge finishing
- Specialty Stitches – Decorative stitches and buttonholes for more complex projects
Understanding sewing machine stitches means knowing when each one shines. Stretch stitches handle knits, while decorative stitches add flair. Smart stitch selection makes every project easier.
Project-Based Stitch Choices
When choosing the right stitch for your project, think like a matchmaker pairing dance partners. Straight stitches excel in garment stitching for woven fabrics, while zigzag stitches handle stretchy materials. Quilting stitches need durability for piecing blocks, and decorative stitches shine in home decor and craft projects.
Your sewing machine becomes more adaptable when you match stitch selection to accessory sewing needs.
Stitch Length and Width Settings
Perfect stitch length matters more than you think. Set your sewing machine to 2.0-2.5mm for standard seams – this creates durable stitches without fabric damage.
Decorative stitch settings need wider spacing for visual impact. Quilting stitch sizes should be smaller at 1.8-2.0mm for precise control.
When troubleshooting adjustments, test fabric type guide recommendations on scraps first.
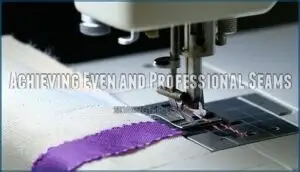
Achieving Even and Professional Seams
You’ll transform your wobbly, uneven seams into crisp, professional lines that make your projects look store-bought instead of homemade.
The secret lies in mastering three key elements: setting your stitch length to 2.0-2.5mm, adjusting thread tension until it’s just right, and choosing between straight stitches for woven fabrics or zigzag stitches for stretchy materials.
Setting Correct Stitch Length
For fabric type and garment requirements, your sewing machine needs precise stitch length adjustments to create durable, professional seams. Purpose matters when selecting these settings for best seam appearance.
- Lightweight fabrics: Use 1.5-2.0mm stitch length for delicate materials
- Medium-weight cottons: Set 2.0-2.5mm for standard garments and quilting
- Heavy fabrics: Choose 2.5-3.0mm for denim, canvas, and thick materials
- Stretch knits: Opt for 2.0-2.5mm with slight zigzag for flexibility
- Topstitching: Increase to 3.0-4.0mm for visible decorative stitching
These sewing machine tips help ensure stitch durability matches your project’s demands.
Controlling Thread Tension
Nobody likes battling tension problems, but mastering thread tension transforms your sewing machine into a precision tool. Start with your dial at 4, then test stitching on fabric scraps.
Heavy fabrics need higher tension settings, while delicate materials require a lighter touch. Check both sides—if bobbin thread shows on top, decrease tension. Match thread weight to fabric type for consistent results and balanced stitches.
Straight and Zigzag Stitch Techniques
Once you’ve got your tension dialed in, master these two workhorses of sewing. Straight stitching forms the backbone of most projects—keep your stitch length at 2.5mm for woven fabrics.
Zigzag stitch offers built-in stretch for knits and also works well for decorative stitching. Practice both on scraps to find your rhythm and perfect fabric compatibility.
Tricks for Sewing Perfect Circles and Curves
Sewing curves and circles can make even experienced sewists break out in a cold sweat, but you’ll master these tricky shapes with the right techniques.
You’ll learn to create smooth, professional curves using templates and pivot methods that turn your machine into a precision tool.
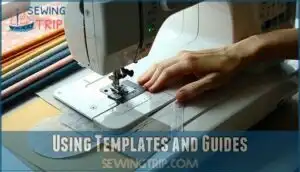
Using Templates and Guides
Several template materials can transform your curved sewing game. Create custom templates from cardboard or plastic sheets for repeatable shapes. Mark guide markings directly on templates for consistent seam allowance placement.
Sandpaper templates grip fabric better than smooth ones. Your sewing machine’s presser foot can follow template edges while maintaining steady sewing techniques and perfect sewing machine stitches.
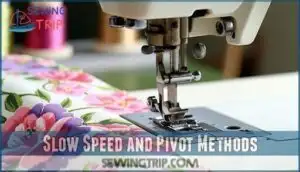
Slow Speed and Pivot Methods
Templates help, but controlled stitching transforms your curves from wobbly to wow. Slow down your sewing machine and use these pivot methods for smooth curves and precise corners:
- Reduce speed to 25-50% – Your sewing machine becomes more manageable for intricate designs
- Stop with needle down – Pivot fabric around the needle for fluid direction changes
- Lift presser foot briefly – Allow easy fabric manipulation without losing your place
These sewing techniques give you mastery over any curve.
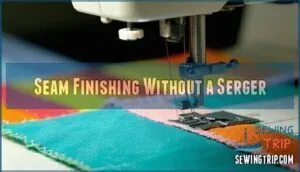
Seam Finishing Without a Serger
You don’t need a serger to create professional-looking seam finishes that’ll keep your fabric edges from turning into a frayed mess.
These simple techniques using your regular sewing machine will give you clean, durable seams that look like you’ve been sewing for years.
French Seams for Sheer Fabrics
French Seams work like magic for Sheer Fabric Selection. You’ll sew twice—first with wrong sides together, then right sides. This creates a clean, enclosed seam that won’t fray.
Tension Fine-Tuning and Seam Allowance Control matter here. Start with 3/8-inch allowances, trim to 1/8-inch after the first stitch. Your Pressing Techniques between steps help guarantee crisp results.
These Sewing Techniques offer heightened Durability Considerations for delicate materials.
Pinking Shears and Zigzag Edges
Your fabric’s edges deserve better than fraying chaos. Pinking shears create decorative edges with zigzag cuts that naturally resist unraveling, offering great edge durability for most woven fabrics. These sewing tricks work brilliantly on cotton and linen.
For stretchy materials, your sewing machine’s zigzag stitch provides enhanced fabric compatibility.
Combine both techniques—pink first, then zigzag—for bulletproof seam finishing that’ll outlast your grandmother’s vintage patterns.
Other Durable Seam Finishes
Creating bulletproof seam finishes without a serger opens up endless possibilities for your projects. These serger alternatives deliver professional results using your regular sewing machine:
- Flat-felled seams – Perfect for jeans and workwear, these double-stitched powerhouses survive 50+ wash cycles
- Hong Kong bound seams – Use bias binding techniques for that couture look in unlined jackets
- Lapped seams – Ideal for leather and vinyl with decorative edges that won’t fray
- Double-stitched seams – Quick hand finishing method that reinforces stress points beautifully
Buttonholes and Hemming Made Easy
You’ll tackle two finishing techniques that often trip up sewers, but they don’t have to be scary.
With the right approach and a few simple tricks, you can create professional buttonholes and invisible hems that’ll make your projects look store-bought.
Pinning Techniques for Buttonholes
Nobody wants buttonholes that shift mid-stitch. Pin both fabric layers securely before starting your buttonhole sequence. Use fabric stabilizers underneath lightweight materials to prevent puckering.
Mark placement with washable markers for consistent spacing between buttons. This simple pinning technique prevents slippage and ensures your sewing machine creates professional-looking buttonholes every time.
Using The Blind Hem Stitch
Master the blind hem stitch to create invisible hems on pants, skirts, and curtains. This sewing machine stitch catches only a few fabric threads, hiding the stitching line completely.
Adjust your presser feet and stitch settings for different fabric types. Practice on scraps first—curved hems need extra patience and steady hands.
Narrow Hemmer Foot Tips
Your narrow hemmer foot transforms raw edges into polished, professional finishes with the right approach. Different Hemmer Foot Sizes work best with specific fabric weights, so match accordingly. This Presser Foot excels at straight edges but struggles with Curved Hems.
- Check Fabric Compatibility before starting – lightweight cottons and silks work best
- Practice Troubleshooting Issues like fabric bunching by adjusting your feeding technique
- Achieve Professional Finishes by maintaining steady, consistent speed throughout your Sewing Machine Stitches
These Sewing Tips and Sewing Tricks make hemming straightforward once mastered.
Preventing and Fixing Common Stitch Issues
You’ve probably watched your machine produce wonky stitches that look like they came from a toddler’s craft project – trust me, we’ve all been there.
The good news is that most stitch problems stem from just a few common culprits like improper threading, wrong needle choices, or tension settings that are way off track.
Avoiding Thread Tangles and Skipped Stitches
Why do threads tangle when everything looks perfect? Threading Issues and Needle Selection cause most headaches. Your Sewing Machine needs proper Bobbin threading—wind clockwise, insert correctly. Check Fabric Feed dogs for lint buildup that creates Bobbin Problems.
| Problem | Quick Fix |
|---|---|
| Thread tangles | Rethread top and bobbin |
| Skipped stitches | Change needle, check threading |
| Uneven feed | Clean feed dogs thoroughly |
Troubleshooting Tension and Threading Problems
Threading problems usually create the biggest headaches, but you can solve most issues by starting fresh. Always rethread your entire machine with the presser foot up – this opens the tension discs properly. Check your thread path against your manual’s diagram.
Mismatched thread weights between your top and bobbin thread throw off tension balance completely. Clean lint from your bobbin case regularly, as debris causes 30% of tension issues.
Test your needle choice and thread management on scraps before adjusting any dials. Regularly servicing your machine can also prevent future tension problems.
Recognizing Needle and Presser Foot Issues
When skipped stitches plague your project, check your needle type first. A bent needle or wrong needle match for your fabric creates poor fabric feed. Adjust foot pressure if your presser foot isn’t gripping properly.
Universal needles work for most fabrics, but ballpoint needles prevent runs in knits. Replace needles after eight hours of sewing to maintain smooth troubleshooting stitches and proper sewing machine maintenance.
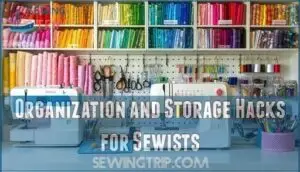
Organization and Storage Hacks for Sewists
A cluttered sewing space turns even the simplest project into a frustrating treasure hunt for missing pins and tangled thread. You’ll save hours of precious sewing time with smart storage solutions that keep your tools organized, accessible, and ready for action.
Storing Pins and Needles Safely
Smart storage prevents costly accidents and keeps your sewing tools sharp. Magnetic pin holders keep pins organized and away from curious pets or children. Store needles in labeled needle case types to prevent rust and damage. Keep sharp sewing tools in closed containers for child safety and pet safety.
A steel wool pin cushion naturally maintains needle sharpness while providing secure storage. These sewing organization tricks make your sewing tool maintenance stays simple and effective.
Organizing Embroidery Floss and Tools
Keep your embroidery floss tangle-free with clothespins clipped to thread rack options for easy access. Use portable floss organizers with DIY organizer ideas like repurposed tackle boxes for floss color-coding.
Store bobbins in clear cases and group sewing tools by project type. Smart tool storage solutions prevent hunting for supplies mid-stitch.
Keeping Your Sewing Space Efficient
Maximizing your workspace transforms chaotic sewing sessions into smooth operations. Smart space optimization keeps everything within arm’s reach while maintaining clean workflow design.
- Position your machine at elbow height for ergonomic setup
- Install adjustable lighting solutions above your cutting area
- Use rolling carts for mobile sewing supplies and tools
- Create designated zones for cutting, pressing, and machine maintenance
- Mount magnetic strips on walls for easy sewing machine troubleshooting access
These sewing hacks make your sewing project management more efficient, making every stitch count.
Frequently Asked Questions (FAQs)
How do I thread a twin needle correctly?
Like threading two needles at once, you’ll use two spools on your machine’s spool pins.
Thread each needle separately through your machine’s guides, then thread each twin needle from opposite directions—left thread through left needle, right through right.
What causes my stitches to pucker unexpectedly?
Puckered stitches usually happen when your thread tension’s too tight or you’re pulling the fabric while sewing. Check your tension settings and let the feed dogs do their job without tugging.
Why does my bobbin thread keep jamming?
Your bobbin thread jams because you’re threading backward, using old or wrong thread, or your bobbin case needs cleaning. Check your threading path and clean out lint buildup.
How do I adjust presser foot pressure?
Think of your presser foot as a gentle hand guiding fabric—too tight creates puckering, too loose causes skipping.
Most machines have a dial or screw on top. Adjust gradually while testing on scraps until fabric feeds smoothly without bunching.
Whats the best way to backstitch securely?
You’ll want to backstitch 3-4 stitches at the beginning and end of each seam. Press the reverse button firmly, stitch backward, then forward again to lock your threads securely.
Conclusion
Perfect stitches aren’t rocket science—they’re the result of consistent practice with these proven sewing machine tricks for perfect stitches. You’ve learned maintenance basics, fabric prep, needle selection, and tension control.
Now it’s time to put these techniques to work. Remember, every expert was once a beginner who refused to give up. Keep practicing these fundamentals, and soon you’ll be creating professional-quality projects that’ll make your friends wonder where you learned to sew so beautifully.
- https://quiltingwemple.com/troubleshoot-sewing-machine-tension/
- https://sewingmachineman.substack.com/p/the-problem-with-poor-quality-thread
- https://singerco.com.au/learn-create/how-to-fix-sewing-machine-tension-issues/
- https://www.youtube.com/watch?v=W7JnLiD5kvM
- https://www.threadsmagazine.com/2008/11/02/understanding-thread-tension

