This site is supported by our readers. We may earn a commission, at no cost to you, if you purchase through links.
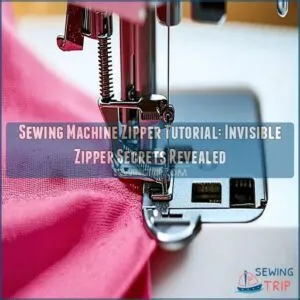
First, prep your fabric and zipper.
Lay the zipper wrong side up, unroll the teeth, and iron them flat on low heat.
Pin it face down onto your fabric.
Use an invisible zipper foot to sew the first side, gently guiding it under the presser foot.
Remember to backstitch!
Repeat on the other side, ensuring a snug fit without puckering.
Avoid sewing over pins—it’s a needle’s worst nightmare!
For that seamless finish, match and sew the seams precisely.
Mastering this technique is like discovering a sewing superpower—one swift move transforms everything!
Table Of Contents
- Key Takeaways
- Preparing for Invisible Zipper Sewing
- Sewing The First Side of The Zipper
- Sewing The Second Side of The Zipper
- Completing The Seam
- Choosing The Right Invisible Zipper
- Essential Materials and Tools
- Mastering The Invisible Zipper Technique
- Common Mistakes to Avoid
- Troubleshooting Common Issues
- Finishing The Seam Professionally
- Frequently Asked Questions (FAQs)
- Conclusion
Key Takeaways
- You’ll need an invisible zipper foot for precise stitching and a seamless finish.
- Pressing the zipper tape and fabric beforehand prevents puckering and ensures even seams.
- Careful pin placement and removal are crucial to avoid damaging your machine or fabric.
- Practice is key to mastering the technique; don’t get discouraged by initial imperfections.
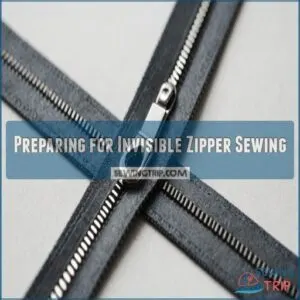
Preparing for Invisible Zipper Sewing
Before you start sewing, get your zipper and fabric ready!
Press your zipper tape flat and neatly press the fabric edges where the zipper will go – this makes for a much smoother, professional-looking finish.
Pressing The Zipper Tape and Fabric
Ironing is very important when prepping for an invisible zipper.
You’ll want to press the zipper tape flat and smooth those fabric edges with care.
This will guarantee perfect zipper alignment and meets seam allowances snugly.
To achieve professional results, use a specialized invisible zipper foot.
Think of it as laying the groundwork for a masterpiece.
With a tidy start, your sewing machine and zipper foot will reward you with
Ensuring Smooth Zipper Tape
After aligning your fabric perfectly, ensuring smooth zipper tape is your next step.
Grab your iron and press the tape flat for a streamlined installation.
This Zipper Tape Ironing reduces tension and prevents puckering.
Think of it as prepping the track for a racing car—smoothness is key.
This foundation makes attaching an invisible zipper with a sewing machine zipper foot a breeze!
Laying The Zipper Face Down
Imagine this: you’re ready to tackle your invisible zipper, laying it face down on the fabric’s right side.
Align the zipper coil with the seam allowance—it’s like setting the stage for a perfect performance.
Remember:
- Zipper tape alignment stays true
- Space for the zipper pull position
- The fabric’s charm showcased naturally
Simple steps, big results!
Pinning The Zipper Tape
Laying the zipper face down, you’ll focus next on pinning the zipper tape.
Make sure zipper tape alignment with the fabric edge, and prioritize pin placement accuracy for seamless sewing.
You can also refer to a guide on zipper coil allowance to ensure your zipper is placed correctly.
Opt for hand basting if pinning feels risky.
Watch zipper tape tension to keep edges smooth.
Here’s a quick guide:
| Step | Tip |
|---|---|
| Align | Match tape to fabric edge |
| Pin | Space pins evenly |
| Hand Baste (optional) | If unsure about pin placement |
| Check | Ensure smooth tape, no puckering |
Sewing The First Side of The Zipper
You’re ready to attach your invisible zipper foot and slide the pinned zipper tape under the presser foot, making sure everything lines up perfectly.
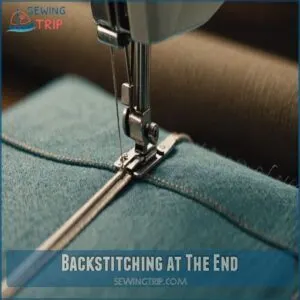
Sew the length of the zipper carefully, remembering to backstitch at the end to keep your stitches secure.
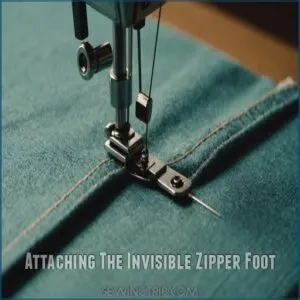
Attaching The Invisible Zipper Foot
Confidence is key when attaching the invisible zipper foot to your sewing machine. Align the foot carefully, making sure it snaps snugly into place. Your sewing machine must be compatible with the foot type you choose for smooth stitching.
- Foot positioning: Align it precisely for best results.
- Compatibility check: Make sure your machine accepts the invisible zipper foot.
- Regular maintenance: Keep your zipper foot clean and functional.
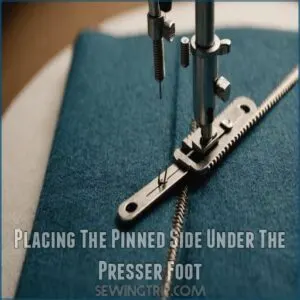
Placing The Pinned Side Under The Presser Foot
Success hinges on proper needle placement.
Position the pinned zipper side under your presser foot, ensuring the needle sits just right of the zipper coil.
Maintain consistent foot pressure and fabric tension.
Perfect zipper alignment is key!
| Step | Description |
|---|---|
| 1 | Align zipper with seam allowance. |
| 2 | Place under presser foot. |
| 3 | Needle to the right of zipper coil. |
| 4 | Check fabric tension. |
| 5 | Begin sewing. |
Remember, practice makes perfect with invisible zippers!
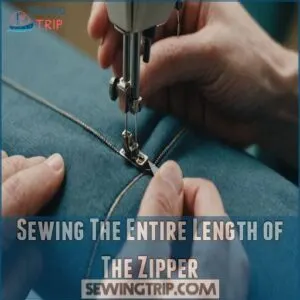
Sewing The Entire Length of The Zipper
You’ve slid the pinned side of your invisible zipper under the presser foot, aligning the needle position just right.
As you begin sewing, make sure to adjust your thread tension settings and select the right needle for your fabric, as explained in the sewing machine setup guide.
Now, maintain zipper tension and keep your stitching speed steady as the sewing machine hums along.
Follow the seam allowance carefully, allowing
Backstitching at The End
Finishing your zipper? Wrap it up with backstitching to keep it snug and secure. It’s like tying a bow on your gift—essential! Remember:
- Backstitch length: Keep it around 1-2 inches.
- Backstitch tension: Match the fabric’s needs.
- Backstitch placement: Right at the end of the invisible zipper.
Master this for polished results without fuss!
Sewing The Second Side of The Zipper
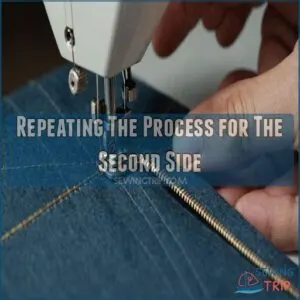
Now that you’ve tackled the first side, it’s time to repeat the process for the second side of the zipper.
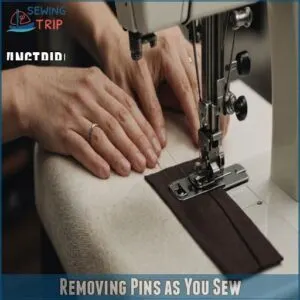
Be sure to remove each pin gently as you sew, ensuring everything stays securely in place for a flawless finish.
Repeating The Process for The Second Side
Now that you’ve mastered one side, it’s time to tackle the second! Align the zipper with the seam for consistency. Keep pin placement precise to maintain zipper alignment. Slide the invisible zipper foot carefully along the coil.
| Step | Tip | Result |
|---|---|---|
| Align Zipper | Check seam consistency | Even look |
| Pin Placement | Keep it precise | No fabric shifting |
| Sew Carefully | Align zipper foot position | Perfect invisible zip |
Happy sewing!
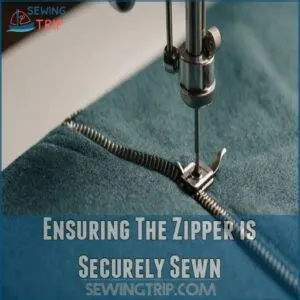
Ensuring The Zipper is Securely Sewn
To make sure your invisible zipper is securely sewn, align those zipper teeth perfectly.
Use your sewing machine’s zipper foot to maintain consistent seam tension.
Check the backstitching length at each end for a sturdy finish.
As you sew the second side, gently adjust zipper foot pressure.
Pay attention to zipper pull placement so everything fits smoothly, making installation a breeze.
Removing Pins as You Sew
Ever sewn over a pin? It’s like hitting a speed bump!
Remove each pin as you sew with your zipper foot for smooth sailing.
This keeps your sewing machine happy and your fingers safe.
Try these pin removal techniques:
- Slide pins gently sideways
- Use both hands for balance
- Slow down sewing at pin spots
- Maintain steady seam tension
Completing The Seam
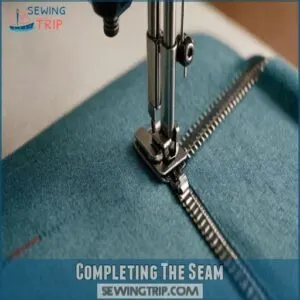
Now you’re ready to finish the seam!
Carefully match the top edges of your zipper and seam allowances, then pin or baste them together before sewing to create a flawless, invisible zipper.
Matching Top Edges and Seam Allowances
You’ve sewn both zipper sides, but ensuring seam allowance alignment is key for a seamless look.
Match the top edges and seam allowances carefully like matching puzzle pieces.
Don’t stress over a little zipper pull placement or fabric matching.
With a trusty zipper foot, the sewing machine turns any seam allowance or zipper insertion into a masterpiece.
| Emotion | What You Feel | Outcome |
|---|---|---|
| Relief | Perfect Match | Seamless Look |
| Pride | Mastery | Professional |
| Control | Precision | Confident Fit |
Pinning or Basting The Matched Seams
Imagine the frustration of mismatched seams.
For this step, consider using a specialized tool like a basting thread sewing kit to help with precision.
Avoid it by pinning or basting the matched seams carefully.
Focus on seam allowance alignment and manage fabric tension.
Pin placement is key here; make sure everything is snug and secure.
Choose between a precise basting technique or thoughtful pinning for a smooth
Sewing The Seam Line
Pin those seams in place? Great!
Now, attach the regular zipper foot to your sewing machine, making sure to use a size 14 needle for smooth stitching as recommended when preparing for zipper installation.
Align the needle with the invisible zipper’s end and sew the seam line until you’ve cleared it.
Remember to keep your seam allowances even.
Finish the seam with a top-stitch or a zigzag stitch for extra durability.
Choosing The Right Invisible Zipper
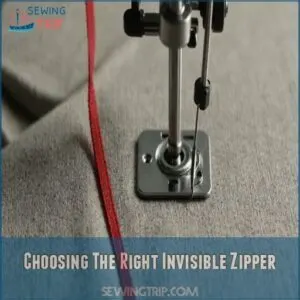
Choosing the right invisible zipper can make your garment look seamless and professional, giving it an enhanced design and sleek finish.
Consider its comfort and versatility; you wouldn’t want your masterpiece to turn heads for the wrong reasons, like a scratchy zipper!
Enhanced Design
Selecting the right invisible zipper can elevate your garment’s design.
Think about fabric choice, color matching, and precise zipper placement.
You’ll need a zipper foot on your sewing machine to achieve that seamless look.
Picture the thrill of your invisible zipper tutorial turning you into the sewing guru of your social circle—control over style, simply by mastering zipper sewing.
Professional Finish
A professional finish hinges on choosing the right invisible zipper.
It’s all about seamless garment construction that masks those zippers like magic.
To achieve this, mind these essentials:
- Zipper placement: Align precisely for a concealed zipper.
- Pressing: Flatten seams and zipper tape for excellent stitch quality.
- Zipper foot: Make sure proper movement and placement.
Comfort
That professional finish looks great, doesn’t it?
Now, let’s talk comfort.
Choosing the right invisible zipper length is key for a smooth garment fit, and using a regular zipper foot can make all the difference in achieving that perfect fit.
Too short, and you’ll struggle.
Too long, and it’ll bunch.
Consider your fabric choice and seam allowance when
Versatility
Once you’ve made sure comfort is covered, consider versatility.
An invisible zipper works with various clothing types and fabric types, from lightweight dresses to formal wear.
Choose the right zipper length to suit your garment’s style.
This concealed zipper lets you explore multiple project ideas.
Just make sure your zipper foot and sewing techniques are ready, making each seam as flawless as possible.
Essential Materials and Tools
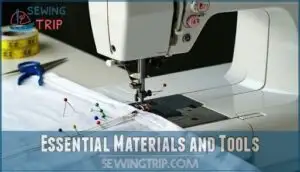
To seamlessly install an invisible zipper, you’ll need a few essential tools that make the job much easier.
Grab your sewing machine, an invisible zipper foot, needle and thread, and some sewing pins to get started on your project.
Sewing Machine
When you’ve picked your ideal invisible zipper, your sewing machine becomes your trusty sidekick.
Keep it in top shape with regular maintenance.
Know your foot types and practice bobbin winding.
Needle selection is key for that smooth glide.
Troubleshooting issues are part of the package but mastering your machine means those little zippers won’t give you nightmares.
Invisible Zipper Foot
Invisible zipper foot types are your secret weapon for a seamless look.
Choosing the right foot makes all the difference in a sewing machine tutorial.
Keep yours in top shape with these tips:
- Foot placement tips: Align carefully for precision.
- Foot maintenance: Regularly check and clean.
- Foot alternatives: Opt for generic if necessary.
- Master invisible zipper use: Practice makes perfect!
Needle and Thread
You’ve got the zipper foot attached, now let’s talk needle and thread.
Pick a needle size that suits your fabric—small ones for lightweight, larger for heavier.
Choose threads that match your material for a seamless finish.
Adjust thread tension on your sewing machine to avoid puckers.
Proper needle threading and secure knotting techniques are key for mastering the invisible zipper.
Sewing Pins
After selecting your needle and thread, sewing pins are a small tool with big impact.
They keep fabric pieces stable.
Here’s what to keep in mind:
- Pin types: Choose between glass head or pearl for better grip.
- Pin size: Opt for fine pins to avoid poking large holes.
- Pin placement: Space them evenly along your invisible zipper seam.
Fabric Marking Tool
Because precise marking is key for a flawless invisible zipper, choose a fabric marking tool wisely.
Types of tools include tailor’s chalk, marking pencils, or disappearing ink pens.
Consider your fabric type; chalk works well on dark fabrics, while pencils suit lighter ones.
Accurate marking prevents mistakes, ensuring your zipper looks professional.
Practice makes perfect, so don’t worry about minor errors.
You’ll master this skill!
Mastering The Invisible Zipper Technique
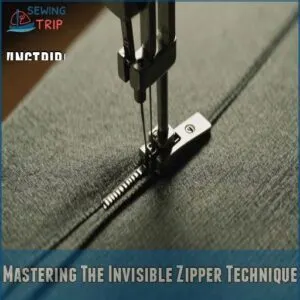
Mastering the invisible zipper technique takes precision and a bit of practice, but it’s totally worth it when you see that flawless finish.
With the right approach, you’ll soon have zippers that seem to magically disappear into your fabric.
The Importance of Precise Stitching
Precise stitching is your golden ticket to a flawless invisible zipper.
Pay close attention to needle size and stitch length—these details affect your seam allowance and zipper alignment.
To master this technique, remember that careful zipper installation tips are essential, especially when it comes to making sure the zipper is sewn in straight lines.
Fabric tension is key, keeping everything smooth and neat.
Use a sewing machine foot for better control, ensuring those zipper
Practice Makes Perfect
Mastering the invisible zipper technique isn’t just about precise stitching; it’s about embracing practice.
You can find a variety of zipper sewing machines online at sewing machine zipper.
Think of it like learning to ride a bike – a few wobbles are normal.
Use your sewing machine zipper and invisible zipper foot regularly.
Experiment with different zipper types to improve stitch quality and seam finishing.
Remember
Common Mistakes to Avoid
When sewing invisible zippers, it’s easy to make mistakes like sewing over pins or placing the zipper incorrectly.
Press the fabric and zipper tape well to avoid these common hiccups and achieve a polished finish.
Sewing Over Pins
Feeling confident with your invisible zipper foot skills? Great!
Watch out for common pitfalls like sewing over pins. It might seem harmless, but it can wreak havoc on your sewing machine and your masterpiece.
Prioritize pin safety with careful pin removal.
Consider alternatives like hand basting for stitch accuracy and avoiding costly mistakes.
Keep your zipper seamless and sleek!
Incorrect Zipper Placement
Sometimes, underestimating the importance of zipper alignment can lead to invisible zippers being visible.
If your zipper coil doesn’t sit snugly in the seamline, it’s easy to create crooked seams.
Always double-check the zipper length against the seam allowance.
Position the invisible zipper foot properly, and secure the zipper pull position to keep everything concealed and sleek.
Inadequate Pressing
Two important steps often overlooked? Pressing the zipper tape and fabric before sewing your invisible zipper.
Seriously, it prevents wrinkles, puckering, and uneven seams.
A good press makes sure the zipper tape lies flat, minimizing zipper slippage and distortion.
This seemingly small step makes a huge difference in achieving a professional, flawless concealed zipper.
Trust me, your sewing machine and invisible zipper foot will thank you!
Troubleshooting Common Issues
You’ve got your invisible zipper sewn in, but sometimes the teeth might peek out, or the seam allowances seem a bit off.
Don’t worry—you’re not alone, and tackling these small hiccups is all part of the sewing adventure.
Zipper Teeth Visibility
Just sewn an invisible zipper, and still spot those pesky teeth peeking through? You might check the zipper teeth alignment and zipper tape thickness first.
A thicker zipper tape or misaligned teeth can cause color contrasts, disrupting that seamless look you want.
Use your invisible zipper foot and make sure seam allowance precision to keep everything perfectly hidden.
Uneven Seam Allowances
Uneven seam allowances got you worried? Fear not!
Ensuring seam allowance consistency is key to a professional finish.
Start by double-checking your measurements and using pressing techniques to smooth everything out.
If things get out of hand, grab your seam ripper and make necessary adjustments.
Mastering the invisible zipper with a zipper foot and sewing machine turns frustration into triumph.
Zipper Pull Placement
You’ve got the seams sorted, but now let’s chat about zipper pull placement.
You don’t want it too long or it’ll snag, too short and you’re fumbling.
Aim for a pull placement style that’s comfy and blends with your garment.
Play with aesthetics to make that invisible zipper pop while keeping it concealed until needed.
Finishing The Seam Professionally
To give your project a polished finish, it’s time to master the art of sewing a seam professionally.
By using a regular zipper foot and aligning your needle perfectly with the stitching, you’ll make sure your invisible zipper stays discreet and your garment looks flawless.
Sewing a Seam Finish
Are zipper woes giving you a headache? Don’t worry! Mastering a polished seam finish will boost your sewing game.
Start by ensuring those seam allowances align perfectly.
A quick seam pressing makes your fabric choice shine.
Topstitching prevents the zipper pull from misshaping your invisible zipper.
Keep your sewing machine ready with these sewing tips, and you’ll achieve a flawless seam finish.
Using a Regular Zipper Foot
After carefully sewing your invisible zipper, it’s time to switch to a regular zipper foot.
This helps finish the seam professionally.
Here’s how:
- Adjust your foot pressure for a smooth stitch.
- Maintain a consistent sewing speed.
- Check your seam allowance.
You’re almost done!
Aligning The Needle With The Stitching
Picture yourself aligning that sewing machine needle with the stitching groove—it’s pure magic for stitching accuracy.
Use your invisible zipper foot for seamless results, ensuring perfect seam alignment.
Carefully position the needle for that topstitching effect, combining precision with finesse.
Let each stitch flow smoothly, empowering those zippers to vanish like magic, leaving you and your seams looking effortlessly professional.
Frequently Asked Questions (FAQs)
How do you sew an invisible zipper on a sewing machine?
Over 60% of fast fashion uses zippers, making them very important.
To sew an invisible zipper, press flat, align with the seam, pin, and use the invisible zipper foot.
Precision helps create a seamless, polished look in garments.
Do I need a sewing machine foot to sew an invisible zipper?
You’ll find sewing invisible zippers easier and neater with a dedicated sewing machine foot.
This special foot helps align the zipper perfectly, ensuring a seamless finish.
While not strictly necessary, it’s highly recommended for best results.
How do you sew an invisible zipper on a cushion?
Start by pressing your fabric and zipper; this makes for a smooth finish.
Align the zipper on the cushion seam, secure with pins, and attach using an invisible zipper foot.
Stitch carefully, making sure you have a neat, clean seam.
What skills do you need to sew invisible zippers?
Sewing invisible zippers is like unraveling a mystery—master patience, precision, and steady hands.
Familiarize yourself with a sewing machine and invisible zipper foot, practice stitching techniques, and make sure you have a calming focus for aligning zippers flawlessly.
When should you sew in invisible zippers?
Use invisible zippers when you want a clean, seamless finish on garments like dresses or skirts.
They’re perfect for formalwear or anytime you wish to keep the closure discreet, blending beautifully with your fabric’s seam.
What is an invisible zipper?
Ever picture a zipper that vanishes into fabric?
That’s an invisible zipper for you!
It hides its teeth within the seam, giving your clothes a sleek, polished finish.
Perfect for fancy dresses or blouses.
How do you sew an invisible zipper on a sewing machine?
Align the open zipper face-down on your fabric’s right side, pin or baste it if needed, and sew along the coil with an invisible zipper foot.
Make sure both sides are secured before closing the seam below.
Do you need a special foot to sew an invisible zipper?
For sewing an invisible zipper, you definitely need an invisible zipper foot.
It’s specifically designed to stitch close to the zipper coil, ensuring that the zipper is truly "invisible" once your seam is complete.
How to insert an invisible zipper into a side seam?
Start by pressing the zipper tape flat.
Align it face down on the garment’s seam.
Pin it securely, then sew using an invisible zipper foot.
Repeat the process on the other side, ensuring a snug fit.
How to use concealed zipper foot?
You’ll attach it to your sewing machine.
Then, you’ll carefully position your fabric and zipper.
Sew along the zipper teeth, guiding the fabric with the foot’s special groove.
It’s that easy!
How do I choose zipper color?
When in doubt, match it out!
Choose a zipper color that blends with your fabric for a seamless look.
If you’re feeling bold, pick a contrasting color for statement flair.
Color can make your projects pop!
Can invisible zippers be reused?
Reusing invisible zippers is possible if you carefully remove them without damaging the teeth or tape.
Gently unpick the stitches and press the zipper tape flat.
Always check for wear and make sure it functions smoothly.
Whats the best fabric for beginners?
Cotton fabric is fantastic for beginners.
It’s easy to handle, doesn’t slip around, and holds stitches well.
You’ll find it forgiving while learning, kind of like that first bike with training wheels.
Happy sewing!
How to prevent fabric puckering?
Prevent pesky puckering by picking the right needle size for your fabric, using a balanced tension, and gently guiding your fabric without pulling.
Don’t forget to pre-wash to avoid shrinkage surprises.
Practice makes perfect!
Is hand-basting the zipper necessary?
Hand-basting before machine sewing an invisible zipper gives you extra control, ensuring perfect alignment.
While not mandatory, it sure helps avoid missteps.
It’s like training wheels—handy until you’re comfortable zipping along without them!
Conclusion
Think invisible zippers are tricky?
With practice, they become second nature.
Using your sewing machine, this zipper tutorial shows you how to nail the seamless look every time.
From carefully pressing zipper tape to mastering precise stitches, you’ll soon find that the invisible zipper superpower is within reach.
Avoid common pitfalls like sewing over pins and enjoy the satisfaction of a professional finish.
Ready to elevate your projects with these invisible zipper secrets?
Give it a go!

