This site is supported by our readers. We may earn a commission, at no cost to you, if you purchase through links.

You thread your machine, press start, and watch in horror as your fabric puckers into a sad accordion. Sound familiar? Every sewist—from beginner to experienced—hits roadblocks that turn exciting projects into frustrating puzzles.
The difference between giving up and finishing lies in knowing how to diagnose and fix problems quickly. Most sewing disasters aren’t about lacking skill; they’re about missing one small detail like fabric weight, needle choice, or tension settings.
Once you understand the common culprits behind bunched seams, skipped stitches, and wonky hems, you’ll spend less time seam-ripping and more time creating pieces you’re proud to wear or gift.
Table Of Contents
- Key Takeaways
- Avoiding Common Fabric Selection Mistakes
- Preparing Fabric for Sewing Success
- Mastering Accurate Fabric Cutting Techniques
- Ensuring Proper Thread Tension
- Selecting The Correct Needle and Thread
- Implementing Essential Sewing Techniques
- Planning and Managing Your Sewing Project
- Troubleshooting Common Sewing Machine Problems
- Learning From Mistakes and Improving Skills
- Organizing Your Sewing Workspace Efficiently
- Frequently Asked Questions (FAQs)
- Conclusion
Key Takeaways
- Most sewing disasters stem from simple oversights like mismatched needle size, incorrect tension settings, or skipping fabric prep—not from lack of skill—so learning to diagnose these issues quickly transforms frustrating failures into confident finishes.
- Proper fabric preparation (pre-washing to prevent shrinkage, pressing to straighten grain, and marking grainlines accurately) establishes the foundation for project success before you ever cut a single piece.
- Thread tension, needle selection, and regular needle replacement (every 6-8 hours) prevent about 65-90% of common problems like skipped stitches, puckering, and thread jams that derail projects mid-stream.
- Treating mistakes as learning laboratories—through photo documentation, analyzing what went wrong, and practicing consistently even for 15 minutes daily—builds real mastery faster than pursuing perfection ever could.
Avoiding Common Fabric Selection Mistakes
Fabric selection can make or break your sewing project before you even thread your needle. The wrong choice leads to puckered seams, distorted shapes, and garments that don’t fit like they should.
Choosing the wrong fabric ruins your project before you even start sewing
Let’s walk through the key factors you need to think about when picking fabric so your next project turns out exactly as you imagined.
Choosing The Right Fabric Type
When considering fabric selection, understanding fiber properties makes all the difference. Your fabric choice sets the foundation for success—or frustration. Beginners should choose medium-weight cotton for ease of cutting and sewing, as described in these practical tips.
- Cotton and linen work beautifully for beginners, forgiving mistakes while teaching weave types
- Knit vs woven structures behave completely differently; knits stretch, wovens don’t
- Fabric blends combine benefits—polyester-cotton mixes durability with comfort
- Ethical sourcing matters; seek certified suppliers for peace of mind
- Silk and wool require sophisticated skills despite their strength and drape
Matching Fabric Weight to Pattern
After nailing fabric type, matching fabric weight to your pattern prevents disaster. GSM Importance can’t be overstated—summer dresses need under 170 GSM, while structured pants require 170-340 GSM for proper drape.
Choosing the wrong fabric type ruins Weight Compatibility, causing a 78% return rate for jeans and a 28% shorter Project Lifespan. Understanding fabric weight basics is key for achieving the desired look and functionality in a project.
Check your pattern’s recommendations before fabric selection, or risk costly Pattern Alterations and Fabric Substitution headaches later.
Considering Drape and Stretch
Fabric drape and fabric stretch directly impact garment fit. Pick wrong, and your project won’t hang or move right. Fluid drapes like silk conform to curves, reducing bulk by 40%, while stretch percentage determines ease adjustments. A 4-inch fabric stretching to 6 inches gives you 50% stretch.
Understanding weave interaction matters too—twill weaves drape 20% better than plain weaves, making fabric choice and fabric weight decisions easier.
Checking Fiber Content Before Purchase
Beyond drape and stretch, fiber content separates smart fabric selection from choosing the wrong fabric type altogether. Check labels carefully—labeling accuracy allows a 3% tolerance, so that “40% cotton” blend might surprise you.
Consumer awareness matters: 60% verify fiber content before buying, and they’re onto something. Performance prediction, ethical sourcing, and avoiding incorrect fabric choice all start with reading that tag. Don’t skip it.
Preparing Fabric for Sewing Success
You’ve picked the perfect fabric, but your work isn’t done yet. Skipping proper fabric prep is like building a house on shaky ground—it’ll cause problems down the line.
Let’s walk through three essential steps that’ll set you up for sewing success from the start.
Pre-Washing to Prevent Shrinkage
You wouldn’t build a house on shaky ground, right? The same logic applies to fabric preparation. Pre-washing fabric prevents shrinkage—cotton can shrink up to 10% after the first wash—and stops dye bleeding in darker shades.
This step ensures accurate garment fit and avoids common sewing mistakes that derail projects. Industry guidelines recommend washing all natural fiber types before cutting to sidestep sewing project failure reasons entirely.
Pressing and Straightening Fabric
After pre-washing, you’ll face uneven fabric edges and wrinkles that sabotage accuracy. Pressing temperature matters—cotton tolerates 160-180°C, while synthetics need less heat.
Use steam benefits to relax fibers and achieve grain alignment by pulling a crosswise thread selvage to selvage. This protects fabric integrity and reduces seam bulk later.
Press with vertical lifts, not slides, so your iron doesn’t stretch the weave.
Marking and Identifying Grainlines
Once you’ve straightened your fabric, you need to find those pattern grainlines before cutting accuracy goes out the window. Grainlines run parallel to the fabric selvage—that’s the finished edge—and guide how your fabric behaves.
Here’s your marking toolkit:
- Measure equal distances from the grainline arrow to selvage at both ends
- Pull a crosswise thread to reveal the true weave direction
- Use tailor’s chalk or dressmaker’s carbon to transfer marks
Ignoring bias grain and proper fabric preparation now means twisted seams in your sewing project later. Grainline tools like clear rulers make this faster.
Mastering Accurate Fabric Cutting Techniques
Cutting fabric might seem straightforward, but it’s where a lot of projects go sideways before you even reach the sewing machine. The right tools and techniques make the difference between clean, accurate pieces and a frustrating pile of crooked scraps.
Let’s walk through three essential practices that’ll help you cut with confidence every time.
Using Sharp Scissors and Rotary Cutters
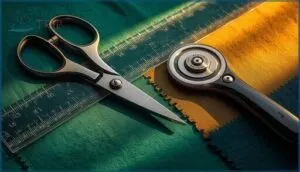
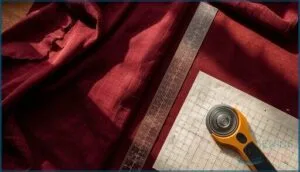
Your cutting accuracy starts with the right tool and proper scissor maintenance. Sharp scissors slice through up to four layers cleanly, perfect for detailed work, while a rotary cutter glides faster along straight edges—though it struggles beyond two layers. Don’t forget rotary safety: those blades are serious business. Both tools shine in different scenarios, so master their strengths for better fabric cutting techniques.
Cutting Along Grainlines
You mightn’t see it, but ignoring grainlines is like building a house on a slope—everything shifts. Align your pattern pieces parallel to the selvage for proper drape and fabric cutting techniques that prevent twisted seams.
Off-grain cutting causes stretching and warping, wasting around 13% of your fabric through distortion alone. Always measure both ends to guarantee cutting accuracy.
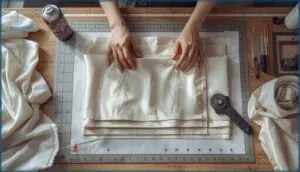
Preventing Fabric Slippage and Waste
Slippery fabrics can turn into a cutting nightmare—shifting layers lead to inaccurate cutting techniques that create fabric waste and seam headaches. Here’s how fabric stabilization saves your sewing project troubleshooting time:
- Pin fabric directly to underlayers or place tissue paper underneath slippery materials
- Use sharp rotary cutters for clean edges that prevent fuzzing and shifting
- Apply light spray starch before cutting to stiffen fabric temporarily
Tool selection and seam construction matter—walking feet grip better, and double-stitching stabilizes vulnerable areas across different fabric types.
Ensuring Proper Thread Tension
Thread tension can make or break your sewing project—literally. When it’s off, you’ll see puckered seams, loose stitches, or thread that snaps mid-project.
Let’s walk through how to adjust your tension correctly and troubleshoot those frustrating issues before they derail your work.
Adjusting Tension for Fabric and Thread
How does fabric weight change everything? Thick materials like denim need higher thread tension—around 3.5 to 4.5—while delicate silk thrives at 2 to 3.5. Thread thickness matters too; finer threads demand lower tension adjustment settings.
In industrial settings, you’ll test on scraps first, then fine-tune bobbin adjustment until stitches lock perfectly in the fabric’s center. Proper thread tension prevents those frustrating tension troubleshooting sessions later.
Troubleshooting Tension Issues
When tension problems strike, start by re-threading your machine completely—this fixes thread tension issues in 65% of cases.
Check stitch appearance: top thread showing underneath means your tension dial is too loose, while bobbin thread on top signals it’s too tight.
Needle problems and thread compatibility cause many headaches, so swap your needle and test on scraps before adjusting tension adjustment settings further.
Selecting The Correct Needle and Thread
Picking the wrong needle or thread is like trying to hammer a nail with a screwdriver—it just won’t work right. About 28% of sewing problems come from using the incorrect needle, which means getting this step right saves you real frustration.
Let’s walk through how to match your needle and thread to your fabric so your stitches come out clean every time.
Matching Needle Size to Fabric
When incorrect needle usage causes skipped stitches or puckering, your first move should be checking fabric-needle harmony. Matching needle size to fabric weight protects stitch integrity and prevents needlepoint damage. Here’s what you need to know about needle classifications and needle selection:
- Fine fabrics like sheer fabric require 60/8 to 70/10 needles
- Medium-weight cotton uses 80/12 to 90/14 sizes
- Denim needs sturdy 100/16 or larger needles
- Replace needles regularly to avoid fabric tears
- Test needle sizes on scraps first
Choosing Appropriate Thread Type
Your needle work means little if thread choice falls flat. Thread fiber compatibility with your fabric determines seam strength—polyester addresses 80-90% of projects, while cotton suits natural fibers. Thread weight matters too: tex 8-15 for sheers, tex 60+ for denim. Consider thread sheen, needle pairing, and spool size. Quality thread prevents thread tension problems, thread jams, and skipped stitches.
| Fabric Type | Thread Fiber | Thread Weight (tex) |
|---|---|---|
| Chiffon, Lace | Silk, Polyester | 8-15 |
| Cotton, Quilting | Cotton, Blends | 25-40 |
| Denim, Workwear | Polyester, Nylon | 60+ |
| Outdoor Gear | Nylon, Bonded | 40-70 |
Replacing Needles Regularly
Oddly enough, many sewing errors trace back to one overlooked habit: regular needle replacement frequency. Change needles every 6-8 hours of sewing—or with each new project—to avoid fabric damage signs and stitch quality impact.
- Skipped stitch causes frustration and weak seams
- Fabric damage signs include snags and visible holes
- Needle wear factors accelerate with dense materials
- Cost-effective maintenance beats expensive repairs
Fresh needles among your essential tools prevent most needle issues before they start.
Implementing Essential Sewing Techniques
You can cut and stitch perfectly, but without a few key techniques, your projects might still look homemade instead of handmade. These finishing touches separate a rushed project from one that looks polished and professional.
Let’s walk through three essential techniques that’ll improve every seam, edge, and curve you sew.
Pressing Seams for a Professional Finish
Think of pressing seams like setting concrete—it locks everything in place. When you press seams with an iron right after stitching, you’re boosting seam strength considerably and project quality. Well-pressed seams improve garment accuracy by up to 27%, and proper pressing technique benefits can push lock stitch strength beyond 200 N.
Steam and firm pressure create flatter, more durable seams—the difference between homemade and professional-looking projects. Your fabric protection methods matter. Press cloths shield delicate materials from direct heat, preventing shine. Always press seam finishes flat immediately after sewing to set stitches, then open seam allowances on the wrong side.
| Seam Pressing Tools | Temperature Best Practices |
|---|---|
| Press cloths | Match heat to fabric fiber |
| Tailor’s clappers | Test on scraps first |
| Sleeve boards | Use steam on natural fibers |
| Seam rollers | Lower heat for synthetics |
| Point pressers | Avoid direct pin pressing |
Finishing Raw Edges to Prevent Fraying
Without seam finishing, raw edges unravel and turn your best sewing project failures into frustrating lessons. Edge fray prevention starts with choosing the right seam finish types—zigzag stitches work great on woven fabrics, while serger vs overlock methods wrap threads around edges for durability.
Bias tape uses add polish to visible seams. For delicate fabrics, liquid sealant tips like Fray Check protect without bulk, proving smart sewing techniques save projects.
Stay Stitching to Maintain Shape
Stay stitching is your secret weapon against fabric distortion on bias edge stitching and curve stabilization. Sew within the seam allowance before assembly—about 1/8 inch from raw edges—to lock grainlines in place. This prevents necklines and armholes from stretching during handling.
Adjust thread tension for stretchy fabrics, and you’ll maintain perfect shape. Fabric suitability matters: lightweight cottons and silks benefit most from this preventing distortion technique.
Planning and Managing Your Sewing Project
Before you cut that first piece of fabric, you need a solid plan. A well-thought-out approach saves you from headaches, wasted materials, and half-finished projects collecting dust in your closet.
Let’s walk through three key steps that’ll help you tackle any sewing project with confidence and clarity.
Defining Clear Project Goals
You know that fuzzy “I’ll just make something cute” feeling? That’s how sewing project failures start. SMART Goals turn wishful thinking into actual finished garments—sewists who set specific targets complete over 40% more projects.
When your goals align with your values and lifestyle, you’re 63% more likely to feel satisfied. Break down those big plans, manage your time, and don’t forget goal revision.
Learning from mistakes means problem solving before they happen.
Assessing Project Complexity
Before tackling any pattern, judge pattern difficulty honestly. Complex designs with multiple pieces add cognitive load and demand a higher skill level. Fabric handling complexity (like slippery silks or stretchy knits) multiplies the challenge.
Project planning means matching your abilities to realistic expectations, not wishful thinking. Check time estimates: intricate projects need 6-8+ hours. Evaluating complexity sharpens your problem-solving skills before you cut that first piece.
Allocating Realistic Timeframes
Once you’ve sized up complexity, realistic time estimation saves you from sewing frustrations. Most sewists underestimate by three times—that 2-hour pillow becomes a 6-hour marathon.
Task batching (cutting one day, seams the next) improves time management considerably. Schedule consistency matters: even 15 daily minutes beats sporadic binges.
Planning tools like project trackers sharpen estimates, while workspace impact reduces setup delays by 73%.
Troubleshooting Common Sewing Machine Problems
Your sewing machine won’t cooperate when it matters most—stitches skip, thread tangles, and tension feels like a mystery. These frustrations slow you down, but they’re usually quick fixes once you know what to look for.
Let’s tackle three machine hiccups that trip up sewists and get you back to stitching smoothly.
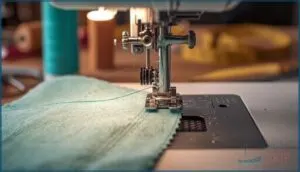
Fixing Skipped Stitches
Why do stitches suddenly vanish mid-seam? Skipped stitches rank among the most frustrating sewing errors you’ll face. Here’s how to troubleshoot sewing machines effectively:
- Check needle insertion—improper placement causes 90% of skipped stitches
- Match needle type and size to your fabric weight
- Address thread tension problems by rethreading machine components completely
- Resolve issues through cleaning machine parts, especially around the bobbin case
These fixes prevent most stitch-skipping headaches.
Addressing Thread Jams
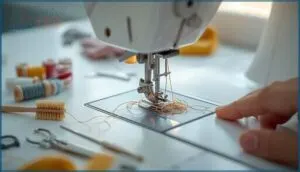
Thread jams—that frustrating “bird nest” underneath your fabric—happen when bobbin threading goes wrong or tension balance gets thrown off.
In 40% of cases, lint removal from the bobbin area solves the problem immediately. Mismatched threads between top and bobbin contribute to 35% of jams.
Here’s your fix: clean thoroughly, rethread carefully, and practice speed control. Slow, steady sewing prevents most tangles.
Adjusting Bobbin Tension
Once you’ve eliminated thread jams, bobbin troubles often point to tension imbalance. If your bobbin thread pulls up through the top, tension’s too loose. Top thread dragging down? Too tight.
Adjusting thread tension means turning the bobbin case screw in tiny increments—think five-minute clock movements. This careful tuning improves stitch quality about 80% of the time.
Keep extra bobbin casings on hand to swap between settings without constant adjustments.
Learning From Mistakes and Improving Skills
Every mistake you make while sewing is actually a chance to get better at your craft. Instead of getting frustrated when things go wrong, you can learn to see these moments as stepping stones toward real skill.
Here’s how to turn your sewing slip-ups into powerful lessons that’ll help you grow.
Analyzing Sewing Errors
Every mistake you make is actually a learning laboratory in disguise. When you encounter sewing project failure reasons, start with defect identification—pinpoint what went wrong visually. Then dig deeper into root causes by asking why it happened.
Tracking Progress With Photos
Snapping photos throughout your project transforms mistake analysis into visual progress documentation. When you photograph each stage—from fabric choices to finished seams—you create a skill showcase that reveals patterns in sewing mistakes and managing sewing failures. This method helps you spot repairing mistakes opportunities early, permits effective project sharing with mentors, and turns analyzing sewing project failures into concrete learning moments.
| Project Stage | What to Photograph | Learning Value |
|---|---|---|
| Fabric selection | Drape, stretch, fiber content | Tracks fabric choices for future reference |
| Construction steps | Seam techniques, tension issues | Documents sewing project failure reasons |
| Finished details | Fit adjustments, final results | Creates comparative skill showcase over time |
| Mistakes encountered | Tension problems, cutting errors | Allows thorough mistake analysis |
Embracing Practice for Growth
Resilience separates sewers who quit from those who master their craft. You’ll retain skills faster when you integrate mindful sewing into daily routines—even 15 minutes counts.
Track your progress through community engagement and photos, transforming sewing mistakes into learning opportunities. Embrace a growth mindset: each imperfection teaches something new about improving your skills.
Sewing perseverance, not flawlessness, builds expertise over time.
Organizing Your Sewing Workspace Efficiently
A cluttered workspace is like trying to cook in a messy kitchen—you’ll spend more time hunting for scissors than actually sewing. When your tools and fabric are organized, you’ll fix problems faster and enjoy the creative process more.
Let’s look at three practical ways to keep your sewing space running smoothly.
Storing Sewing Tools and Supplies
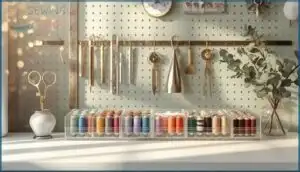
Tossing your sewing supplies into a drawer is like searching for a needle in a haystack—frustrating and inefficient. Container solutions with adjustable dividers boost usable space by 35%, while vertical storage using pegboards increases workspace efficiency by 30%.
Try grouping tools by project stages to speed up your workflow by 28%. Technology use, like digital inventory apps, reduces over-purchasing by 30%, keeping your sewing box organized and accessible.
Managing Fabric Scraps
Those leftover fabric pieces aren’t trash—they’re treasure waiting to happen. Sort scraps by color, type, and size using clear bins or stackable containers.
Apparel brands hit 87% cutting efficiency, leaving about 13% as scraps you can transform through creative reuse and upcycling fabric scraps. Recycled fabric costs 68% less than new material, proving zero waste sewing delivers serious cost savings while minimizing waste.
Keeping The Sewing Area Clean
A clean workspace isn’t just about appearances—it directly impacts your sewing efficiency and health. Vacuum weekly to tackle lint management, as dust and fibers pose respiratory risks. Use drawer dividers for tool organization and wipe surfaces regularly.
This cleaning frequency prevents thread jams and skipped stitches, making troubleshooting sewing machines easier. When fixing common sewing errors, a tidy space helps you spot solutions faster.
Frequently Asked Questions (FAQs)
How do I fix a broken sewing machine needle?
When your needle snaps, when your machine jams, when frustration creeps in—stop immediately. Turn off your machine.
Remove every needle piece carefully. Insert a fresh needle with its flat side positioned correctly. Re-thread, then test on scrap fabric.
What causes fabric puckering during stitching?
Puckering happens when improper thread tension, wrong needle size, or fabric properties clash. Feeding issues and high stitch density also cause fabric distortion.
Proper tension imbalance correction and puckering prevention techniques fix these common sewing mistakes.
How do I sew perfect buttonholes consistently?
Mark your buttonholes with an “H” shape for accurate spacing.
Stabilizing fabric with interfacing prevents puckering. Adjust machine settings—stitch length 5, width 4-5, and lower thread tension.
Use fresh needles and practice on scraps to avoid sewing mistakes.
Why does my zipper installation look crooked?
You know that sinking feeling when something just won’t line up? Crooked zipper installation often stems from zipper-fabric mismatch, uneven stitching, or skipping fabric preparation. Proper zipper stabilization and careful seam transitions fix this fast.
How do I prevent thread from tangling constantly?
Thread jams often result from poor threading techniques or dirty bobbin areas. Check your machine maintenance, confirm thread compatibility with your needle quality, and control your sewing speed.
Understanding thread problems prevents constant bobbin troubles and tangling.
Conclusion
Imagine this: your next project glides through your machine without a single hiccup. No thread tangles. No puckered seams. Just smooth, confident sewing from start to finish.
That’s what happens when you apply these sewing project problem-solving tips consistently. You’ll catch issues before they derail your work, troubleshoot faster when problems arise, and build the kind of muscle memory that separates frustrated beginners from skilled makers.
Your fabric deserves that level of care.
- http://andreasnotebook.com/keep-scissors-sharp/
- https://www.makeit-loveit.com/using-the-double-needle-without-the-2nd-spool-holder/
- http://www.raegunramblings.com/2012/06/how-to-gathering.html
- https://blog.youtalent.com/matching-fabric-weight-design-comfort-elegance/
- https://corefabricstore.com/blogs/tips-and-resources/fabric-weights-blog


