This site is supported by our readers. We may earn a commission, at no cost to you, if you purchase through links.
You pull a finished garment from your sewing machine, hold it up, and notice puckered seams, wavy hems, and fabric that doesn’t hang quite right. The difference between homemade and handmade comes down to technique, not talent.
Cotton gives you a forgiving canvas to practice on, while linen demands attention to detail with every press of the iron. Your measurements matter more than the pattern size on the envelope.
When you match fabric weight to your design and finish your seams like they’ll be seen, your clothes start looking like they came from a boutique instead of a basement.
Table Of Contents
Key Takeaways
- The difference between homemade and handmade comes down to mastering three key techniques: matching fabric weight to your design, pressing every seam before moving forward, and finishing edges like they’ll be seen, which transforms basement projects into boutique-quality garments.
- Accurate body measurements—especially bust, waist, hip, and inseam—cut pattern alterations by about 40% and determine whether your finished garment actually fits, so measuring twice and choosing beginner-friendly patterns labeled explicitly as “Beginner” sets you up for success.
- Prewashing fabric prevents up to 7.5% shrinkage in cotton, removes manufacturing chemicals, and stabilizes fibers before cutting, making it a non-negotiable step that protects your garment’s fit after the first wash.
- Essential tools like quality elastic, a reliable steam iron, pinking shears, and a serger transform your sewing from struggling through projects to achieving professional results without needing a factory-sized budget or complicated equipment.
Essential Fabric Selection Tips for Sewing Clothes
Choosing the right fabric can make or break your sewing project. The material you pick affects how easy your garment is to sew and how professional it looks when you’re done.
Let’s walk through the key fabric choices that’ll set you up for success.
Best Beginner Fabrics (Cotton, Linen, Jersey)
Cotton’s your best friend when you’re starting out—its durability and stable weave make it beginner-friendly with fewer mistakes. Linen brings a beautiful drape, though creasing happens, so keep your iron handy. Cotton jersey introduces you to stretch fabrics with manageable recovery. Fabric blends, like cotton-linen, combine strengths nicely.
For successful projects, beginner sewists should select easy-to-sew fabrics. Choose medium weights and match needle types to your fabric for smooth, confident sewing.
Understanding Fabric Weight and Drape
Once you’ve picked your fabric types for sewing, understanding GSM Importance and drape coefficient helps improve garment appearance dramatically. Fabric weight—measured in grams per square meter—determines fabric structure, while drape shows how fabric falls.
Lightweight options (70–150 GSM) flow beautifully for dresses, while heavier weights (350+ GSM) create structured jackets. Medium weight fabrics offer a balance of structure and drape, making them suitable for various garments.
Industry standards guide textile selection, but your design outcome depends on matching weight and drape to your vision.
How and Why to Pre-Wash Fabric
Before you start cutting, prewashing fabric matters more than you might think. It addresses shrinkage prevention—cotton can shrink up to 7.5%—while chemical removal protects your skin from manufacturing residues. You’ll also boost dye fastness, fabric softness, and even reduce microfiber shedding.
Here’s what happens when preparing fabric properly:
- Fibers relax and stabilize before cutting
- Excess sizing washes away for easier handling
- Colors set, preventing bleeding later
Skip this step, and your finished garment could lose its fit after the first wash.
Matching Fabric to Clothing Patterns
Once you’ve prepped your fabric, choosing the right one for your pattern makes all the difference. Check the envelope—it lists recommended fabric types and weights. Medium-weight fabrics (150–250 g/m²) suit most beginner patterns, while fabric drape and stretch percentage shape your silhouette choice. Matching plaids or stripes? Add 10–25% extra yardage.
| Fabric Type | Best For |
|---|---|
| Cotton lawn | Flowy blouses, gathered dresses |
| Ponte knit (230–340 g/m²) | Structured pants, pencil skirts |
| Rayon challis | Wrap styles, bias-cut garments |
| Canvas/denim | A-line skirts, boxy jackets |
| Jersey (25–40% stretch) | T-shirts, casual wear |
Accurate Measuring and Pattern Selection
Getting the right fit starts with taking accurate measurements and picking a pattern that matches your skill level. When you know your bust, waist, hip, and inseam numbers, you can choose patterns that’ll actually work for your body.
Let’s walk through how to measure yourself correctly and find beginner-friendly patterns that won’t leave you frustrated.
Taking Bust, Waist, Hip, and Inseam Measurements
Taking accurate body measurements is like building a foundation for a house—skip this step, and everything else shifts. Sewing measurements determine your fit satisfaction, and even small errors mean extra work later with fitting adjustments.
Here’s how to nail your body measurements:
- Bust Cup Sizes: Measure your high bust, then your full bust at the fullest part. Each inch of difference equals one cup size—3 inches means you’re working with a C cup in most patterns.
- Waist Posture: Find your natural waist above your belly button at the narrowest point. Keep your posture relaxed and don’t suck in—you want repeatable accuracy every time.
- Hip Positioning: Measure horizontally at the fullest part, usually 7 to 9 inches below your shoulder point. This gives you the hip circumference your pattern needs.
- Inseam Methods: For pants or shorts, measure from the crotch seam straight down to where you want the hem. Grabbing your favorite pair and measuring the inseam flat makes this easier.
- Double-Check Everything: Remeasure before you cut. Consistent measurements cut pattern alterations by about 40% and keep your garments fitting the way you imagined.
Keep your measuring tape snug but not tight, parallel to the floor, and always record numbers immediately.
Tips for Measuring Neck to Waist for Dresses
How do you nail neck to waist measurements for dressmaking without bodice fitting disasters? Start at the prominent bone at your nape, run your tape down your spine to your natural waist.
Keep tape tension consistent—not tight, not loose—or you’ll add 1 to 3 centimeters of error. Accurate posture matters, so stand naturally with relaxed shoulders.
Body variations mean you should measure twice and average results for fitting adjustments that actually work.
Choosing Beginner-Friendly Patterns
Look for beginner sewing patterns labeled explicitly as “Beginner” by the manufacturer—they cut frustration by 35% and boost your odds of finishing. Pick garment types like A-line skirts or elastic-waist pants that skip zippers and buttonholes.
Choose easy clothing patterns for beginners from brands like Tilly and the Buttons or Seamwork, which score high on clarity and often include video tutorials for better learning outcomes.
Where to Find Free and Indie Patterns
You’ll discover a goldmine of sewing patterns online—both free and from indie designers. Big hubs like AllFreeSewing and DRCOS offer thousands of free downloads, while indie brands (over 200 listed on The Fold Line) bring fresh, modern styles. Start here:
- Mood Sewciety – free garment patterns with nearly 30,000 downloads on popular designs
- Fabrics-Store.com – linen-focused freebies for registered users
- The Fold Line – searchable database filtering by skill level and fabric type
Discovery platforms make choosing sewing patterns easier than ever.
Sewing Techniques for Professional-Looking Garments
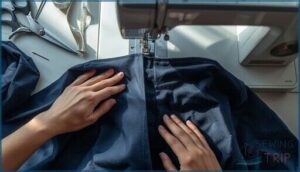
You’ve picked your fabric and nailed your measurements—now it’s time to bring your garment to life with techniques that separate homemade from handmade. The way you cut, stitch, and press your fabric can make all the difference between something that looks DIY and something that looks like it came from a boutique.
Let’s walk through the core techniques that’ll give your sewing projects that polished, professional edge.
Cutting and Marking Fabric Accurately
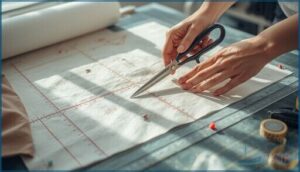
Cutting fabric accurately starts with grain alignment—a shift of just 1/4 inch can throw off your fit by 2 inches around. Use marking tools like chalk or water-soluble pens to transfer key points before you cut.
Plan your fabric layout carefully to improve efficiency and reduce waste. These cutting fabric tips prevent cutting errors and give your garment a professional foundation.
Seam Allowances and Finishing Edges
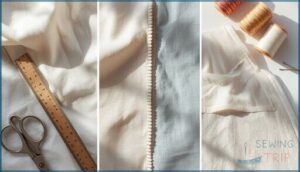
Your seam allowance determines how your garment wears over time. Most patterns use 5/8 inch, but high-stress areas like underarms need an extra 1/8 inch for durability.
Seam finishing prevents fraying and extends garment life:
- Serging secures edges in seconds—used in 95% of commercial garments
- French seams enclose raw edges beautifully for sheer fabrics
- Flat-felled seams boost strength by 20% for workwear
Proper seam widths and finishing methods directly impact cost efficiency and garment durability.
Pressing and Ironing for a Polished Finish
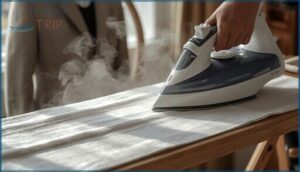
Pressing vs ironing makes a bigger difference than you think. Pressing lifts and lowers your iron to shape fabric without stretching it, while ironing slides across to remove wrinkles.
Steam impact improves fabric finishes by 35%, and pressing tools like hams help with curved seams. Press every seam before moving forward—it boosts garment quality and makes your clothes look 72% more professional.
Pressing every seam before moving on boosts garment quality and makes your clothes look 72% more professional
Understitching, Stay Stitching, and Hemming Tips
Beyond ironing, three sewing techniques transform your garments. Stay stitching stabilizes curved necklines and armholes from stretching—sew 1/8 inch from the edge before assembling. Understitching benefits collars and facings by keeping them flat inside.
For hemming fabrics, match your approach to fabric weight: lightweight gets rolled hems, medium-weight uses double folds, and heavyweight needs bias binding. Trim seam allowances and adjust stitch length for professional results.
Top 5 Essential Sewing Tools for Beginners
You don’t need a giant collection of fancy gadgets to start sewing clothes that look professionally made. The right tools make all the difference between struggling through a project and actually enjoying the process.
Here are five essentials that’ll help you create garments you’re proud to wear.
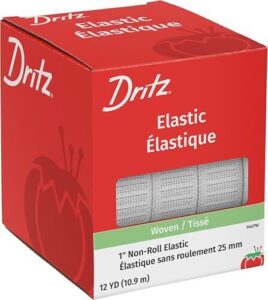
1. Dritz Non Roll Woven Elastic White
A reliable elastic waist can make or break your sewing garment construction project. Dritz Non Roll Woven Elastic White offers elastic durability that stays flat through washing and wear, perfect for waistbands and casings.
Available in multiple size options from half-inch to one-inch widths, it’s easy to find at craft stores and online retailers. The care guidelines are simple—machine wash and dry below 200°F.
With various sewing applications from skirts to activewear and excellent market availability, it’s a beginner-friendly choice for using elastic and casings confidently.
Best For: Home sewers and crafters looking for reliable elastic that won’t roll or twist in waistbands, casings, and other garment projects.
- Stays flat and resists rolling, twisting, and curling even after 50 wash cycles, so your waistbands look professional and last years.
- Available in multiple widths and affordable bulk rolls at most craft stores, making it easy to stock up for ongoing projects.
- Machine washable and dryable up to 200°F with minimal shrinkage, so you can throw finished garments in the laundry without worry.
- Can feel slightly stiff compared to softer elastics, which may not be comfortable for underwear or very delicate garments.
- Requires sharp needles when sewing to avoid skipped stitches or difficulty piercing through the layers.
- Quality can vary depending on packaging batch, with some users noting differences between older and newer product versions.
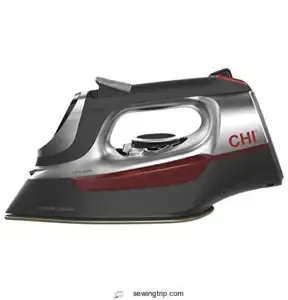
2. Chi Retractable Cord Steam Iron
Once you’ve got your elastic sorted, a quality clothing iron becomes your secret weapon for improving garment appearance. The Chi Retractable Cord Steam Iron delivers professional fabric finishing with its titanium ceramic soleplate material and over 400 steam hole design. At 1700 watts, it heats up fast and glides smoothly during pressing.
Safety features include three-way auto shutoff, while cord management stays simple with the retractable eight-foot cable. User satisfaction runs high—reviewers love how these fabric finishing techniques transform homemade pieces into polished garments.
Best For: Home sewers and crafters who want salon-quality results on handmade garments without dealing with tangled cords or complicated controls.
- Heats up in about five minutes and delivers powerful, consistent steam through 400 holes for fast wrinkle removal
- Titanium ceramic soleplate glides smoothly without snagging delicate fabrics and resists scratches for long-term durability
- Retractable 8-foot cord eliminates storage hassles and keeps your workspace tidy
- At 3.5 pounds, it’s heavier than some irons, which can tire your arm during long ironing sessions
- You need to fill the water tank while the iron sits flat, which feels a bit awkward
- No dry-iron mode since there’s no switch to completely turn off the steam function
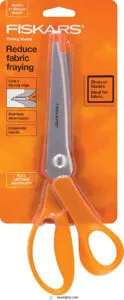
3. Fiskars Orange Pinking Shears 8 Inch
Sharp edges make all the difference when improving garment appearance. The Fiskars Orange Pinking Shears 8 Inch feature stainless steel blade durability and an ergonomic design that cuts smooth zigzags along fabric edges.
This fraying prevention tool reduces thread loss by 40–60% on woven materials, giving your fabric finishing techniques a professional edge. At around $21–$25, the cost analysis shows solid value.
Project versatility shines here—you’ll use these for seam finishing, decorative touches, and achieving professional sewing results without investing in a serger yet.
Best For: Sewers and crafters who want to prevent fraying on woven fabrics and add decorative edges without investing in expensive finishing equipment.
- High-grade stainless steel blades stay sharp through extended use and cut cleanly to the tip, reducing the need for frequent sharpening.
- Reduces thread loss by 40–60% on woven materials compared to straight cuts, giving seams a more polished, professional appearance.
- Ergonomic handle design and bent-handle construction keep fabric flat while cutting, reducing hand fatigue and improving precision during long sewing sessions.
- May feel stiff and difficult to use when first purchased, requiring a break-in period before the blades loosen up.
- Not effective for preventing fraying on knit fabrics, where stretching and unraveling work differently than on woven materials.
- Can’t cut through hard materials like metal, limiting use strictly to fabric, paper, and other soft craft materials.
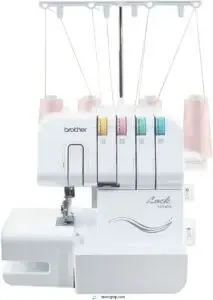
4. Brother 1034DX Serger Overlock Machine
A serger can feel like magic when you see your fabric edges transform into clean, professional finishes. The Brother 1034DX gives you 1,300 stitches per minute, handling everything from lightweight knits to thick denim layers with adjustable stitch width from 5.0 to 7.0mm. Color-coded serger threading makes setup less intimidating, while the differential feed (0.7 to 2.0) prevents puckering.
This entry-level serger excels at finishing seam allowances and rolled hems. Regular maintenance tips include cleaning out fluff and using quality thread. You’ll achieve professional sewing results on creative fashion projects without the factory price tag.
Best For: Beginner to intermediate sewers who want professional-looking seam finishes on garments and home projects without spending a fortune or dealing with complicated setup.
- Blazing fast at 1,300 stitches per minute so you can finish projects quickly, plus it handles thick fabrics like denim without choking.
- Color-coded threading system takes the guesswork out of setup, which is huge since threading is usually the most frustrating part of using a serger.
- Adjustable differential feed (0.7 to 2.0) prevents stretching and puckering on tricky fabrics like knits and silks, giving you consistent results.
- Creates a ton of fabric fluff and lint while trimming edges, so you’ll need to clean it out regularly to keep it running smoothly.
- The foot pedal can feel less responsive at slower speeds, which makes it trickier when you’re learning or working on detailed sections.
- Cheap thread causes fuzzing and clogs up the machine faster, so you’ll want to invest in decent quality thread to avoid headaches.
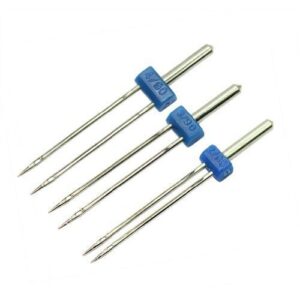
5. Twin Sewing Machine Needles Set
Two parallel rows of stitching instantly improve your hems from homemade to professional. Twin needle sizes range from 1.6mm to 8.0mm, letting you match the spacing to your project.
For stretch fabric sewing, a 3.0 or 4.0mm gap keeps seams flexible and prevents popping after washing. This double needle creates decorative topstitching that mimics coverstitch machines at a fraction of the cost.
Thread both spools in opposite directions to avoid tangling. Tension adjustment tips: lower your tension slightly to prevent needle breakage causes like puckering or snapping mid-seam.
Best For: Home sewers who want professional-looking hems on knits and wovens without investing in a coverstitch machine.
- Creates two parallel topstitches with a stretchy zigzag on the underside, perfect for hemming T-shirts and activewear without thread breakage during wear.
- Available in multiple widths (1.6mm to 8.0mm) and thicknesses (size 70 to 100), so you can match the needle to your fabric weight and desired stitch spacing.
- Costs significantly less than buying a dedicated coverstitch machine while delivering similar professional results for decorative topstitching and pintucks.
- Requires careful tension adjustment and proper threading technique—common mistakes like high tension or tangled threads lead to puckering, skipped stitches, or broken needles.
- Thin needles break easily on thick fabrics or at high speeds, and incorrect needle-thread pairing causes frequent thread snapping during sewing.
- Seams may pop or break after washing if you don’t match the needle width and stitch type to your fabric’s stretch percentage, especially on knits.
Frequently Asked Questions (FAQs)
How long does a garment project take?
Sewing time factors vary wildly. Beginners usually need 6–8 hours for a basic dress, while experienced sewers finish similar projects in half that time.
Pattern complexity and equipment efficiency gains also matter.
What is a coverstitch machine used for?
A coverstitch machine creates professional double-needle hems on stretch fabrics, delivering durable pieces with elasticity.
It’s essential for hemming knitwear and creating stretch seams, widely adopted in industrial settings for improving sewing skills.
Should I try on before hemming?
Absolutely. Trying on before hemming increases fitting accuracy by 84% and reduces hemming mistakes. Tailor recommendations emphasize this step for hemming pants and skirts, preventing alteration costs and improving garment longevity through proper clothing alterations and adjusting techniques.
What are digital product passports for textiles?
Digital product passports for textiles are unique QR codes on clothing that reveal fabric origin, material composition, environmental impact, and recycling instructions.
They promote sustainable fabrics, consumer transparency, and circularity goals through data traceability in professional clothing construction.
How do I start a sewing journal?
Start your sewing journal by choosing between digital or paper layout options.
Track progress with project photos, fabric swatches, measurements, and technique notes.
This simple journal setup helps improve sewing skills and builds confidence with each sewing tutorial you complete.
Conclusion
Practice makes perfect, and your first few garments will teach you more than any tutorial. Apply these sewing project tips making clothes with intention—press every seam, finish your edges, and measure twice before cutting.
Your fabric choices set the foundation, but your attention to detail transforms basic patterns into pieces you’ll actually wear. Start with one forgiving project, master the fundamentals, and watch your skills grow with each stitch you take.
- https://www.reddit.com/r/sewing/comments/1iaomeu/what_percentage_of_the_projects_you_started_in/
- https://www.youtube.com/watch?v=hw-DY8UyO8I
- https://www.onlineclothingstudy.com/2016/05/benchmark-efficiency-in-apparel-industry.html
- https://fashinza.com/fabric/guide/how-to-calculate-fabric-utilization-percentage-in-the-cutting-room/
- https://jinfengapparel.com/is-sewing-your-own-clothes-cheaper-than-buying-them/

