This site is supported by our readers. We may earn a commission, at no cost to you, if you purchase through links.
First, attach the ruffler foot by removing your standard presser foot and securing the ruffler in place—don’t forget to adjust your needle position!
Once set, feed your fabric through while adjusting the ruffle settings, like stitch length and pleat depth, to match your design.
The ruffler foot works wonders on lightweight to medium fabrics, saving you hours compared to hand gathering, it’s like having a mini assembly line right on your sewing machine.
For layered or intricate ruffles, a few tweaks can take your project to the next level!
Table Of Contents
Key Takeaways
- Attach the ruffler foot securely by removing the standard presser foot and aligning it properly with the needle clamp screw.
- Adjust the stitch length, pleat depth, and ruffle frequency to customize gathers for your project.
- Use lightweight to medium fabrics like cotton or linen for smooth feeding and consistent ruffles.
- Test settings on scrap fabric to ensure even gathering and troubleshoot issues like skipped stitches or fabric bunching.
Attaching Ruffler Foot
You’ll need to attach your ruffler foot correctly before creating those perfect gathers for your sewing project.
First, remove your standard foot and secure the ruffler attachment to your machine’s shank, making sure the fork fits over the needle clamp screw.
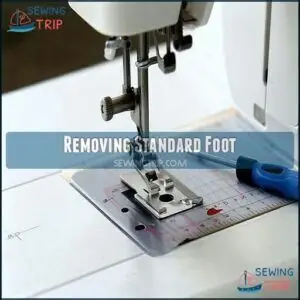
Removing Standard Foot
Before diving into the ruffle world, you’ll need to clear the runway by removing your standard presser foot. This first step is essential for proper ruffler foot installation.
- Turn your machine off and raise the needle to its highest position
- Locate and loosen the foot attachment screw using your screwdriver
- Gently slide the standard foot away from the shank, keeping the screw for later.
For assistance, consider tools for removal.
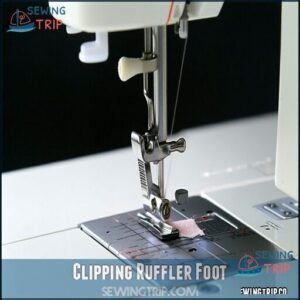
Clipping Ruffler Foot
Now that your standard foot is off, it’s time to clip on your ruffler foot. This attachment connects differently than most feet.
The ruffler foot sewing journey depends on proper foot compatibility with your shank type. Many users find success after purchasing related products.
To secure your ruffler foot, consider the following attachment points:
| Attachment Point | What to Look For | How to Secure |
|---|---|---|
| Bottom Claw | Slides around machine pole | Push firmly until seated |
| Upper Lobster Claw | Fits over needle screw area | Confirm proper alignment |
| Main Body | Should sit in front of normal foot position | Check for stability |
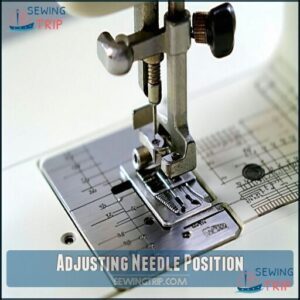
Adjusting Needle Position
Needle positioning is critical for your ruffler foot to function properly. After clipping the foot in place, you’ll need to center the needle to prevent breakage and guarantee smooth operation.
- Turn the handwheel manually to check for needle clearance
- Adjust the needle position to avoid metal contact with the foot
- Test the position by sewing slowly on scrap fabric first
- Listen for unusual sounds that might indicate improper alignment
Proper presser foot pressure is also key for ideal results.
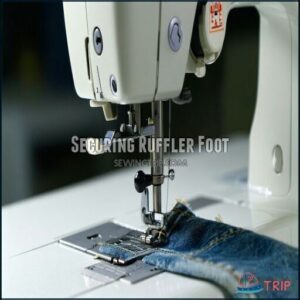
Securing Ruffler Foot
Now that your needle is properly positioned, it’s time to lock everything in place.
Check your ruffler foot’s shank compatibility with your machine before final installation. Tighten the screw firmly but don’t over-torque it—you’ll damage the threads.
Manually turn the handwheel to verify needle clearance before sewing. If you encounter alignment issues, consult your manual.
A properly secured adjustable ruffler foot won’t wobble during operation, even with thicker fabrics.
Ruffler Foot Basics
You’ll find that your ruffler foot, despite its intimidating appearance, is simply a specialized attachment that creates uniform pleats and gathers with minimal effort.
The ruffler foot turns fabric into flawless pleats and gathers, saving time while adding a professional touch to your projects.
It’ll save you hours of tedious hand-gathering while giving your projects those perfect, professional-looking ruffles that once made you wonder if you’d need magic fingers to achieve minimal effort.
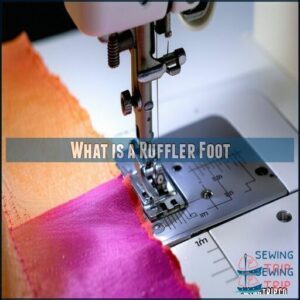
What is a Ruffler Foot
A versatile sewing machine presser foot, the ruffler foot transforms plain fabric into beautiful ruffles and pleats without the headache of hand-gathering.
It’s that magical attachment that looks intimidating but saves you hours of tedious work.
Your sewing machine ruffler foot creates uniform gathers across a range of fabric types, from delicate cotton to medium-weight linen, making it perfect for dresses, home décor, and countless creative projects, with the ability to produce beautiful ruffles.
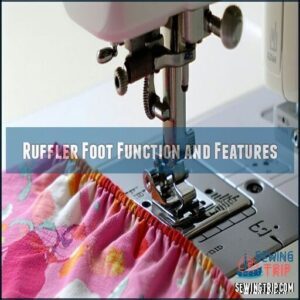
Ruffler Foot Function and Features
How exactly does your ruffler foot transform ordinary fabric into beautiful gathers?
This clever sewing machine attachment automates the gathering process by feeding fabric at adjustable intervals through its blade mechanism.
- Creates perfectly spaced pleats with consistent depth across any project
- Allows simultaneous attachment of ruffles to flat fabric in one pass
- Features multiple settings for customizing ruffle frequency and depth
Your ruffler foot’s black positioning blades guarantee precise decorative elements with minimal effort, making it a valuable tool for creating beautiful gathers with minimal effort.
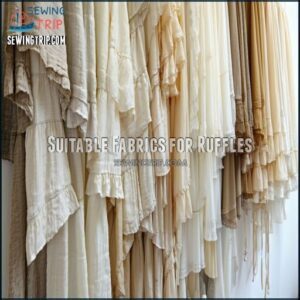
Suitable Fabrics for Ruffles
In the context of choosing fabrics for your ruffler foot, the options range from light to medium-weight materials.
Cotton and linen are perfect starting points, offering manageable structure while maintaining drape quality.
For more flowing effects, try chiffon ruffles or sateen.
Tulle ruffles create whimsical, airy results that work beautifully with your sewing machine ruffler.
Consider exploring different ruffle fabric types for unique textures.
Remember, heavier fabrics create structured ruffles, while lighter materials provide graceful movement.
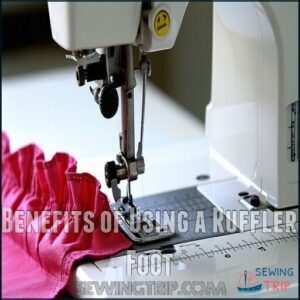
Benefits of Using a Ruffler Foot
The efficiency of using a ruffler foot is undeniable.
You’ll enjoy significant time savings while achieving perfect uniformity in your ruffles that’s nearly impossible by hand.
This versatile sewing machine attachment transforms ordinary projects into professional-looking creations with consistent gathers every time.
Your creative options expand dramatically, allowing you to add ruffles to garments, home décor, or accessories with impressive speed and precision.
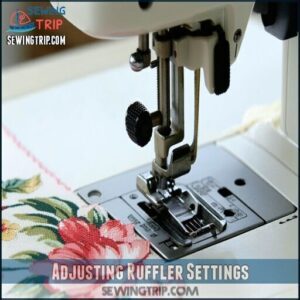
Adjusting Ruffler Settings
You’ll find that adjusting your ruffler settings isn’t rocket science once you understand the key controls.
The front lever determines space between pleats while the black adjustment knob controls the ruffle depth, giving you complete mastery over your fabric’s personality.
Gathering Ratio
After figuring out the basics, let’s explore gathering ratios.
The ruffler foot adjusts fabric fullness by balancing the stitch length and pleat depth. Calculating ratio depends on your fabric width and project type—2:1 or 3:1 ratios create tighter, more dramatic ruffles.
For looser designs, go lighter. The ruffle attachment foot is perfect for precise gathers in sewing projects.
Stitch Length Adjustment
Using the ruffle attachment foot, your sewing machine’s stitch length directly influences pleat density and fullness control.
Shorter stitches create tighter gathers, while longer ones allow looser, more decorative stitching.
Adjust the stitch length based on fabric type and project needs.
Test settings on scrap fabric to avoid surprises—nobody likes uneven ruffles midway through!
Keep tension effects in check for best results to ensure that your ruffles turn out as expected, with the right amount of fullness control.
Pleat Depth Adjustment
Adjusting pleat depth on your sewing machine foot is simple with the ruffler foot’s depth settings.
The higher the number, the fuller your pleats. Use the depth adjuster and test on scrap fabric to fine-tune results.
Fabric width, stitch length, and tension control also affect pleats, so tweak until it looks perfect. Think of it as your ruffle foot guide!
Ruffle Frequency Settings
The magic of the ruffler foot lies in its stitch interval settings. With simple switches, you control pleat density and spacing for your project.
- Star: Skips ruffles entirely.
- 1: Creates ruffles with every stitch.
- 6: Pleats every sixth stitch, perfect for subtle texture.
- 12: Spaced-out pleats, ideal for flowy designs.
- Test settings to see the effect showcase!
Achieving the correct effect may require adjusting the feed dog settings.
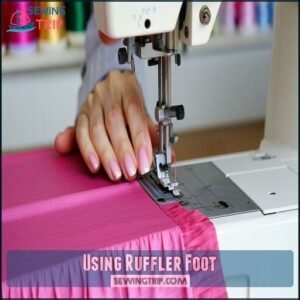
Using Ruffler Foot
Using a ruffler foot might seem tricky at first, but it’s simpler than it looks.
With a steady hand and a few adjustments, you’ll create perfect ruffles in no time.
Feeding Fabric
Before starting, straighten and hem your fabric for smooth feeding.
Slide it under the ruffler foot, ensuring proper fabric alignment. Keep the presser foot down and maintain consistent speed to avoid jams.
Light to medium fabric weight works best for this ruffle sewing technique. Let the sewing machine do the work—no tugging needed!
Guiding Fabric Through
Keep your fabric alignment steady by holding it lightly as it feeds through the ruffler foot.
Watch for consistent feeding to prevent bunching, especially on curves or bulky sections. Let the sewing machine guide the fabric naturally—don’t push or pull.
For trickier spots, like guiding curves, slow down and adjust gently. This ruffle sewing technique guarantees smooth results.
Clean the foot regularly to prevent common attachment issues.
Maintaining Steady Pace
Staying steady while using your sewing machine’s ruffler foot is easier than it seems. A consistent rhythm makes all the difference.
- Apply consistent pressure to the foot pedal for smooth motion.
- Practice a steady pace during rhythm practice.
- Control fabric flow with light hands for balance.
- Avoid sudden stops to maintain fluidity.
- Adjust your speed to match the fabric’s needs, ensuring a consistent rhythm and smooth motion.
Achieving Even Gathering
Even gathering with your ruffler foot depends on fabric weight, tension control, and consistent speed.
Before tackling your project, test settings on scrap fabric to find that sweet spot. Make sure the feed dog is clean and properly engaged.
A steady sewing machine pace, paired with even feeding, guarantees smooth ruffles every time—no bunching, no stress, and ensures a steady sewing experience.
Troubleshooting Common Issues
Skipped stitches or uneven gathers often mean your ruffler foot isn’t attached properly.
Double-check the foot attachment and needle position.
Fabric bunching? Adjust tension and stitch length.
Thin fabrics like tulle may need shorter stitches.
Needle breakage happens if it hits the foot—test clearance manually.
Regularly clean your sewing machine accessories to prevent buildup that disrupts gathering.
For best results, experiment with different stitch lengths on fabric scraps.
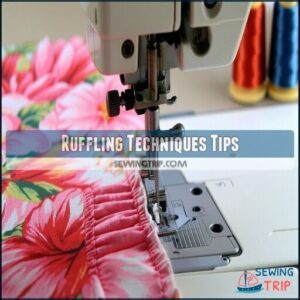
Ruffling Techniques Tips
Mastering ruffling techniques with a ruffler foot can save you time and elevate your sewing projects.
Whether you’re creating basic ruffles or experimenting with layered designs, a few smart tips will keep your stitches smooth and your results stunning, which is key to elevate your sewing projects.
Basic Ruffles
To nail basic ruffles, start with light fabrics like tulle or cotton.
Adjust your ruffler foot settings for ideal ruffle density and thread tension. Smooth edges matter, so finish them neatly for a polished look.
- Set your sewing machine to straight stitch for consistent ruffles.
- Test ruffle types on scrap fabric first.
- Trim excess fabric after sewing for clean edges.
Layered Ruffles
Layered ruffles add depth and drama to your projects.
Stack fabrics with clever color coordination for eye-catching tiered effects. Use the ruffler foot on your sewing machine to control volume and perfect ruffle placement.
Experiment with fabric combinations for unique looks. Here’s a quick guide:
| Layer | Fabric Type | Effect |
|---|---|---|
| Top | Sheer Tulle | Light & Airy |
| Mid | Satin | Smooth & Shiny |
| Bottom | Cotton Blend | Structured Support |
| Accent | Lace Trim | Delicate Touch |
| Base | Denim | Sturdy Foundation |
Combining Ruffles
Mixing ruffle types adds flair to your projects. Use your ruffler foot and sewing machine to combine textures and patterns effortlessly.
Try these ideas:
- Pair sheer and solid fabrics for contrast.
- Layer patterned ruffles over plain ones.
- Alternate pleat sizes for dynamic designs.
- Match colors for harmony or clash for drama.
- Use fabric combinations to create unique textures.
For consistent gathers, consider using a gathering foot attachment to achieve the desired effect, and remember to use your ruffler foot and sewing machine to make dynamic designs.
Time Saving Tips
Batch cutting your fabric saves time upfront, especially for layered ruffles.
Pre-planning your layout guarantees efficient use of material, while chain piecing speeds up sewing ruffles quickly.
Keep an organized workspace to avoid hunting for tools mid-project.
Simplified patterns paired with your ruffler foot on the sewing machine make repetitive tasks a breeze, and these sewing tips streamline your process, making it a breeze!
Maintaining Ruffler Foot
Keeping your ruffler foot in top shape is simple with regular sewing machine foot care.
Clean lint and debris often, oil moving parts sparingly, and store it safely to avoid damage.
Routine checks guarantee proper sewing machine foot adjustment, and timely part replacement prevents mishaps.
Treat it like a trusty sidekick—it’s essential for smooth ruffling and sewing machine foot troubleshooting!
Frequently Asked Questions (FAQs)
How to make ruffles on a sewing machine?
Think of waves rolling onto a shore—creating ruffles on fabric is just as rhythmic.
Attach a ruffler foot, adjust pleat settings, and feed fabric through.
Test on scraps for perfect gathers every time!
What is a Ruffler foot on a sewing machine?
A ruffler foot is a sewing machine attachment that creates evenly spaced pleats or ruffles in fabric.
It’s adjustable for depth and spacing, saving you tons of time compared to hand-gathering fabric, which is a significant time saver.
How do you use a Ruffler foot?
Did you know a ruffler foot can create perfect gathers every 6 stitches?
Attach it securely, adjust pleat settings, and test on scrap fabric.
It’s like having a sewing assistant—minus the coffee breaks!
What is a Ruffler foot?
It’s a sewing machine attachment that creates uniform ruffles, pleats, or gathers in fabric.
You can adjust it for different depths and spacing, making it perfect for decorative trims or adding flair to projects.
How do you attach a ruffler to a sewing machine?
It’s funny how the smallest tools can feel tricky.
Attach the ruffler by sliding its claw around the machine’s pole, hooking the lobster-claw part to the needle screw, and tightening everything securely.
How do you insert fabric into a Ruffler foot?
Slide your fabric under the foot, aligning it with the guide.
Adjust the pleat settings, lower the presser foot, and gently start sewing.
The machine will handle the magic of ruffling as you go.
What is the sewing foot that makes ruffles?
Incredibly, a ruffler foot can save 75% of time compared to hand-gathering fabric.
It’s the sewing machine attachment that creates perfect ruffles, pleats, or gathers effortlessly, turning ordinary fabric into stunning, textured designs.
What sewing foot to use for ruffles?
To create perfect ruffles, use a ruffler foot.
It’s adjustable for pleat depth and spacing, saving you time and effort.
This handy attachment works wonders on dresses, home decor, and other creative projects.
What is the difference between a ruffler foot and a gathering foot?
Think of the ruffler foot as a precision tool for pleats and ruffles, while the gathering foot is simpler, creating soft gathers.
The ruffler offers adjustable settings; the gathering foot relies on stitch length and tension.
Is a ruffler foot worth it?
A ruffler foot saves tons of time and effort, especially for projects needing precise ruffles or pleats.
It’s a game-changer for decorative sewing, turning tedious tasks into quick, professional-looking results.
Conclusion
Mastering the ruffler foot truly simplifies sewing ruffles, turning a once tedious task into a quick, precise process.
With the right settings and techniques, you’ll create professional-looking gathers effortlessly.
Whether you’re working with lightweight fabrics or layering intricate ruffles, this tool saves time and guarantees consistency.
Don’t be afraid to experiment with stitch length and pleat depth to match your vision.
Once you’ve got the hang of it, sewing ruffles becomes a fun, creative adventure!
- https://www.youtube.com/watch?v=wDt56vJCmnI&feature=youtu.be
- https://pinterest.com/pin/create/button/?url=https://www.allfreesewing.com/Sewing-Tips-and-Tricks/How-to-Make-Ruffles-Using-a-Ruffler-Foot-NSM-2017
- https://www.facebook.com/sharer/sharer.php?u=https://www.allfreesewing.com/Sewing-Tips-and-Tricks/How-to-Make-Ruffles-Using-a-Ruffler-Foot-NSM-2017
- http://www.sewingbeefabrics.co.uk/free-tutorials
- https://www.janome.co.uk/sewing-machines

