This site is supported by our readers. We may earn a commission, at no cost to you, if you purchase through links.
Keep your eyes focused on the guide rather than the needle—it’s like driving by watching the road, not your hood. Support your fabric properly with both hands, letting the feed dogs do their job without forcing the material.
A quarter-inch presser foot becomes your best friend for precision work. These foundational techniques reveal advanced methods that’ll make your seams look store-bought perfect. They help you master the art of creating professional seams with ease, using the right tools and techniques, such as using your machine’s features to your advantage, and following key sewing tips.
Table Of Contents
Key Takeaways
- Use proper guides and tools – You’ll achieve precision by using quarter-inch presser feet, magnetic seam guides, or needle plate markings instead of eyeballing your seam allowances.
- Focus ahead, not on the needle – You’ll sew straighter lines by watching your guide or fabric edge rather than the moving needle, just like driving by looking at the road ahead.
- Support your fabric properly – You’ll prevent pulling and distortion by using extension tables and keeping fabric weight evenly distributed on both sides of your machine.
- Let the feed dogs do their job – You’ll get consistent results by allowing your machine’s feed dogs to pull the fabric naturally instead of pushing or forcing it through.
Essential Sewing Tools
The right tools transform wobbly stitches into perfectly straight seams that look professionally crafted.
Your sewing machine’s basic presser foot gets you started, but specialized guide feet and accessories give you the precision control that separates amateur work from expert results.
Adjustable Guide Feet
When you’re ready to ditch guesswork and embrace precision, adjustable guide feet become your secret weapon for straight-line success.
These customizable feet feature adjustable guides that slide from 1/8" to 1-1/2" in precise 1/16" increments, giving you complete control over seam allowances.
Total control over your seam precision—no more guessing games with wobbly measurements.
The guide rails attach to most standard sewing machine feet, creating physical barriers that keep fabric edges perfectly aligned.
This presser foot transforms your machine into a precision stitching powerhouse, delivering professional sewing accuracy every time.
To achieve superior results, understanding sewing machine feet is vital for selecting the right attachments.
Quarter-Inch Feet
Quarter inch feet deliver surgical precision for your quilting and piecing projects.
These specialized presser feet create an exact 6mm seam allowance, eliminating guesswork that plagues traditional foot measurements.
You’ll achieve consistent straight stitching every time, as the built-in edge guide acts as your fabric’s GPS system, perfect for precision quilting work where accuracy matters most.
The use of quarter inch feet involves understanding proper sewing feet options to enhance your sewing experience and ensure consistent results.
Stitch-In-Ditch Feet
Stitch-in-ditch feet transform your sewing precision with their blade guides designed for perfect stitch alignment.
These specialized sewing machine feet excel at ditch quilting and edge stitching by following existing seams. The blade guide sits directly in the seam valley, ensuring your stitchintheditch work stays invisible while maintaining professional results.
- Blade Guide Positioning – Center the metal blade in existing seams for automatic foot adjustment and flawless tracking
- Seam Valley Navigation – Guide fabric so the blade follows the "ditch" between joined pieces for invisible topstitching
- Binding Applications – Perfect for securing quilt bindings and facings without visible stitches on the front
- Hem Finishing – Create professional hems by stitching in the fold line while maintaining sewing straight lines
Magnetic Seam Guides
Magnetic guides attach directly to your sewing machine’s needle plate, creating adjustable physical barriers for consistent seam alignment.
You’ll position the magnetic seam guide at your desired distance from the needle, then guide your fabric edge against it while stitching.
These guides work perfectly for straight stitching and help maintain precise seam allowances without marking fabric.
Using a magnetic seam guide guarantees accurate seam allowance control and professional-looking results.
Seam Allowance Techniques
Accurate seam allowances make the difference between professional-looking garments and frustrating fit issues.
You’ll master consistent seam widths using simple marking techniques and built-in machine guides that transform your stitching precision.
Needle Plate Markings
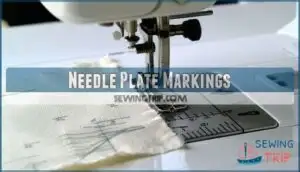
Your sewing machine’s needle plate markings serve as built-in seam guides, displaying common measurements like ⅜", ½", and ⅝" for precise fabric alignment.
These engraved stitch lines eliminate guesswork when positioning fabric edges, ensuring your straight stitch follows the exact seam allowance your project requires for professional results.
DIY Seam Guides
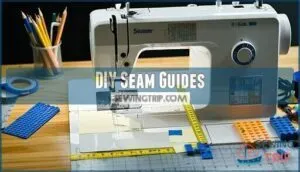
When you can’t find the perfect presser foot, creating your own DIY seam guide becomes a game-changer for sewing straight lines.
Grab painter’s tape, Post It Notes, or even Lego Guides with Blu-tack to craft custom magnetic seam guide alternatives.
These homemade solutions let you set any seam allowance width you need.
Vinyl Strips and Tape Measures also work brilliantly as straight stitch references.
For precise sewing, consider using a sewing presser foot to achieve perfect seams every time.
Temporary Fabric Markers
Precision marks the difference between amateur and professional results.
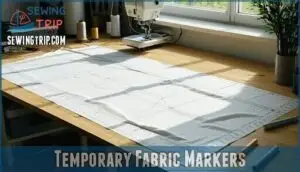
When you can’t rely on fabric edges for guidance, temporary fabric markers become your secret weapon for drawing stitch lines directly onto material.
Use tailor’s chalk or heat-erasable markers with a clear quilting ruler to create accurate reference lines on fabric’s wrong side for seams, right side for topstitching—your ultimate sewing aids for flawless results.
Laser Guides
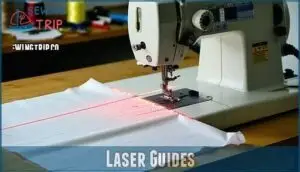
When laser alignment technology meets traditional sewing, you’ll discover revolutionary precision that transforms your straight stitching game.
These high-tech guide systems project a beam directly onto your fabric, creating an unmistakable reference line for flawless seam accuracy.
Unlike magnetic seam guides that require physical barriers, laser guides offer hands-free precision sewing that adapts to any project size or fabric type.
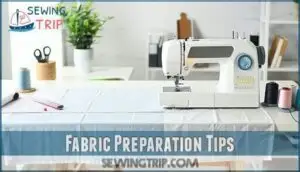
Fabric Preparation Tips
Your fabric’s condition directly impacts your ability to sew straight lines, so proper preparation saves you from frustration later.
Clean edges and stable support create the foundation for precise stitching that even beginners can master.
Trimming Jagged Edges
Before you begin sewing straight lines, jagged fabric edges will sabotage your precision from the start.
Clean cuts create the foundation for accurate seam preparation and professional results.
Use sharp fabric scissors or a rotary cutter to trim uneven edges, ensuring your fabric cutting maintains straight lines for better edge finishing and seam control throughout your project.
Supporting Fabric
Your fabric’s stability depends on proper support throughout the sewing process. Without adequate fabric support, gravity pulls unsupported sections, creating tension that leads to crooked seams and puckered results.
- Position fabric tables or surfaces on both sides of your machine
- Keep fabric weight evenly distributed to prevent pulling
- Use your non-dominant hand to gently guide fabric flow
This simple fabric preparation step transforms your sewing guides into effective tools for achieving perfect seam alignment. It is crucial to follow these steps to ensure that your fabric is handled correctly, resulting in a better sewing experience with less tension and fewer errors.
Using Extension Tables
Large projects benefit from extension tables that provide extra sewing space and machine clearance.
Your extension table creates table stability by supporting fabric weight, preventing drag that pulls your straight stitch off course. This fabric support maintains sewing precision throughout longer seams.
Properly choosing a sewing machine extension is vital for superior results.
| Extension Tips | Table Stability | Fabric Support |
|---|---|---|
| Level with machine bed | Prevents fabric sagging | Reduces pulling tension |
| Smooth surface finish | Eliminates catching points | Maintains even feed |
| Adequate size coverage | Supports project weight | Enables straight lines |
Choosing Stable Fabrics
Success with sewing straight lines starts with your fabric selection – choose quilting cotton, poplin, or linen for foolproof results.
These stable fabrics won’t stretch or distort under your presser foot, making straight stitch sewing effortless.
Material types like canvas and denim offer excellent fabric stability, while proper fabric preparation guarantees your seams stay true.
Smart fabric weight choices eliminate frustration and deliver professional-looking results every time.
Machine Setup Guidance
Proper machine setup is your foundation for achieving perfectly straight seams every time.
You’ll transform your sewing accuracy by mastering a few key techniques that control how your fabric moves through the machine.
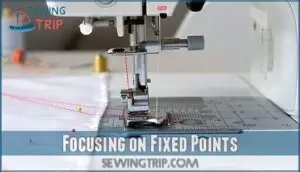
Focusing on Fixed Points
Visual focus transforms wavering stitches into razor-straight seams.
Instead of watching the needle dance, lock your eye alignment on a fixed point ahead—the presser foot’s edge or seam guide works perfectly.
This steady hands technique prevents the natural wobble that occurs when you follow the needle’s movement, allowing for straight stitches that are more consistent, and it’s all thanks to a simple shift in perspective.
Your straight stitches will thank you for this simple shift in perspective.
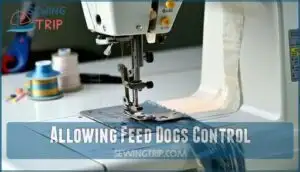
Allowing Feed Dogs Control
Let your sewing machine’s feed dogs do the heavy lifting instead of fighting them.
These toothed metal bars beneath the needle plate work in perfect sync with your presser foot, creating ideal fabric flow and thread tension.
When you push or pull fabric manually, you disrupt this sewing machine calibration, causing uneven stitches and fabric tension issues that sabotage your straight stitch attempts, affecting the overall fabric flow.
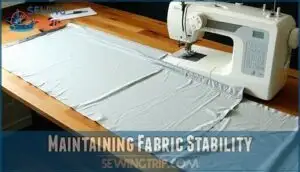
Maintaining Fabric Stability
Supporting your fabric properly transforms wobbly stitching into professional results.
Keep fabric tension even by supporting both sides of your machine with extension tables or smooth surfaces.
This stable feed prevents sagging that pulls seams off course.
Position your seam guide placement carefully, then let consistent fabric support maintain perfect edge control throughout each pass, ensuring a stable feed.
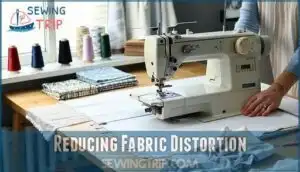
Reducing Fabric Distortion
During normal sewing, your machine’s feed dogs naturally grab and guide fabric through at the perfect pace.
Let the feed dogs do their job instead of pushing or pulling—this prevents unwanted stretching and keeps your seam guide alignment accurate.
- Trust the feed dogs: They’re designed to move fabric smoothly without your help
- Keep hands relaxed: Light guidance beats forceful pulling that creates waves and puckers
- Adjust feed dog pressure: Lower settings work better for delicate fabrics prone to distortion
Maintaining proper fabric control techniques is essential for achieving professional-looking seams.
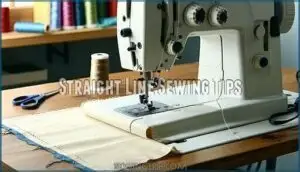
Straight Line Sewing Tips
You’ll master straight-line sewing by combining the right reference techniques with proper machine control.
These professional methods transform wobbly stitches into perfectly aligned seams that make your projects look polished and precise.
Using Reference Points
Reference points serve as your sewing straight compass—choose spots ahead of or beside your presser foot rather than watching the needle.
This prevents wobbles and creates smooth, accurate lines. Needle plate markings, magnetic seam guide edges, or fabric pattern lines work perfectly as visual aids for guided stitching.
Your sewing accuracy improves dramatically when you maintain focus on these precision markers.
Mastering straight line techniques is essential for achieving professional-looking seams and requires understanding of straight line techniques.
Marking Seam Allowances
When reference points aren’t enough, marking fabric directly with fabric markers becomes your precision lifeline.
Draw seam allowance lines using washable chalk or heat-erasable pens on the wrong side for seams, right side for topstitching.
Your seam guide transforms into stitch lines that guarantee straight sewing, especially on curves where edge rulers can’t reach.
This magnetic seam guide approach works perfectly when alignment tools fall short.
Employing Presser Feet
While marking helps, specialty presser foot types transform your sewing accuracy instantly.
The adjustable guide foot clicks into precise measurements, while your quarter inch quilting foot maintains perfect seam allowances.
These guide attachments provide physical barriers that keep fabric aligned, giving you superior stitch control.
Your presser foot becomes your best friend for sewing straight lines and flawless edge stitching.
Utilizing an adjustable guide system can substantially enhance sewing precision and provide a physical barrier.
Utilizing Laser Guides
Laser guides project a straight line onto your fabric, offering high-precision optical assistance for perfect seams.
You’ll calibrate the beam accuracy by aligning the line projection with your desired seam allowance, creating an instant visual reference that beats traditional magnetic seam guides.
This laser alignment transforms sewing straight lines from guesswork into precision work.
Frequently Asked Questions (FAQs)
Is it hard to sew a straight line?
Sewing straight feels like threading a needle in an earthquake at first.
You’ll master it quickly using seam guides, proper fabric support, and focusing ahead of your needle rather than watching it move.
How do you sew straight lines?
Use seam guides on your needle plate or apply tape as reference lines.
Keep fabric edges aligned with guides, focus ahead of the needle, and let feed dogs pull fabric naturally for consistent straight stitching.
Can you sew a straight line with a sewing machine?
Precision transforms chaos into control—you’ll master straight-line sewing effortlessly.
Yes, sewing machines excel at creating perfectly straight seams when you use guide feet, needle plate markings, or magnetic seam guides for consistent fabric alignment, which helps in achieving straight-line sewing.
Does marking a line help you sew straight?
Marking lines directly on fabric transforms your stitching accuracy from guesswork into precision.
You’ll maintain consistent seam allowances by centering the drawn line under your presser foot, creating a reliable visual guide for perfect straight-line sewing.
How do you keep fabric straight while sewing?
Keep your fabric flat and supported on both sides of the machine using an extension table. Focus on a fixed point ahead rather than watching the needle move.
How can I improve my straight line sewing?
Achieving straight stitching comes down to maintaining consistent fabric alignment and controlling your machine’s speed. Focus on guiding your fabric edge along seam guides rather than watching the needle move.
How to get better at sewing straight lines?
Like steering a ship through choppy waters, you’ll master straight stitching by focusing ahead, not on the needle.
Use seam guides, support your fabric, and let the machine’s feed dogs pull naturally.
How do you prevent thread tension problems?
Check your thread tension by threading both top and bobbin threads correctly, using quality thread, and adjusting tension settings gradually.
Clean your machine regularly to prevent lint buildup that affects tension.
What stitch length works best for straight lines?
Setting your stitch length is like tuning an instrument—precision matters for perfect results.
For most straight-line sewing, you’ll want a 5mm stitch length, which creates strong, balanced seams that won’t pucker or stretch your fabric unnecessarily.
How to maintain consistent sewing speed throughout?
Use your machine’s adjustable speed control to start slowly, then gradually increase. Focus on rhythm rather than rushing—steady wins the race for perfectly straight seams.
Conclusion
Perfect seams become your signature once you’ve mastered these sewing straight lines tips.
You’ll transform from struggling with wobbly stitches to creating professional-quality work that rivals store-bought garments.
Remember to trust your guides, support your fabric properly, and let your machine’s feed dogs maintain consistent tension.
With practice, these techniques become second nature, turning every project into a showcase of your improved skills and attention to detail.
- https://www.youtube.com/watch?v=oSwauhLJ3Yc
- https://www.reddit.com/r/sewhelp/comments/176dfdb/arent_there_fool_proof_tools_to_help_me_sew/
- https://www.stacey-lee.com/2021/07/01/how-to-sew-a-straight-line/
- https://www.sailrite.com/Tips-for-Sewing-a-Straight-Line
- https://sewcanshe.com/20-simple-hacks-for-sewing-perfectly-straight-lines/

