This site is supported by our readers. We may earn a commission, at no cost to you, if you purchase through links.
 Sewing through hard plastic isn’t as intimidating as it sounds if you’ve got the right approach.
Start by prepping the surface—clean and mark it carefully to avoid mistakes. Drill small pilot holes along your stitching line; these guide your needle and prevent breakage.
Use a heavy-duty needle, like a denim or leather one, and a strong thread such as nylon for durability.
Adjust your sewing machine’s tension, stitch length, and speed for smooth progress. Take it slow—plastic can resist more than fabric.
With patience and precision, sewing plastic opens doors to creative projects most crafters don’t dare attempt. Ready to try?
Table Of Contents
- Key Takeaways
- Preparing Hard Plastic for Sewing
- Can You Sew Through Hard Plastic?
- Essential Tools for Sewing Hard Plastic
- Sewing Machine Settings for Hard Plastic
- Techniques for Sewing Through Hard Plastic
- Troubleshooting Common Issues With Hard Plastic
- Alternative Techniques for Joining Hard Plastic
- Finishing and Reinforcing Hard Plastic Seams
- Maintaining Your Sewing Machine After Plastic Use
- Advanced Projects Using Hard Plastic Sewing Techniques
- Frequently Asked Questions (FAQs)
- Conclusion
Key Takeaways
- Use a heavy-duty needle, durable thread like nylon, and a Teflon presser foot for smooth and precise stitches.
- Pre-drill pilot holes to prevent cracks and make sewing easier on hard plastic materials.
- Adjust your machine’s settings—slow down the speed, use longer stitches, and reduce presser foot pressure for clean, durable seams.
- Test your setup on scrap plastic first to avoid mistakes and ensure seam strength.
Preparing Hard Plastic for Sewing
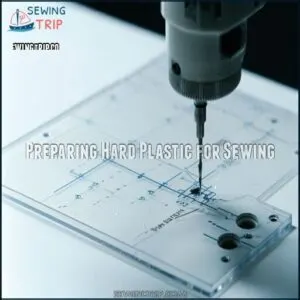
You’ll need to thoroughly clean your plastic with isopropyl alcohol before drilling small pilot holes, spaced 1/4" apart, to guide your needle and prevent cracking.
Thorough cleaning and precise pilot holes are your secret weapons for sewing hard plastic without cracks or frustration.
Proper preparation guarantees your hard plastic won’t split when you sew through it, saving you from that frustrating moment when your project cracks just as you’re finishing the final seam, which is why proper preparation is key to a successful outcome, and preventing cracking is crucial.
Cleaning and Degreasing The Plastic Surface
Before diving into sewing hard plastic, you’ll need to clean up your workspace. Proper surface preparation directly impacts stitch quality and seam durability.
Follow these steps for effective degreasing:
- Wash with mild dish soap and warm water to remove surface dirt and oils
- Apply isopropyl alcohol (91%+) using circular motions to eliminate stubborn residue
- Buff dry with lint-free microfiber cloths until the surface squeaks
Don’t skip this essential step—even invisible contaminants can weaken adhesion between thread and plastic, compromising your entire project, which requires proper surface preparation.
Marking and Measuring Techniques
The secret to perfect plastic projects begins with precise marking and measuring techniques.
Precise marking and measuring lay the foundation for plastic perfection, turning challenging materials into seamless, professional-quality creations.
Use water-soluble markers or chalk pencils for clean, visible lines that won’t permanently stain your material. Pair these with a non-slip ruler to handle slick surfaces without frustrating slippage.
When transferring patterns, sketch on paper templates first, ensuring proper seam allowance. For maximum accuracy, use gridded guides to maintain perfect alignment.
Your marking visibility directly impacts your final results—master these techniques for professional-quality plastic creations every time.
Creating Pilot Holes for Easier Needle Penetration
Now that you’ve measured and marked your plastic, it’s time to create pilot holes—the game-changer for successful plastic sewing projects.
Pilot holes serve as pre-planned pathways through hard plastic, preventing needle breakage and ensuring smooth stitching.
When creating these essential openings:
- Choose the right drill bit size—a 1/16" bit provides the perfect balance between strength and function without compromising material integrity.
- Pay attention to hole spacing—keeping them 1/4" apart prevents cracking while maintaining seam durability.
- Remember that angle matters—hold your drill perpendicular to the surface for clean, even holes.
After drilling, gently sand away any burrs to prevent thread snagging. This simple prep step will save you countless broken needles and frustration.
Techniques for Joining Multiple Plastic Pieces
Once your plastic pieces are prepped, you’ll need reliable joining techniques that guarantee durability.
Proper edge alignment is vital before attempting any connection method.
| Technique | Best For | Durability Level |
|---|---|---|
| Seam Overlapping | Flexible plastics | Medium |
| Corner Stitching | Junction points | High |
| Reinforcement Methods | High-stress areas | Very high |
| Adhesive Joining | Smooth surfaces | Medium-high |
| Mechanical Fasteners | Thick materials | Maximum |
When sewing hard plastic pieces together, maintain consistent pressure and use a slow, steady pace.
For plastic seam construction, you’ll want to position your materials with at least 1/4" overlap for strength.
Don’t forget about joint flexibility needs – some projects require rigid connections while others benefit from movement allowance.
If you’re combining techniques, always apply adhesives before stitching to prevent material shifting that could compromise your finished project, ensuring a durable and high-quality result.
Can You Sew Through Hard Plastic?
You can successfully sew through hard plastic up to 0.75mm thick with the right equipment and techniques.
Though thicker materials like 2mm polyethylene require specialized tools.
You’ll need to use heavy-duty needles (size 14-16), polyester thread, and a Teflon foot to prevent sticking, while maintaining slower speeds to avoid needle breakage and material cracking.
Types of Hard Plastics Suitable for Sewing
Now that you’ve prepared your plastic, let’s look at which materials play nice with your needle.
For successful sewing through hard plastic, focus on LDPE sheets (under 0.75mm thick), HDPE, ABS, and polycarbonate. These materials offer enough flexibility while maintaining structural integrity.
PVC sewability is excellent, making it perfect for waterproof projects.
Avoid polystyrene—it’s brittle and cracks easily. Acrylic options work when thin (under 1/16 inch), but watch for splitting.
Remember, plastic thickness matters more than type. Materials around 0.4mm perform best, while anything approaching 1/8" risks breaking your needle and machine.
Always test on scraps first!
Limitations of Standard Sewing Techniques
In the context of battling hard plastic with ordinary sewing methods, you’re facing an uphill struggle.
Standard techniques simply weren’t designed for these materials.
- Material Thickness: Household machines strain with plastic over 1/16 inch thick
- Needle Dullness: Regular needles quickly become useless against rigid surfaces
- Machine Limitations: Most domestic machines lack sufficient power, leaving projects incomplete
- Cracking Potential: Improper techniques create fractures along stitch lines
Hand sewing presents even greater challenges, as manually forcing needles through hard plastic requires excessive pressure, risking injury.
Stitch issues like skipping and puckering occur because plastic doesn’t compress or yield like fabric.
Potential Risks and Safety Considerations
While standard techniques have their limits, safety becomes your top priority when sewing hard plastic.
Always wear safety goggles to protect against flying shards from unexpected needle breakage. Don’t forget cut-resistant gloves when handling sharp plastic edges.
Beware of fume exposure – proper ventilation prevents headaches from heated plastic.
Slow your machine’s speed to avoid overheating both needle and motor. Regular machine maintenance prevents long-term damage from plastic dust buildup.
Benefits of Sewing Hard Plastic Materials
While safety concerns require careful attention, the advantages of sewing hard plastic make it well worth mastering this specialized skill.
You’ll discover that incorporating hard plastic into your sewing projects reveals remarkable benefits that fabric alone can’t match. Beyond simple utility, plastic sewing creates items with exceptional durability enhancement and repairability advantages.
- Weather-Resistant Strength: Your tool bag construction benefits from plastic materials that withstand moisture, UV damage, and temperature fluctuations, unlike fabric alternatives.
- Customization Options: You can craft unique solutions precisely fitted to your needs—from specialized gear holders to custom organizers.
- Cost Savings: Repair expensive items instead of replacing them, extending their useful life substantially.
- Design Flexibility: Combine plastic with fabrics to create hybrid projects with the perfect balance of structure and softness.
When properly executed, sewing hard plastic transforms ordinary materials into extraordinary, long-lasting creations.
Essential Tools for Sewing Hard Plastic
You’ll need specialized equipment to tackle hard plastic without ruining your machine or wasting materials.
A heavy-duty needle (size 14-16), Teflon presser foot, sturdy polyester thread, and proper safety gear will transform this challenging material into your next successful project.
This becomes two separate lines as the first introduces the need for equipment and the second lists it.
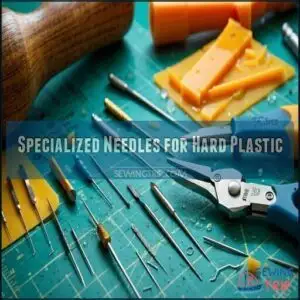
Specialized Needles for Hard Plastic
Now that you know hard plastic can be sewn, let’s talk about your secret weapon: specialized needles.
The right needle makes all the difference when tackling hard plastic.
Choose from these powerhouse options:
Needle Type Best For Size Range Durability
DMC Plastic Craft Needles work wonders for hand projects, while machine users should opt for size 14-16 needles with specialty point styles.
You can find a variety of needle types available for different sewing needs.
Remember: dull needles spell disaster!
Appropriate Thread Selection
Selecting the right thread for hard plastic projects can make or break your results. For successful plastic sewing, consider these industrial-strength options:
- Heavy-duty polyester thread – Offers excellent flexibility while maintaining strength through thick materials
- Bonded nylon thread – Provides superior tensile strength with reduced friction in the machine
- UV-resistant thread – Prevents deterioration in outdoor projects exposed to sunlight
- Clear monofilament thread – Creates nearly invisible seams when aesthetics matter
Thread weight should match your material thickness—heavier plastic requires stronger thread. To prevent thread breakage, verify needle size aligns with thread thickness.
Proper color matching guarantees professional-looking results, while maintaining appropriate thread tension prevents skipped stitches and puckering.
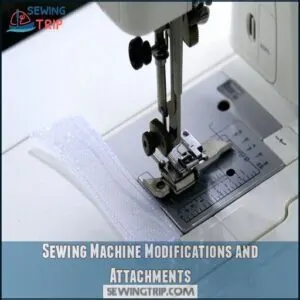
Sewing Machine Modifications and Attachments
Four essential sewing machine modifications can transform your hard plastic projects from frustrating to fantastic.
Start with a Teflon foot or roller foot attachment—these specialized feet prevent sticking and gliding issues when working with rigid materials.
Many crafters swear by the walking foot accessory, which keeps both layers moving evenly through the machine without shifting.
Consider using a specialized sewing attachment for ideal results.
Your machine’s motor power matters substantially when tackling thicker plastics.
Consider a motor upgrade if you’ll frequently work with hard materials—industrial needle-feed systems have successfully handled materials up to 2mm thick.
For consistent results, install a vertical spool pin to maintain even thread tension and prevent snagging.
Set your feed dogs slightly lower to reduce resistance on thick pieces.
Don’t overlook needle selection—specialized Teflon-coated or titanium needles in size 16 withstand the pressure of penetrating hard plastic without breaking.
Test your modifications on scrap material before committing to your final project.
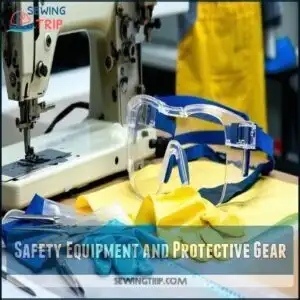
Safety Equipment and Protective Gear
Beyond sewing machine modifications, your physical safety deserves just as much attention when working with hard plastic.
Don’t take chances when tackling these tough materials.
Proper protective gear stands between you and potential injury:
- Safety goggles with side shields provide essential eye protection from flying plastic fragments
- Cut-resistant gloves offer hand protection when handling sharp edges or broken needles
- Respiratory safety masks prevent fume inhalation from melted plastic or adhesives
- Machine guards shield moving parts to prevent accidental contact
- Heavy-duty aprons improve material handling safety and protect clothing
You wouldn’t drive without a seatbelt, so don’t sew hard plastic without safety equipment. Many vendors supply sewing safety goggles for this purpose. Your future self (with all fingers and clear vision intact) will thank you for taking the necessary precautions to ensure your physical safety and protect your eyes and hands.
Sewing Machine Settings for Hard Plastic
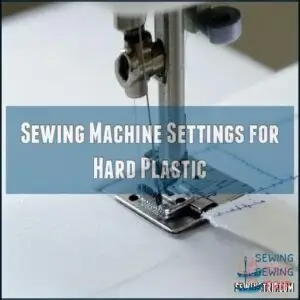
You’ll need to adjust your machine’s settings to successfully sew through hard plastic without cracking or breaking needles.
Increase your stitch length to 3.5-4.0mm, reduce your speed to 30% of maximum, and lower your presser foot pressure for best results when tackling these challenging materials.
To achieve optimal performance, it is essential to follow these guidelines carefully, as they are crucial for tackling these challenging materials.
Adjusting Stitch Length and Width
Now that you’ve got your specialized tools ready, it’s time to fine-tune your sewing machine’s settings for peak performance with hard plastic.
Adjusting your stitch length and width isn’t just helpful—it’s absolutely necessary when working with rigid materials. With the right settings, you’ll create reinforced seams that stand the test of time.
- Increase stitch length to 3.5-4.0mm to prevent tears along perforation points
- Set width between 2.5-3.0mm for maximum seam strength
- Match settings to your plastic’s thickness—heavier materials need longer stitches
- Test on scraps first—fabric settings won’t translate to plastic
Remember, those tiny, close-together stitches that work beautifully on cotton will just perforate and weaken hard plastic. Wider stitches with consistent width distribute tension more evenly, giving you stronger connections every time.
Tension Control for Hard Plastic Materials
Thread tension is the unsung hero of sewing hard plastic. Think of it as fine-tuning your machine’s balance. If it’s too tight, you risk plastic cracking and puckering. Too loose? Say hello to tangled loops ruining your stitch consistency.
Start by setting your sewing machine tension around 2-3 for hard plastic. Always test on scrap pieces first. Proper tension control guarantees your threads lock neatly between layers, with no mess on top or below.
Don’t forget about bobbin tension—adjust it slightly if needed. Check the tension discs, making certain your thread flows smoothly without snagging. Factor in your plastic’s thickness and use a tough thread like polyester or nylon to handle the stress effortlessly.
Testing is key!
Speed Settings for Optimal Results
Finding the right speed is key to mastering sewing plastic techniques. With hard plastic, slower speeds guarantee better control and reduce needle heat or motor strain.
Here’s how to keep your sewing machine settings at their best:
- Set your machine to 25-30% of its maximum speed, allowing steady needle penetration and smoother material feed.
- Check for stitch consistency on test scraps—if you see skipped stitches, lower the speed for better results.
- Gradually increase speed as needed, guaranteeing precision and control.
Patience is your ally; rushing risks uneven seams or needle breakage while sewing hard plastic effectively, and it is crucial for achieving better results.
Presser Foot Pressure Adjustments
Getting the presser foot pressure just right can make sewing hard plastic much easier. Adjusting sewing machine settings to match the material is key.
- Lower the pressure to allow smooth movement and lessen the risk of cracking or sticking.
- Use a Teflon foot or similar sewing machine foot types to improve glide and reduce drag.
- Gradually increase pressure based on material thickness, testing pressure on scraps until stitches form cleanly.
The right balance guarantees maximum pressure, better stitch quality, and frustration-free progress!
Fabric stretching and wrinkles indicate improper pressure settings.
Techniques for Sewing Through Hard Plastic
Sewing through hard plastic requires precision, the right tools, and careful adjustments to your machine.
By following proper techniques, you’ll avoid common pitfalls like needle breakage or uneven seams, ensuring strong and clean results.
Positioning The Plastic Under The Presser Foot
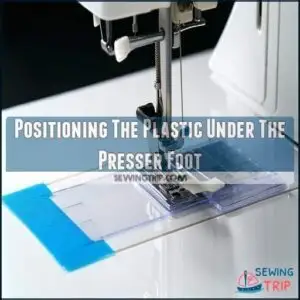
Positioning your material under the sewing machine foot is critical when sewing hard plastic.
Start by aligning the plastic carefully between the feed dogs and presser foot.
To avoid slippage, use painter’s tape to anchor the plastic temporarily or switch to a Teflon foot for smooth material feeding.
Adjust the presser foot pressure to balance firm contact without crushing the plastic, especially for thicker pieces.
For precise alignment, confirm your workspace setup supports smooth movement, keeping edges straight and material steady.
When traversing corners or edges, slow down and guide the plastic with consistent hand pressure.
These guiding techniques help prevent skipped stitches and ensure even seams.
Proper positioning and presser foot pressure directly influence your success with plastic sewing techniques, so take your time here for professional results.
Guiding The Material Through The Machine
Guiding hard plastic through your sewing machine takes patience and the right sewing techniques. Let your feed dogs handle the workload while you maintain consistent feeding with light, steady hands—don’t force or tug the material, as it risks preventing cracking in the seams.
- Use a Teflon foot, roller foot, or even Teflon alternatives like adding tissue paper underneath for smooth fabric flow.
- Keep large plastic supported on a table or helper to avoid dragging.
- Adjust your speed control to a slower pace and make certain the needle aligns with pre-drilled pilot holes.
- Lightly hold edges to prevent slipping.
- Avoid jerky movements that could split seams.
- Watch for skipped stitches due to uneven pressure.
Dealing With Resistance and Sticking
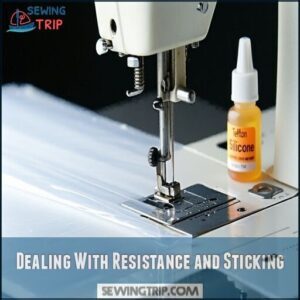
When sewing through hard plastic, resistance and sticking are common frustrations, but simple tweaks can smooth your process.
A Teflon Foot is your best friend—it minimizes drag and helps plastic slide effortlessly under the presser foot.
For extra glide, dab a bit of silicone lubricant on your needle or opt for a needle with a non-stick coating.
If friction persists, place tissue paper underneath the plastic to improve material feed.
You might also need to lower pressure from your presser foot, allowing the fabric to move freely without pulling.
A slow speed is key too, as it gives the needle time to pierce plastic steadily without overheating.
Maintain sewing machine power by keeping feed dogs clean—plastic debris can impede functionality.
When even these steps don’t soften stubborn resistance, drilling small pilot holes could ease the needle’s journey and prevent skipped stitches or cracking, saving both time and frustration.
Backstitching and Securing Seams in Hard Plastic
When sewing hard plastic, backstitching can sometimes crack the material, so smarter reinforcement methods are key.
Instead of traditional techniques, try these simple tricks for durability:
- Backstitch Alternatives: Use clear nail polish or fabric glue along seam edges to lock threads securely.
- Reinforcement Methods: Apply a craft iron on low heat to heat-seal seam edges, avoiding scorch marks.
- Thread Embedding: Double-thread heavy-duty polyester or nylon in key areas for added strength.
These approaches guarantee seam durability while protecting the plastic’s integrity. A well-chosen needle and thoughtful techniques will keep your hard plastic projects looking flawless and holding strong.
Troubleshooting Common Issues With Hard Plastic
When sewing through hard plastic, it’s normal to hit a few snags like skipped stitches or broken needles.
With the right adjustments and techniques, you can tackle these issues and keep your project moving smoothly.
Dealing With Skipped Stitches
Skipped stitches feel like missed opportunities, don’t they? Start by checking your needle type—a dull or incorrect sewing machine needle won’t pierce hard plastic cleanly.
Use a sharp, heavy-duty needle suited for sewing plastic. Next, tweak your thread tension. Too tight or loose? You’ll spot the gaps. Adjust until it’s snug but smooth.
Increase your stitch length to 3.0-4.0 for stability and avoid short stitches that snag. Reduce foot pressure and make certain your feed dogs grip firmly to prevent slippage.
Preventing Needle Breakage
To avoid needle breakage when sewing hard plastic, start with the right needle size—opt for a heavy-duty sewing machine needle, size 16 or larger.
Matching your needle to the material thickness is vital, as thinner needles struggle with dense plastic.
Slow down your sewing speed to 25-30% of your machine’s maximum; rushing increases stress on the needle.
Consider drilling pilot holes (1/16") in hard plastics to ease the strain on your needle.
A Teflon presser foot is invaluable for reducing feed issues caused by sticking.
Replace dull sewing needles frequently to prevent snapping.
Addressing Uneven Seams and Puckering
If sewing hard plastic leaves you with uneven seams or puckering, don’t worry—there’s a fix.
Start by adjusting your foot pressure to reduce material squishing.
Next, fine-tune your stitch consistency with these steps:
- Set the stitch length between 3.0-4.0mm for smooth seams.
- Use a walking foot to improve even material feed from top to bottom.
- Place tissue paper underneath to prevent sticking and allow seamless movement.
Remember, forcing the plastic through the machine disrupts tension balance.
Let the feed dogs handle the job for perfect seams every time.
Resolving Thread Tension Problems
Thread tension problems can turn sewing hard plastic into a frustrating mess, but fixing them is simpler than you think.
First, adjust your Tension Dial to 7-8 for better control. Use a heavy-duty thread designed for plastic to avoid Skipped Stitches and breakage. Check that your Top Thread and Bobbin Thread are flowing smoothly.
A size 14-16 needle works best to handle resistance. Increase the stitch length to 3-4mm for smoother feeding, and lighten the presser foot pressure. Don’t forget to inspect bobbin tension—it must be evenly wound.
Here’s a quick guide:
| Problem | Solution | Key Setting | Tools Needed |
|---|---|---|---|
| Loops on the top | Lower bobbin tension | Adjust the bobbin | Screwdriver |
| Loose top thread | Tighten Tension Dial | Set 7-8 | None |
| Skipped stitches | Use heavier needle/thread | Needle Size 14-16 | Heavy-duty thread |
| Seam puckering | Adjust presser foot pressure | Lighten slightly | Machine setting |
Alternative Techniques for Joining Hard Plastic
When sewing isn’t practical for hard plastic, you’ve got several effective alternatives to explore.
Techniques like heat sealing, adhesive bonding, and mechanical fastening can provide strong, reliable connections without the need for a needle, which is a key aspect of working with hard plastic.
Heat Sealing Methods
Sometimes, sewing hard plastic isn’t the best option. Heat sealing steps in as a game-changer, bonding stronger than stitches and keeping seams airtight. It’s like welding plastics together—clean, durable, and waterproof.
Here’s what you’ll need:
- Heat gun or hot air tools: Melt the plastic edges evenly.
- Impulse sealing machines: Perfect for precise lines on plastic films.
- Wedge welding tools: Ideal for heavy-duty seams.
Materials such as HDPE, LDPE, and PVC love heat sealing, while acrylics may demand ultrasonic welding to avoid distortion. This method opens up next-level mastery for your plastic sewing adventures.
Adhesive Bonding Options
If sewing plastic seems tricky, adhesive bonding can be the rockstar solution.
Epoxy adhesives offer structural bonds, curing in 5-30 minutes, while cyanoacrylate glue is perfect for quick repairs, setting in 30 seconds.
For clear plastics, UV-activated adhesives cure in just 10 seconds.
Prep your surface by roughening it with sandpaper—think of it like giving the glue a better grip for unbeatable bond strength.
Mechanical Fastening Techniques
Mechanical fastening is a strong alternative to sewing hard plastic, offering durable, flexible options for crafting and assembly.
Choosing the right fastener depends on your material’s thickness and the project’s stress requirements.
Here are five common techniques to examine:
- Rivets vs. Screws: Rivets guarantee permanent bonds, while screws provide removable connections.
- Bolt Applications: Use bolts for heavy-duty joints requiring adjustable strength.
- Snap Fasteners: Great for interlocking designs or projects needing quick release.
- Threaded Inserts: Ideal for repeated assembly without damaging plastic.
- Clamping Methods: Specialty hardware evenly distributes pressure, reducing cracks.
Always pre-drill pilot holes using a suitable drill bit for your fastener type to prevent cracking.
Mechanical fasteners complement plastic sewing techniques, guaranteeing strong, reliable joints when stitching isn’t feasible.
For garment projects, consider how functional fasteners secure openings for the best use.
Comparing Effectiveness With Sewing
In the context of sewing vs. alternatives, each method shines depending on the project.
Mechanical fastening, for instance, is solid for rigid connections but lacks flexibility. Adhesive bonding and heat sealing add convenience and seamless finishes but may fall short in durability comparison, especially under stress.
With sewing hard plastic, you’ve got unmatched control. Using the right plastic sewing techniques—like a strong thread and durable needle—your seams stay flexible yet strong, resisting cracking better than welding.
Plus, sewing through hard plastic gives you repair options; adhesives and heat seals don’t.
Consider cost analysis too. While sewing machines handle the job repeatedly, single-use adhesives add up. And nothing beats the clean, professional look sewing plastic achieves for aesthetic differences.
Finishing and Reinforcing Hard Plastic Seams
Reinforcing hard plastic seams strengthens your project and guarantees it holds up under pressure.
By sealing edges, adding support to weak points, and applying heat treatments, you can create durable, long-lasting results.
Seam Sealing Techniques
Seam sealing is essential for keeping your hard plastic projects durable and waterproof.
Even the best stitching needs reinforcements to prevent leaks and damage over time. You’ve got plenty of options, so pick what fits your project best.
- Sealing Tape: Heat-activated tape easily creates a waterproof barrier along your seams.
- Liquid Sealants: Brush on for a flexible, watertight finish over stitches.
- Heat Treatments: Carefully apply heat to smooth out and strengthen seam edges.
- Binding Reinforcement: Use adhesive films between layers for added durability.
- Plastic Welding: Try friction or ultrasonic methods for professional-grade seam bonds.
Master these techniques to elevate your sewing hard plastic projects and seal every stitch perfectly!
Strengthening Weak Points in Hard Plastic
Every plastic project has stress points, but smart techniques keep them durable.
Spot weak spots early and reinforce them with Seam Reinforcement or Corner Supports, placed at critical junctions.
Layer interfacing behind seams for better Stress Distribution and durability.
For added strength, use patches over high-stress areas or pre-drill small pilot holes before sewing through hard plastic.
Strong threads and heavy-duty needles are non-negotiable for Material Durability.
Joint Design is key: align seams and avoid tension-heavy layouts.
These steps guarantee plastic reinforcement and give your finished piece long-lasting strength where it matters most.
Decorative Edge Treatments for Plastic
Adding flair to your plastic sewing projects doesn’t just enhance appearance—it boosts durability.
Try these decorative edge treatments:
- Use Edge Binding to cover raw edges, bringing a polished look.
- Add Decorative Stitching, like zigzags, for stylish reinforcement.
- Highlight lines with Piping Details, great for bold accents.
- Experiment with Fringing Options for a playful, textured finish.
- Explore Heat Embossing to seal edges artistically.
Test these techniques on scraps first—sewing plastic hides no errors.
These ideas elevate any plastic sewing project, marrying durability and design.
Post-sewing Heat Treatments
Wrap up your sewing project with these effective post-sewing heat treatments.
They elevate your seams and boost durability:
- Seam Smoothness: Use a heat gun (300°F) to eliminate rough edges and refine shapes.
- Heat Sealing: Apply a soldering iron along seams for watertight edges.
- Annealing Benefits: Warm tight areas to 200°F, easing stress points and preventing cracks.
These heat application techniques guarantee your plastic projects look polished and last longer, showcasing the power of advanced sewing techniques.
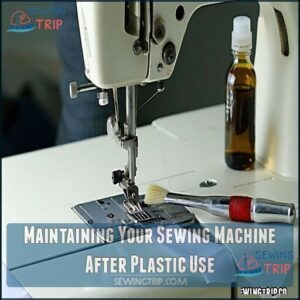
Maintaining Your Sewing Machine After Plastic Use
After sewing hard plastic, it’s essential to clean your machine thoroughly to remove residue and dust that can damage its components.
Regular lubrication and careful inspection for wear will keep your machine running smoothly and ready for your next project, which is crucial for maintaining its performance and longevity.
Cleaning The Machine Thoroughly
After tackling a tough plastic project, your sewing machine deserves a proper cleanup to stay in top shape.
Start by unplugging it and removing the throat plate to access the bobbin area. Use a small brush or compressed air for lint removal and clearing thread residue. Wipe down surfaces with a lint-free cloth.
Here’s a quick cleaning checklist:
| Task | Tools Needed | Purpose |
|---|---|---|
| Remove debris | Small brush, air | Clears plastic bits, thread gunk |
| Wipe surfaces | Lint-free cloth | Keeps machine smooth and clean |
| Needle inspection | Magnifier, cloth | Guarantees needles aren’t damaged |
Regular sewing machine maintenance avoids costly repairs!
Lubricating Moving Parts
Once you’ve finished cleaning your machine, it’s time to focus on lubricating moving parts.
Sewing hard plastic can create extra friction, so proper sewing machine maintenance keeps things running smoothly. Grab high-quality oil—because here, oil types matter.
Here’s how to protect your machine:
- Apply 1-2 drops of oil where metal meets metal, like the needle bar or bobbin case.
- Pay attention to part specifics, especially the feed dogs.
- Slowly turn the hand wheel to guarantee the oil spreads evenly.
- Wipe away any extra oil to avoid staining future projects.
Remember, frequency matters! Regular lubrication prevents wear, increases machine longevity, and keeps every stitch perfect! Don’t skip this step.
Inspecting for Wear and Damage
When sewing hard plastic, inspect your sewing machine thoroughly to maintain durability.
Check needles for bending or dullness—they affect seam integrity and cause stitch degradation.
Look for cracks or scratches on pressure feet using stress point analysis, as these lead to material fatigue.
Examine feed dogs and bobbin areas for plastic debris that can impact machine performance.
Don’t skip reviewing thread paths, as unusual wear compromises sewing machine functionality, and always consider the impact of material fatigue on your work.
Scheduling Professional Servicing
Keeping your sewing machine in tip-top shape after sewing hard plastic isn’t just smart—it’s non-negotiable for long-term performance.
Professional servicing is like giving your machine a well-earned tune-up, reducing downtime and keeping emergency repairs at bay.
A qualified technician can handle what home maintenance can’t. They’ll remove plastic residue lodged in critical parts, adjust thread tension, and fine-tune stitch calibration. Plus, they inspect motors, belts, and electrical systems for wear that you might miss.
These checks guarantee smooth operation and maintain warranty coverage.
Here’s what you get from professional servicing:
- Preventative Maintenance: Avoid costly breakdowns with thorough cleaning and care.
- Peak Performance Enhancements: Technicians calibrate your machine for smooth execution of even tough projects.
- Emergency Repair Prevention: Regular care minimizes major fixes, saving time and service costs.
Treat your machine right—it’ll reward you with less hassle and more creative freedom.
Advanced Projects Using Hard Plastic Sewing Techniques
If you’re ready to level up your skills, advanced projects like these combine innovation with functionality, showcasing the power of sewing through hard plastic.
Master precise techniques and experiment with diverse designs for professional results.
- Robotics Integration: Design protective plastic casings for robot parts, balancing durability and precision.
- Armor Creation: Craft lightweight, layered plastic armor for cosplay or safety gear.
- Medical Devices: Sew intricate plastic materials for custom supports or medical prototypes.
- Artistic Sculptures: Create bold, functional designs by shaping and stitching clear or colored plastic.
For success, use heavy-duty needles, adjust tension for smoother seams, and start with scrap materials.
Achieving clean edges requires binding and facing techniques.
These projects push boundaries, proving sewing hard plastic isn’t just practical—it’s revolutionary.
Frequently Asked Questions (FAQs)
How do you sew through hard material?
Cracking this nut requires preparation: use a heavy-duty needle, strong thread, and a Teflon presser foot.
Slow your sewing speed, test on scraps, and pre-drill pilot holes to prevent cracking or skipped stitches, which is a critical step to ensure the quality of your work.
How do you sew through tough material?
Tough materials demand sharp, heavy-duty needles, strong thread, and adjusted machine settings.
Lower sewing speed, use a walking or Teflon foot to prevent sticking, and test on scrap pieces for smooth, consistent results.
Can you sew through hard plastic?
Sewing hard plastic feels like stitching armor.
Use a heavy-duty machine, Teflon foot, and industrial thread.
Pre-drill pilot holes to prevent cracks, and go slow—patience and the right tools make all the difference.
How do you sew on plastic?
Use a Teflon foot, heavy-duty needle, and polyester thread for smooth results.
Set a longer stitch length, lower presser foot pressure, and avoid pins.
Test stitches on scrap plastic to prevent cracking or uneven seams, using a Teflon foot.
Can a sewing machine sew plastic?
Yes, your sewing machine can handle plastic if you’ve got the right setup.
A Teflon foot, heavy-duty needles, longer stitches, and specialized threads make sewing smoother, even for thicker plastics like vinyl or PVC!
Can you sew plastic sheeting?
You can sew plastic sheeting with the right tools and techniques. Use a Teflon foot to prevent sticking, a heavy-duty needle (like 70/10 or 90/14), and longer stitches for clean, durable seams.
What happens if you sew through hard plastic?
If you sew through hard plastic, the needle can break or dull quickly, and the material might crack or split.
Slower speeds, sharper needles, and pre-drilled holes help avoid damage to both.
What tools do you need to sew on plastic?
You’ll need heavy-duty needles (like size 90/14 or 100/16), strong polyester thread, a Teflon or roller foot, and clips instead of pins.
Keep tissue paper handy to prevent sticking while sewing plastic.
Can a sewing machine go through plastic?
Plastic can be tricky, but with the right setup, your sewing machine can handle it.
Adjust settings, use a Teflon foot, a sturdy needle, and heavy-duty thread to glide smoothly through plastic surfaces.
What sewing machine needle is best for plastic?
A heavy-duty needle, like size 90/14 or 100/16, works best for plastic. Try a leather or titanium-coated needle for tougher materials. Always test on scraps to avoid cracking or skipped stitches.
Conclusion
Mastering the art of sewing through hard plastic requires preparation, precision, and patience.
By cleaning the surface, marking effectively, and drilling pilot holes, you’ll facilitate smoother stitching. Use a heavy-duty needle, strong nylon thread, and fine-tuned machine settings for superior results.
Address challenges like skipped stitches and resistance by adapting techniques and troubleshooting carefully. With practice, sewing hard plastic becomes less intimidating, revealing new creative possibilities.
Now’s the time to turn bold crafting ideas into reality!

