This site is supported by our readers. We may earn a commission, at no cost to you, if you purchase through links.
 Sewing vinyl leather might sound intimidating, but you’ll find it can be as smooth as a velvet stitch with the right tools.
Start with a microtex needle to pierce the vinyl effortlessly, and adjust your machine for a longer stitch length—around 4 or more.
A Teflon foot or walking foot is your best friend here, stopping any sticky situations.
Want a bite-sized trick? Slip some baking paper between your fabric and the machine for seamless sewing.
Don’t forget polyester thread for durability; after all, nobody likes weaknesses in their sewing game.
Now, imagine what other pro tips await you.
Table Of Contents
- Key Takeaways
- Choosing The Right Materials and Tools
- Preparing and Storing Vinyl Fabric
- Marking, Cutting, and Finishing Techniques
- Sewing Machine Recommendations and Settings
- Essential Tools for Sewing Vinyl Leather
- Sewing Techniques for Vinyl Leather
- Troubleshooting Common Issues With Vinyl
- Finishing Touches for Vinyl Projects
- Tips for Working With Vinyl Leather
- Advanced Vinyl Leather Sewing Techniques
- Frequently Asked Questions (FAQs)
- Conclusion
Key Takeaways
- You’ll need specialized needles (leather, denim, or topstitch) and polyester thread for strength and durability.
- Use a Teflon or acrylic presser foot to prevent sticking and a walking foot for better fabric control, especially on thick seams.
- Adjust your stitch length to 3-4 mm and your thread tension to avoid puckering, tearing, and thread breakage. Test settings on scraps first.
- Avoid pins; use clips or Wonder Tape to hold fabric layers together without puncturing the vinyl.
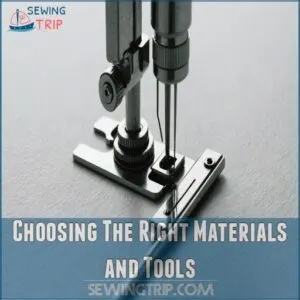
Choosing The Right Materials and Tools
Before you start sewing vinyl, you’ll need the right tools and materials for a smooth process.
Choosing the correct needles, thread, and presser foot will make all the difference in achieving professional-looking results, so let’s get started!
Leather, Denim, or Topstitch Needles
When you’re sewing vinyl leather, choosing the right needle is very important.
Opt for leather, denim, or topstitch needles, each designed for thick fabrics.
Leather needles have a chisel point to pierce smoothly, while denim and topstitch needles handle multiple layers with ease.
Avoid universal needles as they might snap.
Secure a reliable brand and size for the best results.
Polyester Thread for Strength and Durability
After picking the right needle, you’ll need polyester thread to handle the demands of vinyl sewing.
Polyester’s strength and slight stretch work wonders with vinyl fabric.
Opt for heavyweight polyester thread to avoid thread breakage.
Balance thread tension carefully, steering clear of cotton or silk, which can snap under pressure.
Brands like Coats & Clark offer reliable options.
Acrylic Presser Foot for Smooth Gliding
Sliding effortlessly through your vinyl projects, an acrylic presser foot is your secret weapon.
Its transparency offers clear visibility, making sewing vinyl a breeze.
Unlike Teflon feet, which can make materials slip, the acrylic option balances control and smooth gliding beautifully.
Opt for this foot to make sewing vinyl leather less of a hassle, enhancing your precision and creativity.
Walking Foot for Better Fabric Control
Ever thought about how a walking foot could change your sewing game?
It’s like having a third hand!
A walking foot offers benefits by moving with your fabric, not against it, controlling every stitch.
Regular feet can’t compete in handling vinyl leather.
Those versatile techniques make your vinyl sewing projects look polished and perfect.
Give it a shot!
Preparing and Storing Vinyl Fabric
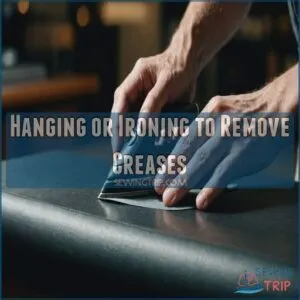
To keep your vinyl fabric in top shape, hang it on a clothesline or use low heat to gently press out creases.
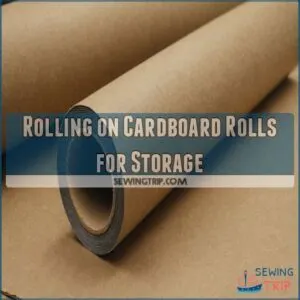
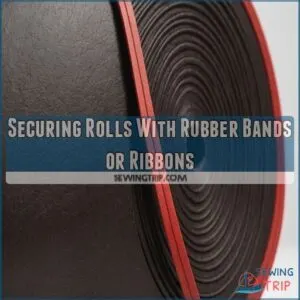
Vinyl fabric should be rolled on cardboard tubes and secured with rubber bands or ribbons to prevent pesky wrinkles during storage.
Hanging or Ironing to Remove Creases
Creases in vinyl fabric can be a headache, but try these four steps for smooth results:
- Hanging your vinyl to let gravity do its magic is often the simplest solution, and if needed, you can also consider a vinyl crease remover.
- Use a low-heat iron and press cloth for gentle pressing.
- Hover the iron over the fabric without steam to relax wrinkles.
- Keep it flat during storage to prevent new creases.
Rolling on Cardboard Rolls for Storage
Avoid those pesky creases! Roll your vinyl onto sturdy cardboard tubes for easy storage. This vinyl storage method keeps your fabric smooth and prevents damage.
Consider roll size selection based on your project and available space. Cardboard tubes from paper towels or wrapping paper work great.
Proper storage optimizes your crafting space. Label each roll for easy identification of vinyl fabric types. This helps you find the perfect vinyl fabric for bag making or any craft project.
Securing Rolls With Rubber Bands or Ribbons
To keep your vinyl rolls neat and tidy, try securing them with rubber bands or ribbons. It’s easy and effective! Here’s how:
- Gently wrap a rubber band around each end of the roll; don’t stretch too tightly.
- Use a ribbon for a touch of style, tying it loosely.
- Store vertically to maintain their shape.
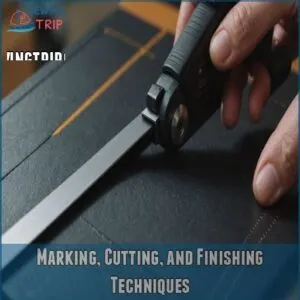
Marking, Cutting, and Finishing Techniques
When working with vinyl leather, you’ll want to make sure your cutting and finishing techniques are on point to achieve smooth, professional results.
Test your marking tools on scraps, opt for rotary cutters for smooth edges, and remember to avoid ironing directly on the vinyl to keep it looking pristine.
Testing Marking Tools on Scraps
When sewing with vinyl, testing marking tools on scraps is essential.
With countless marking methods available, choose wisely to avoid permanent marks.
Whether you’re working with vinyl fabric, faux leather, or pleather, this step guarantees your project remains unblemished.
By experimenting on scraps, you’ll discover which tools suit your vinyl types, leading to better results without unwanted surprises.
Using Rotary Cutters for Smooth Edges
After ensuring your marking tools didn’t create marks on scraps, embrace the rotary cutter for smooth edges.
This tool is a game-changer for cutting vinyl fabric.
Here’s how:
- Rotary cutter safety: Keep fingers clear.
- Choosing the right blade: Opt for sharp, fresh blades.
- Cutting techniques: Apply even pressure.
- Vinyl cutting tips: Use a self-healing mat beneath.
Avoiding Ironing Directly on Vinyl
Ironing vinyl directly might cause heat damage, but you can dodge this bullet with savvy techniques.
Use a hairdryer on low to smooth your vinyl fabric without scorching it.
A press cloth also offers good fabric protection.
Remember, sewing vinyl slowly with a longer stitch length helps maintain its beauty.
Here’s a quick comparison of methods:
| Method | Benefits |
|---|---|
| Hairdryer | Gentle heat, no burn |
| Press cloth | Shields from heat |
| Longer stitch | Prevents puckering |
| Slow sewing | Better control |
| Alternative tools | Preserve vinyl care |
Sewing Machine Recommendations and Settings
When sewing vinyl leather, you’ll want to use leather or jeans needles for best results, ensuring they glide smoothly through the material.
Pair these needles with a longer stitch length and adjusted thread tension.
Swap out pins for sewing clips or Wonder Tape to keep everything in place without damaging your project.
Leather or Jeans Needles for Vinyl
Grab your sewing machine!
For sewing vinyl, you’ll need the right needle.
Leather or jeans needles, with their strong points, are your best bet.
Brands like Schmetz are reliable choices.
Needle size depends on your vinyl’s thickness; experiment to find the perfect fit.
Remember regular needle replacement prevents skipped stitches and breakage, important for leather bag making.
Using the correct needle greatly improves your vinyl sewing projects.
Longer Stitch Length for Vinyl
Switching to a longer stitch length when sewing vinyl is a game-changer for your projects.
It minimizes vinyl tearing risk and puckering while easing the fabric through your machine.
When you set your stitch length to 3-4 mm, it helps maintain balance and precision, ensuring smooth seams.
This setting also prevents tiny holes, keeping your vinyl fabric intact and looking sharp.
Adjusting Thread Tension for Vinyl
When tackling vinyl fabric, getting thread tension just right can feel like finding a magical balance.
Start by testing on scraps and keep your eye on that tension dial.
Here’s how you achieve it:
- Loosen the tension slightly to prevent puckering.
- Use polyester thread, which flexes better.
- Adjust needle type if you notice skips.
Using Sewing Clips or Wonder Tape Instead of Pins
Adjusting thread tension makes sure your sewing machine’s ready for the next step.
Instead of pins that may puncture or distort vinyl fabric, use sewing clips or Wonder Tape.
These alternatives hold pieces securely without damage, perfect for creating sharp lines in vinyl bags.
Wonder Tape makes assembly a breeze, simplifying complex parts of bag making.
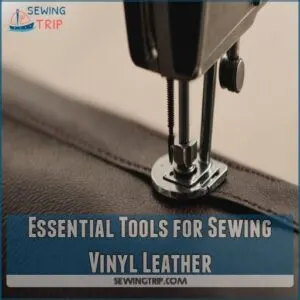
Essential Tools for Sewing Vinyl Leather
When tackling the challenge of sewing vinyl leather, make sure you have the right tools by your side, such as a sturdy presser foot and the correct thread.
Opt for sharp rotary cutters for clean cuts and use clips instead of pins to avoid puncturing your material.
Presser Foot Options for Vinyl
Feeling creative with your sewing machine? Let’s explore presser foot options for vinyl.
Opt for an acrylic presser foot for smooth gliding, avoiding the Teflon-coated foot’s drawbacks of excessive slipping.
A roller foot can give more control, especially on tricky curves.
Presser foot adjustments are key for different vinyl fabrics, ensuring you sew with precision and ease.
Thread Considerations for Vinyl
Picking the right thread can make your vinyl sewing go smoothly.
Opt for bonded nylon thread with a heavy weight, ensuring it withstands the vinyl fabric’s demands.
Consider shopping for a suitable heavy-duty vinyl sewing thread for your project.
Adjusting thread tension is key; too tight or too loose leads to frustration.
Look for reliable thread brands, matching colors to the fabric, and consider SewTites for topstitching on vinyl projects.
Cutting Techniques for Vinyl
Now that you’ve chosen your thread, let’s cut your vinyl!
Use a rotary cutter and a self-healing cutting mat for clean cuts.
Consider your vinyl thickness; a sharp blade is key.
Precise pattern selection helps avoid wasted fabric.
Remember safety precautions – always cut away from yourself.
Enjoy the process!
Pinning Alternatives for Vinyl
When sewing vinyl, traditional pins can leave visible holes and damage the material.
Sewing clips, Wonder Tape, and SewTites offer smooth alternatives.
Magnetic pins and clover clips easily hold layers together.
If you’re hand sewing vinyl hems, consider using fabric glue to keep seams secure without piercing.
These tools protect your work and help create a clean, professional finish.
Sewing Techniques for Vinyl Leather
When sewing with vinyl leather, you’ll need to adjust your stitch length and tension to avoid tearing and puckering.
A walking foot can help handle thick seams with ease.
Practicing on scrap vinyl pieces will give you confidence and help perfect your techniques for a smooth sewing experience.
Stitch Length and Tension for Vinyl
When working with vinyl leather, it’s essential to select a suitable sewing machine, such as the best leathercrafting sewing machine, to handle the thickness and type of material. Your sewing machine’s stitch length and tension must harmonize to master vinyl projects.
Use a longer stitch length, around 3-4 mm, to prevent vinyl stretching and puckering.
Adjust the tension balance carefully to avoid loose threads and dreaded thread breakage.
To achieve the best results, consider adjusting your sewing machine setup, including serger settings, to create a professional edge on your vinyl leather projects, see sewing vinyl leather techniques.
Practice on scraps to perfect settings for sewing vinyl fabric, vinyl upholstery, and bags effortlessly without causing damage.
Handling Thick Seams With Vinyl
Handling thick seams with vinyl requires some finesse.
Make sure your work is durable by using stitching techniques that reinforce your work, whether it’s for vinyl fabric for upholstery or outdoor projects.
Shorten stitch length slightly for firm seams.
Test scrap pieces for perfect tension.
Use quality thread for lasting results.
A bit of patience, and you’ll stitch like a pro.
- Use heavyweight polyester thread
- Shorten stitch length for thick areas
- Test tension settings on scraps
- Reinforce seams with backstitching
- Press seams open gently
Using a Walking Foot for Vinyl
Tackling those tough, thick seams often leads you to think about a walking foot, a game-changer in sewing vinyl.
This handy tool offers better control, preventing fabric from slipping while you create vinyl upholstery or unique vinyl bags.
If you’re in the market for the right walking foot, check out specialized walking foot vinyl to help you get started.
Setup is simple: attach the walking foot and feel the difference as your project ideas flow smoothly without the usual troubleshooting issues.
Practice on Scrap Pieces of Vinyl
Before diving into your main project, grab some scrap pieces of vinyl to experiment with.
This practice lets you test needle strength, adjust stitch length, and explore thread tension effortlessly.
It’s like a dress rehearsal for your sewing machine, ensuring smooth seam finishes.
Evaluating fabric behavior on scraps can save you from unexpected surprises later when sewing vinyl upholstery or patterns.
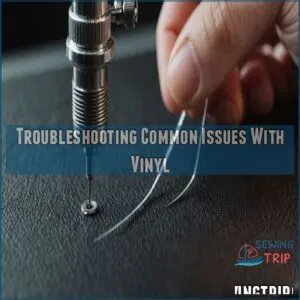
Troubleshooting Common Issues With Vinyl
So, you’ve tackled sewing vinyl, but now you’re facing some frustrating hiccups?
Let’s troubleshoot those common vinyl sewing problems—from sticky presser feet to frustrating skipped stitches—and get you back to creating beautiful projects.
Fabric Sticking to Presser Foot
You’ve started sewing vinyl raincoats, and suddenly, the fabric sticks to the presser foot. It’s like wrestling a sticky octopus! Choose the right presser foot to save your sanity:
- Use Teflon or acrylic presser foot for smooth gliding.
- Sprinkle baby powder to reduce sticky residue.
- Test on scraps before stitching final pieces.
- Explore gauge numbers for vinyl, ensuring no surprises.
Skipped Stitches With Vinyl
Your machine’s skipping stitches with vinyl? Consider needle selection—leather needles work wonders.
Adjust machine speed and tension issues, ensuring fabric thickness doesn’t throw off the balance.
Skipped stitches solutions often lie in testing your settings on vinyl mesh.
Don’t let it unravel your project.
| Problem | Solution |
|---|---|
| Needle issues | Use leather needles |
| Tension problems | Adjust tension control |
| Fabric thickness | Test on scraps |
| Machine speed | Slow down |
Thread Breakage With Vinyl
Thread breakage when sewing vinyl can be frustrating, but a few tweaks might help. Adjust the thread tension to find the sweet spot where it doesn’t snap.
Keep an eye on:
- Needle Sharpness: Use a sharp, sturdy needle to pierce vinyl effectively.
- Thread Type: Opt for strong polyester thread.
- Stitching Speed: Slow down to prevent excessive heat and tension.
Vinyl Tearing or Puckering
So, you’re sewing vinyl and dealing with tears or puckering?
Try adjusting that stitch length to around 3-4 mm; it’s like magic for stopping those pesky holes.
To achieve a smooth glide over seams, consider using a Zigzag Teflon Sewing Presser Foot, which is ideal for working with various types of leather.
Opt for a leather or jeans needle, as size matters here.
Also, control thread tension to keep things smooth.
Prep your fabric well, and practice your stitching techniques to master this challenge.
Finishing Touches for Vinyl Projects
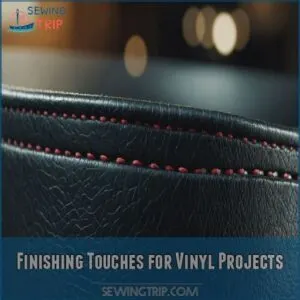
When wrapping up your vinyl project, focus on topstitching for a polished finish and adding decorative elements to enhance the design.
Use fabric glue for accents and reinforce seams for durability, ensuring your creation is both stylish and long-lasting.
Topstitching for a Professional Finish
Imagine perfecting your vinyl creation with topstitching that doesn’t just look good but holds up. Choose a longer stitch length and heavy-duty thread; they’re your best allies here. Keep an eye on needle gauge to handle thickness, adjust needle tension, and remember the seam allowance.
- Stick with heavy-duty thread
- Adjust needle tension carefully
- Consider a longer stitch length
- Monitor needle gauge
- Maintain seam allowance
Adding Decorative Elements to Vinyl
Neat stitching finishes your project, but let’s add some pizzazz!
Explore vinyl embellishments; hardware options like rivets or buckles add a tough look.
Consider fabric accents, maybe some contrasting stitching patterns for visual interest.
Heat transfer designs are another easy way to personalize your creation.
Don’t be afraid to experiment and have fun!
Using Fabric Glue for Vinyl Accents
For a flawless finish on your vinyl project, consider using fabric glue for accents, especially when working with heavier materials that require specialized needles like leather/denim types.
It’s a breeze when you know the right types and best brands.
Remember, drying time is key, so hold your horses!
Apply evenly, avoid common mistakes like over-gluing, and always test on scraps first.
You’ll master this in no time, making your creations pop!
Adding Reinforcement to Vinyl Seams
Reinforcing vinyl seams strengthens your projects, ensuring they stand the test of time.
Try these savvy seam reinforcement methods:
- Apply seam tape for stability.
- Stitch along the edges using durable stitching techniques.
- Layer reinforcement materials like interfacing.
- Conduct seam stress testing for durability.
With these techniques, your vinyl creations will boast both function and flair.
Tips for Working With Vinyl Leather
When working with vinyl leather, choosing the right type and preparing it properly can save you from common headaches.
Use the correct needle and thread to prevent mistakes, ensuring your project goes smoothly.
Choosing The Right Type of Vinyl
You’ve mastered finishing touches, but choosing the right type of vinyl is a different kettle of fish.
Consider vinyl weight for durability, and check color options to match your project.
Avoid woolen backing; it can mess with your sewing mojo.
Look for a plain, paper-like backing and compare prices to snag a deal.
This step guarantees your project’s success!
Preparing Vinyl Leather for Sewing
Maybe you’ve wondered how to smoothly sew vinyl leather without hassles.
Here’s the key: Preparation is important.
Follow these steps for success:
- Avoid creases: Hang your vinyl or roll it on cardboard.
- Storage tips: Secure with ribbon or rubber bands.
- Test first: Use marking tools on scraps before your project.
These tips help you sew smoothly every time!
Using The Right Needle and Thread
When tackling vinyl leather, choosing the right needle and thread is essential.
Use a leather needle, with sizes suited to your fabric thickness, as it cuts through effortlessly.
Opt for polyester thread, its weight providing durability.
To make sure you have a professional-looking finish, consider the importance of using the right presser foot, such as a non-stick glide foot, to prevent sticking and dragging.
When sewing vinyl leather, ensure you’re using a suitable needle size and type for the fabric and thread, as explained in troubleshooting sewing machine problems, to prevent issues like skipped stitches and thread breaking. Adjust thread tension and sewing machine settings carefully to avoid unnecessary stress on your material.
These steps ensure a smoother, professional finish.
Avoiding Common Mistakes With Vinyl
Having prepped your vinyl, avoid common pitfalls!
Use the correct needle selection; leather needles work wonders.
Maintain proper thread tension; too tight and you’ll break threads, too loose and stitches will unravel.
A longer stitch length prevents puckering.
Remember, practice makes perfect!
Careful cutting with sharp tools makes for clean edges, and always test your settings on scraps first.
These small steps lead to professional-looking results.
Advanced Vinyl Leather Sewing Techniques
Advanced vinyl leather sewing techniques require a bit of finesse, but they’re worth mastering.
Tackling heavy-duty projects like bags or upholstery? You’ll need techniques that cut the mustard.
For a strong foundation in leather sewing, consider mastering hand sewing leather techniques, which emphasize precision and durability.
Here’s a run-down to jazz up your skills:
- Precision Stitching: Use longer stitches (3.0 mm or more) to avoid perforating the vinyl, which can weaken seams. Adjust the tension on your machine to prevent puckering and achieve neat stitches.
- Seam Reinforcement: Consider a leather-vinyl combination for added durability. Use fabric glue or Gorilla Glue to strengthen bag straps, enhancing longevity without bulk.
- Creative Embellishing: Upgrade with decorative topstitching or add unique accents using vinyl repair techniques. This repairs and also adds flair.
Regular machine maintenance for vinyl projects keeps everything running smoothly—after all, an ounce of prevention is worth a pound of cure.
Frequently Asked Questions (FAQs)
Can I sew vinyl with a regular sewing machine?
Sure, you can sew vinyl with a regular sewing machine.
Use a leather or denim needle, polyester thread, and an acrylic presser foot.
Adjust stitch length to 3-4 mm, and avoid pins—use clips instead.
What is the best way to sew faux leather?
Use leather or denim needles, polyester thread, and an acrylic presser foot for faux leather.
A longer stitch length, around 3-4 mm, prevents tearing.
Secure layers with clips, not pins, for seamless sewing.
Can you sew faux leather with a regular sewing machine?
When working with vinyl leather, it’s essential to use leather needles that feature a unique design for punching through the material without damaging it. Faux leather fabric can function flawlessly on a regular sewing machine.
You must, though, use a leather or denim needle and polyester thread.
Adjust stitch length to avoid holes.
Use an acrylic presser foot for smooth sewing.
Do I need a special needle to sew vinyl?
Yes, you’ll need a specialized needle! Leather, denim, or topstitch needles work best. Their strong points and larger eyes prevent tearing and breakage. Don’t use regular needles; they’ll likely snap.
How do I clean vinyl leather projects?
Imagine your vinyl leather project as a treasured artifact.
Wipe with a damp cloth, use mild soap for stubborn spots, and dry with a towel.
Keep it away from heat and sunlight to maintain its luster.
Can vinyl leather be waterproofed easily?
Waterproofing vinyl leather is straightforward.
Use a spray specifically designed for vinyl to create a barrier against moisture.
Apply it evenly, let it dry completely, and reap the benefits of enhanced durability and water resistance.
Is vinyl leather safe for outdoor use?
Vinyl leather can be used outdoors, but it’s not as durable as genuine leather.
To enhance its longevity, keep it out of direct sunlight and wet conditions.
Consider applying a UV protectant for added protection.
How to avoid vinyl leather stretching?
To prevent stretching vinyl leather, use polyester thread for strength.
Increase stitch length to avoid tiny holes.
Employ an acrylic presser foot for smooth gliding.
Always test on scraps to adjust tension and settings.
Whats the best way to attach straps?
Around 90% of crafters swear by using fabric glue to attach straps securely.
Apply a thin layer, press firmly, and hold with clips.
This method guarantees a strong bond without puncturing the material, keeping it sleek.
Conclusion
Imagine you’ve just sewn a personalized vinyl leather bag; it reflects your skill and attention to detail.
With the right tools and techniques, sewing vinyl leather can be enjoyable and rewarding.
Use a microtex needle and Teflon foot to avoid frustration, and remember to test stitch lengths on scraps.
By practicing with these tips, you’ll master vinyl projects and enjoy creating durable, unique items.
So roll up that fabric and get stitching with confidence!

