This site is supported by our readers. We may earn a commission, at no cost to you, if you purchase through links.
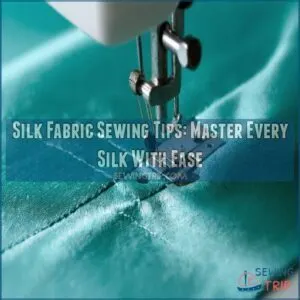
Start by pre-washing your silk to avoid those pesky water marks.
Stabilize it with starch or tissue paper, and cut using a sharp rotary cutter with weights to prevent shifting.
Choose fine needles and silk thread for smooth stitching, and consider using a walking foot on your sewing machine for better fabric control.
For precision, opt for a slightly shorter stitch length.
If you’re ready to conquer even the trickiest silks, there are more nifty tricks waiting just around the corner!
Table Of Contents
Key Takeaways
- Pre-wash your silk fabric to prevent water marks, color bleeding, and shrinkage, ensuring it retains its charm throughout your project.
- Use fine needles, silk thread, and a walking foot to enhance sewing precision, and opt for a slightly shorter stitch length for smooth, snag-free seams.
- Stabilize slippery silk with starch or tissue paper, and cut with sharp tools and pattern weights to prevent shifting while maintaining clean, crisp lines.
- Master hand-sewing techniques such as French seams and basting to create elegant finishes and invisible hems, ensuring your silk garments look professional and polished.
Preparing Silk Fabric
Before you start sewing your delicate silk masterpiece, make sure to pre-wash it to prevent any unwelcome surprises like shrinkage or color bleeding.
Pre-wash your silk.
Stiffen your silk with a gelatin solution and block it to guarantee it lays perfectly flat.
Pre-washing Silk
Got silk ready to sew? Pre-wash it to dodge color bleeding and shrinkage surprises.
Use baby soap and cold water—gentle but effective.
Test a scrap first to see how your silk reacts.
Hang it up to dry without sunbathing! This care keeps your silk fabric’s charm intact and your sewing project on point.
Stiffening Techniques for Easier Handling
Working with slippery silk can be a nightmare, but stiffening solutions are your secret weapon!
Consider using a gelatin solution—it’s gentler than starch and works wonders for lighter silks.
Heavier silks might need a touch more support; experiment to find what suits your fabric weight.
Remember, a little stiffening goes a long way—you want to improve handling, not create a board!
Always test a small area first to avoid any surprises.
Leveling and Blocking Silk
To achieve flat silk that doesn’t warp, leveling and blocking are your best friends.
After prewashing, lay the fabric on a large flat surface, manipulating it gently to align the grain.
Use tools for leveling to smooth the fabric, and let it air dry.
This extra step guarantees stability and makes pressing silk a breeze, giving you more control.
Choosing The Right Tools
Choosing the right tools is important when sewing silk, but don’t worry—it’s simpler than it sounds.
Silk requires fine needles, silk thread, and sharp scissors or a rotary cutter to get those seams just right.
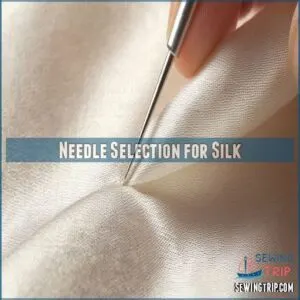
Needle Selection for Silk
Choosing the right needle for silk can make or break your project.
Consider using fine needles like Microtex or Sharp needles, typically size 60/8 for lightweight silk.
Their precision prevents fabric snags and tears, ensuring smooth sewing.
Famous brands like Schmetz offer sharp needles with perfect points, ideal for delicate silk fabrics.
Your silk masterpiece deserves nothing less!
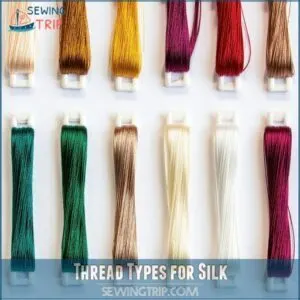
Thread Types for Silk
Selecting the right thread can make sewing silk a breeze.
Opt for silk thread—it matches silk’s strength and sheen perfectly.
Choose fine needles to handle delicate silk fabric.
Thread weight and color matching are key; a perfect match hides stitches.
Adjust thread tension for smooth seams.
With these tips, you’ll sew like a pro, avoiding thread breaks.
Sewing Machine Feet for Delicate Fabrics
Silk sewing demands finesse, and the right sewing machine foot makes all the difference.
Walking foot benefits are immense; it evenly feeds delicate silk fabric.
Consider these:
- Delicate fabric feet: Reduce snagging.
- Presser foot pressure: Adjust for smoothness.
- Feed dog adjustments: Guarantee even movement.
- Needle selection for feet: Pair fine needles with silk thread for precision.
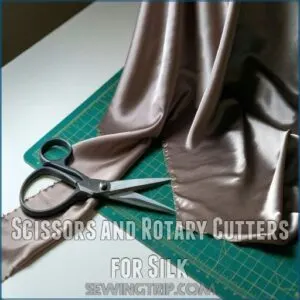
Scissors and Rotary Cutters for Silk
When working with silk, precision tools make all the difference.
Opt for scissors with superb blade sharpness or a rotary cutter with a fresh blade.
Using a cutting mat can prevent those pesky fabric layers from slipping.
Whether you’re slicing through silk fabric single-layer or tackling multiple layers, these tools help your silk projects stay smooth and precise.
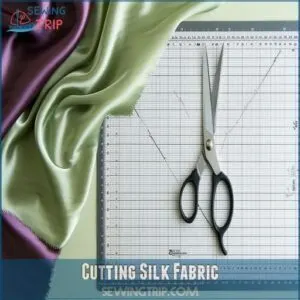
Cutting Silk Fabric
Cutting silk can seem intimidating, but with the right techniques, it’s easier than you think!
We’ll show you how to prevent shifting and get those crisp, clean lines you crave, so let’s get started.
Single-layer Cutting Methods
To successfully cut silk fabric, start by placing a paper sandwich beneath the fabric to boost stability.
Opt for a rotary cutter on a cutting mat for those precise edges you’ve been dreaming of.
When working with delicate or knit fabrics, consider using techniques for preventing knit fabric unraveling.
Pinning silk becomes a breeze with silk pins that keep everything in place.
Tackle those silky challenges with confidence and say goodbye to shifting fabric!
Transferring Pattern Markings to Silk
You’ve got your silk fabric prepped; now it’s time to mark patterns without a hitch.
Use tailor’s chalk or fabric markers with precision.
Tracing wheels and transfer paper help when chalk isn’t enough.
For those intricate details, try silk pins within seam allowances.
Pinning methods and pattern weights, or even tissue paper, can be your best friends for steady hands.
Preventing Fabric Shifting While Cutting
Preventing silk fabric from shifting while cutting is all about strategy.
Start by:
- Using Pattern Weights: They hold the fabric steady.
- Layering with Paper: Sandwiching silk between sheets provides grip.
- Opting for Single-layer Cutting: Guarantees precision.
- Using a Fabric Table Cover: Stabilizes your material.
These stabilizing techniques make your cutting process as smooth as satin.
Grain Line Considerations for Silk
Picture yourself aligning the grain line on silk fabric. It’s like walking a tightrope between order and chaos.
The grain line impacts drape, offering stability on straight grains, while bias cuts dance dramatically.
Fabric alignment guarantees your masterpiece doesn’t skew as it sways.
Understanding these differences helps you sew silk with grace and confidence, achieving the perfect silk fabric drape.
Machine Sewing Silk
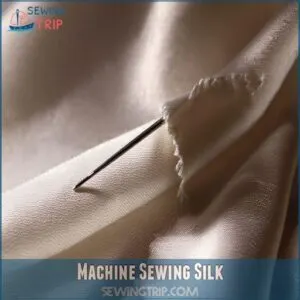
When you’re machine sewing silk, setting the right stitch length and width is essential to prevent puckering and enhance fabric flow.
Use a fine needle and adjust your machine’s tension to smoothly guide the slippery layers without pulling your hair out in frustration.
Optimal Stitch Length and Width
Finding the right stitch length and width for silk is like finding the sweet spot in your favorite recipe.
A stitch length of 1.5-2mm works wonders for lighter silks, while heavier fabrics benefit from 2-2.5mm.
Keep your sewing speed steady and adjust machine tension for smooth results.
Pair these techniques with sharp needles to master your silk projects.
Preventing Fabric Layers From Shifting
So, you’re sewing with silk—a slippery little devil, right?
Three simple tricks stop layers from shifting:
- Pin perpendicular to the raw edge. This keeps everything snug.
- Use plenty of pins; don’t be shy!
- Nest seams together. It’s like a fabric hug.
- Consider using lightweight interfacing for extra stability. This adds a little structure, helping to keep those layers behaving.
Dealing With Fabric Feeding Issues
Struggling with fabric feeding issues? Adjust machine tension and use fine needles based on fabric weight.
A walking foot can help, especially with slippery charmeuse.
Tweak foot pressure and consider feed dog adjustments for smoother sewing.
Prewashing silk reduces slippage, and silk thread aids in smooth stitching.
Master these tweaks and gain control over tricky silks!
Seam Finishes for Silk Garments
When sewing silk, French seams and mock French seams give your garment a polished finish without compromising the fabric’s fluidity.
Serger finishes opt to save time, while whipped seams can handle thicker silks.
For hems, a hand-rolled hem adds elegance, or try a serger rolled hem for quick precision.
Master these techniques to enhance your silk sewing projects!
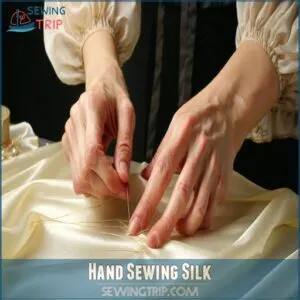
Hand Sewing Silk
Hand sewing silk might seem intimidating, but with a few techniques, you’ll handle it like a pro.
Embrace skills like basting and French seams to create elegant finishes without breaking a sweat.
Basting Techniques for Silk
Getting those silk seams just right? Basting’s your pal.
To achieve accurate pattern pieces and prevent fraying edges, you need to cut silk fabric precisely using techniques found in Preparing Silk Fabric.
Use a needle and contrasting thread to hand-baste along seam lines.
Choose from diagonal or long-stitch types to suit your silk.
Grab a few basting tools, and remember the basting’s purpose is temporary.
After stitching, simply snip and remove before final sewing, ensuring your silk looks and feels wonderful.
Hand-rolled Hem Instructions
Got your silk fabric ready? Let’s talk silk hemming using hand-rolled hems.
Grab your hand-rolled hem tools, like a fine needle and matching thread.
Roll a narrow hem edge between your fingers, then stitch along the fold using tiny, invisible stitches.
This technique adds a subtle, professional touch.
Remember, patience is your friend here, ensuring perfect hem stability and finish.
French Seams by Hand
A hand-sewn French seam’s a neat trick for sewing silk.
First, sew wrong sides together with a tiny seam allowance.
Trim close, then turn the fabric.
Now, stitch again, encasing the raw edges.
This creates a polished, professional finish, perfect for those finishing touches on your silk projects.
It’s a little extra work, but the result is totally worth it!
Invisible Stitching on Silk
Master the art of invisible stitching on silk with ease.
To get started, choose the right needle, such as a fine silk needle size, and silk thread for hand-stitched hems and invisible seams.
Embrace sewing techniques like the slip stitch, blind stitch, or ladder stitch to achieve sleek finishes.
Picture your needle dancing through the silk fabric, ensuring your stitches disappear beautifully into the fabric, creating a flawless finish.
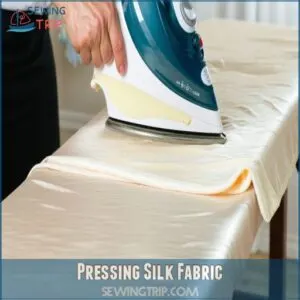
Pressing Silk Fabric
When pressing silk fabric, always keep a trusty pressing cloth handy to protect against shine and scorch marks.
Adjust your iron’s temperature based on the silk type.
Remember to press gently, especially on bias-cut silks, to maintain their perfect drape.
Using Pressing Cloths Effectively
Hand sewing silk requires patience, but you’ve nailed it. Now, onto pressing cloths! These protect silk fabrics from scorch marks and shine.
Here’s how to use them effectively:
- Choose the right cloth – silk organza works wonders.
- Keep it clean – wash often.
- Always cover the fabric.
- Avoid steam – stick with dry heat.
Temperature Settings for Different Silk Types
Once you’ve got your pressing cloth handy, tackling the right temperature settings makes all the difference.
Light silk types, like chiffon, need lower heat around 250°F, while medium-weight silks can handle up to 300°F.
Avoid heat damage by steering clear of steam; a dry iron paired with silk threading is key.
Remember, silk blends require careful temperature tweaks.
Pressing Techniques for Bias-cut Silk
Pressing bias-cut silk demands a gentle touch.
Understanding the true bias of the fabric, typically at a 45-degree angle to the selvage, is essential for achieving the desired drape and stretch.
Use cool iron settings and always place a pressing cloth over the fabric to prevent steam impact and guarantee drape control, especially when working with bias cutting techniques.
Align with the grain line for the best shape.
This helps the silk fabric maintain its elegant flow, letting its natural beauty shine without distortion.
Keep those delicate layers smooth and graceful.
Avoiding Shine and Fabric Impressions
Want to avoid that dreaded shine and those pesky fabric impressions when ironing silk?
Use a pressing cloth, like cotton or silk organza, to shield the fabric.
Choose a dry iron over steam to sidestep water spots.
Press in the direction of the silk weave and consider the fabric’s weight—lightening your touch for delicate silk.
Hemming Silk Garments
Getting a professional-looking hem on your silk garment doesn’t have to be a nightmare; we’ll show you several simple techniques, from machine-rolled hems to perfectly invisible hand-stitched ones, so you can choose the method that best suits your project and skill level.
Whether you’re a seasoned sewer or just starting out, you’ll find a way to create a beautiful, flawless finish on your next silk creation.
Machine Rolled Hems on Silk
Achieving a neat machine rolled hem on silk can feel like taming a slippery eel.
Start with the right rolled hem tools—your sewing machine’s rolled hem foot is essential.
Adjust machine settings for your particular silk fabric type, using a small stitch length.
Remember, tension matters!
This hem finishing technique delivers clean edges, making sewing silk garments look professionally polished.
Serger Rolled Hem Technique
When you’re ready to tackle silk fabric with your serger, rolled hem tips will save you from frustration.
Adjust serger settings to lower thread tension, preventing fraying.
Guide the silk gently for a clean, neat edge.
Rolled hem variations, like tackling a bias cut, demand patience but offer elegance that a flat hem can’t match.
Your silk masterpieces await!
Hand-sewn Invisible Hems
Creating invisible hems on silk is as easy as pie with the right tools.
Grab a fine needle and silk thread to match your fabric.
For a seamless finish, consider investing in an invisible stitch needle, available at online marketplaces like specialty sewing needles.
Start with fabric preparation; make sure it’s smooth and wrinkle-free.
Use tiny stitch types called invisible stitching for finesse.
This handsewing method makes your silk fabric hems look flawless, mastering elegance in simplicity.
Bias Tape Finishing for Silk Edges
Looking to give your silk fabric a neat finish? Try adding bias tape for those elegant edges.
It’s like giving your garment a durable, polished border that stands out.
Whether you’re handling chiffon or dupioni, the right bias tape types and sewing techniques make all the difference.
This method keeps the silk fabric edges pristine while easing your stitching woes.
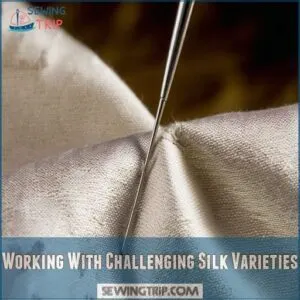
Working With Challenging Silk Varieties
When you’re tackling challenging silk varieties, knowing the right techniques makes all the difference in your final results.
Whether it’s slippery charmeuse or stretchy silk knits, with a little patience and practice, you can master them all without losing your cool.
Sewing Slippery Silk Charmeuse
Tackling slippery silk charmeuse can feel like wrestling a slippery fish, but mastery is within reach.
Stabilize your silk fabric using pattern weights and a walking foot for control.
To prevent fraying and guarantee a smooth cut, use serrated scissors techniques.
Avoid puckering by:
- Pinning precisely: in the seam allowance
- Choosing fine needles: for delicate stitching
- Perfecting seam finishes: like French seams
Embrace confidence in sewing silk!
Handling Delicate Silk Chiffon
Sewing with silk chiffon? It’s like working with a whisper!
To prevent fraying, use a small stitch length and generous seam allowances.
Stabilize the delicate chiffon with tissue paper while cutting.
Gentle pressing techniques are key—avoid harsh heat.
Remember, patience is your best tool when working with this beautiful, flowing fabric.
Techniques for Thick Silk Dupioni
You’ve tamed delicate chiffon; now, conquer thick silk dupioni with finesse.
This robust fabric demands a sharp needle and a walking foot for smooth sewing.
Stiffen dupioni slightly with a gelatin solution to ease cutting and pressing.
Remember, this fabric’s prone to fraying, so finish seams with zigzag or overlock stitches.
Embrace the challenge and relish the results!
Managing Stretchy Silk Knits
Stretchy silk knits can sometimes behave like a rebellious teen, refusing to stay in line.
Achieve more control by using lightweight interfacing to stabilize the fabric before cutting.
Maintain the drape by adjusting the sewing machine’s tension and using stretch stitches.
Finish seams with gentle hand-stitching or a zigzag pattern to keep everything in check and your project flawless.
Buttonholes and Closures
When sewing buttonholes and closures on silk, it’s essential to stabilize the fabric to prevent unwanted puckering or stretching.
Whether you’re tackling bound buttonholes or inserting zippers, a steady hand and the right techniques will keep your silk looking flawless and your stress levels low.
Stabilizing Silk for Buttonholes
Mastering silk means dealing with its slippery nature.
Keep buttonholes sharp by using interfacing or fusible stabilizers to reinforce underlying fabric.
Lighter interfacing options work well, ensuring the silk stays stable and stitch placement is precise.
Monitor fabric tension to avoid puckering—just like balancing on ice.
Keep your thread light to maintain seamless beauty.
Bound Buttonhole Technique
Embrace three specific tools for bound buttonholes: sharp scissors, silk thread, and a buttonhole chisel.
Picture slicing through silk fabric with ease, making sure precise buttonhole placement.
Try bound buttonhole variations for a polished finish, experimenting with different sizes on a scrap first.
This sewing tip ensures your silk stitches shine, creating buttonholes that truly enhance your garment’s elegance without fuss.
Sewing Zippers Into Silk Garments
Inserting zippers into delicate silk garments can be intimidating, but it doesn’t have to be.
Align the zipper tape precisely, using a zipper foot for a smooth glide.
Opt for an invisible zipper to keep the fabric’s elegance intact.
Carefully pin and baste before sewing, ensuring the silk fabric stays stable.
These sewing tips will help you navigate zippers with ease.
Hook-and-eye Placement on Silk
After zipping up those silk creations, let’s talk hook-and-eye closures.
Choose the right hook-and-eye size for your silk fabric’s weight; smaller hooks work best for lighter silks.
You can find a variety of silk hook and eye closures at silk hook and eye.
Make sure you get the placement symmetry right – it’s all about that perfectly balanced look!
Consider using silk fabric interfacing to stabilize the area before sewing.
For extra security, you can reinforce the closure with a bit of lining.
Remember, proper closure placement is key for a flawless finish!
Finishing Touches
When you’re finishing your silk garment, pay attention to the details that will make it shine, from lining choices to embellishments.
You’ll also want to learn how to care for and mend your silk items, ensuring they stay beautiful and last for years.
Lining Silk Garments
Lining silk garments doesn’t have to be intimidating.
Just like giving a well-made cake its perfect frosting, lining adds structure and comfort.
Choose lightweight lining fabrics that complement your silk.
Use French seams for a neat finish, and position lining seams to avoid bulk.
Select sewing needles and interfacing that match silk’s delicacy.
Consider lining placement for a sleek silhouette.
Embellishment Techniques for Silk
Adding embellishments to silk fabric can take your garment from elegant to extraordinary.
Think of beading or hand embroidery tutorials for that personal touch, which can include techniques like the running stitch, backstitch, and French knot.
Try appliqué for a textured effect or hand-painting for a burst of color.
Fabric manipulation, like pleats or gathers, can also add unique flair.
Use sequins sparingly for sparkle without overpowering the silk’s natural beauty.
Care Instructions for Silk Items
Silk fabric items need a bit of TLC to stay pristine. Remember these tips:
- Gentle clean: Opt for hand washing in cool water or go for professional dry cleaning.
- Iron with care: Use pressing cloths to prevent shine and bruises.
- Proper storage: Hang silk garments or store them rolled to avoid creases.
- Quick stain action: Handle stains immediately to avoid long-term damage.
Repairing and Mending Silk Fabric
You’ve cared for silk, but accidents happen—tears and holes appear when you least expect them.
Tackle repairs with confidence. Use small patches or clever weaving to mend those pesky gaps.
Stabilize fraying edges by adding interfacing underneath.
Silk fabric can be stubborn with stains; quick treatment with mild soap often does the trick.
With these mending tips, keep your silk flawless.
Frequently Asked Questions (FAQs)
What is the best stitch for silk fabric?
Imagine tailoring a silk cloud; a tiny 5-2 mm straight stitch sews silk best.
Use a fine needle, adjust machine tension, and test on scraps.
This stitch keeps silk smooth and elegant, ensuring precision without bulk.
Is silk fabric hard to sew?
Sewing silk can be tricky due to its slippery texture and delicate nature.
Using sharp needles, small stitches, and stabilizing techniques can make the process smoother, turning potential frustration into a rewarding sewing adventure.
How to stabilize silk for sewing?
Stabilize silk by stiffening it with a gelatin solution for easier handling.
Test on swatches first to check results.
Use tissue paper underneath or between layers during cutting to keep everything steady and avoid shifting.
What is the best sewing machine setting for silk?
Adjust your sewing machine to a lower tension with a stitch length around 2-5mm for silk.
Use a fine needle, like a size 70/10 Sharp, and a walking foot to prevent fabric shifting.
How do I prevent silk from slipping?
Imagine trying to wrestle a slippery eel—silk can be the same.
To keep it in place, use tissue paper underneath, apply pattern weights, and opt for sharp cutting tools like fine shears or a rotary cutter.
What interfacing works best with silk?
Use lightweight fusible interfacing for silk to maintain its delicate drape.
Apply with a cool iron and a damp pressing cloth to avoid damaging the fabric.
Test on a scrap piece first for safe results.
Can I use a serger on silk?
Worried about damaging your silk? You can definitely use a serger!
A three-thread setup’s perfect for casual projects.
Just go slow and practice on scraps first—you’ll get the hang of it.
How do I remove wrinkles from silk?
Press silk while slightly damp using a low heat setting and a pressing cloth to avoid shine.
Avoid steam to prevent water spots.
Allow the fabric to cool on the ironing board for a smooth finish.
Whats the best way to store silk?
Think of silk as a diva needing specific care.
Store it rolled in acid-free tissue paper inside a breathable cotton bag.
Keep away from sunlight and moisture to prevent damage.
Rotate and inspect occasionally for longevity.
Conclusion
Think of sewing with silk as a dance; once you’ve got the steps down, it’s smooth sailing.
From pre-washing to choosing the right tools, each step in these silk fabric sewing tips guides you through the process.
Cutting and stitching become easier, and even tricky tasks like hemming and finishing transform into simple routines.
Now that you’re armed with these insights, tackling silk projects feels less intimidating, promising beautiful results with your newfound skills.







Igraine
November 14, 2024 at 05:53 AM
wILL YOU PLEASE HELP US--even though we know we are probably not honoring the fabric as we should? In a cold climate, we rely on silk long-johns (underwear that reaches wrists and ankles). We are usually able to find them on sites that sell to serious outdoorspeople. The trouble is that they get runs in them--much like the stockings worn in the 20th century--even though we carefully wash them in cold water with mild, specially-labeled cleanser and dry them flat. Is there any way to mend the runs? In winter, we need these garments every day, but they are too expensive to own in gross numbers, so we spend too much time rinsing them out every evening. Brrrrrrr! The runs become holes, and the garments wear out fast . . .