This site is supported by our readers. We may earn a commission, at no cost to you, if you purchase through links.
 Cutting knit fabric without unraveling is easier when you’ve got a few tricks up your sleeve.
Start by choosing the right tools—sharp scissors or a trusty rotary cutter are your best pals.
Make sure they’re clean and sharp for crisp, professional cuts.
Pre-wash your fabric to avoid surprises later, and iron it flat to banish those pesky wrinkles.
Stabilize with spray starch or fusible interfacing to stop the unraveling madness.
When cutting, a single-layer and smooth motion are your secrets to minimizing stretch.
Finish those edges with zigzag stitching or serging for peace of mind.
With these tips, you’re ready to tackle knits like a pro!
Keep reading to discover more crafty secrets.
Table Of Contents
Key Takeaways
- Choose the right tools, like sharp scissors or a rotary cutter, to start your knit-cutting journey with ease. It’s like choosing your sidekick for a mission—go for the reliable ones that make every snip feel like slicing through butter.
- Prepping your fabric is a must-do. Think of it as giving your material a spa day with a good wash and iron, so it’s all set for a smooth, wrinkle-free transformation. Trust us, you don’t want any surprises later—no one likes realizing they have misshapen clothes after the first wash.
- Stabilize those edges with spray starch or fusible interfacing. It’s like putting on the perfect pair of socks—cozy, secure, and no slippage. This stops the fabric from unraveling, keeping your project looking as polished as a freshly waxed floor.
- Finish the edges with techniques like zigzag stitching or serging. It’s your final step to prevent future messes, much like icing on a cake—protective and oh-so-satisfying when neatly done. You’ll keep those threads in line and save your work from falling apart at the seams.
Choosing the Right Tools for Cutting Knit Fabric
You’re about to become a knit fabric cutting pro, and it all starts with choosing the right tools.
From sharp fabric scissors to rotary cutters, and even specialized knit fabric tools, we’ll guide you through the options that’ll keep your knits from unraveling faster than your patience on a Monday morning.
Sharp Fabric Scissors Vs. Rotary Cutters
For tackling unruly knits, you’ve got two trusty sidekicks: fabric scissors and rotary cutters, like those used with cordless electric fabric cutting scissors. Scissors offer precision for intricate shapes, while rotary cutters excel at straight lines and larger pieces.
Your choice depends on your project’s needs and personal preference.
Consider factors like cutting accuracy, blade sharpness, and cost.
Importance of Using Clean, Well-maintained Tools
Anyone who’s wrestled with dull scissors knows the frustration.
Your tools are your trusty sidekicks in the knit-cutting adventure.
Keep ’em clean and sharp, and they’ll have your back.
Wipe blades after each use, oil moving parts, and store them properly to prevent rust.
It’s like giving your gear a spa day – they’ll thank you with crisp cuts and a longer lifespan.
Specialized Knit Fabric Cutting Tools
Mastering knit fabric cutting requires the right arsenal of tools.
You’ll want to explore specialized options like rotary cutter blades with a smooth edge for clean cuts.
Fabric shears designed specifically for knits can be a game-changer, while electric fabric cutters offer precision for larger projects.
Don’t forget cutting mat materials that grip your fabric, preventing slips.
Some sewing machines even have attachments for cutting knits – talk about a time-saver!!
Benefits of Using Pinking Shears
Pinking shears are your secret weapon for cutting knit fabric.
These zigzag-bladed scissors offer several benefits:
- Prevent fraying along cut edges
- Create a decorative scalloped finish
- Allow slight give for stretchy fabrics
- Reduce bulk in seam allowances by grading or trimming seam allowances
You’ll feel like a fabric-cutting ninja with these in your toolkit. Just remember to keep them sharp and clean for best results. They’re not just for your grandma’s sewing room anymore!
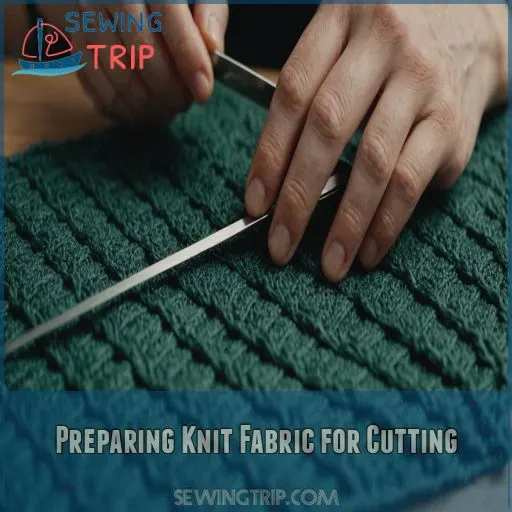
Preparing Knit Fabric for Cutting
Before you start snipping away at your knit fabric, you’ll want to prep it properly to avoid any cutting mishaps.
A little care upfront can save you from a tangled mess later, so let’s get your fabric ready for its big makeover.
Washing and Drying Fabric Before Cutting
Before you even think about cutting, always pre-wash your knit fabric.
You’ll thank yourself later when your finished project doesn’t shrink or warp after its first wash.
Choose the right water temperature based on your fabric type – cold for delicates, warm for sturdier knits.
For drying, opt for a gentle cycle or air-dry to maintain the fabric’s shape and integrity.
Proper Ironing Techniques for Knit Fabrics
Now that your fabric’s fresh and clean, let’s tackle ironing. You’ll want to tread lightly here – knits can be fickle friends.
Set your iron to low heat and use a pressing cloth to protect delicate fibers.
For stubborn wrinkles, a gentle burst of steam can work wonders.
Ensuring Fabric is Flat and Wrinkle-free
Ironing techniques help get knit fabric wrinkle-free and ready for cutting.
Imagine this: fabric demands to be treated right, just like a diva!
Use a table with ample space and pressing tools. Make sure:
- Fabric tension stays even
- Edges lie flat
- Creases don’t haunt
- Fabric storage is safe
Flatter fabric makes smoother cuts!
Marking Cutting Lines With Fabric-friendly Tools
Once your fabric is smooth and wrinkle-free, it’s time to mark your cutting lines.
Reach for fabric-friendly tools like tailors chalk, disappearing ink pens, or washable markers.
These won’t leave permanent marks on your delicate knits.
You can also use tracing paper to outline your pattern pieces.
Just be gentle – knits are easily distorted.
| Tool | Pros | Cons |
|---|---|---|
| Tailors Chalk | Inexpensive, easy to use | Can be messy, may not show up well on dark fabrics |
| Disappearing Ink Pens | Clean, precise lines | Ink may reappear over time |
| Washable Markers | Vibrant, easy to see | May bleed through fabric |
| Tracing Paper | Reusable, no mess | Requires extra care when transferring lines |
Stabilization Techniques to Prevent Unraveling
Preventing knit fabric from unraveling while you cut might seem like trying to hold onto water, but with the right techniques, it’s easier than you think.
From spray starch to fusible interfacing, we’ve got tips that’ll have your fabric behaving as it should, with no stray threads in sight!
Using Spray Starch or Stabilizing Sprays
Ever tried spray starch types? They’re like a superhero cape for your fabric! Just mist over delicate knit to stiffen and prevent unraveling.
However, heavier fabric weight might need more starch magic.
When comparing spray starch vs. interfacing, starch is a quick fix.
Don’t forget to explore alternatives like homemade sprays—perfect for a crafty, cost-effective approach!
Applying Fusible Interfacing to Cutting Areas
When choosing fusible interfacing, you’ve got options! Pick the right interfacing weight for your knit project—lightweight for delicate fabrics, heavier for sturdy ones.
Strategically place it on cutting areas and use proper ironing techniques to bond it smoothly.
Temporary Fabric Stabilizers for Delicate Knits
If you’re working with delicate knit fabrics, temporary stabilizers can be a lifesaver.
Try using a lightweight fusible web or spray starch – they’ll help reinforce the fabric and prevent stretching or distortion during cutting.
Just be sure to remove the stabilizer carefully afterward to avoid damaging the fabric.
Importance of Proper Tension While Cutting
Temporary fabric stabilizers are great, but let’s tackle tension control while cutting knit fabric. You want to keep a gentle grip, like holding a baby bird—firm yet soft. Remember:
- Keep fabric stretch minimal.
- Use sharp blades for smoother cuts.
- Move in the right cutting direction to maintain shape.
You’ll have your fabric singing your praises, not unraveling!
Cutting Methods to Minimize Fabric Stretching
To cut knit fabric without stretching it, you’ll want to master these pro techniques that even your grandma would’ve sworn by.
From using the right hand placement like a ninja to trading pins for pattern weights, you’ll effortlessly keep your knits looking sharp.
Single-layer Cutting Vs. Folded Fabric Cutting
Ah, the age-old debate of single-layer versus folded fabric cutting! Single-layer cutting offers fantastic accuracy and prevents pesky fabric stretch, especially with thicker materials.
It shines in pattern alignment but takes a bit more time.
Folded cutting, on the other hand, is quicker for larger projects.
Choose based on your project size and desired cutting accuracy!
Proper Hand Placement to Avoid Fabric Distortion
When cutting knit fabric, proper hand placement is important to avoid distorting the material.
Keep your dominant hand firmly on the fabric, guiding the scissors with your other hand.
Maintain a slight shear angle and apply even pressure to support the fabric as you cut.
This helps preserve the fabric’s integrity and prevent uneven edges.
- Keep your dominant hand steady on the fabric
- Apply even pressure with your other hand to support the material
- Maintain a slight shear angle for clean, straight cuts
Cutting in One Smooth Motion
Imagine slicing through butter; that’s how cutting knit fabric should feel.
Keep hand positioning steady, and check blade sharpness before cutting.
Maintain fabric tension without strangling it—just a firm grasp.
Moderate your cutting speed; swift, smooth cuts make a world of difference. Think: slow and steady wins the race.
Here’s a quick guide:
| Control | Mastery | Freedom |
|---|---|---|
| Hand | Tension | Speed |
| Positioning | Control | Smooth Cuts |
| Steady | Firm | Swift Motion |
Using Pattern Weights Instead of Pins
Switch from pins to pattern weights for cutting success! You’ll skip holes and minimize fabric stretch. Here’s how:
- Pattern Weight Types: Use anything from washers to fancy weights.
- Weight Placement: Distribute evenly over fabric.
- Pinning Alternatives: Weights are gentle on fabric—perfect for multiple layers.
Try it and feel the freedom of smooth, stress-free cutting!
Finishing Cut Edges to Prevent Future Unraveling
Once you’ve carefully cut your knit fabric, it’s important to finish the edges to prevent future unraveling.
From serging and overlocking to quick zigzag stitching, we’ll share the best techniques to keep your knits looking polished and professional.
Serging or Overlocking Cut Edges
Now that you’re done with minimizing fabric stretching, let’s talk about edge finishing.
Serging or using an overlock stitch makes sure no sneaky unraveling down the road.
Whether you’re using a 3-thread or 4-thread serger, it’s gold for finishing edges on various fabric types.
Keep your eye on the seam allowance, and voilà! Your masterpiece stays neat and tidy.
Applying Clear Nail Polish to Prevent Runs
After serging, reach for that trusty bottle of clear nail polish. It’s not just for manicures! Dabbing a bit on cut edges stops those pesky runs.
Quick, effortless, and barely a wait to dry—just don’t toss the fabric around like confetti. For best results, choose a durable type.
If polish isn’t handy, explore those alternatives!
Using Fusible Hem Tape on Cut Edges
Much like clear nail polish saves you from pesky sweater snags, fusible hem tape works wonders on raw edges.
It’s available in multiple types suited for different knits.
Simply iron it on for a no-sew finish.
Though serging offers strength, tape’s convenience is unbeatable.
Mastering its application grants you freedom from unraveling edges.
Happy crafting!
Zigzag Stitching as a Quick Finishing Method
If you’re looking for a quick and easy way to finish cut edges on knit fabrics, try zigzag stitching.
This simple technique helps prevent unraveling without the fuss of serging or applying fusible tape.
Just adjust your sewing machine settings – a shorter stitch length and medium tension work best for most knit weights.
It’s a lifesaver for quick projects!
Frequently Asked Questions (FAQs)
How to identify the grainline on knit fabric?
Visualize the fabric’s flow – that’s your grainline.
Picture a river’s current, guiding your scissors as you glide through the supple knit.
Mastering this invisible path is the key to clean, controlled cuts that won’t unravel.
Can sewing techniques prevent knit fabric from unraveling?
Absolutely, you can stop knit fabric from unraveling with a zigzag stitch or serger.
These techniques bind the edges, keeping everything snug as a bug in a rug.
It’s like giving your fabric a cozy little hug! (Source)
Whats the best storage method for knit fabrics?
Store knit fabrics by folding them neatly and placing them in a breathable bin or drawer.
Keep them away from sunlight to prevent fading.
Roll them up like little cinnamon buns to save space and prevent wrinkles.
Do all knits require edge finishing after cutting?
Like a cat needs a nap, some knits want an edge finish to avoid unraveling.
Lightweight or loosely woven knits benefit from serging or zigzag stitches, while others can happily remain unfinished.
It’s your call!
How to fix cut knit fabric that unravels?
If your cut knit fabric starts unraveling, don’t panic!
You can easily fix this by securing the edges with a sewing machine, pins, or crochet.
This will prevent further unraveling and keep your project looking polished.
Conclusion
Did you know that about 40% of people shy away from sewing with knits because of fear of unraveling?
But now, you’re armed with pro secrets for how to cut knit fabric without unraveling.
With sharp tools, proper prep, stabilization, smooth cutting, and finishing techniques, you’re ready to conquer any knit project like a master tailor.
Keep these tips handy, and enjoy the satisfaction of beautifully crafted, unravel-free creations.
Happy sewing, and may your scissors always be sharp!


