This site is supported by our readers. We may earn a commission, at no cost to you, if you purchase through links.
When your tension’s dialed in right, both sides of your seam look clean and even—no loose loops, no thread breaks.
Home machine or industrial rig, getting tension right means fewer do-overs, less wasted thread, and seams that actually hold up.
The good news? Once you understand what’s happening between those tension discs and how your bobbin case works, fixing most tension headaches becomes second nature.
Table Of Contents
Key Takeaways
- Thread tension controls how your top and bobbin threads lock together in the fabric’s center—when it’s balanced right, you get identical stitches on both sides, strong seams, and zero puckering or loops.
- Most tension problems show up as visible defects: thread breaks, puckered fabric, skipped stitches, or loose loops that account for roughly 15% of all sewing defects and kill productivity.
- Fixing tension issues starts with three adjustments: dial your tension regulator up or down, tweak the bobbin case screw in quarter-turns, and set presser foot pressure to match your fabric weight.
- Modern digital tension sensors cut defects by over 50% and maintenance costs by 30% through real-time monitoring, automated adjustments, and predictive alerts that catch problems before they wreck your production run.
What is Thread Tension Control?
Thread tension control is how much resistance your thread faces as it runs through your sewing machine or textile equipment.
Get it right, and you’ll see perfectly even stitches on both sides of your fabric—no puckering, no loose loops, and no frustrating thread breaks that wreck your work.
Thread Tension Definition and Etymology
Ever wonder why your grandmother could whip up perfect stitches without breaking a sweat while your sewing machine seems to throw tantrums every few minutes? The answer lies in understanding thread tension – the delicate balance of resistance your thread faces as it travels through your machine.
Thread tension is the invisible balance that makes your grandmother’s perfect stitches effortless while your machine fights you at every turn
Rooted in Textile Origins and Fiber Science, "thread" comes from Old English "thraed," meaning "twisted yarn." This Thread History reveals how our ancestors understood that controlling string tension during Weave Patterns was essential for strong fabric construction.
Thread Tension in Textile and Sewing Contexts
Think of thread tension as the invisible conductor of your sewing orchestra—when it’s perfectly balanced, every stitch plays in harmony, but when it’s off, the whole performance falls apart.
Thread tension is all about balance—it controls how your top thread and bobbin thread lock together inside the fabric as each stitch forms. When you get it right, both threads meet dead center in the fabric, giving you strong seams no matter what you’re sewing.
Works the same whether you’re handling something delicate like silk or pushing through heavy denim.
Key Terms: Thread, Fiber, Weave, String, Wire
When you’re neck-deep in a sewing project, you’ll hear me throw around words like thread, fiber, weave, string, and wire—and while they might sound like they’re all cut from the same cloth, each one plays a different role in how your machine manages tension. Here’s what you need to know:
- Thread is your workhorse—the spun material that runs through your machine and creates stitches
- Fiber refers to the raw material (cotton, polyester, nylon) that determines thread composition and strength
- Weave describes how fibers interlace in fabric, affecting how your bobbin thread interacts with different materials
- String and wire are specialty threads—heavier gauge options for decorative or industrial weaving applications
Why Proper Thread Tension Matters
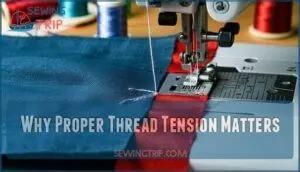
Bad thread tension shows up fast—puckered fabric, loose loops on top or bottom, or thread snapping mid-seam. All of it kills your momentum and burns through supplies.
Getting it dialed in means your seams lie flat, your fabric stays intact, and your machine runs smooth without constant stops for rework.
Impact on Stitch Quality and Fabric Integrity
Getting your sewing machine tension right makes the difference between clean, professional seams and puckered fabric that looks homemade.
When tension is balanced, stitches lock in the center of the fabric—no tight pulls on top, no loose loops underneath.
That balance directly affects seam strength, fabric durability, and garment lifespan. Proper bobbin tension and thread tension work together to reduce defects and keep your work looking sharp.
Common Issues Caused by Incorrect Tension
Your machine will tell you loud and clear when tension’s off. Here’s what you’ll see on the fabric:
- Thread breakage incidents—snap mid-seam, happening up to 12 times per 1,000 stitches when tension’s wrong
- Seam puckering—fabric bunches and waves, especially with tight stitches that pull too hard
- Skipped stitches and loose stitches—gaps in your seam where the needle missed or didn’t lock properly
- Fabric distortion and downtime losses—warped material and constant stops that kill your productivity
These tension problems account for nearly 15% of sewing defects and directly impact both stitch quality and seam quality. Addressing issues such as uneven or broken stitching is important for maintaining garment integrity.
Role in Sewing Machine and Textile Operations
Thread tension controls production quality across every sewing environment—from your workspace at home to industrial plants operating around the clock. Get the tension right, and you avoid downtime plus the expensive fabric defects that come from poor stitch formation.
Industrial settings rely on automated tensioning and specialized tension devices to preserve stitch quality during high-speed operations. One wrong adjustment at those speeds can ruin an entire production run when material behavior shifts.
How to Adjust Sewing Machine Thread Tension
Adjusting your sewing machine’s thread tension doesn’t have to feel like guesswork. With a few simple tweaks to the tension dial, bobbin, and presser foot, you’ll get balanced stitches every time—no more loops, puckers, or thread breaks to slow you down.
Using The Tension Regulator Dial
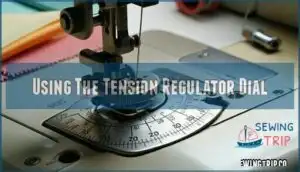
Your tension regulator dial isn’t some mysterious black box—it’s actually the easiest tool you’ve got for dialing in perfect stitches.
Most tension dials have numbers marked around them, usually with 3, 4, or 5 highlighted as your starting point.
When you’re adjusting top thread tension, just turn the dial toward lower numbers to loosen things up—helpful when bobbin thread visibility shows on top of your fabric—or crank it higher to tighten.
Adjusting Bobbin and Top Thread Tension
Getting both threads to play nice together is like tuning a duet—when the bobbin and top thread are in sync, your stitches sing, but when one’s pulling harder than the other, the whole seam falls apart.
Start by adjusting your top thread tension using the regulator settings—dial it down if bobbin thread shows on top, or crank it up if you see loops underneath.
For bobbin thread tension, you’ll tweak that tiny screw on the bobbin case itself, but go easy—quarter-turns are your friend here.
Setting Presser Foot Pressure for Balanced Stitches
If you’ve ever wrestled with puckered seams or fabric that just won’t feed smoothly, the presser foot pressure might be your hidden culprit.
Too much pressure crushes delicate fabrics and throws off stitch balance, while too little lets thicker material slip and bunches.
Adjusting presser foot pressure gives you fabric feed control that directly impacts stitch appearance—dial it down for silks, crank it up for denim, and watch your balanced tensions fall into place.
Troubleshooting Thread Tension Problems
When your stitches look wonky—loops on top, puckers underneath, or uneven seams—you’re dealing with tension trouble, and it’s usually fixable in minutes.
Let’s walk through how to spot what’s wrong, check your threading path, and keep everything running smooth so you can get back to sewing without fighting your machine.
Diagnosing Uneven, Loose, or Tight Stitches
When your seams look more like a tangled mess than a clean line, it’s time to play detective with your stitches. Start by checking stitch appearance on both fabric sides—if you see loops or puckering, you’ve got a tension imbalance.
Here’s what to watch for:
- Loops on top? Your bobbin tension’s too tight or top thread’s too loose
- Fabric puckering like a bad wrinkle? Both threads are fighting each other—adjust your sewing machine tension
- Skipped stitches appearing randomly? Check for bobbin issues before touching that dial
Correct Threading Techniques and Thread Guides
Most tension headaches start with one culprit: threading your machine wrong from the very beginning. You’ve got to follow the threading order exactly—skip one thread guide, and your tension discs won’t grip right.
Run your thread path through every guide, looper, and tension disc in sequence. When threading a sewing machine, make sure your presser foot’s up so those discs open properly.
For bobbin winding, use that tension guide on your spool pin to keep things even.
Tips for Maintaining Consistent Tension
Once you’ve got your threading down pat, keeping that tension dialed in week after week comes down to a handful of simple habits that’ll save you hours of frustration. Here’s what’ll keep your sewing machine tension rock-solid:
- Spool Placement – Always position your thread so it unwinds smoothly without catching
- Bobbin Winding – Wind bobbins evenly every time using your machine’s tension guide
- Thread Quality – Invest in good thread; cheap stuff shreds and creates inconsistent tension settings
- Machine Cleaning – Brush out lint weekly from tension discs and bobbin case
- Regular Checks – Test-stitch on scrap fabric before each project when adjusting sewing machine tension
These simple steps prevent most troubleshooting stitch problems before they start.
Advances in Thread Tension Technology
Modern textile operations are getting a serious tech upgrade with digital tension sensors and IoT-enabled monitoring systems that track every thread in real time.
These smart tools cut defects by more than half, slash maintenance costs by 30%, and give you the kind of precision control that wasn’t even possible a few years ago.
Digital and IoT-Enabled Tension Sensors
Today’s digital tension sensors bring real-time monitoring and automated adjustments straight to your production floor. You’ll see wireless connectivity that feeds sensor data analytics directly into cloud platforms, letting you track tension settings across multiple machines at once.
These IoT-enabled tension devices watch your tension discs and tension regulator performance continuously, flagging issues before they become problems. Predictive maintenance alerts catch drift in tension control early, so you’re fixing things on your schedule—not when a breakdown forces your hand.
This is especially useful since IoT supports Textile 4.0, a digital revolution that prioritizes efficiency.
Measurement Tools: Tension Meters and Load Cells
Choosing the right measurement tool can mean the difference between guessing at your tension settings and knowing exactly what’s happening with every thread that runs through your machine. Here’s what you need to know about the workhorses of tension control:
- Handheld tension meters deliver ±5% tension meter accuracy for quick spot-checks on the floor.
- Fixed in-line transducers provide real-time feedback with 98% uptime reliability during continuous runs.
- Load cells handle 1000% load cell overload capacity and need calibration frequency of just once yearly.
- Digital IoT integration sensors boost production transparency by 40% over analog tension devices.
Economic Benefits and Future Trends in Textile Production
Textile manufacturers are seeing tangible returns from modern tension control systems. Retrofitting older equipment with digital sensors can cut annual maintenance costs by 30%. Meanwhile, faster weaving speeds and fewer manual tweaks translate to productivity jumps of 20–35%.
The numbers tell a broader story too—analysts expect the global digital thread market to hit $37.99 billion by 2031.
On the sustainability front, better thread tension cuts waste by 22% and reduces water consumption in dyeing. European mills are moving fast—72% have already adopted these systems.
Those old-school manual tension adjustments? They’re fading out as IoT sensors step in to catch and fix stitch issues before they happen.
| Benefit Category | Real-World Impact |
|---|---|
| Cost Savings | 30% lower maintenance costs |
| Productivity Gains | 20–35% output increase |
| Market Growth | $37.99B by 2031 |
| Sustainability Impact | 22% waste reduction |
| Tech Adoption | 72% European uptake |
Frequently Asked Questions (FAQs)
How does thread type affect tension settings?
You’ll find that thread thickness, Thread Ply, and Material Weight directly influence your tension dial settings. Understanding thread tension starts with matching fabric types to Thread Fiber characteristics—thicker threads need looser tension, while fine threads require tighter settings.
Elasticity Effects and Coating Impact also shift how smoothly thread flows through your machine’s tension discs.
Can humidity or temperature impact thread tension?
Yes—humidity and temperature absolutely affect thread tension. Environmental conditions change how fibers behave, and that means you’ll be adjusting sewing machine tension more often than you’d think when the weather shifts.
Here’s what happens behind the scenes:
- High humidity swells natural fibers like cotton and silk, adding friction that tightens thread tension and causes skipped stitches or thread breakage
- Dry winter air shrinks those same threads, loosening tension and creating loops on your fabric’s underside—seasonal adjustments aren’t optional
- Heat softens synthetic thread composition, making polyester go limp and requiring you to dial up your tension regulator mid-project
- Cold storage conditions stiffen both natural and synthetic materials, demanding warm-up time before threading to avoid troubleshooting stitch problems later
- Material sensitivity varies wildly—rayon reacts twice as fast to environmental impact as nylon, so knowing your thread means understanding thread tension on a deeper level
Keep your sewing machine and thread spools in climate-controlled spaces. When weaving through seasonal changes, test your stitches on scrap fabric before starting any serious work—it’ll save you from ripping out seams later.
What tension settings work best for stretchy fabrics?
For stretchy fabrics like jersey or spandex, you’ll want to loosen your tension slightly—try starting at 3 or Lower thread tension prevents puckering and allows garments to stretch naturally.
Always run test stitches and pair a ballpoint needle with quality thread for best stitch quality.
How often should tension devices be calibrated?
Like keeping a well-tuned engine running smooth, calibration frequency depends on your setup. Load cells in modern textile systems need calibration only once per year, while handheld tension meters benefit from quarterly checks.
Calibration keeps your measurements accurate, which stops defects before they happen and protects textile quality.
It’s like tuning up your sewing machine—routine care that saves you money and makes troubleshooting easier down the road.
Does thread speed influence optimal tension levels?
Speed absolutely influences ideal tension levels—your thread behaves differently at 200 stitches per minute versus 1, Here’s how Speed-Tension Correlation affects your work:
- High-Speed Stitching generates heat and friction, demanding looser tension settings to prevent breakage
- Fabric Type Impact becomes magnified at speed—delicates need gentler handling than canvas
- Thread Material Effects vary dramatically; polyester tolerates speed better than cotton
- Automated Adjustments on modern machines compensate instantly, while manual systems require your intervention
- Understanding thread tension problems means recognizing that bobbin thread tension shifts as speed increases
Adjusting sewing machine tension isn’t one-size-fits-all when weaving at different speeds.
Conclusion
Perfect thread tension control feels like a paradox—it’s simultaneously the simplest adjustment and the most frustrating mystery on your machine. But once you nail down those tension discs, bobbin settings, and presser foot pressure, you’ll never second-guess a stitch again.
Tension problems don’t fix themselves, but armed with the right troubleshooting steps and a little patience, you’ll turn out perfect seams every time. Now get out there and make those threads behave.
- https://tensitron.com/why-optimizing-fabric-tension-is-important/
- https://new.abb.com/products/measurement-products/measurement-products-blog/textile-expert-tsg-boosts-productivity-with-abb-web-tension-load-cell-technology
- https://www.interfaceforce.com/the-textile-industrys-future-demands-force-measurement-solutions/
- https://pmc.ncbi.nlm.nih.gov/articles/PMC10302087/
- https://www.boshitex.com/news/576.html

