This site is supported by our readers. We may earn a commission, at no cost to you, if you purchase through links.
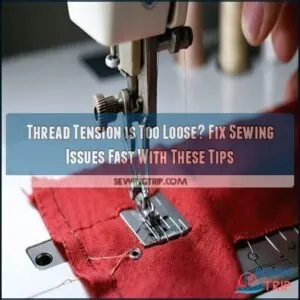
Start by checking for visible loops or bobbin thread showing on top; these are clear signs something’s off. First, make sure your machine’s threaded correctly—sometimes a tiny misstep sneaks past you.
Next, adjust the tension dial slightly higher (small increments here work wonders). Still too loose? Double-check that the bobbins are inserted properly and that no lint or stray threads are clogging the tension disks.
And remember, matching your thread weight, needle size, and fabric type is key! Tension issues are like knots—annoying but solvable.
Table Of Contents
- Key Takeaways
- Identifying Loose Thread Tension
- Causes of Loose Thread Tension
- Improper Threading Techniques
- Tension Adjustment Basics
- Fixing Loose Top Thread Tension
- Bobbin Tension Adjustment
- Maintaining Proper Tension
- Thread Weight and Needle Size
- Advanced Tension Troubleshooting
- Preventing Loose Thread Tension
- Frequently Asked Questions (FAQs)
- Conclusion
Key Takeaways
- Check your threading carefully—missed guides or improper bobbin insertion often cause loose thread tension.
- Adjust the tension dial in small increments and test on scrap fabric for clean and balanced stitches.
- Clean the tension disks, bobbin area, and remove lint regularly to prevent buildup that disrupts thread tension.
- Match your thread weight, needle size, and fabric type to avoid uneven stitches or thread breakage.
Identifying Loose Thread Tension
Spotting loose thread tension doesn’t have to feel like a mystery.
Loose thread tension is your sewing machine’s way of whispering, "Hey, I need some attention!
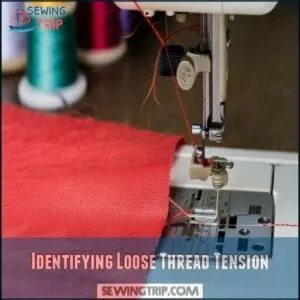
Look for visible loops, messy stitches, or a top thread sneaking onto the fabric’s underside—your sewing machine’s giving you clues!
Visible Loops on Fabric
Visible loops on fabric? That’s loose thread tension showing off! Looping thread ruins stitch quality and looks messy.
Here’s a quick fix:
- Check proper threading—missed guides cause chaos.
- Adjust tension dial accuracy by increasing slightly.
- Use quality thread; cheap ones mess up tension.
- Test stitch length impact; short stitches can exaggerate loops.
- Re-thread if loops persist—seriously, it works wonders!
Top Thread Showing on Underside
If you notice the top thread loose and tangling underneath, it hints at loose thread tension or sewing machine tension imbalance.
Often, it’s due to improper threading or skipping thread guides.
Check your tension adjustment dial—it might need a nudge higher.
Also, verify that thread quality matches the fabric influence, as mismatches can mess with stitch formation.
Bobbin Thread Appearing Loose
Feeling like your bobbin thread’s on vacation? Loose stitches on top signal bobbin issues! A wobbly bobbin case or thread tension slip could be the culprit.
Remember to inspect the bobbin case alignment for proper seating.
- Check bobbin case issues; clean and inspect.
- Use quality thread spool to prevent snags.
- Stabilize fabric with a stabilizer for smoother stitching.
- Peek under the needle plate for lint.
- Adjust stitch length for balance.
To ensure the best results, it is crucial to follow these steps carefully, as they will help you identify and potentially fix the thread tension problems affecting your sewing machine.
Causes of Loose Thread Tension
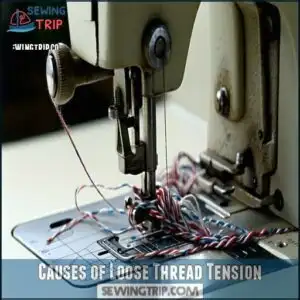
Loose thread tension can happen for a variety of reasons, from improper threading to issues with the bobbin.
It’s like a mystery unraveling—literally—but with a few quick checks, you can solve it fast.
Challenges Of Topic Exploration
Understanding sewing machine tension can feel like untangling spaghetti, especially when the bottom thread’s loose or the thread tension’s off.
There’s plenty to juggle: scope limitations, evolving knowledge, and information overload from manuals and videos.
Add in bias identification and source credibility, and it’s a checklist overload.
Tackling loose stitches often needs clear steps for proper tension adjustment, not guesswork.
Benefits Of Audience Engagement
Engaging with your sewing community turns loose thread tension problems into learning moments.
You’ll discover benefits like:
- Valuable Feedback: Fellow sewists spot tension troubleshooting tricks you may miss.
- Content Improvement: Share tips and sharpen your sewing machine tension skills.
- Brand Loyalty: Trust builds when you help others.
- Community Building: Solve sewing machine troubleshooting together.
- Increased Sales: Happy sewists recommend tools that work!
Future Impact And Trends
The future of sewing looks exciting with AI tension control and smart sewing machines making tension troubleshooting a breeze.
Automated adjustments will reduce sewing machine tension issues, while sustainable thread tech guarantees eco-friendly projects.
Predictive maintenance might even alert you before loose tension becomes a problem, it’s like having a sewing buddy that never gets tired or grumpy!
Improper Threading Techniques
If your sewing machine’s thread tension is too loose, improper threading might be the culprit.
Skipping a guide or loading the bobbin the wrong way can mess things up faster than you can say "bird’s nest.
Incorrect Spool Orientation
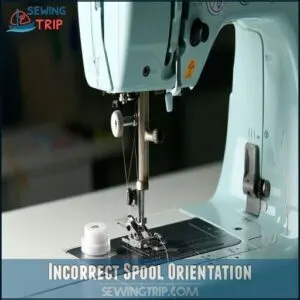
If the spool’s unwinding the wrong way, you’ll face tension trouble fast.
Horizontal spools unwind over the top; vertical spools go anticlockwise.
Try these steps:
- Check unwinding direction.
- Use a spool cap for smooth thread delivery.
- Inspect spool pin for issues.
- Remove any stickers.
- Test-stitch and adjust sewing machine tension.
Many sewers find sewing spool caps useful for consistent thread feed and to avoid sewing machine issues.
Missed Thread Guides
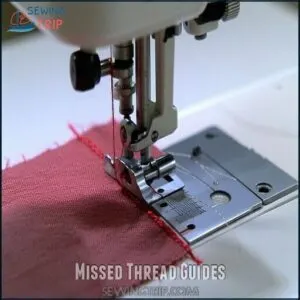
Skipping sewing machine thread guides? It’s like taking a shortcut and getting lost—your thread tension suffers, leading to loops or puckering.
Missed guides mess up the threading sequence, making rerouting thread essential. Always follow your machine’s threading path carefully.
A vital step involves using high-quality sewing needles to prevent thread fraying. Here’s a quick look:
| Issue | Cause | Fix |
|---|---|---|
| Loose thread | Skipped guides | Follow threading sequence painstakingly |
| Uneven tension | Missed thread guides | Re-thread with care |
| Poor stitch quality | Guide importance ignored | Use manual’s threading diagram |
| Snapping thread | Wrong thread path | Recheck and correct |
| Loopy stitches | Misaligned thread | Make certain thread flows smoothly |
Using the correct threading path is essential for maintaining good thread tension and preventing issues like loopy stitches or snapping thread. By following these simple steps, you can ensure your sewing projects turn out with professional quality. Remember, proper threading is key to achieving the desired stitch quality.
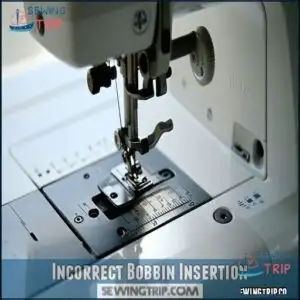
Incorrect Bobbin Insertion
If you’ve checked the thread guides but still have tension problems, the sewing machine bobbins might be the culprit.
Incorrect bobbin insertion leads to loose stitches and frustration.
Follow these tips:
- Match bobbin type to your machine.
- Verify proper bobbin direction (clockwise or anticlockwise).
- Listen for insertion clicks.
- Check bobbin case seating depth.
- Confirm bobbin thread flows smoothly.
To ensure proper sewing machine function, it is crucial to address any issues that may arise from incorrect bobbin insertion.
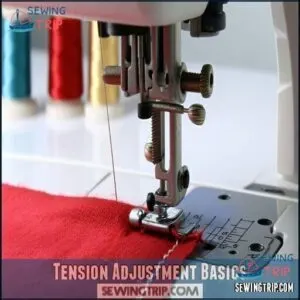
Tension Adjustment Basics
Adjusting thread tension might sound tricky, but it’s easier than you think with the right steps.
Adjusting thread tension isn’t hard—small tweaks make a big difference for smooth, even stitches every time!
By understanding how your machine’s tension dial works and making small adjustments, you’ll keep your stitches snug and tidy in no time.
Understanding Tension Dials
A sewing machine’s tension dial is your secret weapon against loose thread tension.
Those little dial markings? They show the tension range. It’s not rocket science—just tweak it slightly.
Incremental adjustments are best; think of it as turning a faucet to get just the right flow.
Material impact matters too, so match tension to your fabric’s needs, considering the material.
Default Tension Settings
Got tension problems? Start with your sewing machine’s factory settings.
Most manuals recommend tension number 4 as a solid starting point for thread tension. If you’ve been fiddling with dials, resetting tension to the default helps pinpoint loose tension issues.
Think of it as hitting "refresh" – it keeps things balanced before you tweak further, which is why resetting to the default is often a good idea to address tension problems.
Adjusting Tension in Small Increments
Once you’ve learned about default tension settings, let’s make incremental adjustments.
Turn the tension dial a small amount, like a clock’s tick, and follow up with some test stitching.
Use different thread colors to see changes clearly.
Sewing machine tension is sensitive, so document changes to track progress.
Small steps fix loose tension without overwhelming adjustments, which is a key concept to remember.
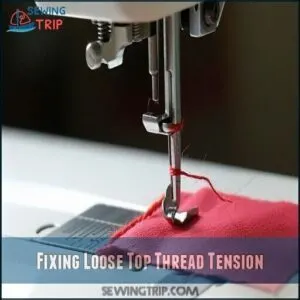
Fixing Loose Top Thread Tension
If your top thread looks loose and messy, don’t worry—it’s an easy fix.
A quick tweak to the tension dial, a re-threading check, or swapping to a better-quality thread can get your stitches looking clean and strong again.
Increasing Tension Dial Setting
Ever wonder why your thread tension feels like a tug-of-war gone wrong?
Tweak the tension dial in small increments—test stitches on scrap fabric after each change.
If the bottom thread’s loose or showing up top, gradually increase the setting.
Remember, fabric effects and thread compatibility matter.
Dial adjustments can save your project from a troubleshooting failure!
Re-threading The Machine
Sometimes, all a sewing machine needs is a good re-threading!
Follow these steps to fix tension problems and tighten up those stitches:
- Raise the presser foot to release tension.
- Rethread the upper thread in the correct threading order.
- Verify the thread path engages all guides.
- Insert the bobbin thread correctly.
- Double-check for common mistakes like missed guides.
Using Correct Thread Type
Choosing the right thread type is like picking the perfect tool for the job.
Match your thread material, weight, and fiber content to the fabric. Specialty threads, like metallic or elastic, can complicate tensions.
Stick to high thread quality—thin, cheap ones cause headaches. Always check thread compatibility to avoid loose stitches or uneven results.
Understanding the correct thread type is essential for superior sewing. Balance matters!
Bobbin Tension Adjustment
Adjusting bobbin tension might feel intimidating, but it’s easier than you think.
Just turn the small screw on the bobbin case—clockwise to tighten or counterclockwise to loosen—and test as you go!
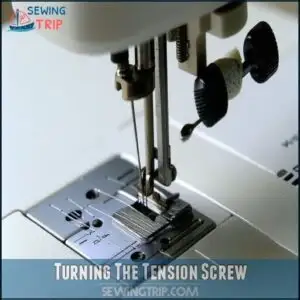
Turning The Tension Screw
If the bottom thread’s loose, it’s time to tackle the tension screw on your bobbin case.
Grab the right screwdriver—don’t underestimate the importance of perfect size! Make micro-adjustments; a tiny turn goes a long way.
Think of bobbin screw physics like tuning a guitar—small tweaks fine-tune the harmony. Turn carefully to avoid screw damage risks, and test often.
Consistent bobbin tension means smooth stitches, not frustration. Just a heads up, thread tension starts here, so don’t overdo it.
Cleaning the bobbin area can also prevent thread bunching issues. Your sewing machine tension will thank you with beautiful, balanced seams!
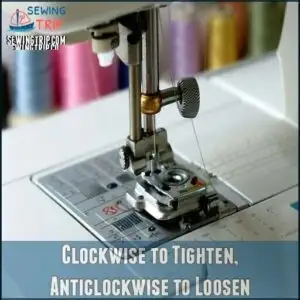
Clockwise to Tighten, Anticlockwise to Loosen
To fix bottom thread tension, remember this rule: turn the bobbin screw clockwise to tighten and anticlockwise to loosen.
Think of it as the physics of the tension spring—small adjustments, big results! Use micro-adjustments (1/8 turns at most) to keep things precise.
Test after each tweak because thread directionality and tightness are sensitive to even tiny changes. Stick with a consistent tightening method to avoid overdoing it.
If your sewing machine tension has the bottom thread loose, these careful tension adjustments will help guarantee balanced, clean stitches without stress or frustration.
Maintaining Proper Tension
Keeping your machine in top shape isn’t just about keeping it happy—it’s the secret to perfect stitches.
Regular cleaning, dusting, and an occasional checkup are all it takes to keep tension troubles away.
Regular Machine Cleaning
Keeping your sewing machine tension balanced means regular cleaning. Lint buildup loves to hide! Clear it out to keep stitches smooth.
Here’s how:
- Clean the bobbin area with a soft brush.
- Check tension disks for lint, gently wiping them.
- Use sewing-specific oil on mechanisms as per your manual.
- Stick to a yearly servicing frequency to maintain a balanced tension.
Checking for Lint and Dust
Lint buildup and dust accumulation can mess with your sewing machine’s tension disks and bobbin area, causing loose thread tension.
Check these spots often—especially if your machine’s acting up.
A quick brush or a blast of compressed air works wonders, think of it as regular sewing machine maintenance—a clean machine stitches smoothly, without the drama of loops or skipped stitches, which is the result of proper maintenance.
Servicing The Machine
Once you’ve tackled cleaning lint and the bobbin area, it’s time to show your machine more love.
Regular sewing machine maintenance keeps everything running smoothly.
Here’s your checklist:
- Oil moving parts sparingly to prevent squeaks.
- Clean tension disks for a proper stitch.
- Schedule professional service annually.
- Inspect the tension mechanism if stitches still misbehave.
Your machine deserves a spa day! Regular maintenance is key to a smoothly running machine.
Thread Weight and Needle Size
Using the right thread weight and needle size can make or break your stitches, especially when tension feels off.
If your thread’s too thick or your needle’s too small, it’s a bit like trying to thread spaghetti through a straw—frustrating and ineffective!
Matching Thread to Needle Size
Don’t underestimate the Needle Size Guide—it’s your sidekick in taming thread tension.
Match thread weight to the needle eye. A 40 wt thread needs a larger needle than a 60 wt one.
Thicker threads demand room to glide; too small a needle causes breakage, while oversized, it’s loose stitches galore.
A proper needle size guide guarantees ideal stitch formation. Consult a Thread Weight Chart to prevent chaos!
Fabric Type Compatibility
Different fabrics like Knit Fabric, Delicate Fabrics, or Heavy Fabrics need matching thread types and thicknesses for smooth stitching.
Stretch Fabrics or Layered Fabrics, for example, might pull weirdly if tension isn’t adjusted for fabric weight or fiber content.
Always test on scrap fabric first—your sewing machine doesn’t read minds, so guide it right for perfect stitches! This ensures that you achieve the desired outcome without damaging your fabric, and it’s crucial for working with delicate fabrics.
Using Correct Needle Size
Ever tried sewing denim with a needle meant for silk? It’s like hammering a nail with a spoon!
Use a Needle Size Guide to match needle type with fabric and thread. A bent needle causes skipped stitches and messes up thread tension fast.
For smooth sewing machine tension, verify fabric needle match and thread compatibility—it’s magic!
Advanced Tension Troubleshooting
When basic fixes don’t cut it, it’s time to tackle advanced troubleshooting.
Don’t worry—it’s easier than it sounds, and with a few clever tricks, you’ll have your machine stitching perfectly in no time!
Bobbin Drop Test
To check bobbin tension, try the bobbin drop test! Place the bobbin in its case, hold the thread, and gently drop it.
If it falls too fast (drop height impact), the tension spring effect is off, causing loose thread tension.
Adjust the bobbin case tension screw until it passes the test. It’s an easy, handy sewing machine trick!
Checking Tension Disks
A clogged tension disk can throw off your sewing mojo.
Gently inspect your sewing machine’s tension disks with a thin tool, like a needle, to verify they move freely.
Misaligned or dirty tension disks cause tension imbalance and messy stitches.
Regular disk maintenance avoids tension problems.
Adjust tension settings only after confirming disks aren’t the culprit during sewing machine troubleshooting.
Cleaning Clogged Tension Disks
If thread tension issues still persist, it’s time to inspect those tension disks.
Dust and lint can sneak in, causing big tension problems. Use lint removal tools or a pipe cleaner, then apply light disk lubrication for smoother function.
Cleaning frequency matters—make it regular. If nothing clicks, consider professional cleaning.
Proper sewing machine troubleshooting keeps your tension dial function first-rate!
Preventing Loose Thread Tension
You don’t need to let loose thread tension ruin your sewing projects—preventing it’s easier than you think.
With proper threading, regular tension checks, and high-quality thread, you’ll keep your stitches neat and frustration-free.
Proper Threading Techniques
Proper threading is the foundation of balanced tension. Follow the threading order, ensuring the upper thread flows smoothly through thread paths and guides.
Misplaced spool placement or bobbin loading mistakes? They’ll throw off tension fast. Rethreading works wonders—raise the presser foot to engage tension discs fully.
Adjusting tension settings helps prevent thread snapping. A well-threaded sewing machine always keeps your stitches tidy and frustration-free, which is the key to achieving proper threading and maintaining smooth thread flow.
Regular Tension Checks
Think of tension checks like a quick health check-up for your sewing machine.
Regularly testing prevents sewing machine tension problems, ensuring consistent stitching. Jot adjustments in a tension log—it’s like tracking symptoms for early detection.
Preventative maintenance isn’t glamorous, but it stops chaos later. Master these sewing machine troubleshooting tips, and thread tension woes won’t ruffle your creative flow!
Using High-Quality Thread
In regards to loose tension, cheap thread is your worst enemy.
High-quality thread guarantees better stitch consistency and fewer headaches.
Follow these quick tips:
- Choose threads with consistent thickness and strong fibers.
- Look for smooth textures to reduce breakage.
- Match thread weight and fabric compatibility.
- Avoid overly elastic threads unless your project needs stretch.
Frequently Asked Questions (FAQs)
How would you know if the tension was too loose?
Like a lazy hug, loose tension leaves loops or visible top thread on the fabric’s underside.
Stitches might bunch up or look wobbly.
Test scraps often—it’s the easiest way to spot sneaky tension issues.
How do you tighten a loose thread?
To tighten loose thread tension, crank the tension dial slightly higher—just a notch or two.
Test on scrap fabric first, adjusting incrementally.
Don’t overdo it, though; a stitch tug-of-war isn’t the goal!
How to fix your thread looping under the fabric?
Loose thread looping like a spiderweb under your fabric?
Lift the presser foot, rethread the machine carefully, and make certain the top thread passes through all guides.
Adjust the tension dial slowly, testing stitches frequently.
How does humidity affect thread tension stability?
Humidity messes with thread tension because moisture swells fibers, making threads stickier or tighter.
Your stitches might go wonky if the air’s too damp or dry.
Keep your machine area climate-controlled for smoother sewing.
Can thread type impact machine tension settings?
Thread type absolutely impacts tension.
Thicker threads need looser settings, while delicate ones might demand a little extra tension.
Different materials, like stretchy or metallic threads, can act finicky, so always test your setup first, considering the impact of thread type on the overall outcome.
Why does tension change with fabric direction?
Isn’t it funny how fabric seems to have a mind of its own?
The direction of fabric grain affects how threads grip and stretch, shifting tension balance.
It’s like sewing has mood swings!
Are different brands of thread tension-compatible?
Not all thread brands play nice with every machine.
Some might create uneven tension due to their finish, thickness, or twist.
Stick to quality threads and test first to verify your stitches stay balanced!
What role does bobbin winding tightness play?
Don’t underestimate how tightly you wind the bobbin—it’s like wrapping a gift too loosely.
Uneven or loose winding makes stitches inconsistent, causes tangles, and messes with tension.
Aim for smooth, even, snug winding every time!
Conclusion
Fixing loose thread tension doesn’t have to feel like unraveling a mystery novel.
Start small—check your threading, tighten that tension dial in tiny steps, and clean out dust that loves to hide in your machine.
Don’t skip over matching your thread, needle, and fabric; it’s a recipe for smoother sewing.
Whether it’s tweaking bobbin tension or re-threading entirely, a little patience goes a long way.
Remember, tackling thread tension is just part of mastering your craft!
- https://www.justanswer.com/small-appliance/nw07l-bottom-thread-machine-loose.html
- https://www.thesewingdirectory.co.uk/thread-tension/
- https://www.fortheloveofthread.com/blog/solving-tension-issues-on-your-sewing-machine
- https://www.tillyandthebuttons.com/2020/03/thread-tension-troubleshooting.html
- https://leatherworker.net/forum/topic/97051-tight-thread-tension-on-top-loose-on-the-bottom/

