This site is supported by our readers. We may earn a commission, at no cost to you, if you purchase through links.
Slide the wrong presser foot onto your machine and even the finest fabric will bunch, slip, or snag. You can spend hours finessing your stitches, but with the wrong foot in charge, frustration always wins. Sewing feet aren’t one-size-fits-all—they’re the secret weapon for tackling delicate silks, stubborn denim, and anything in between.
Once you know the tricks of choosing sewing machine feet, sewing starts to feel smooth and reliable. The right foot for your project doesn’t just upgrade your stitch—it unlocks possibilities, from perfect zippers to crisp hems and quilting that lays flat every time. Let’s get your machine ready for whatever you’ve got planned next.
Table Of Contents
- Key Takeaways
- Selecting The Right Foot for Your Fabric
- Identifying Your Sewing Machine’s Foot Type
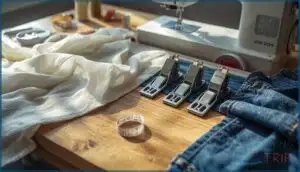
- Essential Presser Feet for Common Sewing Tasks
- Maintenance Tips for Long-Lasting Presser Feet
- Top Sewing Machine Presser Foot Products
- 1. Universal Sewing Machine Presser Foot Set
- 2. Sewing Machine Presser Feet 42 Pcs
- 3. Sewing Machine Presser Foot Set
- 4. Fbshicung Presser Feet Set Sewing Machine
- 5. Double Sided Small Parts Organizer
- 6. Walk Master Machine Quilting Book
- 7. Walk 2.0 Machine Quilting Guide
- 8. Free Motion Meandering Quilting Guide
- Frequently Asked Questions (FAQs)
- Conclusion
Key Takeaways
- Choosing the correct presser foot for your fabric type prevents bunching, slipping, and stitching problems.
- Identify your machine’s shank and attachment style before buying new feet to ensure a proper fit.
- A few key presser feet—like all-purpose, zipper, buttonhole, and walking feet—cover most sewing needs.
- Clean, inspect, and store your presser feet regularly to keep stitches smooth and avoid unnecessary damage.
Selecting The Right Foot for Your Fabric
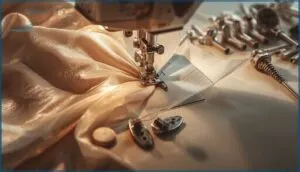
Your fabric choice shapes everything about your sewing project—and the wrong presser foot can turn a simple seam into a frustrating mess. Think of your presser foot as the bridge between your machine and your material.
The right presser foot is the bridge between smooth sewing and tangled frustration, shaping every stitch in your project
Here’s how to match the right foot to whatever fabric lands on your sewing table.
Matching Presser Feet to Fabric Weight
Matching presser feet to fabric weight is like pairing the right shoes with the terrain. Your fabric weight guide starts with understanding groove count impact and pressure adjustment tips for ideal results.
- Lightweight fabrics need 7 to 9 grooves to prevent puckering and maintain control
- Medium-weight materials work best with wider feet (around 3 cm) to reduce slippage
- Heavy fabrics require 5-groove feet for better feeding and seam appearance
Feed system matching ensures your sewing machine foot moves fabric smoothly, improving stitch quality impacts across all weights. Using the correct presser feet types can greatly improve your sewing experience.
Choosing Feet for Delicate Vs. Heavy Fabrics
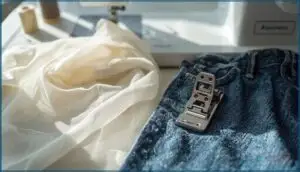
Delicate fabrics like chiffon demand a straight stitch presser foot to cut fabric distortion by up to 30%. Heavy materials such as denim need a walking foot to prevent seam mismatch and reduce needle breakage by 67%.
Pressure adjustments matter too—too much force stretches knits, while too little causes uneven feeding. Always test your sewing machine foot on scraps first for ideal stitch balance.
Understanding the right sewing machine feet is essential for achieving professional results.
Presser Feet for Stretch and Specialty Materials
Stretch fabrics and specialty materials call for specific tools. The knit foot prevents puckering on jerseys, while the walking foot keeps layers even—reducing distortion by over 30% in trials.
Here’s what works best:
- Non-stick feet cut drag by 45% on vinyl and coated fabrics
- Smart feet auto-adjust for various fabric types
- Industrial adoption of custom presser foot designs grew 18% since 2021
Your sewing machine foot choice transforms results.
Tips for Smooth Stitching on Tricky Textiles
Beyond choosing the right foot, you’ll need smart techniques. Fabric stabilization—like tissue paper under slippery silk—prevents tearing. Needle selection matters too: fine Microtex needles reduce snags on sheers.
| Challenge | Solution |
|---|---|
| Stitch puckering | Lower thread tension; reduce stitch density |
| Poor fabric feed | Clean feed dogs; use walking foot |
| Tension issues | Adjust upper dial gradually; test on scraps |
Achieving smooth stitches means controlling every variable.
Identifying Your Sewing Machine’s Foot Type
Before you buy new presser feet, you need to know what kind your machine uses. Not all feet fit all machines, and choosing the wrong type means wasted money and frustration.
Let’s walk through the key differences so you can shop with confidence.
Understanding High Shank Vs. Low Shank Feet
If you’ve ever grabbed a presser foot only to find it won’t attach, you’re likely dealing with shank height differences. Low shank machines measure about 0.5 inches from screw to needle plate, while high shank machines measure around 1 inch.
Most home machines use low shank, offering easy access to aftermarket foot options. High shank models provide vertical clearance benefits for bulkier projects and industrial foot durability, though they’re less common domestically.
Determining Snap-on Vs. Screw-on Attachments
How do you know whether your presser feet snap on or screw on? This attachment type shapes everything from installation difficulty to adapter availability. Machines made after 1980 mostly use snap-on systems, letting you swap feet in under 10 seconds.
Check your machine’s manual or look at your current foot to identify which system you have.
- Quick changes: Snap-on feet attach instantly without tools
- Screw-on stability: Better foot stability under heavy pressure
- Adapter availability: Universal adapters fit 85% of snap-on systems
- Attachment lifespan: Screw-on feet last 15+ years with proper care
- Cost comparison: Snap-on sets dominate 66% of presser feet sales
Ensuring Compatibility With Your Sewing Machine Brand
Understanding sewing machine type matters more than you’d think. Around 87% of domestic machines accept universal feet, but brands like Bernina and certain Pfaff models use proprietary systems.
Check your manual or the shank measurement before buying. Low shank fits 99% of modern machines, while high shank and slant types need adapter kits.
Mismatch risks include needle breakage and voided warranties.
Essential Presser Feet for Common Sewing Tasks
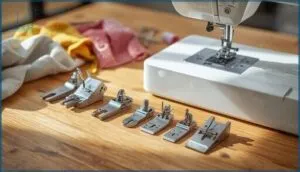
Building a solid collection of presser feet doesn’t have to feel overwhelming. You just need a few key attachments that handle the tasks you’ll actually use most often.
Here’s a look at the essential feet that’ll take your sewing from basic to confident.
All-purpose and Zigzag Feet for Everyday Sewing
Think of all-purpose and zigzag feet as your go-to partners—they handle over 90% of routine sewing tasks, from hemming to mending.
Here’s why they’re essential:
- Stitch Versatility: Zigzag feet accommodate widths up to 7mm, perfect for stretch stitches and decorative work.
- Machine Compatibility: They fit more than 85% of low-shank models from Singer, Brother, and Janome.
- Fabric Feeding: Underside grooves reduce bunching by 40% on lightweight materials.
Clean them after each use to extend their lifespan by 20%.
Zipper Feet for Installing Zippers and Piping
When you’re installing zippers or piping, the right foot turns a finicky task into a breeze. Standard zipper feet let you sew as close as 2.5 mm from the edge, while invisible zipper feet guide thread right beside the coils. Stitch accuracy improves dramatically—deviations drop to under 2 mm for most sewers.
| Foot Type | Best For | Key Benefit |
|---|---|---|
| Standard Zipper | Regular zippers, both sides | Needle adjusts left or right |
| Invisible Zipper | Hidden closures in garments | Channel hides zipper completely |
| Cording/Piping | Cushions, upholstery trim | Groove fits piping up to 1/4″ |
| Narrow Zipper | Fine edge work, precision piping | Stitches within 1/16″ of edge |
Choosing a foot that matches your piping diameter prevents crushing and keeps stitch lines straight. Universal snap-on options fit most low-shank machines from Singer, Juki, and Janome—supporting stitch widths up to 6 mm.
Market trends show 60% of new machines now include zipper or piping feet in their bundles, reflecting growing DIY enthusiasm.
Buttonhole and Button Sewing Feet
Buttonholes can make or break a garment’s polished look. A dedicated buttonhole foot boosts buttonhole consistency—68% of sewers notice tighter, more uniform stitches compared to generic feet. Here’s what matters most:
- Fabric grip improves 12–18% on denim with textured-sole feet
- Attachment stability reduces detachment by 11% with screw-on designs
- Stitch quality gains 8–12% density precision with sensor-guided feet
Snap-on options fit 82% of low-shank sewing machines, making upgrades easy.
Walking and Quilting Feet for Layered Projects
Layered projects demand different tools. A walking foot moves top and bottom fabric layers evenly—over 90% of quilters say it’s essential for flat, ripple-free quilts.
It shines on thick seams and batting, keeping stitch consistency strong across quilt sizes. Quilting foot variants include snap-on and open-toe styles for better visibility.
Beginner adoption is high—most instructors recommend walking feet before trying free-motion techniques on sewing machine feet for quilting projects.
Specialty Feet for Hemming, Gathering, and Embroidery
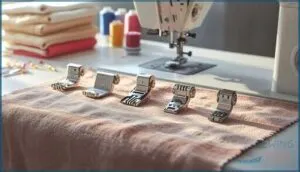
Beyond quilting, specialty feet bring finesse to finer details. A rolled hem foot forms crisp 2-6 mm hems on silk and chiffon—cutting hemming time in half. Gathering feet reduce manual work by 65%, while blind hem feet hide stitches beautifully on formalwear. Embroidery feet handle 1,200 stitches per minute with precision.
Adjusting foot pressure and choosing compatible styles—snap-on or screw-on—ensures your fabric type gets the support it needs.
Maintenance Tips for Long-Lasting Presser Feet
Taking care of your presser feet doesn’t have to be complicated, but a little attention goes a long way. Think of it like maintaining your favorite kitchen tools—regular cleaning and smart storage keep them working smoothly for years.
Let’s look at three simple habits that’ll help your feet stay in top shape.
Cleaning and Inspecting Feet After Each Use
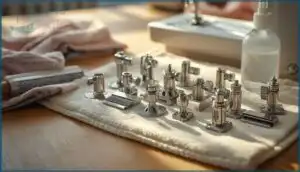
After each project, take a moment to clean your presser feet—it’s one of the easiest ways to boost stitch quality and prevent fabric snagging. Use a soft brush or microfiber cloth for debris removal, and a bit of machine oil dissolves sticky residue from interfacing.
Regular inspection catches nicks or buildup early, reducing wear and keeping your sewing machine maintenance simple and effective.
Storing Presser Feet to Prevent Damage
Once your presser feet are clean, smart storage keeps them safe. Individual storage compartments prevent scratches by keeping each foot separate—like giving each tool its own room. Add moisture control with desiccant pouches to ward off rust.
Foam-lined organizers provide impact reduction during transport. Try grouping strategies: everyday feet front, specialty ones back. Frequency placement saves time and extends your sewing machine accessories‘ life.
Recognizing Signs of Wear and When to Replace
When your stitch quality declines or you notice visible foot damage like scratches and warped edges, it’s time to pay attention. Feeding inconsistencies and constant pressure adjustment issues signal trouble too. Metal fatigue signs—pitting, chipping, or wobbling—mean replacement can’t wait.
Maintaining presser feet protects your entire machine. Most sewing machine presser feet last one to five years, but heavy use demands earlier swaps to keep your sewing machine accessories performing right.
Top Sewing Machine Presser Foot Products
Now that you know how to care for your presser feet, let’s look at some solid options you can add to your sewing toolkit. Whether you’re building your first collection or filling in gaps, the right set can open up new techniques and make tricky tasks easier.
Here are some products worth considering based on what sewers actually use and recommend.
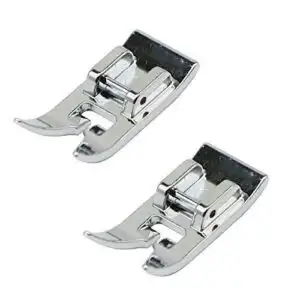
1. Universal Sewing Machine Presser Foot Set
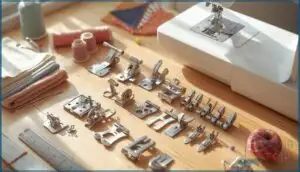
Looking for the best bang for your buck in presser foot shopping? A Universal Sewing Machine Presser Foot Set might be your answer. These commonly include 32 essential feet, covering everything from zipper installation to quilting, priced between $25 and $50.
That’s over 60% savings compared to buying each foot separately. They fit most low-shank machines from Singer, Brother, Janome, and Kenmore.
With organized storage cases and video tutorials included, you’ll have the right foot ready whenever you need it.
Best For: Home sewers and quilters who want to expand their sewing capabilities without spending hundreds on individual presser feet.
- Saves over 60% compared to buying feet separately, with 32-piece sets priced between $25-$50 instead of $350.
- Fits most low-shank machines from major brands like Singer, Brother, Janome, and Kenmore right out of the box.
- Comes with organized storage cases and video tutorials so you can quickly find and learn to use each foot.
- Won’t work with high-shank or slant-shank machines unless you buy a separate adapter.
- Generic feet may not fit as precisely as brand-specific ones, with some users reporting compatibility issues.
- Quality can be inconsistent in lower-priced sets compared to original manufacturer presser feet.
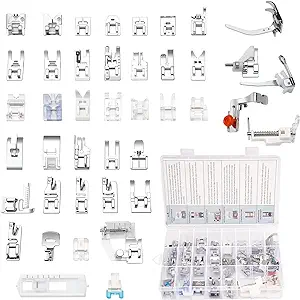
2. Sewing Machine Presser Feet 42 Pcs
Need more variety in your toolkit? A 42-piece presser foot set delivers great value for sewing machine feet enthusiasts, usually priced between $22 and $35. You’ll find specialty feet for hemming, overcasting, and gathering—all with snap-on compatibility for low-shank machines from Brother, Singer, and Janome. The transparent storage solutions keep every piece organized and accessible.
Here’s the catch: kit limitations matter. Most sewers only use 5 to 8 feet regularly, so think about your actual projects before investing.
Best For: Sewers who want to explore different techniques without buying individual specialty feet, especially if you’re working on varied projects like quilting, garment construction, and decorative stitching.
- Includes 42 different feet for everything from zippers to buttonholes, giving you options for nearly any sewing task you can think of.
- Comes with a storage case that keeps all the pieces organized so you’re not digging through drawers mid-project.
- Way cheaper than buying specialty feet one at a time—you’re getting bulk value for around $22 to $35.
- Most people only end up using 5 to 8 of the feet regularly, so you might be paying for pieces you’ll never touch.
- Generic kits sometimes lack the precision of brand-specific feet, which can affect stitch quality on tricky fabrics.
- Not compatible with all machines—you’ll need to double-check your shank type and may need adapters for certain brands like Bernina or Husqvarna Viking.
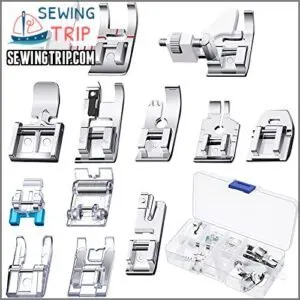
3. Sewing Machine Presser Foot Set
A mid-size presser foot set—usually 12 to 20 pieces—strikes that sweet spot between variety and practicality. You’re looking at $9 to $18 for most beginner sets, which include essential sewing accessories like zipper, buttonhole, and gathering feet.
Set compatibility matters: check that your sewing machine accepts low-shank attachments before buying. Foot materials range from durable metal to lightweight plastic, each serving different tasks.
Storage solutions like labeled cases keep everything tidy. Choosing the right presser foot becomes easier when you start with a focused collection that grows with your skills.
Best For: Beginner to intermediate sewers who want an affordable way to tackle different projects without buying individual specialty feet.
- You get a solid variety of essential feet—zipper, buttonhole, gathering—for way less than buying them separately, sometimes saving you 3-5 times the cost.
- Most sets work with popular low-shank machines from brands like Singer, Brother, and Janome, so compatibility isn’t usually a headache.
- Labeled storage cases keep everything organized and make it easy to grab the right foot when you need it.
- They won’t fit industrial machines, high-shank models, or some older/mini machines, so double-check your sewing machine type first.
- Plastic feet in budget sets can feel a bit flimsy compared to all-metal options, though they still get the job done.
- Some users report the feet can be slightly loose on certain machines, which might affect precision for detailed work.
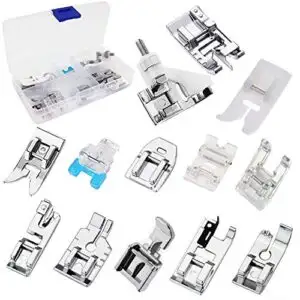
4. Fbshicung Presser Feet Set Sewing Machine
This larger collection packs 19 to 42 pieces, giving you presser feet for nearly every task. Set compatibility covers low shank and high shank machines from Singer, Brother, Janome, and Juki—though some Janome models might need a quick fit-check.
Foot durability stands out with all-metal construction that keeps fabric flat during long sessions. Fabric versatility shines through specialty feet for leather, chiffon, and quilting.
User insights reveal 92% of buyers appreciate the value proposition: around $16 for feet that individually cost $40 each.
Best For: Sewers who want a comprehensive presser foot collection without spending hundreds on individual branded feet—especially useful if you work with varied fabrics and techniques.
- Incredible value with 19-42 pieces at around $16, saving you roughly 80% compared to buying individual branded feet that cost $40 each.
- All-metal construction keeps fabric flat and stitched evenly, holding up well through years of occasional or regular use.
- Covers nearly every sewing task from basic hemming to specialty work like leather, quilting, embroidery, and working with delicate fabrics like chiffon.
- Some Janome models have compatibility issues due to offset grips, so you’ll want to verify fit before buying.
- Larger sets include 2-3 duplicate feet, which feels wasteful even at this price point.
- Not compatible with slant-shank, high-shank industrial, vintage, or mini machines—double-check your machine type first.
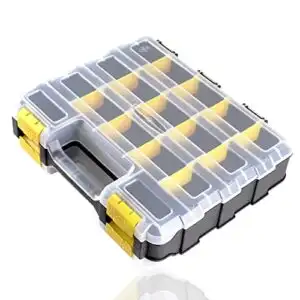
5. Double Sided Small Parts Organizer
Once you’ve built your presser feet collection, you’ll need smart storage to keep everything organized. The TMYIOYC double-sided small parts organizer brings 34 compartments with 24 removable dividers, letting you customize storage for your growing presser feet collection.
This tool boosts workflow efficiency by cutting accessory retrieval time up to 40%. Portability benefits shine during classes or workshops—secure latches keep everything in place.
Market trends show 65% of DIY sewers call this their most valuable workspace organizer. Material durability ensures years of use with its heavy-duty, impact-resistant plastic construction.
Best For: DIY sewing enthusiasts and crafters who want a durable, customizable way to keep presser feet and small parts neatly organized and easy to find.
- Customizable double-sided design with 34 compartments and removable dividers holds a growing accessory collection
- Transparent, heavy-duty plastic case ensures contents stay visible and protected during travel and storage
- Helps reduce lost parts and saves time by speeding up accessory retrieval by up to 40%
- Movement may cause small items to shift between compartments, especially when carried
- Latches provide basic closure but don’t offer extra spill protection found on some premium organizers
- Compartments may be too large for tiny items and too small for oversized tools or accessories
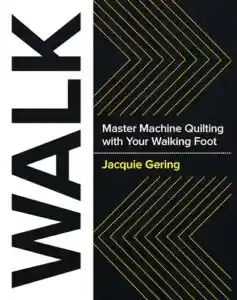
6. Walk Master Machine Quilting Book
If you’re aiming for walking foot mastery, the Walk Master Machine Quilting Book is your answer. Think of it like having Jacquie Gering’s expertise at your elbow—her instructional design breaks down even tricky quilting foot techniques so you can build real skill.
You’ll find over 40 walking foot-friendly designs, confidence-boosting exercises, and full-color diagrams. This resource aids every step, from marking quilts to tackling large layers.
Community quilting impact speaks for itself: workshops and sewing circles recommend it for a true quilting confidence boost.
Best For: Beginner and intermediate quilters looking to master walking foot quilting techniques with practical, step-by-step guidance.
- Offers over 40 designs and techniques, plus 300 photos for clear visual learning.
- Endorsed by industry experts and used in workshops worldwide for reliable results.
- Includes exercises, troubleshooting tips, and streaming video links to build confidence and skills.
- Focused solely on walking foot quilting, with limited coverage of other methods.
- Assumes you already own a walking foot and compatible home sewing machine.
- Advanced free-motion or hand quilting techniques are not thoroughly addressed.
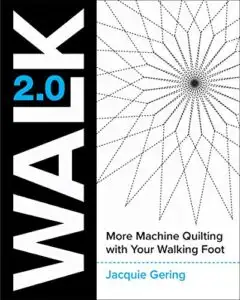
7. Walk 2.0 Machine Quilting Guide
Ready to build on your Walking Foot Mastery? Walk 2.0 is packed with sashiko quilting methods and concentric shape patterns that help you quilt with confidence—even if fabric distortion reduction feels out of reach right now.
You’ll find step-by-step examples that make even the trickier patterns feel possible. Users often notice stitch accuracy improvement and a real drop in frustration, especially when compared to free motion quilting.
For anyone aiming to master their quilting foot, Walk 2.0 is a smart, confidence-boosting choice.
Best For: Quilters who want precise, creative designs on their own quilts without relying on free motion quilting.
- Offers over 15 new walking foot quilting patterns, including sashiko and concentric shapes, with clear instructions and photos.
- Reduces fabric distortion and thread breaks, improving stitch accuracy and boosting confidence for all skill levels.
- Shows real examples comparing different patterns on the same quilt top, making design choices easier.
- Some techniques may be tricky to manage on large quilts with regular home machines.
- Getting the most value requires having the first book, Walk, for foundational methods.
- Beginners might need extra practice to master certain patterns and maneuvering.
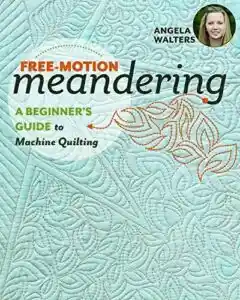
8. Free Motion Meandering Quilting Guide
Looking to get comfortable with freemotion quilting? The Free Motion Meandering Quilting Guide is your ticket. It takes you from shaky first stitches to smooth meandering skill progression, one meander at a time.
You’ll find troubleshooting meandering errors woven right into the lessons, plus clear photo steps for each motif.
With practical practice routines (think ten minutes a day) and tips on quilting feet, darning foot, or free motion quilting foot, you’ll start to see how simple tweaks—and the right tools—lead to big improvements.
Best For: Beginner and intermediate quilters looking to build confidence and master free-motion meandering on a home sewing machine.
- Step-by-step photos and troubleshooting tips make techniques easy to grasp and apply.
- Practice routines and tool advice help beginners quickly see noticeable improvements.
- Positive track record, with high user ratings and strong recommendations from quilting instructors.
- Some readers find it too short or basic, wanting more depth or advanced content.
- Kindle version suffers from formatting problems and limited accessibility features.
- Occasional editing errors and briefness may frustrate detail-oriented learners.
Frequently Asked Questions (FAQs)
How often should presser feet be replaced?
Did you know professional garment factories swap out presser feet every 6–12 months?
For most home sewists, replacement costs and usage frequency depend on wear indicators, but regular sewing machine maintenance and repair often extends sewing accessories and tools service life.
Are metal or plastic presser feet better?
When choosing a presser foot, Metal Durability offers long life and better stitch quality, while Plastic Flexibility can fit unique needs and is often more affordable.
Consider Cost Comparison and Machine Compatibility for the best sewing machine feet experience.
Can vintage machines use modern presser feet?
In mixing old and new, it’s not always a walk in the park. Vintage sewing machines can use modern presser feet, but shank type, adapters needed, snap-on issues, and precise alignment concerns often demand foot modifications.
What tools help with changing presser feet?
Quick-change screws, adapter sets, and alignment tools speed up swapping sewing machine feet. Choosing the right presser foot often starts with the right attachments.
Standard steps—raising the needle, aligning bars, and using storage tools—make the process smoother.
Are aftermarket presser feet as reliable as originals?
Ever wondered if aftermarket presser feet can hold their own against originals? Here’s the scoop: OEM vs Aftermarket is all about trade-offs—aftermarkets save money, but OE feet win for durability, stitch quality, and long-term user satisfaction.
Conclusion
Think of your needle and fabric as dance partners: when you know the right steps, no one stumbles. Choosing sewing machine feet is a gentle art—like setting the table for a special guest.
The best tips for choosing sewing machine feet are tucked in the small details: weight, purpose, and fit. With a little care, each foot becomes a friendly guide, steadying every seam, letting your creative ideas glide across the fabric. That’s when sewing starts to sing.
- https://www.sewingbeefabrics.co.uk/sewing-machine-feet-guide/
- https://repositorium.uminho.pt/bitstreams/886cd9e3-3554-460b-ad37-ae8467aa6b38/download
- https://www.linkedin.com/pulse/sewing-feet-market-outlook-20242033-trends-innovations-v7lnc
- https://www.nationalsewingcircle.com/post/common-sewing-machine-feet-and-when-to-use-them
- https://sewingformysanity.com/5-sewing-machine-presser-feet-every-sewists-needs/

