This site is supported by our readers. We may earn a commission, at no cost to you, if you purchase through links.
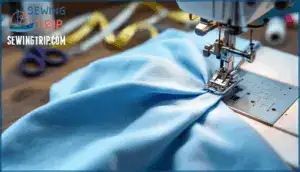
The good news? Smooth, professional seams aren’t reserved for expert seamstresses with decades of experience. They’re the result of understanding key techniques and knowing which tools actually make a difference.
Whether you’re wrestling with slippery silk or battling thick denim, mastering these fundamentals will transform your stitching from frustrating to impeccable.
Table Of Contents
Key Takeaways
- Smooth seams depend on three fundamentals: balanced thread tension (4.0-5.0 setting), matching your needle size to fabric weight, and adjusting presser foot pressure—getting these right prevents up to 70% of common seam problems like puckering and skipped stitches.
- An edgeguide presser foot and specialized feet like walking feet dramatically improve seam quality by maintaining alignment within 1mm and reducing fabric slippage by up to 95%, especially on tricky materials like silk or thick denim.
- Proper fabric preparation through pre-washing (which prevents 2-5% shrinkage), ironing while slightly damp, and cutting on a flat surface reduces fabric distortion by 30% and eliminates most post-project surprises.
- Professional results come from consistent stitch speed (starting at 500-1,000 stitches per minute), pressing seams as you work, and regular machine maintenance like cleaning the bobbin case weekly and replacing needles every 8 hours of sewing.
Essential Tools for Smooth Seams
Getting smooth seams starts with having the right tools in your kit. You don’t need every gadget out there, but a few key pieces make a real difference in how your seams turn out.
Let’s look at the essentials that’ll help you sew straighter, more consistent seams every time.
Edgeguide Presser Foot for Straight Seams
Think of the edgeguide presser foot as your guardrail for achieving perfect seams. This specialized presser foot features a built-in guide plate that keeps your fabric edge aligned, ensuring straight stitching every time.
Here’s what makes it essential for seam consistency:
- Precision control: Maintains alignment within 1 mm over a full meter of stitching
- Fabric handling flexibility: Works beautifully on everything from slippery silk to thick denim
- Industrial usage proven: Reduces rework time by 20-25% in professional settings
These feet, also known as compensating edge guides, are available in various widths. Pair it with proper foot calibration and regular maintenance tips like cleaning lint from the guide channel to keep your sewing machine delivering impeccable results.
Choosing The Right Sewing Machine Feet
While the edgeguide presser foot excels at straight seams, you’ll need a broader collection to tackle different projects. Your sewing machine likely came with a universal foot, but specialized options dramatically improve seam quality.
A walking foot prevents fabric slippage by up to 95% on thick or stretchy materials, while a Teflon foot reduces drag by 70% on vinyl or leather. Zipper feet allow stitch precision within 2-3 mm of closures.
Most modern machines use snap-on connectors for easy foot compatibility, and adjusting presser foot pressure helps you handle fabrics from delicate chiffon to heavy denim without puckering. Insufficient pressure can cause uneven stitch length and wandering seams.
Using Seam Gauges for Accurate Allowances
Accurate seam allowances depend on consistent measurement tools. Seam gauges commonly measure from 1/8 inch to 1 1/2 inches, covering most projects. Magnetic gauges maintain accuracy within 0.5 mm on your needle plate, while digital accuracy tools reduce cumulative errors by 22% compared to analog versions.
Quilters use 1/4 inch allowances; garment makers need 5/8 inch for adjustments. Test gauge calibration before projects to prevent deviations beyond 0.25 mm.
For gauge maintenance, clean metal tools regularly and store them in protective sleeves to extend lifespan by 50%.
Importance of Quality Needles and Threads
Your tools matter more than you might think. High-quality thread material improves stitch quality by up to 30% over cheaper options, while proper needle selection prevents breakage and skipped stitches. Match needle size to fabric weight—polyester threads boost seam strength by 25% and cut machine wear by 30%.
Premium threads reduce lint buildup, lowering maintenance by 20%. Get thread tension right, and you’ll see stronger seams and smoother fabric handling every time.
Preparing Fabric for Flawless Stitching
Before your needle ever touches fabric, you need to set yourself up for success. The right prep work makes the difference between a seam that holds up beautifully and one that causes frustration.
Let’s walk through four essential preparation steps that’ll transform your sewing results.
Pre-Washing and Ironing Techniques
Pre-washing your fabric is like insurance—it prevents unwelcome surprises after you’ve finished sewing. Cotton shrinks 2–3% and linen up to 5% on the first wash, which can throw off your entire project.
Here’s your fabric preparation checklist:
- Wash in warm water to remove residue and trigger shrinkage before cutting
- Use gentle cycles to reduce fiber strain by 25%
- Tumble dry on low heat for an extra 1–2% pre-shrinkage
- Press with a warm iron at appropriate temperatures (cotton needs 200–230°C)
- Iron slightly damp to cut pressing time and improve alignment by 15%
Proper fabric handling and care eliminates up to 90% of surface chemicals that cause skipped stitches.
Marking and Pinning for Seam Accuracy
With proper marking tools, you’ll turn pattern lines into accurate seam lines that guide your stitch accuracy. Start by choosing the right marking method for your fabric—white carbon transfer paper works beautifully on delicate materials, while chalk pens handle heavier textiles like denim.
Place pins perpendicular to your seam alignment every 2 inches to prevent fabric shifting during sewing. This simple pinning and basting approach keeps your layers stable and delivers even seams every time.
Cutting Fabric on a Flat Surface
Before you even thread your needle, you need a rock-solid foundation for fabric handling—and that starts with your cutting surface. A completely flat table reduces fabric distortion by up to 30%, keeping your grainlines true and your seam allowances consistent.
Use a self-healing mat for surface stability and improved tool performance with rotary cutters or fabric scissors. Flat cutting also boosts fabric yield, cutting waste by 10% to 15% while preserving grainline precision.
Ergonomic cutting height prevents strain and gives you better control during fabric preparation techniques—essential for design and pattern considerations that follow.
Using Stay Stitching and Basting
Stay stitching acts like insurance for your curved edges—keeping necklines, armholes, and bias cuts from stretching out of shape before you even start sewing. Stitch 1/8 inch from your seam line right after cutting for bias control and curve stabilization.
Hand basting stitches create temporary seams that hold layers perfectly aligned, giving you consistent seams and smooth seams every time. These sewing techniques boost seam alignment and workflow efficiency, preventing costly fixes later.
Preventing and Fixing Seam Puckering
Puckering is one of the most frustrating seam problems you’ll face, but it’s also one of the most fixable. The good news? Most puckering comes down to a few adjustments you can make right now.
Let’s walk through the key fixes that’ll have your seams lying flat and looking professional.
Adjusting Thread Tension Settings
Thread tension is like the secret handshake between your machine’s upper and lower threads—get it right, and your seams lie flat and smooth. Understanding tension settings helps you troubleshoot puckering before it ruins your project.
- Start with your dial between 4.0 and 5.0 for most fabrics, then make small adjustments—just one-quarter turn at a time
- Test seams on scrap fabric using the same materials, watching for thread loops or puckering that signal incorrect tension
- Check bobbin tension by suspending the case—it should drop slightly then stop, showing proper resistance
Tension control depends on fabric elasticity and thread types. Polyester needs tighter settings than cotton, while thicker threads require looser adjustments. Always re-thread completely before tension setting adjustments, and clean those tension discs regularly to prevent lint from causing problems.
Selecting The Right Needle and Foot
Your needle choice and presser foot pairing determine whether your seams sing or struggle—mismatched combinations cause up to 35% more skipped stitches. Fabric compatibility starts with matching needle diameter to fabric weight, from fine 60/8 for silk to heavy 110/18 for denim.
| Fabric Type | Needle Size | Recommended Presser Foot |
|---|---|---|
| Lightweight (silk, chiffon) | 60/8 to 70/10 | Standard or roller foot |
| Medium (cotton, linen) | 80/12 to 90/14 | Universal or walking foot |
| Heavyweight (denim, canvas) | 100/16 to 110/18 | Jeans or non-stick foot |
| Knits (jersey, spandex) | 75/11 ball point | Walking foot or stretch foot |
| Leather (genuine) | 90/14 to 100/16 leather | Roller or Teflon foot |
Thread matching matters too—pair size 70-80 needles with standard polyester for balanced tension. Specialty feet like walking foot improve layer alignment by 35%, while maintenance matters: replace needles every 8 hours to prevent fabric snagging and keep presser foot grooves clean.
Managing Fabric Feed and Pressure
Your machine’s fabric feed system works like a tiny conveyor belt—when foot pressure and feed dog height aren’t balanced, even perfect needles won’t prevent puckering. Pressure imbalance causes fabric to shift or compress, creating uneven stitches.
Lightweight fabrics need gentler presser foot pressure to prevent distortion, while heavyweight materials require firmer control for proper fabric flow. Manual adjustment is simple: dial down for silk and chiffon, dial up for denim and canvas. A walking foot adds differential feed control for tricky layers.
Re-threading and Bobbin Troubleshooting
Even with pressure dialed in, threading path errors and bobbin winding issues cause up to 70% of tension problems. Start by lifting the presser foot and re-threading completely—this opens the tension discs properly.
Check your bobbin: uneven winding or overfilled spools create irregular tension that mimics puckering. Clean the bobbin case monthly with compressed air to remove lint buildup, and verify your bobbin thread unwinds counterclockwise for proper tension balancing acts.
This preventive maintenance catches faults before they wreck your seams.
Ironing Out Minor Puckering
When troubleshooting seam puckering, steam application at 212°F relaxes cotton fibers and reduces puckering by up to 80%. For delicate fabrics, use pressing cloths for temperature control, and press with an up-and-down motion rather than gliding.
A warm iron with 5–10 seconds of firm pressure per section encourages fiber relaxation. For stubborn areas, try a clapper tool after steam pressing—it boosts fabric flatness by 40% and gives you that professional finish.
Sewing Techniques for Perfect Seams
Getting your seams to look professional isn’t just about avoiding problems—it’s about using the right techniques as you sew. Once you’ve got your tension and fabric prep sorted, the way you actually stitch makes all the difference.
Here are five techniques that’ll help you create seams that look clean and stay strong.
Maintaining Consistent Stitch Speed
Think of your foot pedal as the conductor of your sewing orchestra—it sets the tempo for everything. Foot pedal sensitivity and speed consistency directly affect your seam quality, while proper tension adjustment and feed adjustment work together to prevent puckering.
Here’s how to master steady speed techniques:
- Practice gradual pressure on the pedal – Start at 500–1,000 stitches per minute to build control before increasing speed
- Reduce speed by 30–40% for specialty threads – Metallic or delicate threads need slower speeds to prevent breakage
- Match fabric speed selection to your material – Denim works with 1,800–2,200 SPM well, while lightweight cotton works best at 1,000–1,400 SPM
- Use your machine’s speed limiter – Electronic controls let you cap maximum speed, cutting stitch errors by up to 28% on curves
Inconsistent fabric feed happens when speeds vary too much during sewing. Adjusting sewing machine settings for consistent medium speed improves seam alignment and keeps tension control balanced throughout your project.
Proper Use of Walking Foot and Zipper Foot
When you need smooth seams on quilts or thick layers, a walking foot synchronizes fabric feed from top and bottom, cutting slippage by up to 90%.
For zipper foot types, adjustable models let you stitch within 1–2 mm of teeth, giving you serious control.
Adjusting foot pressure settings between 45–60 g/cm² helps maintain fabric feed balance and seam alignment across different materials.
Trimming Threads for a Clean Finish
After finishing a seam, trim threads close to the fabric—within 2 mm—to meet quality standards and prevent unraveling that can reduce seam durability by 25%. Spring-loaded snippers cut fatigue by 30% and save time. Here’s how to get professional-quality finishes:
- Use sharp trimming tools like thread snippers or embroidery scissors for precision
- Trim excess threads immediately after each seam to prevent bunching
- Check both sides of your fabric for trailing thread ends
- Maintain blade sharpness through regular inspection every 40 hours
- Follow safety practices by powering off your machine before any maintenance
Clean finishes aren’t just about looks—proper post-sewing techniques boost seam strength and prevent machine jams by 15%.
Pinning and Stitching Curves Accurately
Curved seams present unique challenges, but the "one-pin" technique significantly reduces fabric distortion by 60%. Instead of struggling with multiple pins, placing one at the curve’s center maintains alignment while allowing the fabric to behave naturally. This minimal pinning approach decreases seam misalignment from 23% to 8% and cuts sewing time by 25%.
Here’s your curve techniques roadmap:
| Curve Challenge | Solution | Result |
|---|---|---|
| Fabric shifting | Pin at curve center only | 60% less distortion |
| Uneven stitching | Slow stitching speed to 400 spm | 18% better accuracy |
| Puckering | Use walking foot + correct tension | 40% reduction in distortion |
| Stretch distortion | Apply stay-stitching first | 25% less stretching |
| Visible pinholes | Minimize pins (especially on silk) | 35% fewer marks |
For efficiency gains and distortion prevention, carefully match your convex and concave layers—this alone reduces seam issues by 30%. Press (don’t slide) your iron along finished curves to prevent warping. These fixing curved hems strategies transform tricky curves into smooth, professional seams.
Using Zigzag Stitch for Finishing Edges
Zigzag stitch transforms raw edges from fraying nightmares into secure, professional finishes. Set your zigzag width to 3–3.5 mm and length to 2–2.5 mm for most fabrics—this combination reduces fabric fraying by 70–85% compared to unfinished seams.
For edge finishing, position your stitch so the outer swing barely overshoots the fabric edge while the inner swing lands 1–2 mm inside. An overcast foot improves alignment dramatically, and adjusting your tension balance slightly looser than straight stitching prevents puckering.
Proper needle selection matters too—use an 80/12 for seam construction, then switch to a 70/10 for seam finishing on medium-weight fabrics.
Advanced Tips for Professional Results
Once you’ve got the basics down, it’s time to step up your game with some pro-level tricks.
These techniques will take your seams from "good enough" to "did you make that yourself?" They cover everything from choosing the right finish to keeping your machine in top shape.
Choosing Seam Finishes for Different Fabrics
Your fabric type dictates the right seam finishing technique. Sheer fabrics like chiffon demand French seams for clean edges with minimal visibility. Stable wovens such as linen work well with zigzag or overlocked finishes that prevent fraying without adding bulk. Heavyweight materials like denim need flat-felled seams for finish durability and strength. Wool and brocade benefit from Hong Kong finishes for aesthetic appeal and pro techniques for seam finishing.
Testing sample seams helps you balance edge finishing quality with cost efficiency.
Applying Bias Tape and Fusible Tape
Bias tape and fusible tape are your secret weapons for smoother seams and professional seam finishing techniques. Double-fold bias tape works beautifully on curved edge binding, while single-fold varieties handle tighter turns. Apply bias tape by stitching the wrong side first, then folding and topstitching for seam durability.
Fusible web weights range from lightweight for silk to heavy for upholstery—just remember heat setting at 300°F for about 10 seconds activates the bond. These sewing techniques transform tricky edges into polished results.
Adjusting Presser Foot Pressure for Fabrics
Your machine’s pressure adjustment determines how firmly the presser foot holds fabric against the feed dog during stitching. Too much pressure causes fabric slippage and seam puckering on delicate materials, while too little creates uneven stitch uniformity.
Most sewing machine settings include numbered dials—use higher pressure (5-6) for lightweight fabrics, moderate (3-4) for cotton, and lower (1-2) for heavy materials like denim.
Testing fabric tension adjustment on scraps prevents wonky seams before you start your project.
Pressing Seams for a Polished Look
After adjusting pressure, your next step is heating things up—literally. Pressing seams with a warm iron transforms good stitching into professional work. Heat control matters: cotton tolerates 204°C, but polyester needs cooler temps around 148°C to avoid damage. Steam improves flatness by 30% compared to dry pressing techniques.
Here’s how pressing tools and fabric techniques deliver aesthetic outcomes:
- Test your fabric steamer or iron on scraps first to prevent scorching
- Press seams open to reduce bulk or to one side for extra strength
- Use a pressing cloth on synthetics to avoid unwanted sheen
- Apply wooden clappers after steaming to lock in crisp seam benefits
These ironing techniques create sharper edges and better garment symmetry—seam benefits you’ll notice immediately.
Maintaining Your Sewing Machine for Smooth Operation
Proper sewing machine maintenance solves most sewing machine problems before they start. Cleaning frequency matters: remove lint from the bobbin case weekly to prevent 30% drops in stitch quality. Needle replacement every 8 hours stops 40% of thread breakage and skipped stitches.
Follow oiling procedures after 3–4 bobbin changes, but check if your machine needs professional servicing instead—some models are self-lubricating. Annual machine calibration by technicians catches 70% of sewing machine issues early.
Environmental impact counts too: room temperature (18–24°C) and dust covers reduce internal rust by 15%.
Frequently Asked Questions (FAQs)
How do I make my sewing machine look smooth and professional?
Want smoother seams and professional-quality finishes? Start by mastering balanced thread tension and consistent stitch length.
Use proper needle plate selection for your fabric, ensure fabric stabilization through pinning, and adjust feed dog settings to prevent seam puckering—these fundamentals create puckering-free sewing every time.
How do I Make my seams smoother?
To make your seams smoother, start with proper fabric preparation—pre-wash and iron before cutting.
Check your tension balance and needle selection for your fabric type. Use the right presser foot, maintain stitch consistency, and press as you sew to prevent seam puckering and wrinkles.
How do I prevent seam shifting on my sewing machine?
Seam shifting can turn a simple project into a total headache. Prevent fabric bunching by stabilizing your layers—pin strategically, use the right presser foot, and adjust machine settings.
Check your needle selection and fabric tension to stop puckering and wrinkles before they start.
How can I make sewing straight seams easier?
Straight stitching becomes much easier when you use seam guides or DIY seam guides like tape on your machine.
An edgeguide presser foot keeps fabric handling consistent with steady pressure, while guiding tools and practice drills build confidence for perfect seam alignment.
How do you avoid puckering seams in a sewing machine?
To prevent puckered seams, adjust your thread tension between 4 and 5 for most fabrics, use the correct needle size, and make sure your presser foot pressure matches your fabric weight. Test on scrap fabric first.
How can I improve my sewing skills?
You’ll stitch together faster progress by tackling skill-building exercises and exploring higher-level techniques like pattern adjustments.
Build your fabric knowledge through hands-on practice with puckering control, seam rippling prevention, and straight stitching.
Embrace continuous learning—each project sharpens your sewing techniques and mastery.
How do you backstitch at seam beginnings?
To lock your stitches, press your sewing machine’s reverse button while lowering the needle into the fabric. Sew backward for 3-4 stitches, then continue forward—your seam just gained serious reinforcement against unraveling.
Whats the ideal stitch length for most fabrics?
Most fabrics work well with a 5 mm stitch length—about 10 stitches per inch—which gives you the sweet spot between seam strength and thread consumption.
This default setting on your sewing machine prevents puckering while keeping ripping ease manageable if you need to fix mistakes later.
When should you change your sewing machine needle?
Aim to change your needle every six to eight hours of sewing or after completing about eight projects.
Heavy fabric needles wear faster on materials like denim and canvas, so swap them sooner to avoid fabric damage signs like skipped stitches or snagging.
How do you sew stretchy fabrics without distortion?
Stretch fabrics demand a ballpoint needle, steady tension balance, and proper grainline orientation. Pre-wash shrinkage can reach 3–5%, so wash first.
Use a walking foot or differential feed, apply stabilizer usage along seams, and air-dry flat for best results.
Conclusion
Your machine won’t magically perfect every seam overnight—but these tips for smooth sewing machine seams will absolutely transform your results faster than you think. Each technique builds on the last, turning frustration into genuine skill.
Start with proper tension and the right needle, then work your way through fabric prep and foot selection. Before long, you’ll flip your projects over with confidence instead of dread.
Those professional-looking seams aren’t luck—they’re simply the reward for understanding what actually works.


