This site is supported by our readers. We may earn a commission, at no cost to you, if you purchase through links.
 When your top thread tension is too tight, it causes serious sewing troubles—think puckered fabric, snapped threads, and uneven stitching.
Start by checking that your machine is threaded correctly; a simple misstep can throw off tension. Next, check your bobbin’s placement and thread direction.
If all looks good, adjust the tension dial slowly, aiming for smooth stitches with balanced top and bobbin threads. Denser fabrics or thicker threads might need extra tweaks.
Don’t ignore the signs—tight tension can ruin your project. Want more pro tips? Sometimes it’s the tiniest adjustment that makes the magic happen.
Table Of Contents
Key Takeaways
- Check your threading and bobbin placement; even small mistakes can throw off tension.
- Lower the tension dial gradually and test on scrap fabric until the top and bobbin threads balance.
- Look for signs like puckered fabric, snapped threads, or bobbins threads showing on top to identify tight tension.
- Use proper thread weights, clean your machine regularly, and re-thread when basic adjustments don’t work.
Causes of Tight Tension
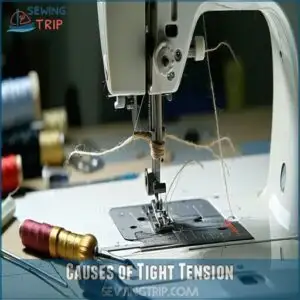
Tight thread tension often comes from small issues like incorrect threading or a poorly placed bobbin. Fabric type and thread weight can also cause problems, making adjustments necessary.
Incorrect Threading
Threading mistakes often cause tight thread tension. If your machine isn’t threaded properly, the top thread can snag or pull too tightly.
Be sure to:
- Follow the threading guides carefully.
- Check spool placement—ensure it spins freely.
- Confirm smooth bobbin winding errors are avoided.
- Lower the presser foot before threading.
- Verify the thread path flows correctly without skipping steps.
Improper Bobbin Placement
Many sewists overlook how improper bobbin placement directly affects tight thread tension.
When your bobbin isn’t seated correctly in its case, the thread can’t flow smoothly.
Check that your bobbin is inserted in the right direction (usually clockwise for front-loading machines) and that it clicks securely into place.
Incorrect bobbin size compatibility or threading direction errors can also cause unexpected tension issues even when your top thread seems perfectly threaded.
Regularly cleaning can prevent common bobbin problems.
Fabric Density Effects
The density of your fabric creates a silent battleground for thread tension.
When fabric is tightly woven, it increases thread exposure and can make your top thread tension feel too high.
Here’s how fabric density affects tension:
- Dense weaves force more upper thread to the surface
- Batting creates drag on threads, requiring tension adjustments
- Tight fabrics increase resistance, making normal tension feel too high
- Loose weaves may hide thread tension issues
The key factors to consider are the dense weaves and how they force more upper thread to the surface, as well as the impact of batting on thread tension.
Thread Type and Weight
Through your sewing journey, different thread types and weights can substantially impact top thread tension.
Heavier threads create more resistance, requiring lower tension settings.
Specialty threads like metallic or nylon need extra slack compared to standard cotton.
Always match weight between your bobbin and top thread for compatibility.
When blending threads of different composition, tension adjustments become essential.
Thread tension issues often arise simply from using the wrong thread weight for your project.
Refer to a thread weight guide for help selecting the correct size, which can help with thread weight selection.
Identifying Tight Tension
You’ll know your top thread tension is too tight when you see the bobbin thread showing on the top of your fabric or notice puckering along your seam line.
These telltale signs are like your machine waving a little flag saying "help me," and catching them early will save you from the frustration of unpicking crooked stitches later.
Visible Top Thread
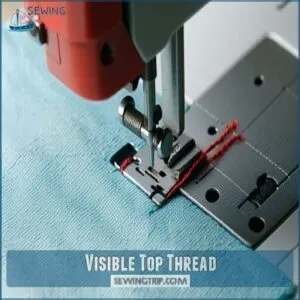
You’ve troubleshooted the causes, now let’s spot the evidence. When your top thread tension is too high, you’ll notice it appearing on the underside of your fabric.
This stitch imbalance happens because the tight upper thread pulls the bobbin thread through to the top surface. Look at your fabric’s backside—if you see a straight line of your top thread color, your tension’s too high and needs adjustment.
This situation indicates that the tension is indeed the problem, and by checking the fabric’s backside, you can confirm whether the issue lies with the top thread tension being too high.
Puckering Fabric
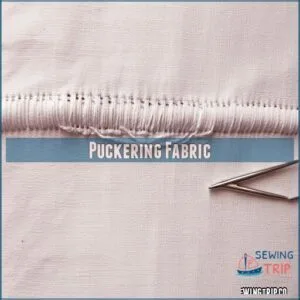
One telltale sign of tight top thread tension is puckering fabric.
When your upper thread is too tight, it pulls the fabric together, creating unwanted ripples along your seam. This happens because the tension is literally pulling your material, much like cinching a drawstring too tightly.
Check for this puckering especially on lighter fabrics, where tension issues become most visible.
Adjusting your sewing machine tension downward can resolve this common feed dog issue, related to sewing machine tension.
Bobbin Thread Visibility
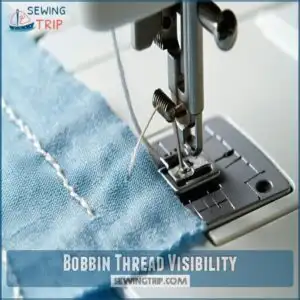
When fabric puckers, you’ll also notice another telltale sign of tight top thread tension: bobbin thread visibility.
If you see those bobbin threads showing on the top side of your fabric, your tension is definitely too high.
This tension imbalance causes the upper thread to pull the bobbin thread through to the surface, creating uneven stitches.
Different fabric types and thread weights can make this problem more obvious, especially on lighter materials.
Cleaning the tension discs regularly can help maintain proper tension and prevent the issue of bobbin thread visibility.
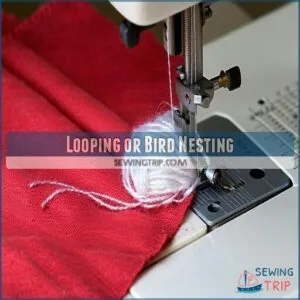
Looping or Bird Nesting
When bobbin thread appears on your fabric’s top side, you’re likely facing another common sign of tight tension: looping or "bird nesting."
This frustrating tangle of threads beneath your fabric happens when your upper thread tension is too high.
You’ll notice fabric loops, frequent thread breaks, and messy stitches.
Check for needle issues, bobbin problems, or poor thread quality.
Regular machine cleaning helps too—don’t forget to examine your feed dogs for lint buildup during your tension troubleshooting.
Adjusting Top Thread Tension
You’ll need to turn your tension dial to a lower number when that stubborn top thread is causing puckered fabric or visible bobbin thread on your project’s surface.
With just a half-number adjustment at a time and a quick test stitch, you’ll find that sweet spot where both threads meet perfectly in the middle of your fabric, achieving a balance that eliminates issues like puckered fabric or visible bobbin thread.
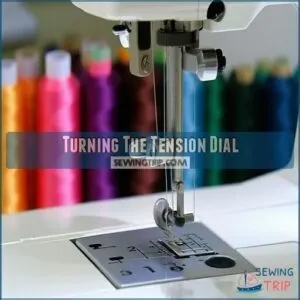
Turning The Tension Dial
To fix tight top thread tension, locate the tension dial near the top of your machine.
This numbered dial (typically 0-9) controls how tightly your upper thread flows.
Turn the dial to a lower number when your tension’s too high – each machine has different sensitivity, so try small changes first.
Test each adjustment on scrap fabric using contrasting thread combinations to see immediate results on your machine, ensuring you achieve the right thread tension.
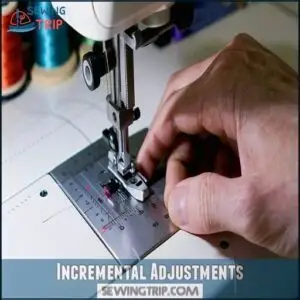
Incremental Adjustments
Take baby steps when making tension adjustments.
Never jump from 2 to 8 on your tension dial.
Instead, move only half a number at a time, test stitching on a fabric scrap between each change.
This fine-tuning process helps you pinpoint the exact setting needed.
Remember, tension adjustment is an art that requires patience—sometimes just a quarter turn can solve your thread tension troubleshooting issues.
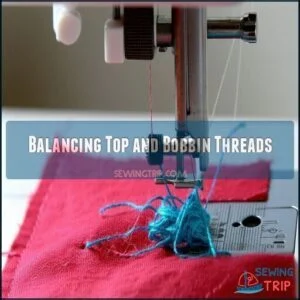
Balancing Top and Bobbin Threads
Achieving perfect stitches requires balancing your upper thread with bobbin thread.
When testing tension, look for symmetrical stitches on both fabric sides.
If thread breaks often, your upper thread is likely too tight.
Adjust gradually until neither thread dominates.
Remember that fabric type affects tension—thicker materials need looser settings.
For maximum seam strength, always match your thread types between top and bobbin.
Incorrect thread placement often causes most tension issues, which can be resolved by understanding the importance of thread tension and symmetrical stitches.
Advanced Tension Adjustments
You’ll need more precise control when basic adjustments don’t solve your tension troubles.
With a few targeted tweaks to both your top thread and bobbin settings, you can finally achieve those perfectly balanced stitches that won’t snap when stretched, which is crucial for achieving stitches that are durable.
Decreasing Top Tension
Turn the tension dial to lower numbers to decrease top tension when your upper thread feels tight. If your fabric puckering shows tension is too high, adjust gradually – try reducing by 0.5-1 increments and test stitch between adjustments.
- Use colored test threads to easily spot tension imbalances
- Set aside a "tension sampler" from your project fabrics for consistent adjustments
- Remember thicker threads naturally need looser settings (1-3 lower)
When loosening stitches, patience is key – small adjustments make big differences!
Adjusting Bobbin Tension
When your top thread adjustments aren’t solving tension problems, it’s time to tackle the bobbins tension.
For this delicate operation, you’ll need a tiny screwdriver.
Turn the screw clockwise (righty-tighty) to increase tension or counterclockwise to loosen it, making tiny increments of 1/4 turn.
After each adjustment, perform a bobbins case test by holding the thread and seeing if it drops slightly.
A specialized kit can provide the necessary tools.
Retest your stitching until that sweet spot is achieved, ensuring the best results with proper tension problems solutions.
Using Different Thread Weights
Thread weight warriors often face tension troubles when mixing different thread thicknesses.
When you switch to thicker thread, you’ll need to lower your tension dial settings.
Heavier threads require more space between tension discs to flow properly.
Match your needle size to your thread type for best results.
Fabric thickness impacts tension too—bulkier fabrics need looser settings.
You can find quality heavy thread for these projects.
Remember that blending thread weights creates interesting decorative stitching effects if tension is properly adjusted, which can lead to a more professional finish.
Maintaining Balanced Tension
Keeping tension balanced is like maintaining a delicate dance between your upper and lower threads.
Check for stitch symmetry by examining both sides of your fabric. Thread matching is essential—use similar weights top and bottom.
Test tension on scrap fabric before starting your project. Regular cleaning can help prevent common tension problems.
If your upper thread’s tight, gradually decrease tension. Remember, balanced tension equals stronger seams and better fabric stability, which is crucial for better fabric and achieving stronger results.
Troubleshooting Persistent Issues
If you’ve tried all the basic fixes but your stitches still look like your machine is having a bad hair day, don’t worry—you’re not alone in the tension troubleshooting club.
You’ll need to investigate deeper issues like complete re-threading, double-checking your bobbin direction, or possibly scheduling a maintenance check-up for your trusty sewing companion.
Re-threading The Machine
When your upper thread remains too tight despite tension adjustments, re-threading your machine is often the simplest fix.
Incorrect threading prevents proper thread flow through tension discs. Remove your thread completely and start fresh.
Follow your machine’s thread path precisely, ensuring thread passes through all thread guides. Check spool placement for smooth unwinding.
Remember to raise the presser foot when threading – this opens the tension discs, allowing proper thread seating. This basic sewing machine troubleshooting step solves many mysterious tension problems, often related to improper thread flow and tension adjustments.
Checking Bobbin Thread Direction
Many tension problems stem from incorrect bobbin thread direction.
Check your machine’s manual for proper insertion—most front-loading bobbins should unwind clockwise. If your top thread feels too tight despite adjustments, remove your bobbin and reinsert it correctly.
This simple fix guarantees consistent thread feed and often resolves persistent tension issues without requiring further tension adjustment.
Remember: proper direction means proper tension!
Consulting Professional Servicing
When all your troubleshooting efforts fall flat, it’s time to call in the professionals.
Technicians with specialized expertise can diagnose issues you might miss, from hidden thread path problems to worn tension discs.
Preventative maintenance during servicing extends machine longevity while protecting warranty implications.
The service cost is worth it—a properly adjusted machine with balanced tension saves you countless hours of frustration and guarantees your projects look professional every time.
Frequently Asked Questions (FAQs)
Why is my top thread too tight?
Did you know 60% of sewing issues come from tension mishaps?
When your top thread’s too tight, the fabric may pucker.
Check threading, gently lower the tension dial, and test on scrap fabric first.
How to know if tension is too tight?
Tension’s too tight if the fabric puckers, top thread snaps, or bobbin thread peeks through.
Think of it like a tug-of-war—your top thread’s pulling too hard, overpowering the balance.
Adjust gradually!
What controls the tightness of the top thread?
Did you know 70% of sewing tension issues are top-thread related?
The tightness of the top thread is controlled by the tension dial, which presses thread between tension discs to regulate its flow.
When should you loosen the needle thread tension?
Loosen the needle thread tension when the fabric puckers during stitching, bobbin thread shows on top, or seams feel too tight.
Adjust gradually, testing stitches on scrap fabric until they balance perfectly.
Why does top tension change during sewing?
Top tension can change if the thread isn’t seated properly in the tension discs, the presser foot isn’t down, or there’s lint buildup.
It also shifts with fabric thickness, thread type, or uneven stitching speed, which can be considered a complete concept in understanding the factors that influence top tension.
How do environmental factors influence thread tension?
Thread tension acts like a balancing scale, easily tipped by humidity, temperature, or dust.
Dry air can make threads brittle, while heat changes fabric stretch.
Regular cleaning, tests, and adjustments keep your sewing smooth and precise.
What impact do specialty stitches have on tension?
Specialty stitches, like zig-zag or decorative patterns, need adjusted tension because they pull thread differently.
Wider stitches often expose more bobbin thread on top.
Testing on scrap fabric helps fine-tune settings for perfect results.
Should metallic threads require specific tension settings?
Over 75% of metallic thread issues come from tension problems.
Loosen the top tension slightly, and use a metallic needle to prevent snags.
Test on scrap fabric first; metallic threads are fussy but rewarding with patience!
Conclusion
Did you know a tiny turn of the tension dial can fix 90% of sewing issues?
If your top thread tension is too tight, don’t panic—start with small adjustments. Check your threading, bobbin setup, and fabric type.
Smooth, balanced stitches are the goal, so tweak settings slowly. Test on scrap fabric before diving into your project.
If problems persist, re-thread or consult a pro. Remember, a tiny adjustment could save your masterpiece from puckering or snapping threads, which is crucial for achieving balanced stitches.

