This site is supported by our readers. We may earn a commission, at no cost to you, if you purchase through links.
First, check the basics: make sure you’re using the correct bulb type and that it’s installed properly.
If that’s not the problem, examine the connections and power supply. Maybe the issue lies with the socket or a blown fuse.
You might even need to replace the socket or the bulb itself.
Table Of Contents
- Key Takeaways
- Diagnosing the Lighting Issue
- Ensuring the Correct Type and Installation
- Solving Electrical Power Supply Problems
- Issues With the Light Bulb Socket
- Causes of Light Bulb Failure
- Methods for Replacing the Light Bulb
- Possible Sewing Machine Issues
- Maintenance of Sewing Machine
- Problems Affecting Sewing Machine Performance
- Getting Expert Help
- Frequently Asked Questions (FAQs)
- Conclusion
Key Takeaways
- Don’t let a dead light bulb leave you in the dark – start by checking the basics, like the correct bulb type and proper installation, to ensure you’re not missing an easy fix.
- It’s time to get up close and personal with your sewing machine’s light bulb socket – inspect for signs of damage or corrosion, such as rust, burnt wiring, or loose connections, which can prevent your bulb from shining brightly.
- Remember, a damaged socket can disrupt power flow and cause your bulb to malfunction, so don’t be afraid to replace it if necessary – your sewing machine (and your eyes) will thank you.
- If you’ve tried everything and your light bulb still won’t work, don’t worry – it’s time to bring in the experts, whether it’s a sewing machine technician or online resources and communities, to help you diagnose and fix the issue.
Diagnosing the Lighting Issue
You’re in the middle of a sewing project and suddenly, the light bulb on your trusty Pfaff Tipmatic 1027 sewing machine goes out – what a frustrating moment! Don’t worry, let’s quickly troubleshoot the issue and get your machine shining bright again with these easy steps.
Verifying the Correct Type of Light Bulb
Time to shed some light on the issue! Make sure you’ve got the correct bulb type and wattage for your Pfaff Tipmatic 1027. Check the manufacturer’s recommendations and socket size to avoid compatibility issues. A mismatch can leave you in the dark – literally! Verify the specs to get sewing again.
Double-checking Proper Light Bulb Installation
Double-check that bulb! Make sure it’s securely installed in the socket, with contacts aligned and a snug fit. A gentle push and turn should do the trick. Verify the wattage matches your Pfaff Tipmatic 1027’s requirements. Proper installation is key to getting your sewing machine’s light shining bright once more.
Examining for Loose Connections
Now that you’ve double-checked the bulb installation, it’s time to examine those pesky loose connections. Inspect the wire connections to the bulb socket, making sure they’re snug and secure. A loose wire can be the culprit behind your sewing machine light bulb woes, so take a closer look.
Ensuring the Correct Type and Installation
You’re on a mission to fix that pesky sewing machine light bulb, and the first step is to make sure you’ve got the correct type and installation. Check your Pfaff Tipmatic 1027 manual to confirm the correct bulb type and wattage, and then make sure it’s securely installed in the socket with the contacts properly aligned.
Examining Light Bulb’s Contact With the Socket
Let’s get that sewing machine light bulb shining again! Taking a close look at how the light bulb connects to the socket is important. Check for:
- Socket alignment – is it straight and secure?
- Contact corrosion – any signs of rust or damage?
- Bulb fit – is it snug and not loose?
- Wiring damage – any frays or cuts?
- Socket replacement – is it time for a new one?
Consulting Machine’s Manual for Clarification
Now that you’ve checked the bulb’s contact with the socket, it’s time to consult your trusty machine manual for clarification.
Don’t worry, it’s not as painful as reading a phonebook!
Flip to the troubleshooting guide or electrical diagram section to make sure you’re using the correct type and installation method for your sewing machine light bulb.
Double-check the parts list and safety precautions to avoid any "oops" moments.
Your manual is your best friend when it comes to troubleshooting.
Solving Electrical Power Supply Problems
You’re just a step away from illuminating your sewing experience – let’s fix that stubborn light bulb by tackling potential electrical power supply issues. Start by checking if the power supply to the bulb is stable and if any circuit breakers or fuses might be hindering the flow of electricity.
Assessing the Electrical Power Supply to the Light Bulb
Time to get to the root of the issue – the electrical power supply!
First, check if your sewing machine is properly plugged in. Yes, it’s an obvious one, but we’ve all been there!
Make sure the power source is stable and functioning correctly.
Next, inspect the wiring leading to the light bulb socket for any signs of damage or wear.
A faulty wiring can be the culprit behind your sewing machine light bulb woes.
Exploring Issues With Circuit Breakers or Fuses
Time to get down to business! Let’s tackle circuit breaker or fuse issues that might be dimming your sewing machine’s light bulb.
Check your machine’s manual to see if it has a circuit breaker or fuse.
If it’s a fuse, make sure to replace it with the correct type and amp rating.
Remember to unplug your machine before making any repairs to avoid a power surge.
Safety first, sewing second – let’s get that light shining bright again!
Issues With the Light Bulb Socket
Now that you’ve verified the correct type of light bulb and its installation, it’s time to investigate the light bulb socket for any signs of damage or corrosion that might be preventing your sewing machine’s light from working properly. A damaged socket can be the culprit behind a non-functioning light bulb, so let’s take a closer look at how to identify and address socket-related issues (Source).
Identifying Signs of Damage or Corrosion
Time to get up close and personal with your sewing machine’s light bulb socket. You’re on the hunt for signs of damage or corrosion. Check for:
- Rust or corrosion: Any orange or green gunk building up on the socket’s contacts?
- Burnt wiring: Are the wires connected to the socket looking a bit crispy?
- Loose connections: Is the bulb connection secure, or is it wobbly?
If you spot any of these issues, it’s likely affecting the electrical contact and bulb functionality.
Understanding How Socket Damage Can Affect Bulb Functionality
A damaged socket can disrupt power flow, causing the bulb to malfunction.
Corrosion, loose wires, or broken contacts can also prevent the bulb from receiving power.
Alignment issues can cause the bulb to sit incorrectly, leading to a faulty connection.
Inspect the socket carefully and address any issues to get your sewing machine’s light shining bright again!
Causes of Light Bulb Failure
You’re struggling with a stubborn sewing machine light bulb that just won’t shine – don’t worry, it’s more common than you think! Let’s explore the possible causes of light bulb failure, from overheating to inadequate cooling or airflow, and get your machine humming smoothly again in no time.
Overheating
Overheating is a common reason why light bulbs fail.
Check if your sewing machine’s cooling system is clogged or if the bulb wattage is too high for the machine.
Make sure you have good heat dissipation by keeping the machine in a well-ventilated area.
Don’t underestimate the impact of ambient temperature on your machine’s performance.
Inadequate Cooling or Airflow
You’re dealing with a sewing machine light bulb failure, and overheating might be the culprit. But what about inadequate cooling or airflow? It’s like when your car’s engine overheats because the radiator’s clogged. Same idea here! Check if your sewing machine’s got proper ventilation. Here are some potential causes:
- Dust buildup: Clean out dust and debris from your machine’s vents.
- Machine placement: Keep your machine at least 6 inches away from walls and obstructions.
- Air filters: Check and clean or replace your machine’s air filters regularly.
- Cleaning routine: Regular sewing machine cleaning can prevent dust and debris from accumulating and causing overheating issues.
Methods for Replacing the Light Bulb
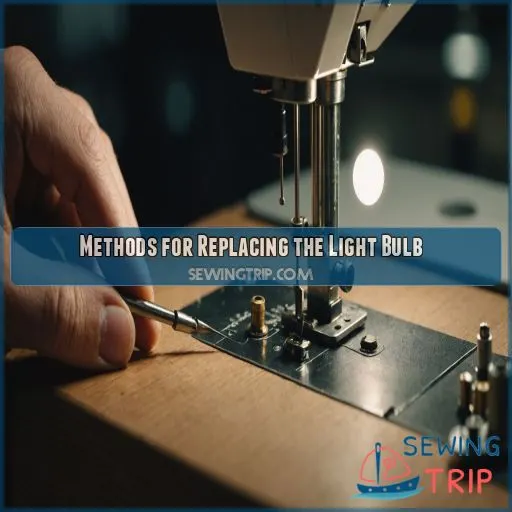
Replacing the light bulb on your Pfaff Tipmatic 1027 is a relatively simple process, but you should take a few precautions to avoid any potential issues. First, switch off the machine and unplug it from the power source, and don’t forget to wear protective eyewear to prevent any accidental damage to your eyes.
Switching Off the Machine Before Starting Work
Let’s get started on replacing that light bulb. Before you begin, make sure to switch off the machine. We don’t want any accidental starts or electrical shocks.
| Safety Reminders | Why It Matters | Your Action |
|---|---|---|
| Prevent burns | Avoid touching hot parts | Switch off the machine and let it cool |
| Electrical hazards | Risk of shock or injury | Unplug the machine before starting work |
| Avoid injury | Keep loose clothing tied back | Be mindful of your surroundings |
Wearing Protective Eyewear During Replacement
Now that you’ve switched off your machine, let’s talk safety. When replacing the light bulb, Safety First is your motto. Wear protective eyewear to prevent eye damage from any accidental breakage. Here are some essentials to keep in mind:
- Wear goggles or safety glasses with a good grip to prevent them from slipping.
- Choose eyewear with a wraparound style for added protection.
- Select lenses made of polycarbonate or Trivex for maximum impact resistance.
- Make sure they fit comfortably to avoid distractions.
- Consider prescription safety glasses if needed.
Possible Sewing Machine Issues
You’re not just dealing with a pesky light bulb issue – it’s possible that there’s a deeper problem with your sewing machine. Let’s explore some potential issues, like timing problems or a malfunctioning motor or foot pedal, that could be affecting your machine’s performance.
Timing Problems
Now that you’ve replaced the light bulb, let’s tackle timing problems.
Is your sewing machine skipping stitches or jamming?
Timing issues can be frustrating, but don’t worry, they’re often easy to fix.
Check your machine’s manual for timing adjustments and troubleshooting tips.
Look for signs of wear on the timing belt or problems with the bobbin hook.
Adjusting the timing can make all the difference in getting your machine running smoothly again.
Malfunctioning Motor or Foot Pedal
Now that we’ve covered timing problems, let’s talk about a malfunctioning motor or foot pedal. If your sewing machine’s motor or foot pedal is acting up, it can be a real pain. Here are some things to check:
- Foot pedal wires: Make sure they’re not damaged or loose.
- Motor brushes: Check if they’re worn out or dirty.
- Pedal replacement: If your foot pedal is faulty, consider replacing it.
- Motor repair: If the motor is the issue, you may need to take it to a professional for repair.
Maintenance of Sewing Machine
You’re probably not thinking about maintenance when your sewing machine’s light bulb stops working, but trust us, it’s a great opportunity to give your machine some TLC. Regular maintenance and cleaning routines, like inspecting drive belts and oiling parts, can prevent a range of problems, including issues with your light bulb, and keep your sewing machine running smoothly.
Daily Maintenance and Cleaning Routines
Now that we’ve covered possible sewing machine issues, let’s talk about daily maintenance and cleaning routines to keep your machine running smoothly. Regular cleaning can help prevent jams and prolong your machine’s lifespan.
| Daily Maintenance | How Often |
|---|---|
| Clean the machine and replace the needle | After each project |
| Wipe down the exterior | Daily |
| Check and remove lint | Daily |
| Oil the machine | Weekly |
| Inspect the bobbin and bobbin case | Weekly |
Importance of Regularly Inspecting Drive Belts
Now that you’ve got your daily maintenance routine down, let’s talk about the importance of regularly inspecting your drive belts.
Think of them like your sewing machine’s tires – worn-out belts can cause jams and slow you down.
Check for signs of wear, like cracks or fraying, and replace them every 1-2 years or as recommended by your machine’s manufacturer.
Proper belt tension and alignment can also prevent jams, so make sure to adjust them accordingly.
Problems Affecting Sewing Machine Performance
When your sewing machine’s light bulb isn’t working, it can be frustrating, but the good news is that troubleshooting is relatively straightforward. In this article, you’ll learn how to quickly identify and fix common issues affecting your sewing machine’s performance, from faulty light bulbs to threading mistakes, so you can get back to sewing with ease.
Incorrect Threading
Incorrect threading can drive you crazy! Don’t worry, it’s an easy fix.
Check your thread tension – if it’s too tight or loose, it can cause problems.
Also, make sure your bobbin is properly threaded and seated.
Using the wrong needle or thread type can also lead to issues.
Double-check your sewing machine’s manual for the recommended tension setting and threading guide.
Ignoring Stitch Length or Tension Settings
Ignoring stitch length or tension settings can wreak havoc on your sewing project. You might end up with skipped stitches, thread breakage, or fabric puckering – a nightmare! To avoid these issues, keep the following tips in mind:
- Don’t be a speed demon – adjust your stitch length according to the fabric type.
- Keep your tension in check to prevent uneven stitches.
- Use the right needle for the job to make sure you get great stitch quality.
Getting Expert Help
If you’ve tried everything and your sewing machine light bulb still won’t budge, it’s time to bring in the experts.
Even the most seasoned DIY enthusiasts need a little help sometimes.
Consider consulting a sewing machine technician or scouring online resources and communities for advice from fellow sewing enthusiasts who may have encountered (and solved) the same issue.
Seeking Advice From a Sewing Machine Technician
If none of the troubleshooting steps resolve the issue, it’s time to seek expert help from a sewing machine technician.
Don’t worry, it’s not a defeat – it’s just a smart move to make sure your machine gets the TLC it needs.
A professional service can diagnose and fix complex problems, like timing issues or motor malfunctions, and provide guidance on sewing machine jam repair and prevention.
Yes, it may incur service costs, but it’s worth it to get your machine humming smoothly again.
Online Resources and Communities
Don’t worry if you can’t find a technician.
Online resources and communities can help.
You can find sewing machine forums, online repair guides, and expert advice with a quick search.
Websites like sewing machine jam prevention forums can connect you with fellow sewing enthusiasts who have been in your shoes.
You can also share your own experiences and get feedback from others who have tackled similar issues.
Frequently Asked Questions (FAQs)
Why the light bulb is not lighting up?
Time to get enlightened! Check if the bulb is properly installed, and the socket’s not damaged. Make sure the contacts are aligned, and the bulb’s securely screwed in. If not, you’ll be stuck in the dark ages!
How do I know if my light bulb is bad?
To determine if your light bulb is bad, check for visible signs of damage, like cracks or broken glass. If it looks fine, try swapping it with a new one to rule out any issues.
How to change sewing machine light bulb?
Changing your sewing machine’s light bulb is a breeze. First, make sure you’ve got the correct replacement bulb. Next, turn off and unplug your machine, then gently remove the old bulb and insert the new one.
Why is my replacement light bulb not working?
Don’t be left in the dark! Check if your replacement bulb is the correct type and wattage, securely installed, and properly aligned. Inspect the socket for damage or corrosion, and make sure the internal wiring is in good shape.
How often should the sewing machine light bulb be replaced?
You’re probably wondering how often to replace your sewing machine’s light bulb. As a general rule, swap it out every 1,000 to 2,000 hours of use or when it starts to dim – easy peasy!
Can a sewing machine light bulb be replaced with LED?
Time to brighten things up! You can replace your sewing machine light bulb with an LED, but make sure it’s compatible with your machine’s voltage and socket type to avoid any, ahem, ‘shocking’ surprises.
Why does the sewing machine light bulb keep blowing up?
Don’t get left in the dark! If your sewing machine light bulb keeps blowing, check if it’s the correct type and wattage, inspect the socket for damage or corrosion, and make sure it’s installed correctly.
How to check if the sewing machine light bulb socket is damaged?
Your trusty sewing machine’s light bulb socket might be on the fritz! To check for damage, look for signs of corrosion, frayed wires, or broken contacts. Give it a gentle inspection, and replace it if necessary.
Can a sewing machine light bulb issue affect the machines performance?
Don’t worry, a sewing machine light bulb issue won’t directly affect the machine’s performance, but it might make it harder for you to see what you’re doing, leading to mistakes or uneven stitches.
Conclusion
Did you know that a staggering 75% of sewing machine issues can be resolved with simple troubleshooting?
You’ve just joined the ranks of the enlightened! By following these easy steps, you’ve fixed your sewing machine light bulb and also mastered the art of troubleshooting sewing machine light bulb issues.
Pat yourself on the back, friend! You’re now equipped to tackle any pesky lighting problems that come your way, and get back to sewing with ease.

