This site is supported by our readers. We may earn a commission, at no cost to you, if you purchase through links.
Start by ensuring you’re using the correct needle for your fabric and project—denim calls for a heavyweight needle while silk needs something finer.
Check that the needle isn’t bent and is inserted correctly. Incorrect threading or overly tight thread tension can also stress the needle, so re-thread with the presser foot up and adjust tension gradually.
Regularly clean lint from the bobbin area and needle plate—dust buildup’s a troublemaker too. Want smoother sewing? Stay tuned!
Table Of Contents
Key Takeaways
- Use the right needle size and type for your fabric and thread to avoid breakage.
- Check your threading path and make sure the thread flows smoothly through the tension disks.
- Clean lint and debris from the needle plate and bobbin area regularly to prevent buildup issues.
- Adjust thread tension gradually and ensure your machine’s settings match your project’s needs.
Causes of Needle Breakage
When your sewing machine’s needle keeps breaking, it’s usually a sign of something out of sync, like an incorrect needle type or poor threading.
By spotting these common causes, you can save time and frustration, keeping your projects running smoothly.
Spotting common causes of needle breakage saves time and frustration, ensuring every sewing project runs effortlessly and smoothly.
Incorrect Needle Type
Using the wrong needle type or size is a top cause of sewing machine needle breakage.
The wrong needle size or type is a fast track to constant breaks—choose wisely to keep sewing frustration-free!
A thin needle on thick fabric? Disaster waiting to happen!
Refer to a Fabric Needle Guide or Needle Size Chart to match your project.
Proper selection prevents issues, so research needle options beforehand.
Needle Point Types and Specialty Needle Uses matter too—pick wisely to avoid frustration and wasted time, ensuring proper selection and understanding of needle breakage.
Thread Tension Issues
Thread tension problems often cause needle breakage and thread breakage by putting too much strain on the thread.
Check sewing machine tension issues like unbalanced tension or incorrect settings. Adjust the bobbin tension and make certain thread flows smoothly through the tension disks.
Don’t overlook thread weight—mismatches can lead to trouble. Proper tension adjustment avoids frustrating breaks and keeps stitching seamless.
Low-Quality Thread
If you’re frustrated because your needle breaks often, low-quality thread could be the culprit.
Threads from bargain brands may skimp on durability, causing frequent thread breakage and stressing your machine.
Improper storage impacts thread quality too, leading to tension issues.
You can find various types available online.
Invest in sturdy, alternative brands with reliable composition to avoid the cost implications—and the headaches—of repeated needle replacements.
Fabric and Thread Mismatch
A mismatch between fabric weight, thread type, and needle size can wreak havoc on stitch integrity.
Thick threads or heavy fabric need larger sewing machine needles, while fine thread with a thick needle type is a recipe for failure.
Test combinations before sewing to prevent machine damage and guarantee smooth operation since misalignments mean needle breaks often.
Avoid guesswork—precision matters.
Choosing Right Needle
Picking the right needle feels simple, but using the wrong one can quickly lead to broken needles, frustration, and wasted fabric.
Match your needle type and size to your fabric and thread to keep your machine running smoothly.
Use The Right Needle
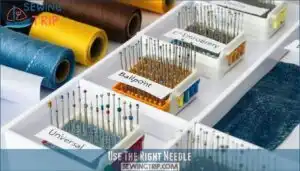
Your needle keeps breaking? Start with the right one for your project.
Check a Needle Selection Guide or Fabric Compatibility Chart to match the needle type with your fabric. Specialty needle types, like ballpoint for knits, make a difference.
Needle Condition Check is key—ditch dull or damaged sewing machine needles. Remember, selecting wisely means fewer frustrations, and using the right needle is crucial for a successful project with fewer frustrations.
Check Needle Size
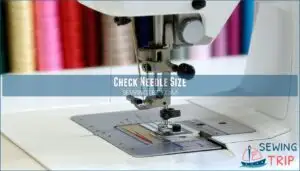
Choosing the correct sewing machine needle size can save headaches, especially when the needle keeps breaking.
Use a needle measuring gauge to check size and markings. Match fabric thickness, thread weight, and needle type to your project.
Here’s how:
- Use a size guide for needle selection.
- Confirm markings match fabric needs.
- Verify point style suits thread weight.
Thread The Needle Properly
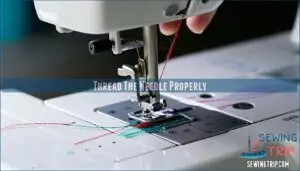
Always thread with the presser foot raised—this opens the tension disks for smooth threading.
Follow your machine’s threading order carefully, ensuring the thread path is clear.
Check thread snugness; too tight or loose can lead to broken needle causes.
A misstep here might mimic needle installation issues, leaving you wondering why your sewing machine needles keep breaking!
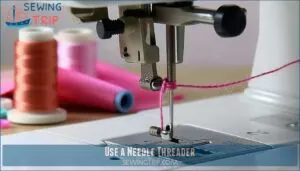
Use a Needle Threader
If threading sewing machine needles feels like threading a camel through a needle’s eye, a needle threader simplifies life.
Here’s why:
- Threader Benefits: Saves time and eyesight, especially with fine threads.
- Threader Types: Manual or built-in, choose what fits your style.
- Threader Limitations: They wear out, so keep Threader Maintenance in mind—replace when frayed to avoid sewing needle problems.
Manual threaders are also a cost-effective sewing aid.
Top 5 Sewing Needles
Choosing the right sewing needle can make or break your project—literally. Let’s look at five reliable needle options to keep your machine running smoothly and your stitches flawless.
1. Schmetz Universal Sewing Needles Assorted

Schmetz Universal Sewing Needles Assorted are a reliable choice, offering versatility and durability for sewing enthusiasts.
Designed with slightly rounded points, they easily handle wovens and knits, preventing fabric damage or skipped stitches.
Compatible with all household sewing machines, this set simplifies your projects, whether you’re tackling delicate silks or thick denim.
Their German engineering guarantees high quality, delivering smooth, even stitches every time, making them a must-have in your sewing kit, with 50 needles per pack, they’re both cost-effective and practical.
Best For: Sewing enthusiasts who need high-quality, versatile needles to work with various fabrics like wovens and knits.
- Compatible with all household sewing machines.
- Durable German-made needles for smooth, even stitches.
- Cost-effective with 50 needles per pack.
- Needs replacement after approximately 5 hours of continuous use.
- Packaging may not be eco-friendly.
- Not specialized for extremely delicate or heavy-duty fabrics.
2. Sewing Machine Needles Assortment Sizes
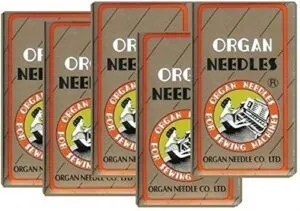
In regards to versatile sewing, assortment needle packs are a game-changer.
Having multiple sizes like 65/09 through 110/18 guarantees you’re ready for anything, from delicate sheers to heavy upholstery.
The "MSB" brand offers a reliable 50-piece set, perfect for polyester, leather, and cotton projects.
Each needle is engraved for quick identification, and their durability holds up under frequent use.
If you break needles often or tackle varied fabrics, a mixed pack simplifies your choices.
Think of it as your sewing toolkit’s MVP, providing a solution that is both practical and efficient for varied fabrics and frequent use.
Best For: Casual and frequent sewers needing a versatile, durable, and cost-effective needle assortment for varied fabrics and projects.
- Includes multiple sizes for handling delicate to heavy fabrics.
- Durable needles that withstand frequent use and heavy-duty projects.
- Convenient engraving and organized packaging for easy identification.
- May not include specialty needle options like ballpoint or quilting needles.
- Not ideal for advanced sewers seeking more tailored needle types.
- Foil packaging may not appeal to users preferring reusable storage solutions.
3. Prewound Bobbins Size A Sewing Embroidery
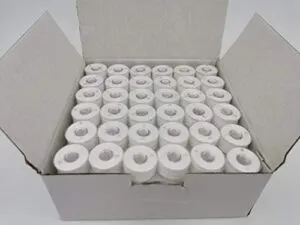
Prewound bobbins, like Size A embroidery options, can be a lifesaver for sewing enthusiasts.
They’re ready to go, saving you the hassle of rewinding, and fit most modern machines like Brother or Babylock.
Each bobbin holds extra thread, minimizing interruptions, and their polyester thread resists tangling or breaking, even during high-speed stitching.
However, check your machine’s compatibility first, as not all brands fit every model.
With consistent tension and quality, prewound bobbins keep stitchwork smooth, so you can focus on creativity, not logistics.
Best For: Sewing hobbyists and professionals who want ready-to-use, high-quality thread for embroidery and quilting projects.
- Not compatible with all sewing machine models.
- May leave lint on certain fabrics.
- Some bobbins can be hard to start threading.
- Prewound with extra thread to reduce interruptions.
- Durable polyester thread resists tangling and breakage.
- Consistent tension ensures smooth, even stitches.
4. Bobbin Thread Spool Savers Color Mix
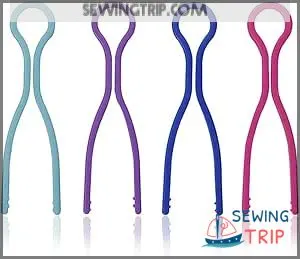
Bobbin Thread Spool Savers Color Mix is a handy tool for keeping your sewing space organized and stress-free.
These flexible savers fit most home sewing machine thread spools, preventing annoying thread tangles and keeping bobbins secure.
They work well for embroidery projects, as you can match bobbins to their thread cones easily, and are perfect for small to large spools.
While they’re great for most uses, they might struggle with XL cones, but they’ll save you time hunting for that elusive bobbin!
Best For: Crafters and sewers looking to organize thread spools and bobbins effectively, especially for embroidery projects.
- Flexible design fits most small to large spools.
- Keeps bobbins matched with thread cones for convenience.
- Helps prevent thread tangles and unwinding.
- Not suitable for XL embroidery cone thread.
- May not be durable for long-term use.
- Could poke out the bottom of smaller spools.
5. Bobbin Clips Thread Spool Holders
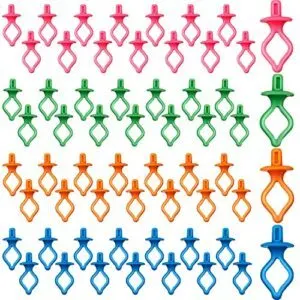
Bobbin clips are a game-changer for keeping your sewing organized.
They stop thread from unraveling, hold bobbins tightly, and prevent messy drawers.
Imagine never chasing a rolling bobbin across the floor again—it’s satisfying, right?
These clips fit most spools and bobbins, offering a snug, secure hold.
They’re lightweight, easy to use, and keep sewing spaces tidy.
Perfect for preventing tangles and pairing bobbins with matching threads, they save time and simplify your sewing routine.
A pegboard thread storage system can further enhance organization.
Stay organized and stress-free!
Best For: Sewing enthusiasts, crafters, and tailors looking for an affordable and efficient way to keep bobbins and thread spools organized.
- Prevents thread unraveling and keeps drawers tidy.
- Fits a wide range of spools and bobbins securely.
- Lightweight, durable, and portable for easy storage.
- Slightly long for smaller spools on racks.
- Requires manually tucking thread ends to avoid unwinding.
- Does not include a storage case.
Threading Techniques
If your sewing machine needle keeps breaking, improper threading might be the culprit.
Double-checking your bobbin placement, threading path, and tension settings can save you time, frustration, and a pile of broken needles.
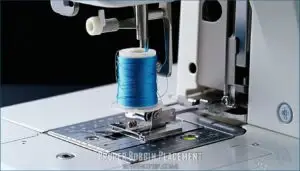
Proper Bobbin Placement
Getting bobbin placement right is key to smooth sewing.
Verify the bobbin sits snugly in the bobbin case, matching the correct bobbin type.
A drop-in bobbin must face the proper direction for tension balance.
Avoid loose winding issues, as they hinder thread delivery.
Take a moment to double-check alignment for stress-free stitching – it’s worth it!
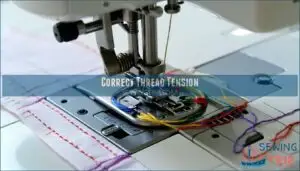
Correct Thread Tension
Thread tension makes or breaks your stitching game. Misaligned tension settings often ruin balanced stitch formation.
Adjust the tension dial settings gently—tighten slightly clockwise or loosen counterclockwise. Don’t forget the bobbin tension screw; it’s key for fabric-thread matching.
For tension troubleshooting tips, always test on scrap fabric first. Patience with tension adjustment brings about smooth sailing for your sewing machine.
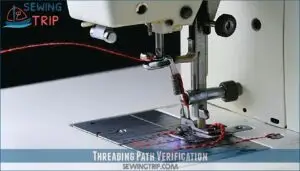
Threading Path Verification
Start by double-checking your threading path—it’s the backbone of smooth sewing. Follow the threading diagram in your manual, ensuring the thread slides snugly into the tension disc.
Missed the take-up lever? You’ll get skipped stitches or thread bunching. Proper thread storage prevents damage from dust and humidity.
Watch threading issues vanish with these tips:
- Raise the presser foot.
- Thread in sequence.
- Avoid tangles.
- Confirm tension settings.
Proper thread storage is crucial for maintaining your sewing machine’s performance.
Take-Up Lever Threading
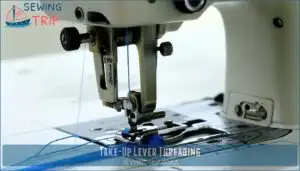
You’ve checked the threading path, now focus on the take-up lever. It controls thread loops and tension balance, guaranteeing smooth stitching. If skipped stitches or thread breakage occur, double-check the lever’s engagement.
Always thread with the lever at its highest point. A missed lever can derail sewing machine troubleshooting faster than a runaway bobbin.
| Issue | Cause | Effect | Fix | Reminder |
|---|---|---|---|---|
| Skipped stitches | Lever not engaged | Uneven seams | Rethread with lever up | Guarantee lever is visible during setup |
| Thread breakage | Missed lever threading | Loose tension | Rethread from scratch | Check threading guide |
| Uneven tension | Lever incorrectly threaded | Pulled fabric | Rethread carefully | Verify thread path |
| Loose loops | Lever skipped | Messy stitching | Raise lever before threading | Engage take-up lever every time |
| Stitch inconsistency | Improper lever tension | Stitch gaps | Adjust lever to correct height | Follow sewing machine manual |
To ensure proper sewing machine function, remember that the take-up lever is crucial for maintaining even tension and preventing thread breakage. By following the guidelines outlined in the table, you can troubleshoot common issues such as skipped stitches, uneven tension, and loose loops. Always refer to your sewing machine manual for specific instructions on threading and lever adjustment.
Machine Maintenance
Keeping your sewing machine in top shape reduces needle breakage and keeps your projects running smoothly.
Regular cleaning, oiling, and checking key parts like the needle and bobbin case can save you from frustrating interruptions.
Regular Cleaning
Regular sewing machine cleaning prevents lint, dust, and debris from causing trouble.
Use soft brushes or compressed air as your cleaning tools, focusing on the bobbin area, feed dogs, and needle plate.
Inspect parts for damage during cleaning.
Schedule professional servicing if buildup persists.
Consistent sewing machine maintenance, like lint removal and part inspection, guarantees smooth performance.
Lubrication and Oil Change
Once your sewing machine is clean, lubrication keeps it running smoothly.
Use sewing machine oil, avoiding alternatives like WD40, to prevent corrosion. Apply just 1-2 drops at key lubrication points, like the bobbin housing and feed cams.
Regular oiling helps to improve machine performance. Stick to an oiling frequency of every 8-10 sewing hours.
Over-oiling, though, risks messy contamination and diminished machine performance!
Needle Replacement
Blunt needles or bent sewing needles can wreak havoc on your stitches, so replace them after 8-10 hours of sewing.
Pay attention to needle brands—high-quality options last longer. Proper needle installation prevents wobbles and breaks.
Always dispose of broken needles safely. Remember, a fresh needle protects your fabric and reduces the chances of frustrating breaks or skipped stitches, which is why proper installation is crucial.
Bobbin Case Maintenance
Your bobbin case needs regular TLC to avoid bobbin case problems.
Start by:
- Damage Inspection: Look for cracks or burrs on the edges.
- Thread Buildup: Remove lint and debris—these mess with bobbin tension.
- Proper Insertion: Make certain it clicks in place after bobbin winding.
Cleaning frequency matters—don’t skip it!
To maintain the machine, consider regular cleaning and maintenance of the bobbin area.
Smooth bobbin tension, smoother stitches.
Troubleshooting Steps
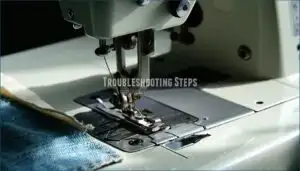
When your sewing machine needle breaks, it’s important to stay calm and methodical.
By following a few simple troubleshooting steps, you can quickly pinpoint the issue and get back to sewing.
Identify Breakage Cause
To find broken needle causes, start with a needle inspection for damage or bending.
Analyze thread quality—old or weak thread snaps easily.
Check fabric resistance; thick fabrics need heavy-duty needles.
Examine machine timing, as improper synchronization causes sewing needle problems.
Operator error, like incorrect needle size, often explains breakages.
Here’s a quick troubleshooting guide:
| Problem | Possible Cause | Quick Fix |
|---|---|---|
| Needle keeps breaking | Fabric resistance | Use a thicker needle |
| Skipped stitches | Needle size mismatch | Match needle to thread weight |
| Frequent snaps | Poor thread quality | Switch to high-quality thread |
Check Bobbin and Tension
A poorly placed bobbin can throw off your stitch harmony.
Verify proper bobbin placement, and double-check that tension balance matches your thread weight.
Thread tension that’s too tight or loose leads to breakage or skipped stitches.
Make tension adjustments gradually—small changes make a big difference.
Take your time, and your sewing machine will thank you, as proper care ensures its longevity and performance.
Inspect Needle Plate and Presser Foot
Start by inspecting the needle plate for damage or material buildup, as burrs can cause thread snagging and needle bending.
Check the presser foot alignment, ensuring it’s secure and undamaged.
If the needle hits the plate, it’s likely a misalignment issue. Adjust the foot pressure appropriately for the fabric, and clean debris to avoid further needle-breaking incidents.
Replicate Issue in Slow Motion
Slow down your sewing to a crawl—think snail, not rabbit.
Motion analysis helps you spot if your needle’s hitting the plate or bending. Use precise observation in a controlled environment with good lighting.
Repeatable steps make problem isolation a breeze. These needle breaking tips can save you headaches and prevent needle damage by uncovering hidden sewing machine needle issues.
Prevention and Repair
You can prevent needle breakage by checking your thread tension, using the right needle, and keeping your machine clean.
When a needle does break, stop sewing immediately, remove the broken pieces, and rethread carefully to avoid further damage.
Adjust Thread Tension
Thread tension impacts stitch quality and prevents needle breakage.
Adjust the Tension Dial Settings for balanced stitch appearance.
Use these quick checks:
- Inspect tension. Too tight? Loosen slightly. Too loose? Tighten gently.
- Test bobbin tension using the Bobbin Tension Screw for even thread delivery.
- Track settings in a Tension Log—ideal for troubleshooting fabric-specific tension issues.
Master this skill effortlessly!
Secure Thread Ends
Double-check your thread ends—it’s like tying shoelaces to prevent unraveling! Use knotting techniques or a securing backstitch for stability.
Maintain proper tail length to stop slipping while reducing thread breakage risks. Frayed thread? Inspect its condition.
Balanced thread tension prevents sudden snags, a common sewing machine troubleshooting step to avoid needle breaking. Small efforts, big needle-breaking tips!
Stop Sewing Immediately
When a needle breaks, stop sewing immediately to avoid injury risk and prevent further damage. This quick pause is your safety net.
Follow these steps:
- Turn off the machine.
- Clear tangles quickly and safely.
- Assess machine condition for any visible issues.
- Check if the needle hitting the plate caused damage.
- Inspect thread for tension problems.
Stay safe, operator!
Remove Broken Needle Pieces
If your needle snaps, stop immediately and locate fragments to prevent injury or machine damage.
Carefully inspect the needle plate and bobbin area for debris. Use tweezers for safe removal, then check for needle plate damage or dull sewing needle issues.
Dispose of broken pieces safely and install a replacement needle to resume stitching. Needle breaking tips protect your sewing machine!
Frequently Asked Questions (FAQs)
What should I do if my sewing machine thread breaks?
Check your threading path, tension, and bobbin placement—imagine untangling holiday lights.
Rethread with the presser foot up, adjust tension, and clean the bobbin area.
Invest in quality thread; cheap ones snap under pressure!
Why do sewing machine needles break?
Poor alignment, fabric too thick, or incorrect tension often causes needle breakage.
Using mismatched thread and needle sizes, dull or bent needles, or threading errors can also lead to frustrating snaps mid-stitch.
Can a sewing machine break?
Even the best machines, like a weary traveler, can break under pressure.
Misaligned parts, skipped maintenance, or overworked motors can cause failures.
Keep it clean, lubricated, and well-adjusted to avoid costly breakdowns.
How to repair a sewing machine needle?
Replace the broken needle entirely; it’s not repairable.
Loosen the needle clamp screw, remove remnants, insert a new needle with the flat side facing the machine’s rear, then tighten firmly.
Re-thread and resume sewing confidently, with a new needle.
How to fix a broken sewing machine?
First, unplug the machine for safety.
Inspect for damage in the needle, bobbin, or thread paths.
Re-thread carefully, clean off lint, and check tension settings.
If problems persist, consult your manual or a technician.
Why is my Singer sewing machine breaking needles?
If your Singer sewing machine keeps snapping needles, it’s like hitting speed bumps in a smooth ride.
Check improper threading, wrong needle type, bent parts, or tension issues,
then clean, rethread, and adjust carefully.
What is the most common cause of needle breakage?
The most common cause of needle breakage is using the wrong needle type or size for your fabric or thread.
This mismatch leads to stress on the needle, causing it to bend or snap mid-sew.
Which of the following causes the breakage of the sewing machine needle?
Did you know 70% of needle breaks happen due to improper threading or tension issues?
When your needle’s the wrong size, hits the throat plate, or struggles with poor thread quality, it’s destined to snap!
What is the remedy for needle breaking?
Check the needle for damage, ensuring it’s the correct size and type for your fabric.
Rethread the machine, inspect tension settings, and clean the bobbin area.
Slow your pace for thick fabrics to avoid strain.
How does sewing speed affect needle longevity?
Imagine this: your sewing machine humming like a race car.
Fast speeds generate heat and strain, weakening needles.
Slow your pace slightly—it reduces stress, avoids breaks, and lets the needle perform its best work.
Conclusion
Solving sewing machine needle breakage might seem intimidating, but it’s easier than you think.
Start by identifying the root cause—whether it’s the wrong needle, thread tension issues, or a pesky dust buildup.
Keep your machine clean, use the correct needle, and match your thread to the fabric.
Don’t ignore tension settings or damaged parts, and with regular maintenance and attention, you’ll minimize breakages and keep sewing smoothly.
Troubleshooting sewing machine needle breakage guarantees frustration-free projects every time, and by following these steps, you’ll ensure a smoothly sewing experience.

