This site is supported by our readers. We may earn a commission, at no cost to you, if you purchase through links.

Measure carefully from waist to floor, trace your pattern with seam allowance, and cut fabric symmetrically. Sew the pants’ sides, create elastic casings at the waist and ankles, and stitch up those finishing touches.
Pro tip: experiment with lightweight cotton or breezy linen for maximum movement. These versatile tutorials on DIY harem pants aren’t just clothing—they’re a statement of creative freedom.
Whether you’re hitting a yoga class or lounging at home, you’ll turn heads with your handmade fashion masterpiece.
Table Of Contents
- Key Takeaways
- Materials and Tools
- Pattern and Measuring
- Measure From Your Belt Line or Desired Waistline to The Floor
- Measure The Distance From The Fold to The End of The Curve for The Crotch Section
- Lay The Fabric on a Flat Surface and Fold It in Half
- Trace The Curve 1 Cm or ½ in Away to Give It a Seam Allowance
- Measure The Distance Between The Fold and The End of The Curve and Transfer It to The Other Side of The Fabric
- Cutting and Sewing
- Finishing Touches
- Accessorizing
- Frequently Asked Questions (FAQs)
- Conclusion
Key Takeaways
- You’ll master DIY harem pants by selecting the right lightweight fabric like cotton or linen and understanding precise measurements for a custom fit.
- You’ll need essential tools including a sewing machine, measuring tape, scissors, elastic, and fabric markers to transform your fabric into stylish, comfortable pants.
- You’ll create professional-looking harem pants by carefully tracing patterns, adding seam allowances, sewing precise elastic casings at the waist and ankles, and finishing with clean hems.
- You’ll elevate your handmade harem pants by experimenting with fabric textures, colors, and accessorizing with belts, jewelry, and complementary pieces that showcase your personal style.
Materials and Tools
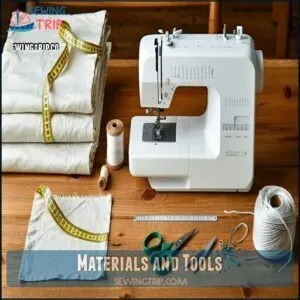
You’ll need a few key materials to transform loose fabric into comfy harem pants that’ll make you look like a style pro.
Grab your measuring tape, soft cotton or linen fabric, elastic, scissors, pins, and a trusty sewing machine, and you’re ready to start crafting your perfect pair of pants.
Craft comfy, stylish harem pants with passion—your measuring tape and creativity are the ultimate sewing superpowers!
You have everything needed to create comfy harem pants.
Fabric (e.g., Cotton, Linen, Silk)
Fabric is the soul of your harem pants, and choosing wisely can transform your sewing project from drab to fab.
Cotton blends, lightweight linen, and silk types offer breathable comfort and drape beautifully.
Your textile adventure starts with understanding weave patterns and fabric care, ensuring your DIY pants are amazing and feel like a second skin.
Understanding cotton fabric properties is essential for selecting the perfect material.
Elastic for Waistband and Ankles
With elastic as your secret weapon, transform those harem pants from flat to fabulous! Here’s your ultimate elastic guide:
- Select premium elastic that hugs just right
- Measure waistband precisely for comfort
- Cut ankle elastic with confidence
- Thread elastics smoothly into casings
- Adjust tension for that perfect, liberating fit
Using the right elastic waistband is essential for a comfortable fit.
Embrace the stretch, craft your style!
Sewing Machine and Thread
Ready to turn your harem pants dream into reality? Your sewing machine is the magic wand that’ll transform fabric into fabulous fashion.
Select sewing machine thread that matches your fabric—polyester works wonders for durability. Adjust machine settings carefully, paying attention to stitch length and fabric tension.
Smooth, consistent stitches are your ticket to professional-looking pants. Pro tip: Practice on scrap fabric to nail those sewing machine settings before tackling your main project.
Consult sewing tutorials for insider tricks, and remember: every stitch brings you closer to creating comfortable, stylish pants that scream personal freedom. To achieve the best results, consider the suitable thread types available.
Scissors or Rotary Cutter
Your trusty cutting companion awaits! Whether you’re a fabric ninja or a sewing newbie, choosing the right cutting tool can make or break your harem pants project.
- Sharp scissors: Your precision partner
- Rotary cutter: The straight-line specialist
- Blade quality matters more than brand
- Comfort trumps everything in cutting tools
Master your fabric cutting technique with confidence and creativity!
Measuring Tape and Marker
After cutting your fabric, grab your measuring tape—your trusty sidekick in creating perfectly fitted harem pants.
Trace your measurements with a fabric marker, capturing your unique body curves. Capture waist, inseam, and hip dimensions accurately.
Add a generous seam allowance, ensuring comfort and flexibility in your DIY sewing adventure. Precision is your passport to stylish, personalized pants.
Safety Pins
Some crafters swear by safety pins as secret weapons in their sewing arsenal.
These versatile fastening aids help you gather fabric, secure elastic, and create temporary holds during your harem pants tutorial.
Pin types matter—choose sharp, rust-free options that won’t snag delicate materials.
From emergency fixes to precise positioning, safety pins are your DIY sewing companion, making complex projects feel like a breeze.
Matching Color Thread
In a journey through color theory, select thread that harmonizes with your fabric’s dye and texture.
Match your sewing threads precisely to create seamless, professional-looking harem pants. Your sewing machine becomes the magic wand, transforming fabric into stylish comfort.
By choosing the right color and weight, you’ll elevate your DIY harem pants from homemade to haute couture.
Transform your DIY harem pants from simple stitches to runway-worthy style with the perfect thread.
Pattern and Measuring
Get ready to transform your fabric into fabulous harem pants by mastering the art of precise measuring and pattern making.
With just a measuring tape, a flat surface, and your unique body measurements, you’ll create a custom pattern that guarantees a perfect, comfortable fit crafted specifically to your style.
This approach allows for a perfect fit, ensuring that your harem pants are both comfortable and flattering, making you feel confident and stylish.
Measure From Your Belt Line or Desired Waistline to The Floor
Ready to rock those harem pants? Let’s map out your measurements like a pro! Your pant length is the secret sauce of a perfect fit.
- Grab a measuring tape and stand tall
- Measure from your desired waistline to the floor
- Account for fabric’s dreamy drape
- Consider your unique body proportions
Precision is your sewing superpower – each inch counts in crafting those killer, comfy pants. With complete concepts in mind and a focus on perfect fit, you’ll be well on your way to creating great harem pants.
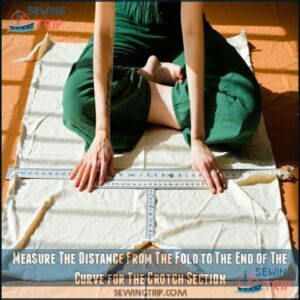
Measure The Distance From The Fold to The End of The Curve for The Crotch Section
After measuring your belt line, it’s time to nail the crotch depth.
Sit on a flat surface and get precise.
Fold your fabric carefully, tracing the curve just 1 cm away from the edge.
This seam allowance is your secret weapon for perfect-fitting harem pants.
Measure from the fold to the curve’s end, ensuring your pattern matches your body’s unique contours.
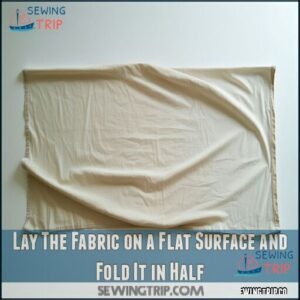
Lay The Fabric on a Flat Surface and Fold It in Half
Smooth out your fabric like a canvas, spreading it flat with purpose. When crafting harem pants, precision starts here.
Fold the fabric exactly in half, right sides facing each other, creating a mirror image ready for transformation:
- Align edges with laser-like focus
- Verify a wrinkle-free surface
- Check fabric grain direction
- Smooth out any stubborn creases
- Position for pattern perfection
Your sewing adventure begins with this foundational fold. Accurate sewing pattern making measurements, including body measurements, are vital for a well-fitted garment.
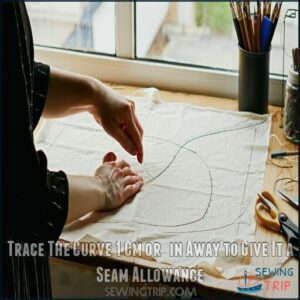
Trace The Curve 1 Cm or ½ in Away to Give It a Seam Allowance
Wielding your fabric chalk, trace the crotch curve with precision, adding a 1 cm seam allowance to guarantee your harem pants fit like a dream.
This essential step in pattern drafting guarantees a comfortable, custom-made garment.
Carefully follow the curve, leaving extra room for movement—your future self will thank you for this painstaking attention to detail.
Measure The Distance Between The Fold and The End of The Curve and Transfer It to The Other Side of The Fabric
Now that you’ve traced the curve’s outline, it’s time to nail your harem pants’ symmetry.
Measure the distance from the fold to the curve’s end with precision. Mirror this measurement on the opposite side of your fabric, ensuring your sewing pattern matches perfectly.
This step guarantees a flattering fit and professional-looking harem pants.
Cutting and Sewing
You’re about to transform that fabric into your dream harem pants by mastering the art of cutting and sewing. With precise pattern tracing, strategic stitching, and expert elastic placement, you’ll create a comfortable, stylish garment that’ll have you looking and feeling amazing.
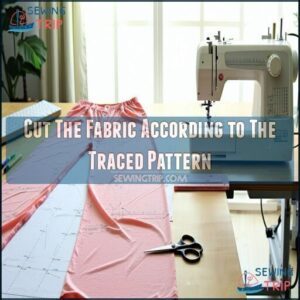
Cut The Fabric According to The Traced Pattern
Ready to transform that traced pattern into fabric magic? Your scissors are your paintbrush, and this fabric’s your canvas! Grab those sharp cutting tools and prepare to make precision your superpower.
- Feel the fabric’s potential
- Channel your inner designer
- Embrace creative freedom
- Trust your crafting instincts
Follow your pants sewing pattern painstakingly, remembering that half-inch seam allowance is your best friend. Choose flowy fabrics that’ll make your harem pants sing with style and movement. Cut with confidence – you’ve got this! Make precision your superpower
Sew The Ends of The Pants Together, Creating a Casing for The Elastic Waistband
With your fabric pieces cut and ready, it’s time to bring your harem pants to life!
Carefully sew the pants’ seams together, leaving a small opening for the elastic waistband.
Pro tip: use a straight stitch and leave about 2 inches unsewn to create the perfect elastic casing.
Your waistband style is about to get seriously comfortable!
Sew The Thin Elastic Around The Ankles
Your harem pants’ ankle elastic is the secret sauce to a perfect, comfy fit. Master these ankle cuff techniques with confidence:
- Measure precisely for elastic length around each ankle
- Cut thin elastic with sharp scissors
- Pin elastic before permanent stitching
- Test elastic tension for comfort
- Use zigzag stitch for flexibility
Professional sewists know: elastic insertion transforms good pants into great ones. Nail this step, and you’ll rock those stylish, custom harem pants like a pro.
Understanding elastic casing techniques is essential for a professional finish, and with these skills, you can create great pants.
Finishing Touches
You’re almost there – the final touches can make or break your harem pants project!
Carefully close up that waistband casing, sew your hems with precision, and adjust the elastic to guarantee a comfortable, personalized fit.
That’ll have you strutting in style.
Stitch Up The Gap in The Waistband Casing
Your waistband’s final seal is the gateway to comfort!
Carefully stitch the casing’s opening using a straight or zigzag stitch, ensuring elastic tension remains consistent.
Close the gap with precision, maintaining seam allowance to secure the elastic smoothly.
This essential waistband closure technique transforms your DIY harem pants from homemade to professional-looking.
Sew The Hems of The Pants
Your crafting adventure reaches a pivotal moment as you transform raw fabric edges into polished pant hems. With precision and creativity, master these essential techniques:
- Select the perfect hem allowance
- Choose complementary thread color
- Adjust stitch length for fabric weight
- Press seams before final stitching
- Create clean, professional-looking cuffs
Carefully fold and press raw edges, then sew with confidence, ensuring your DIY harem pants look runway-ready.
To achieve a professional finish, understanding sewing machine settings is vital for a successful hemming process.
Adjust The Fit as Needed by Adding or Removing Elastic From The Waistband
After hemming your pants, fine-tune your waistband with confidence! Gently pull and ease elastic to release tension, ensuring a perfect fit.
Use a safety pin to guide new elastic through the casing, then stitch the ends securely. Want more wiggle room? Replace the entire elastic band for a customized, long-lasting solution.
Try on the pants before final sewing to guarantee comfort.
Accessorizing
Now that you’ve crafted your perfect pair of harem pants, it’s time to make them truly yours with the right accessories.
From statement belts that cinch your waist to bold jewelry that catches the eye, you’ll transform these comfy pants from simple sewing project to a runway-worthy ensemble.
Experiment With Different Fabrics and Colors to Create Unique Combinations
Let your creativity run wild when mixing fabrics for your harem pants tutorial! Your fabric selection is the secret weapon in transforming DIY harem pants from basic to breathtaking.
- Blend lightweight cotton with silk panels for a luxurious texture
- Experiment with pattern mixing using complementary prints
- Try unexpected dye techniques like ombré or tie-dye
- Combine contrasting textures for a personalized statement piece
Fabric choices reveal endless possibilities in your sewing journey. Each material tells a unique story—from breezy cotton to shimmering chiffon, your selections define the pants’ personality.
Remember, these handmade harem pants are your personal canvas, inviting you to express your individual style through thoughtful fabric selection and creative combinations. To achieve a perfect outfit, consider exploring festival style tips to elevate your harem pants.
Add Accessories Like Belts, Jewelry, or Headpieces to Enhance Your Outfit
Step into a world beyond fabric with harem pants that beg for the perfect accessories! Elevate your handcrafted creation by mastering the art of styling:
- Belt Styles: Choose a woven belt to define your waist or opt for a metal-detailed piece that screams boho chic.
- Jewelry Trends: Layer delicate necklaces for casual vibes or rock statement pieces that command attention.
- Headpiece Options: Crown your look with a vibrant headband, floppy hat, or whimsical flower crown.
Your harem pants are a canvas waiting to be transformed. Mix and match these styling tips to create runway-worthy outfits that showcase your unique fashion sense.
From footwear to handbag selection, every accessory tells a story of personal style and creative expression.
Frequently Asked Questions (FAQs)
How to make DIY harem pants?
Picture yourself dancing through life in baggy, breezy comfort: grab lightweight fabric, trace a pattern, sew with elastic waist and ankles.
Voilà! You’ve just crafted DIY harem pants that scream freedom and style.
How do I choose the best harem pants?
Choose lightweight, flowy fabrics like cotton or silk that drape beautifully.
Consider your body shape, comfort, and personal style.
Opt for elastic waistbands, adjustable fits, and ankle cuffs that showcase your unique personality and movement.
How do you sew harem pants?
Grab your telegraph and sewing machine! You’ll trace a pattern, cut lightweight fabric, sew inseams and crotch, create elastic waistbands, and attach ankle cuffs.
Press seams, try on, and rock your handmade harem pants with confidence.
What are harem pants made of?
You’ll love harem pants crafted from lightweight, flowing fabrics like cotton, rayon, or chiffon.
Silk and jersey knit work magic too, giving you comfort and style with that perfect drape and breathable feel.
How do you draw harem pants?
Dance with fabric’s whispers, tracing curves and angles on paper.
Sketch loose, billowing legs that capture freedom’s essence.
Start with a basic pant template, then drop the crotch and widen the leg openings for your harem pants design.
How do you adjust harem pants to fit your body type?
Measure your body carefully, then adjust the waistband and crotch depth.
Experiment with elastic tension and fabric drape.
Tailor the pants to highlight your best features, ensuring comfort and style that flatters your unique silhouette.
How much fabric do you need to make harem pants?
Like a chameleon adapting to its surroundings, you’ll need about 2-3 yards of fabric, depending on your size and chosen design.
Opt for lightweight, flowing materials that’ll make your harem pants drape beautifully and move with you.
Are harem pants easy to make?
You’ll find harem pants surprisingly simple to create.
With basic sewing skills, a comfy pattern, and lightweight fabric, you can whip up these trendy pants in just a few hours.
It’s easier than you might think to make harem pants, and with these skills, you can have them ready in no time.
What fabric is best for harem pants?
You’ll want lightweight, flowing fabrics like cotton lawn, linen, or chiffon that drape beautifully.
Avoid heavy materials like denim.
Stretch jerseys work great too, giving you comfort and that signature billowy harem pants silhouette, with chiffon being another good option.
How to turn a skirt into harem pants?
Let’s repurpose that skirt into fabulous harem pants! Slice strategically, add elastic, and transform the fabric’s silhouette.
Sew new seams, create a dropped crotch, and cinch those ankles for a bohemian-chic, breathable statement piece that screams personal style.
Conclusion
Sewing your DIY harem pants is like releasing a creative tornado in your wardrobe!
With these tutorials diy harem pants steps, you’ve transformed fabric into a personal style statement.
You’ll rock comfort and self-expression with every stitch.
Whether you’re dancing, lounging, or strutting your stuff, these handmade pants are more than clothing—they’re a reflection of your creativity.
Embrace the journey, celebrate your unique style, and keep pushing those fashion boundaries.
- https://www.wikihow.com/Make-Harem-Pants
- https://www.sparklybelly.com/how-to-make-belly-dancer-harem-pants/
- https://themotherhuddle.com/easy-harem-pants-tutorial/
- https://www.reddit.com/r/sewing/comments/11ui7sf/anyone_know_any_patterns_for_harem_pantshippie/
- https://www.costumesbyalice.ch/harem-pants-how-to

