This site is supported by our readers. We may earn a commission, at no cost to you, if you purchase through links.
 Creating a lunch bag with TutorialsDIY is like designing your own little masterpiece for mealtime.
It’s simple, eco-friendly, and saves a ton of cash. You’ll need basics like canvas fabric, thread, and maybe a sewing machine (but don’t worry—no fancy skills required).
Personalize it with cool features like Velcro closures, drawstrings, or even a splash of embroidery. Plus, these bags are reusable, so you’re cutting waste while carrying your snacks in style.
Whether it’s for work, school, or picnics, this project suits all ages. Bonus: you’ll feel like a crafting superstar every time someone asks, “Where’d you get that?”
Curious yet?
Table Of Contents
Key Takeaways
- You’ll save money and reduce waste by making a reusable lunch bag with sturdy fabric like canvas or oilcloth.
- Personalize your bag with easy touches like Velcro closures, embroidery, or iron-on designs.
- Prepping techniques like waxing fabric or sewing lining improve durability and water resistance.
- Pairing reusable bags with organized containers makes lunch packing eco-friendly and hassle-free.
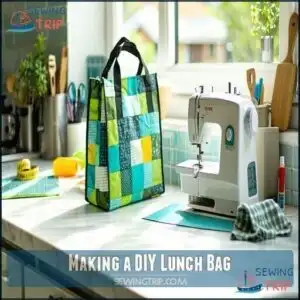
Making a DIY Lunch Bag
You’ll save both money and the planet when you stitch up your own stylish lunch bag using these beginner-friendly patterns.
With just some fabric scraps and basic sewing skills, you can create a personalized carrier that’ll make your coworkers wonder if you’ve been secretly moonlighting as a fashion designer!
Why Make a DIY Lunch Bag
In a world of disposable options, why not create something lasting?
Making your own DIY lunch bag isn’t just a craft project—it’s a statement about your values and style.
A DIY lunch bag isn’t just handmade—it’s a daily reminder of your creativity, values, and personal style.
When you stitch together your personal lunch carrier, you’ll enjoy:
- Save Money – Skip those $8 daily takeout meals and pocket the difference
- Reduce Waste – Say goodbye to single-use paper and plastic bags
- Express Yourself – Design a bag that reflects your personality or matches your wardrobe
Plus, there’s something satisfying about using something you’ve made with your own hands. You can even personalize it with grosgrain ribbon details.
Creating something with your own hands adds a touch of pride—and a sprinkle of your unique style!
Ready to start your sustainable journey?
Benefits of a Reusable Lunch Bag
Investing in a reusable lunch bag offers remarkable benefits beyond just carrying your meals.
When you make the switch, you’ll enjoy both practical advantages and feel good about your eco-friendly choice.
| Benefit | For You | For Our Planet |
|---|---|---|
| Financial | Save $300+ yearly | Reduce landfill waste |
| Health | Portion control | Fewer plastic chemicals |
| Practical | Customizable storage | Resource conservation |
| Style | Express personality | Inspire others |
Your DIY lunch bag keeps food at proper temperatures while eliminating daily plastic waste.
Plus, you’ll naturally make healthier meals when you’ve got a special carrier you’re proud to show off, which can also help with portion control.
Suitable for All Ages
Whether you’re 7 or 70, DIY lunch bags offer Universal Appeal that spans generations while showcasing your personal style.
Our lunch bag tutorial makes crafting homemade lunch bags accessible for everyone in your household!
- Kids lunch bag: Transform colorful fabrics into monster shapes or add superhero appliqués that make lunchtime an adventure
- Teen-friendly: Incorporate trendy patterns and customizable pockets perfect for storing phones and snacks
- Adult lunch bag: Create sophisticated, office-appropriate designs with insulated linings that keep meals fresh
- Senior-friendly: Design with easy-open closures and comfortable, wider handles for improved grip
- Family project: Turn it into a Shared Activity where everyone designs their own bag while learning basic sewing skills
The beauty of Age-Friendly Designs? Each bag can be customized to match both skill level and personal preference!
Eco-Friendly and Cost-Effective
In your kitchen drawer lies the secret to both saving money and saving the planet.
Making your own DIY lunch bag isn’t just crafty—it’s a smart move for your wallet and Mother Earth.
Using ecofriendly materials like fabric scraps or old shirts, you’ll create a reusable lunch bag that’s uniquely yours—while keeping plastic out of landfills.
| Benefit | Environmental Impact | Cost Savings |
|---|---|---|
| Reduce Waste | No more disposable bags | $100+ yearly |
| Upcycled Materials | Gives fabric new life | Practically free |
| Sustainable Designs | Lasts for years | Replaces $20 store bags |
| Healthier Meals | Encourages home cooking | Saves on takeout |
Using ecofriendly materials and making your own DIY lunch bag can lead to sustainable designs that are not only good for the planet but also encourage healthier meals. This approach to lunch can help reduce waste, give new life to upcycled materials, and result in significant cost savings.
DIY Lunch Bag Supplies and Tools
You’ll need sturdy fabric like canvas or oilcloth, a sewing machine with heavy-duty needles, and basic notions like thread and closures to create your money-saving lunch bag that’ll make your coworkers green with envy (and not just because you’re helping the planet).
Don’t forget your measuring tape, fabric scissors, and perhaps some decorative elements like buttons or appliqués – after all, brown-bagging it doesn’t mean sacrificing style for sustainability! You can still have a stylish bag that is also eco-friendly.
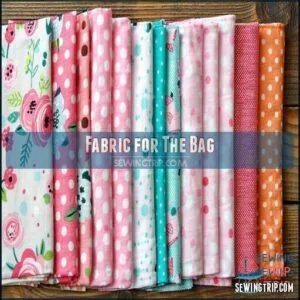
Fabric for The Bag
The perfect fabric choice makes your DIY lunch bag both practical and stylish.
When selecting materials, prioritize fabric sturdiness and water resistance for daily use.
- Canvas fabric: Durable and takes well to personalization designs
- Oilcloth: Naturally water-resistant and wipes clean in seconds
- Laminated cotton: Combines cute patterns with practical protection
- Quilted fabric: Adds insulation to keep foods at proper temperatures
Pre-washing your fabric prevents future shrinkage, especially important for canvas.
Many options are available if you need canvas material.
For extra protection, apply a wax sealant to non-laminated fabrics—it’s like giving your fabric lunch bag a raincoat for those inevitable spills!
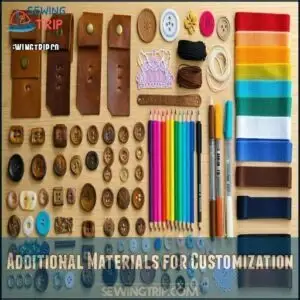
Additional Materials for Customization
Beyond basic fabric, your DIY lunch bag deserves some personality through customization! Leather closures add sophistication, while button closures provide both function and flair. Swap in colorful nylon straps for a sportier vibe than traditional leather handles.
For decorative elements, consider adding lace trim around edges or applying iron-on patches for instant character. Fabric markers let you create custom designs, while embroidery adds texture and personalized touches.
Appliqués transform plain fabric into something special. Black ribbon provides sleek contrast against colorful fabrics. Consider adding various bag fasteners for securing your lunch.
Remember that strategic button placement can enhance both style and function—try screw-back buttons for durability on bags you’ll use daily. This approach allows for a personalized touch and can make your DIY lunch bag truly unique, reflecting your personal style with custom designs.
Optional Materials for Decoration
Your lunch bag’s personality is waiting to shine! Dress it up with these fun decorative options:
- Lace trims and decorative ribbons – add a touch of elegance to edges
- Fabric markers and fabric paint – create custom designs with no fuss
- Iron-on patches and appliqués – transform plain fabric with character
- Button embellishments and embroidery – add texture and dimension
Mix and match these elements for a one-of-a-kind creation that’ll make lunchtime more exciting and have friends asking, "Where’d you get that?
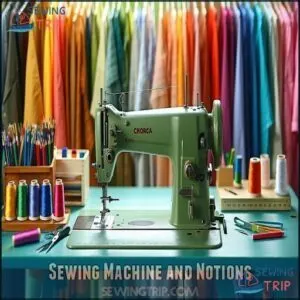
Sewing Machine and Notions
The sewing machine soldier and its trusty notions will make your lunch bag journey a breeze. You’ll need a heavy-duty needle to conquer canvas and sturdy fabrics without breaking.
Match your thread selection to your fabric weight—polyester for everyday use, cotton for natural fibers. Don’t forget these game-changers:
- Zipper feet for smooth closures
- Seam rippers (for those "oops" moments)
- Walking foot to prevent fabric shifting
Keep extra bobbins wound and ready—nothing kills momentum like running out mid-seam! Choosing the right needle, like universal sewing options, is essential for different fabrics. For detailed sewing instructions, adjust your machine to the appropriate stitch length (longer for thicker fabrics).
With these sewing supplies in your arsenal, you’ll stitch your eco-friendly bag like a pro!
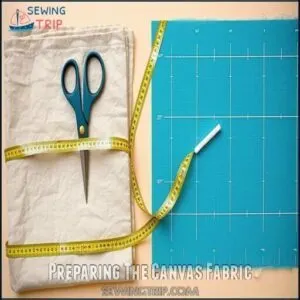
Preparing The Canvas Fabric
You’ll need to prep your canvas fabric before turning it into that lunch bag that’ll make your coworkers green with envy (and not just because you’re saving the planet!).
Pre-wash your fabric to prevent future shrinkage, then measure and cut precisely, allowing extra room for those all-important seam allowances that’ll keep your sandwich from making a grand escape.
Measuring and Cutting The Canvas
Now that you’ve gathered your supplies, it’s time to master the art of measuring and cutting your canvas fabric. With your ruler and tailor’s chalk in hand, mark your fabric dimensions precisely—remember, cutting accuracy makes or breaks your lunch bag!
Align your pattern pieces with the canvas grain (those tiny lines running through the fabric) for maximum durability. Who wants a lunch bag that falls apart after two uses? Not you!
When placing patterns, leave a 1/2-inch seam allowance around all edges. Your future self will thank you when those seams hold strong.
Choose sharp cutting tools—scissors work, but a rotary cutter gives those clean edges that make sewing a breeze!
Painting or Dyeing The Canvas
With your canvas cut to size, it’s time to express your creativity! Transform that plain fabric into something spectacular with paint or dye.
- Choose fabric-specific paints that won’t crack or fade after washing
- Try ombré dyeing for a professional gradient effect that wows
- Use freezer paper stencils for crisp, clean designs without special equipment
- Consider color fastness by adding vinegar to dye baths for lasting vibrancy
- Test your design on scraps before committing to your lunch bag fabric
Remember to heat-set your paint with an iron or dryer for durability. Your canvas preparation now will guarantee your lunch bag remains vibrant through countless uses!
Folding and Sewing The Canvas
Now that your freshly prepared canvas fabric is waiting, it’s time for the transformation to begin! Fold it precisely in half with right sides kissing each other, then secure with pins along the edges.
Fire up your sewing machine and create strong side seams using straight stitches. Remember to backstitch at beginning and end points for seam strength!
- That satisfying sound when your needle glides through canvas fabric
- The pride of perfectly aligned corner reinforcement
- The excitement of seeing your bag take shape
- The confidence knowing your homemade creation will outlast store-bought options
Applying Fabric Wax Sealant for Water Resistance
Water transforms your lunch bag from soggy disaster to spill-proof marvel with the right wax sealant.
A beeswax-paraffin blend creates that perfect barrier between your sandwich and the outside world.
Waxed canvas remains a durable, high-quality material with proper care.
- Rub wax directly onto fabric using circular motions, focusing on seams and corners
- Melt the wax into fibers with a hairdryer on high setting for deeper penetration
- Test waterproofing by sprinkling water droplets – they should bead up, not absorb
- Re-apply every 6 months or when water resistance diminishes
This technique works best on canvas and cotton/poly blends.
Ever had grape juice leak through your bag?
Not anymore with this DIY sealant superhero!
Sewing The Reusable Lunch Bag
Let’s get sewing!
With sturdy seams, boxed corners, and a Velcro closure, you’ll have a reusable lunch bag that’s both durable and easy to use.
Plus, it’s way more fun than buying one!
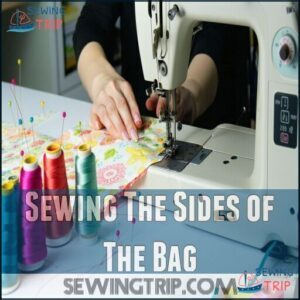
Sewing The Sides of The Bag
Alright, let’s get those side seams stitched up! Start by lining up your fabric pieces—right sides together like they’re sharing a secret. Use pins or clips to hold everything steady.
For solid seam strength, grab your sewing machine, select a straight stitch, and sew with a 1/2-inch seam allowance. Double-check your fabric alignment as you go—nobody wants wonky edges!
Keep your speed steady, and take a moment to verify your side seams are clean and even. Pro tip: backstitch at the start and end for extra durability.
With this step done, you’re on your way to a lunch bag that’s ready for action (and leftovers).
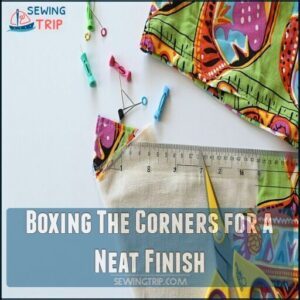
Boxing The Corners for a Neat Finish
You’re mastering cornering techniques to give your DIY lunch bag a professional finish.
To achieve this,
- Use precise markings
- Clip corners neatly
- Sew with a 1/2-inch seam allowance
- Press for crisp edges, ensuring structural integrity and visual appeal in your tutorials DIY lunch bag project.
Focusing on corner construction and sewing techniques to avoid bulk.
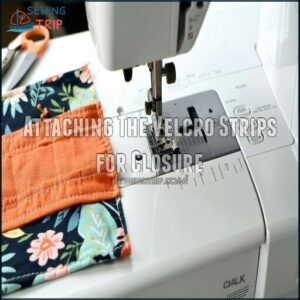
Attaching The Velcro Strips for Closure
Velcro placement is key to keeping your DIY lunch bag secure.
Attach the hook side of the Velcro strips to one flap, and the loop side to the other.
Use a zigzag stitch for maximum closure strength.
For extra durability, double-stitch or consider alternative closures like snaps or buttons.
| Step | Materials Needed | Tips |
|---|---|---|
| Mark the fabric | Tailor’s chalk | Guarantee strips align for a neat finish |
| Pin Velcro strips | Straight pins | Keep them steady during sewing |
| Stitch edges | Sewing machine | Use a zigzag stitch for durability |
| Test closure | Completed bag | Adjust placement if needed |
Velcro guarantees no snack escapes—perfect for a hassle-free lunch solution!
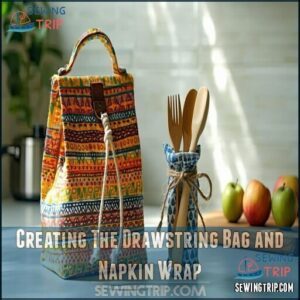
Creating The Drawstring Bag and Napkin Wrap
Let’s make packing lunch fun with a drawstring bag that’s simple to sew and keeps everything secure.
Pair it with a napkin wrap that doubles as a stylish way to bundle your utensils—practical and classy all in one!
Sewing The Drawstring Bag
If you’re ready to sew a drawstring bag, it’s easier than you think and perfect for beginners! Pick sturdy fabric that holds up but reflects your style because fabric choice impacts durability. Pre-wash it to avoid laundry surprises later.
Let’s get sewing!
- Cut two 11×35-inch rectangles and fold them lengthwise with the right sides together.
- Sew the sides using a 1/2-inch seam allowance; finish edges with zigzag stitching.
- Fold the top edge down twice to create a drawstring casing; press with an iron.
- Sew around the casing, leaving an opening for threading.
Use fun cord material options like cotton rope or paracord for the drawstring closure. For a polished interior, select lining fabric to add a professional finish.
Quick tip? Play with bag size variations for endless uses!
Crafting The Large Napkin Wrap
Pick a soft cotton fabric for your napkin wrap—it’s washable and gentle on containers.
Trim it to a handy 18×18 inches for snug wrapping. Fold the edges ½ inch, iron them flat, and stitch for a clean hem.
It’s a quick, fun sewing project! Pair it with your lunch bag for a tidy, Bento-style presentation. Simple and stylish!
Adding a Buttonhole for a Name Tag
Adding a buttonhole for a name tag? It’s a quick upgrade to personalize your DIY lunch bag or wrap!
Focus on buttonhole placement—try a corner edge so it’s easy to spot but stays out of the way.
Here’s a simple tutorialsdiy lunch bag approach:
- Stitch the buttonhole using your machine (buttonhole foot helps!) or sew manually.
- Use sturdy tag material like grosgrain ribbon or fabric strips, reinforced for durability.
- Embroider a name or add a stylish patch, finishing with matching thread.
It’s a fun, easy way to claim your bag!
Using a Variety of Containers for Separation
How do you keep your lunch organized and spill-free? The trick’s in your containers!
A mix of options makes your DIY bag functional and stylish.
- Snap-lid containers: These are lifesavers for portion control and keeping wet foods separate.
- Silicone snack bags: Flexible for sandwiches, snacks, or veggies—they’re space-saving champs.
- Mini jars: Perfect for dressing or hummus, ensuring nothing leaks onto your bento box setup.
Choose sturdy, leak-proof options for a lunch that’s mess-free and Instagram-worthy!
Assembling and Customizing The Lunch Bag
Putting your lunch bag together is easier and more fun than you’d think.
With a few simple tweaks like adding embroidery or fitting a cute bento box, you can make it both practical and totally unique!
Placing Food Containers and Utensils
Organizing food containers is like solving a fun puzzle.
Start with your largest items—snaplid containers for main dishes can sit at the bottom. Stack smaller silicone snack bags or round containers snugly on top.
Slide slim containers for utensils along the sides to keep things tidy. Fill empty spaces with little extras like granola bars or fruit.
Always choose leak-proof containers to prevent any lunchtime messes—nobody loves a soggy sandwich! This approach makes your lunch bag neat and also makes meal preparation smoother and guarantees everything stays in place during the day, which is a fun puzzle to solve and results in a neat arrangement.
Tying The Napkin and Containers Together
Once your food containers are packed, grab a sturdy napkin wrap for that perfect combo of function and flair.
Place your lunch containers in the middle of the napkin, fold it diagonally, and tie it up snug—not too tight, though, or you’ll wrestle to unwrap it later!
Here are five clever ways to secure your setup:
- Use soft fabric ties for a reusable, DIY lunch bag charm.
- Slip on a napkin ring; it’s classy and practical.
- Elastic bands work wonders for secure fastening.
- Clip it with colorful bag clips.
- Pair with utensil placement for bento-like integration!
This method provides a practical way to pack your lunch.
Customizing With Embroidery or Applique
Why settle for plain when your DIY lunch bag can pop with personality?
Embroidery stitches or cute appliqué materials like felt or fabric scraps turn an ordinary bag into a masterpiece. Stitch funky owls or bright hearts, or use iron-on design templates for a fast fix.
Here’s a fun breakdown:
Method Skill Level Fun Factor Best Tools
Play with thread colors and unique fabric combinations. A personalized lunch bag makes meals more exciting!
Using a Japanese-Style Bento Box for a Traditional Look
For an extra touch of elegance, pair your DIY lunch bag with a Japanese-style bento box—it’s like giving your lunch its own perfect little stage.
These boxes blend traditional aesthetics with modern practicality, making meals feel special.
Here’s why bento boxes are a hit:
- Compartmentalized design keeps flavors and textures separate—great for picky eaters.
- Portion-friendly sections follow the classic 4:3:2:1 food arrangement for rice, protein, vegetables, and extras.
- Durable materials like wood, plastic, or stainless steel mean longevity.
With a bento box, lunch isn’t just organized—it’s an artform.
Tips and Considerations for The DIY Lunch Bag
Taking care of your DIY lunch bag is easier than you think and keeps it looking great longer.
Wash it regularly, iron out the wrinkles.
Don’t forget to share your crafty success with friends—they’ll love it!
Washing and Ironing The Bag and Napkin
Keep your lunch bag and napkin looking great with the right care!
Wash the bag gently inside out using mild detergent. Skip the dryer—air drying protects fabric durability.
Got stains? Try a vinegar-water spray for quick stain removal.
When ironing napkins, use low heat to preserve designs and maintain crispness.
For synthetic bags, remember that you should avoid fabric softening.
Regular washing frequency keeps everything fresh—because no one wants a stinky sidekick at lunch, and it’s essential to maintain fresh conditions.
Maintaining Hygiene and Durability
Taking care of your homemade lunch bag isn’t rocket science—it’s about consistent love and care to keep it fresh and strong.
- Regular Cleaning: Wipe crumbs and splashes daily with a damp cloth.
- Stain Removal: Blot stains quickly with cold water to avoid them sticking around.
- Washing & Ironing: Use cold water, mild detergent, and air dry completely to protect fabric durability.
- Repair Techniques: Fix tears with sturdy patches or extra stitching to keep it reliable.
- Storage Solutions: Store it in a dry spot to prevent odors or mildew.
Your bag will last longer—and thank you!
Sharing Your Experience and Results
Sharing your DIY lunch bag journey can be as rewarding as the project itself! Snap some photos of your fabulous creation and post them online using hashtags like #DIYlunchbag. It’s like your own mini art exhibition.
Join online forums or drop into blog comments to swap tips and tricks. Sharing progress updates or crafting tutorials can inspire others and maybe even spark fun design iteration ideas.
Plus, user feedback is pure gold for skill improvement. Tweaks based on community feedback make your next project even better. Who knows? Your tutorial creation might turn into a trending masterpiece. DIY isn’t just creative—it’s a chance to connect, learn, and shine.
Frequently Asked Questions (FAQs)
What are the best DIY lunch bags?
DIY lunch bags are like a blank canvas for creativity.
You’ll love options like quilted totes, waterproof vinyl bags, or cute drawstring styles.
Add pockets, zippers, or decorations to make them uniquely yours!
How do you make a lunch bag?
Start choosing durable fabric like canvas, then cut, sew, and personalize it with fun touches like Velcro or zippers.
Add a sturdy handle for easy carrying.
It’s easier than you’d think!
Can you make a lunch bag with fabric?
Imagine this: a sturdy canvas lunch bag with your favorite designs.
You can absolutely make one!
Pick durable fabric, pre-wash it, sew strong seams, and personalize it with embroidery, paint, or fun decals!
What can I make if I can’t sew a lunch bag?
If sewing’s not your thing, try a no-sew fabric lunch bag.
Use iron-on adhesive, fabric glue, or even staple sturdy fabric together.
Add Velcro, and boom, you’ve got a functional, creative bag!
How do you customize a store-bought lunch bag?
Funny how customizing a lunch bag feels like decorating your own treasure chest, right?
Try fabric patches, iron-on designs, or even paint pens.
Add keychains, embroidery, or stickers to make it totally yours!
Can you make a lunch bag with a zipper?
You can sew a lunch bag with a zipper.
Use sturdy fabric, an insulated lining, and a zipper foot on your sewing machine.
It’s durable, keeps food fresh, and adds a polished touch.
How to make a lunch box bag for school?
Grab sturdy fabric, a zipper, and a sewing machine.
Cut and stitch pieces into a boxy shape, adding lining for durability.
Attach handles and finish edges.
You’ve got a personalized lunch bag ready for school!
How do you make a lunch box at home?
Making a lunch box at home is easier than you’d think!
Choose sturdy fabric, cut to size, sew edges neatly, add handles and closures like Velcro or snaps.
Customize with patches or fun designs, which can be a complete way to personalize your lunch box.
How do you pack a school lunch bag?
Packing a school lunch bag is like creating a mini picnic.
Use sturdy containers, add balanced meals with fruits, veggies, protein, and fun snacks.
Don’t forget a cool drink and an ice pack!
How do you make a heart out of lunch bags?
Fold your lunch bags into half-heart shapes, cut along the edges, and unfold for a symmetrical heart.
Stack, glue, or tape layers for thickness.
Add color or glitter—you’ve got an adorable DIY masterpiece!
Conclusion
Ready to channel your inner artist? Crafting your own lunch bag with TutorialsDIY isn’t just practical—it’s fun, eco-friendly, and saves cash.
You’ll love how these customizable, reusable bags reduce waste while adding a personal touch to mealtime. Whether you’re sewing Velcro closures or crafting a chic drawstring, each project is uniquely yours.
Plus, being asked, “Where’d you get that?” never gets old. So grab your canvas and creativity—your perfect TutorialsDIY lunch bag awaits, and it’s a great way to express your creativity!
- https://www.youtube.com/watch?v=ZxxUA2tGrds
- https://www.reddit.com/r/sewing/comments/zw2pi3/made_my_own_lunchbag_since_i_couldnt_find_any/
- https://www.quora.com/How-do-I-make-a-lunch-bag
- https://www.pinterest.com/curlysue77/diy-lunch-bag/
- http://alemonsqueezyhome.blogspot.com/2010/08/lunch-sack-tutorial.html

