This site is supported by our readers. We may earn a commission, at no cost to you, if you purchase through links.
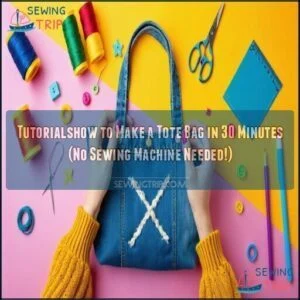
Start by choosing a sturdy fabric like canvas or denim. Cut two rectangles for the bag body and two strips for the straps.
Fold the edges of the fabric inward, then hand-stitch the sides and bottom using a simple running stitch.
To give the bag shape, pinch the bottom corners into triangles and stitch across. Attach the straps securely at the top, reinforcing with an "X" pattern for strength.
Add pockets or decorations if you like. With a little patience, you’ll have a stylish, handmade tote bag!
Table Of Contents
Choosing The Right Fabric
You’ll want to pick a sturdy fabric like canvas or medium-weight cotton that won’t sag when you fill your tote with groceries or beach essentials.
Choose durable fabrics like canvas or cotton to keep your tote strong and stylish, no matter what you carry.
The right material makes all the difference in how long your bag lasts, so avoid stretchy fabrics and consider adding interfacing for extra structure to ensure your tote has extra structure.
Types of Fabric Suitable for Tote Bags
When choosing fabric for a no-sew tote bag, five fantastic options stand out:
- Canvas: Exceptional durability makes it perfect for heavy groceries or books
- Cotton: Versatile and beginner-friendly with countless print options
- Denim: Provides sturdy structure that withstands daily wear and tear
- Linen: Natural texture creates a sophisticated look, ideal for lighter items
- Jute: Eco-friendly style with rustic charm, though rougher to handle
Canvas remains the top choice for beginners due to its forgiveness and strength. You can find various canvas tote materials online.
Your fabric selection directly impacts both function and style of your tote. Remember that thicker materials like canvas and denim offer better structure, while cotton provides the most versatility for creative projects.
Weight Capacity of Fabric
Beyond material type, understanding fabric density determines how much your no-sew tote will carry.
Different fabrics have specific weight capacities:
- Lightweight fabrics (170-230 GSM): Hold 5-10 pounds, perfect for light shopping
- Medium-weight options (230-340 GSM): Support 10-15 pounds of books or groceries
- Heavy-duty fabrics (340-450+ GSM): Carry 15-20+ pounds with ease
Canvas and polyester offer impressive fabric strength, with polyester supporting up to 44 pounds when properly constructed. Consider the typical weight capacity of your chosen material before loading your tote.
Remember that seam strength matters as much as material—even the sturdiest fabric fails at weak stress points. For maximum load distribution, consider how weight affects both fabric and handle attachment points.
Interfacing for Added Structure
The right interfacing acts as your tote bag’s hidden support system, transforming floppy fabric into a structured masterpiece.
Interfacing is the secret ingredient that turns soft fabric into a sturdy, stylish tote bag masterpiece.
When choosing interfacing for your no-sew project, consider these options:
- Lightweight fusible interfacing bonds easily with cotton and linen using just an iron
- Medium-weight interfacing gives canvas and denim totes perfect stability without stiffness
- Sew-in interfacing can be attached with fabric glue for machine-free projects
- Fusible fleece adds gentle padding to protect electronics or delicate items
- Peltex ultra-firm interfacing creates bags that stand upright on their own
Apply interfacing to your fabric’s wrong side by positioning it adhesive-side down and pressing with a hot iron for 10-15 seconds.
Focus on reinforcing high-stress areas like handles and bag bottoms for maximum durability and professional results.
Experimenting With Different Fabrics
Why not turn your tote into a style statement by experimenting with different fabrics?
Mix and match to discover unique combinations that reflect your personality.
| Fabric Type | Best Paired With | Weight | Texture | Color Tip |
|---|---|---|---|---|
| Cotton prints | Canvas solids | Light | Smooth | Bold with neutral |
| Denim | Floral cotton | Medium | Rough | Blue with pastels |
| Upcycled t-shirts | Canvas | Light | Soft | Monochrome palette |
| Burlap | Linen | Heavy | Coarse | Earth tones |
| Quilting cotton | Canvas | Light | Smooth | Pattern mixing |
Remember to keep in mind fabric weight when creating combinations—lighter fabrics need heavier partners for proper structure.
How to Make a Tote Bag
You’ll create a useful tote bag in just 30 minutes using only fabric, scissors, and a needle and thread.
With this simple no-sew method, you can make a stylish carryall that’s perfect for groceries, books, or beach essentials, and it’s a great way to have a stylish bag.
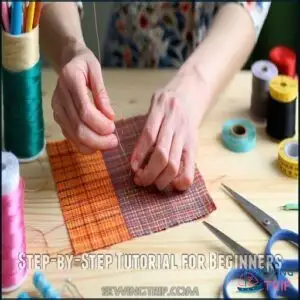
Step-by-Step Tutorial for Beginners
Now that you’ve selected your perfect fabric, let’s jump into making your first tote bag without any sewing machine.
This 30-minute tote bag tutorial breaks down every step for beginners. You’ll transform simple materials into a functional accessory using just needle and thread.
Follow along with our clear instructions to avoid common beginner mistakes while mastering simple seams.
- Feel the pride of completing your first handmade project
- Experience the satisfaction of creating something practical from scratch
- Enjoy the freedom of customizing your bag to reflect your personal style
Gather your fabric choices and tool essentials—your DIY tote bag journey starts right here!
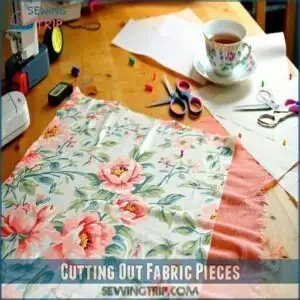
Cutting Out Fabric Pieces
Now that you’ve learned the basics, let’s prepare your fabric pieces. With good cutting preparation, your bag will come together smoothly.
For this no-sew tote, you’ll need:
- One main fabric piece: 18" x 30" (for bag body)
- Two strap pieces: 4" x 24" each
- Optional pocket piece: 6" x 6"
Place fabric on a flat surface, follow the fabric grain, and use sharp scissors for precise cuts. Consider pattern placement before cutting to showcase your favorite designs.
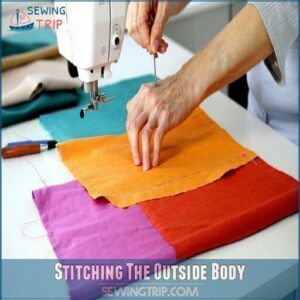
Stitching The Outside Body
Now you’ve got your pieces cut, let’s stitch that tote bag body.
Place both pieces with right sides together and align all edges carefully. Pin along the sides and bottom to keep everything steady.
For hand-sewing your tote bag, use a simple running stitch about 1/2-inch from the edge, leaving the top open.
Keep your stitches small and even for strength.
Boxing The Corners
After stitching the sides, your fabric tote bag needs corner depth for volume impact and stability. This simple box stitch technique transforms your flat piece into a three-dimensional bag.
Pinch each bottom corner into a triangle with the seam centered for perfect angle precision. Measure your corner dimensions (2-3 inches wide) and mark with pins.
- Cut a small square from each corner for easier manipulation
- Apply firm pressure while stitching across the triangle
- Use multiple stitches for extra stability techniques
The boxed corners create a flat bottom that stands up by itself. Both corners must match exactly for a balanced, professional-looking tote bag tutorial result.
Adding an Inside Pocket
Now that your corners are boxed, let’s add functionality with an inside pocket.
Cut a 9×9-inch fabric square for your pocket material. Fold it in half with right sides together, then hand-stitch three sides using a simple running stitch.
Turn right side out and press flat.
Pin your pocket centered on the lining for perfect pocket placement.
This simple addition keeps your phone, keys, and small items organized and easily accessible.
Essential Materials and Tools
You’ll need basic items you probably already have around the house for this no-sew tote bag project.
Gather some sturdy fabric, sharp scissors, strong fabric glue or hem tape, measuring tape, pins, and an iron to make your bag assembly quick and straightforward.
Fabric Selection and Preparation
Now that you know the basic steps, let’s focus on selecting the right fabric for your no-sew tote. Your fabric choice directly impacts your bag’s durability and functionality.
For a quick 30-minute project, consider these fabric strength options:
- Canvas or duck cloth offers excellent fabric durability and maintains structure
- Medium-weight cotton provides balance between strength and flexibility
- Felt or thick wool creates a structured bag without fraying edges
Always check the fabric grain by finding the direction with minimal stretch. Print orientation matters too—position patterns the way you want them displayed on your finished bag.
Pre-treatment methods are simple: most fabrics benefit from prewashing to prevent future shrinkage. Allow for shrinkage allowance when calculating how much fabric to buy—approximately 10% extra guarantees you’ll have enough after pre-washing.
Tools and Notions Required
Just a few essential tools will get your no-sew tote bag project off the ground. Since you won’t need a sewing machine, focus on gathering these hand-crafting supplies:
- Sharp fabric scissors (Scissors Sharpness matters for clean cuts)
- Strong all-purpose thread or heavyweight craft thread
- Large-eye needles for hand sewing
- Measuring tape for precise dimensions (Measuring Accuracy guarantees symmetry)
- Straight pins or fabric clips (Pin Alternatives like wonder clips work great)
- Iron set to appropriate fabric setting (Iron Settings depend on fabric type)
- Fabric marking pen or chalk
- Cutting mat if using a rotary cutter
Your craft supplies don’t need to be fancy – just functional. A good pair of scissors makes all the difference when cutting fabric cleanly. Consider the need for exceptionally sharp blades for intricate fabric work.
Consider organizing your sewing tools in a small container so everything stays together between crafting sessions. Remember, with hand-sewing projects, patience is just as important as having the right equipment.
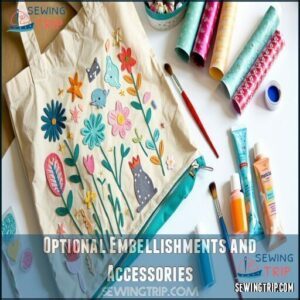
Optional Embellishments and Accessories
Once you’ve gathered your basic supplies, it’s time to think about personalizing your no-sew tote. Adding optional embellishments can transform your simple bag into something uniquely yours.
Consider these easy add-ons:
- Fabric paint or appliqué designs for expressing your style without stitching
- Tassel trims or key fobs attached to handles for practical flair
- Zipper pouches that adhere with fabric glue for extra organization
These decorative elements don’t require sewing skills but make a big impact. You can find inspiration for unique painting designs to further customize your tote. Even simple touches like buttons glued in a pattern or iron-on patches can turn your basic tote into a head-turning accessory.
Assembling The Tote Bag
Now you’ll transform your fabric pieces into a functional tote bag by joining the parts together with simple hand stitches.
You’ll see your creation take shape as you connect the sides, create a sturdy base, and attach the straps in just a few straightforward steps to form a complete tote bag.
Sewing Side Seams
Just three side seams transform your fabric pieces into a functional tote bag. No sewing machine needed for this step!
| Step | Action | Hand-Sewing Technique |
|---|---|---|
| 1 | Align fabric edges (right sides together) | Use pins every 2-3 inches |
| 2 | Thread needle with doubled thread | Knot end securely |
Double-check matching seams before proceeding to confirm proper alignment. This step is crucial for the functional tote bag to ensure it is sewingly sound.
Creating Boxed Corners
Creating boxed corners gives your flat tote bag depth and structure—like magic. This simple technique transforms your bag into a practical carrier with a stable bottom.
To create perfect corner dimensions in your sewing tutorial:
- Pinch each bottom corner into a triangle, with side seams centered
- Measure 2-3 inches from the point (adjust for desired corner depth)
- Stitch straight across, then trim excess fabric to ½ inch
No special box stitch needed for this stability technique. You can reinforce corners with double stitching for heavier items. Try aesthetic variations like rounded corners for a softer look or deeper corners for more capacity.
For a professional finish, consider mastering seam allowances.
Attaching Straps to Bag Exterior
Now it’s time to attach your straps! Position each strap 3-4 inches from the side edges of your bag exterior for perfect balance.
- Pin straps flat against fabric, measuring equal distances on both sides
- Use X-pattern stitching for maximum strap reinforcement
- Try box stitch patterns for heavy-duty tote bags
- Consider webbing options for lighter bags or add rivets for style
Secure your handles with strong, even stitches. For no-machine sewing, use a tight backstitch at connection points. Double-stitch areas that will bear weight. Your tote bag straps should lie flat without twisting when complete.
Joining Lining and Exterior Bag Pieces
Now’s the moment when your tote truly comes together.
Place your exterior bag inside the lining with right sides facing each other and align the top edges carefully.
- Match side seams precisely to avoid puckering
- Pin around the entire top edge before hand-sewing with 1/2-inch seam allowance
- Leave a 4-inch turning gap for flipping the bag right side out
- Try clipping corners for crisp edges when turning
After sewing, pull the bag through the turning gap, hiding seams inside, and press the top edge flat for a clean finish.
This step is crucial for the bag’s final appearance, ensuring a professional look and proper construction.
Adding Pockets and Straps
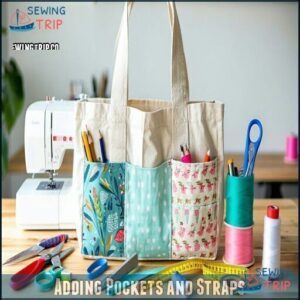
You’ll transform your simple tote into a functional carryall by adding pockets and straps in this section.
You can customize the pocket size and strap length to fit your needs while making your bag both practical and personal.
Creating Durable Straps
Now that your bag is taking shape, let’s focus on the straps – they’ll carry the weight of everything you toss inside!
Sturdy straps are non-negotiable for a functional tote.
Here’s how to create handles that won’t let you down:
- Select appropriate materials – Cotton webbing provides strength while being comfortable to hold. For a no-sew option, use pre-made strapping or ribbon at least 1-inch wide.
- Determine ideal length – For hand-carrying, 12-14 inches works well. For shoulder straps, measure 18-22 inches.
- Attach securely – Use strong glue designed for fabric and reinforce with decorative rivets at stress points.
Constructing an Interior Pocket
Add handy interior pockets to keep small items within reach.
Cut a 9×9 inch fabric square and fold it in half. Press edges flat and double-fold the top for reinforcement.
| Pocket Type | Dimensions | Best For |
|---|---|---|
| Basic | 9"x9" | Keys |
| Zippered | A5 size | Valuables |
| Divided | 8"x10" | Organization |
Match pocket fabric with your lining for a clean look. Proper pocket placement improves bag functionality and adds valuable storage.
Attaching Pocket to Bag Lining
With your pocket ready from our previous step, let’s attach it to your bag lining – no machine required!
Perfect pocket placement guarantees your items stay organized and accessible.
Here’s how to secure it properly:
- Position your pocket 3-4 inches from the top of your lining for easy reach
- Center it between side seams, adjusting pocket size to match your needs
- Pin all four corners first, then along edges to prevent fabric shifting
- Use small, even hand stitches (1/8-inch from edge) for secure attachment
For lining stabilization, press the area with an iron before sewing to keep everything flat.
Reinforce the top corners with extra stitches – these spots take the most stress when you’re digging for your phone!
Remember: well-placed pockets transform a simple tote into an organizing marvel.
Customizing Strap Length and Style
Now that your pocket is securely attached, let’s perfect your straps! You’ll transform your tote bag with straps that match your style and needs.
| Strap Type | Best For | Materials Needed |
|---|---|---|
| Standard | Everyday | Fabric, webbing |
| Crossbody | Security | Longer strips |
| Padded | Comfort | Batting, fabric |
Measure across your shoulder for ideal strap length – 22-26 inches works for most people. Wider straps (2+ inches) distribute weight better for heavier loads.
For decorative straps, try ribbon overlays or braided details. Want adjustable straps? Add D-rings or buckles. Whatever style you choose, secure with an X-stitch pattern for maximum durability.
Finishing Touches and Customization
You’ll transform your plain tote into a unique accessory with simple decorations and personal touches.
Add fabric paint, iron-on patches, or hand-stitched designs to make a bag that shows off your style.
Adding Decorative Elements
Creativity transforms your tote from ordinary to extraordinary with decorative elements that showcase your personal style. Now that the basic structure is complete, it’s time for artistic expression.
Three simple embellishment techniques:
- Try fabric painting for bold patterns or inspirational quotes
- Add dimension with appliqué techniques by attaching fabric shapes
- Incorporate basic embroidery designs along edges or center panel
Strategically place embellishments where they’ll be visible – center front or along the top edge works best. Exploring various applique techniques can substantially enhance your design options. Don’t overdo it; even minimal decorative stitching creates impact. Iron-on patches offer a no-sew alternative that adheres securely to your fabric with proper heat application.
Reinforcing High-Stress Areas
Durability comes down to reinforcing high-stress areas in your no-sew tote.
Focus on where straps connect to the fabric by adding a second layer of fabric or adhesive interfacing. For seam security, use fabric glue along edges and corners.
Heavy items? Place small fabric squares at the bottom corners for extra strength.
Double-layer your straps and secure with no-sew tape or strong fabric adhesive for lasting strap reinforcement. This ensures your tote can handle heavy items.
Topstitching for a Professional Finish
Surprisingly, topstitching can transform your hand-sewn tote from homemade to professional-looking without a sewing machine. This finishing technique adds strength while creating clean, visible edges around your bag.
When hand-topstitching:
- Choose thread that contrasts or complements your fabric
- Keep edge alignment consistent (about 1/4 inch from seam)
- Use small, even stitches with proper thread tension
- Press seams flat before topstitching for best results
Work slowly with a thimble to protect your fingers. Practice on scrap fabric first to perfect your needle selection and stitch length before working on your actual bag.
Personalizing With Embroidery or Appliqué
Now that your seams look sharp, let’s make your tote truly yours with embroidery or appliqué.
Transform a simple bag into a personalized treasure by adding decorative elements. Working on flat fabric pieces before assembly creates the cleanest results.
- Choose contrasting embroidery thread colors that pop against your fabric
- Position appliqué designs on front panels for maximum visibility
- Try iron-on fabric transfers for quick customization
- Test embroidery stitches on scrap fabric first
- Consider simple monogramming options for an elegant touch
These techniques don’t require a sewing machine—just your creativity and some basic hand-stitching skills.
Variations and Alternative Designs
You can transform your basic tote into something special with a few simple changes to the design.
Try adding quilted panels for texture, a zipper for security, making it reversible for two bags in one.
Or exploring different shapes beyond the standard rectangle to give your tote a unique look, with reversible designs offering versatility.
Making a Quilted Tote Bag
While decorative elements add personality, quilted tote bags offer a way to showcase your fabric collection without a sewing machine.
Transform scraps into something practical with just hand stitching.
To create your no-machine quilted tote:
- Cut fabric squares (4-5 inches works well) and arrange in your chosen patchwork pattern
- Use a simple running stitch with 1/4" seam allowance to join squares
- Layer with quilt batting for structure before assembling
The key to hand-sewn quilted totes is keeping your stitches small and even.
Fabric square size matters – smaller squares create more visual interest but require more stitching time.
Adding a Zipper Closure
Easily add a zipper closure to keep your items secure without using a sewing machine. Select a zipper that’s 1" longer than your bag opening.
Hand-Sewing Supplies Purpose
With zipper separated, baste one side to your bag. Work slowly toward side seams. Topstitch each side using running stitches for a clean finish.
Creating a Reversible Tote Bag
A reversible tote bag is a fun way to double your style with one project! Choose two coordinating fabrics that look great together and follow a simple tote bag pattern. Use hidden seam techniques like French seams for a polished finish inside and out.
- Dual Fabric Choice: Pick prints that complement each other.
- Reversible Strap Options: Sandwich straps between layers before sewing.
- Pattern Matching Challenges: Align designs for a seamless look.
- Interior Pocket Reversibility: Add pockets usable on both sides.
Secure with a magnetic snap or button for versatility. This sewing tutorial keeps things simple yet stylish!
Exploring Other Tote Bag Patterns
If you’ve mastered the Reversible Bag, it’s time to explore more sewing bag patterns that challenge your creativity.
With endless tote bag patterns available, you can craft bags for every need and occasion.
Here are four exciting options to try:
- Origami Bag – Inspired by Japanese design, it’s simple yet elegant, using clever folds for a no-fuss finish.
- Quilted Tote – Perfect for showcasing Patchwork Quilts, this sturdy bag adds warmth and charm.
- Zipper Closure Tote – Keep your essentials secure with a sleek, functional design.
- Upcycled Tote – Repurpose old fabrics like jeans or tea towels for an eco-friendly twist.
These sewing patterns are beginner-friendly, often offered as free patterns, and allow endless customization!
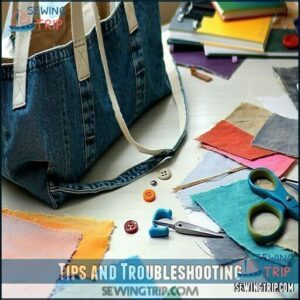
Tips and Troubleshooting
Sometimes things don’t go as planned, but a few simple fixes can save the day.
Here, you’ll learn how to avoid common mistakes and handle tricky spots with ease, which can be considered complete concepts to master.
Common Mistakes to Avoid
Nobody’s perfect, but avoiding common sewing mistakes can save you a lot of frustration. Here’s what to watch out for:
- Uneven seams: Always measure carefully and mark your fabric before cutting. Rushing leads to crooked cuts and poor alignment.
- Insecure straps: Weak straps are a no-go! Use an X-box stitch or double stitching to keep them sturdy.
- Fraying edges: Raw edges can unravel over time. Use pinking shears or fold and stitch edges for a clean finish.
Take your time to box corners evenly and press seams flat to prevent fabric puckering. A little patience makes all the difference!
Troubleshooting Common Issues
Mistakes happen, even with the best tote bag pattern. Here’s how to tackle common hiccups in your sewing tutorial:
- Uneven Stitching: Adjust your tension and sew slowly. Practice on scraps first.
- Fabric Puckering: Check if your thread matches the fabric weight and loosen the tension.
- Seam Slippage: Pin layers securely, or use clips for slippery fabrics.
- Crooked Straps: Double-check alignment before sewing. If they’re twisted, unpick and resew.
- Lining Issues: Verify it’s cut precisely and pinned evenly to avoid mismatched edges.
- Pro Tip: Keep a seam ripper handy—it’s your best friend for quick fixes.
To avoid skipped stitches, remember to replace needles regularly. Nobody’s perfect, but with patience and these troubleshooting tips, your tote bag will look polished in no time!
Tips for Working With Different Fabrics
Working with different fabrics can feel like a juggling act, but a few tricks make it easier.
Start by matching your needle and thread to the fabric’s weight and fiber content—canvas or denim need a size 90/14 needle, while lighter fabrics like linen use 70/10.
Always check the print direction before cutting to avoid upside-down patterns. Prewash fabrics to handle shrinkage and test how the texture reacts to washing instructions.
For mixed materials, pair fabrics with similar stretch, like cotton canvas with cotton lining.
Here’s a quick checklist for success:
- Cut along the grain for stronger seams.
- Press seams flat before opening or folding them.
- Test on scraps for seam durability and texture effects.
A little prep guarantees your tote bag looks polished and lasts!
Ensuring a Professional Finish
Give your tote bag that polished, professional finish with these tips:
| Tip | Why It Works |
|---|---|
| Press seams as you sew | Keeps edges crisp and fabric smooth. |
| Use French seams | Hides raw edges for a clean interior. |
| Reinforce handles | Prevents straps from pulling loose under weight. |
| Topstitch edges neatly | Adds durability and a polished look. |
| Trim seam allowances | Reduces bulk for a sleeker design. |
Take your time, and remember: neatness counts!
Frequently Asked Questions (FAQs)
How to make a tote bag?
Start by cutting sturdy fabric for the bag and lining.
Sew sides and bottom, box corners for shape, and attach handles securely.
Add lining, topstitch edges, and personalize with pockets or embellishments for flair.
How do you sew a tote bag?
Think of sewing a tote bag as weaving a story.
Cut your fabric, stitch the sides, box the corners, add straps, and finish with a topstitch.
Each step builds a sturdy, stylish creation.
How do you make a charm square tote bag?
Cut 12 charm squares for front and back panels, sew them into rows, and fuse interfacing.
Add lining, sew panels together, and box corners.
Attach straps securely, turn right-side out, and topstitch edges.
How do you make a tote panel?
To make a tote panel, sew charm squares into rows.
Then join rows to form a rectangle.
Press seams flat, fuse interfacing to the back for structure, and trim edges for a clean finish.
What is the best pattern for a tote bag?
Picture a tote bag that’s both stylish and functional—choose a boxy design with reinforced straps, a flat bottom, and optional inner pockets.
This pattern balances durability, elegance, and practicality, perfect for everyday use, making it a great combination of elegance and functionality.
What are tote bags made of?
Tote bags are typically made from sturdy fabrics like canvas, denim, or medium-weight cotton.
These materials guarantee durability and style.
You can also use linen, jute, or quilted fabric for unique textures and looks.
How to make a tote bag for beginners step by step?
Start with sturdy fabric like canvas.
Sew two rectangles together, leaving the top open.
Add straps securely with an X-stitch.
Attach lining, turn it right-side out, and topstitch for a polished finish.
What material can I use to make a tote bag?
You can use canvas, cotton, denim, or linen for a tote bag.
Canvas and denim are sturdy for heavy use, while cotton is lightweight and versatile.
Pre-wash fabrics to avoid shrinkage and guarantee durability.
How to make bags at home step by step?
Imagine turning fabric scraps into a stylish tote.
Cut fabric pieces, sew sides and bottom, add lining, and attach straps securely.
Finish with topstitching for a polished look.
It’s easier than it sounds!
What is the best stitch for a tote bag?
A straight stitch is your best bet for tote bags.
It’s sturdy, easy to sew, and works on most fabrics.
Pair it with reinforced box stitches at stress points for extra durability.
Conclusion
Don’t worry if you’ve never made a bag before—this tutorial shows how to make a tote bag is simple and beginner-friendly.
You don’t need fancy tools, just patience and basic materials.
With sturdy fabric, a few stitches, and some creativity, you’ll have a stylish tote in no time.
Customize it with pockets or decorations to suit your style.
Hand-stitching might take effort, but the result is worth it.
Now grab your fabric and start crafting!
- https://orangebettie.com/2020/06/18/tea-towel-origami-bag-easy-sewing-tutorial/
- https://www.allpeoplequilt.com/bags-pillows-gifts/bags-and-purses/cinch-it-tote-bag
- https://www.sewcanshe.com/blog/sew-easy-big-tote-bag-free-sewing-tutorial
- https://switchedonpop.com/merch/p/tote-bag
- https://www.kokoroyale.com/insider/how-much-weight-can-a-tote-bag-typically-handle/?srsltid=AfmBOoqlWmwLRfEz2MUv0qbecM1_X2D_XqKgphDSXTrDw0dwzWF7BVoU


