This site is supported by our readers. We may earn a commission, at no cost to you, if you purchase through links.
First, grab your fabric and prep it well—washing and ironing are your best friends here.
Mark your corner points with precision.
Now, align your fabric at a 45-degree angle on a cutting mat, and slice carefully with a rotary cutter.
When sewing, line up the mitered edges smoothly and start stitching slowly.
As you pivot at the corner, think of it like turning a car—smooth and steady wins the race!
Backstitch for extra strength, and voilà, you’ve nailed it!
Curious about making those seams extra crisp?
There’s a trick for that too!
Table Of Contents
Key Takeaways
- You’ll want to prewash and iron your fabric to avoid shrinkage and ensure crisp mitered corners.
- When cutting, align your ruler precisely at a 45-degree angle, using a rotary cutter for clean edges.
- Align mitered edges carefully and start sewing with small stitches for secure, neat seams.
- Don’t forget to press your seams open and use steam for a polished, professional finish.
Mastering Mitered Corners Basics
You’re about to learn the secrets of creating mitered corners, making your projects look professional and tidy without the usual bulky mess.
With the right fabric, tools, and some understanding of their benefits, you’ll be ready to tackle anything from quilts to napkins with confidence.
Understanding The Benefits of Mitered Corners
With mitered corners, you add elegance to projects, creating a clean, professional finish without bulk.
They’re versatile, offering durability even in demanding spots.
Whether it’s cushions or tablecloths, the seams are your secret ingredient for sophistication.
Grab your fabric chalk and marker, adjust your seam allowance, and watch those mitered joints transform simple fabric into art.
Choosing The Right Fabric for Mitered Corners
Choosing the right fabric makes mitered corners a breeze. Think about fabric weight and how it will drape, ensuring it’s easy to handle.
- Check the fiber content for best results.
- Be mindful of print direction, so patterns align.
- Select a fabric with a smooth texture for clean edges.
- Use fabric scraps to practice before cutting.
Essential Tools for Sewing Mitered Corners
To sew perfect mitered corners, you’ll need to start with accurate measurements and cuts, just like when sewing box cushion corners. Grab your trusty rotary cutter, cutting mat, and ruler – these are the essential tools for sewing perfect mitered corners.
With a few simple folds and precise cuts, you’ll be on your way to creating beautifully finished edges.
Don’t forget to press as you go and use those pins to keep everything in place.
Let’s get sewing!
Common Applications for Mitered Corners
You’re ready to explore where mitered corners shine.
Think pillow covers with crisp edges or quilt blocks that fit just right.
To achieve those neat, sharp corners, you need to master the technique of sewing mitered corners, which reduces bulk and creates neat edges.
How about gift bags that need to impress? Or tablecloths that drape perfectly?
Here’s a quick list:
- Pillow covers
- Quilt blocks
- Gift bags
- Tablecloths
Each project benefits from those neat, sharp corners!
Preparing for Mitered Corner Success
To make sure your mitered corners are picture-perfect, start by pressing and preparing your fabric to banish wrinkles and unwanted folds.
Don’t forget to mark those corner points clearly and draw sewing lines to guide your cuts, because precision is key and even small mishaps can lead to big drama!
Pressing and Preparing Fabric for Cutting
Start with pre-washing your fabric; it’s essential for preventing shrinkage and preserving colors.
Use pressing tools to smooth out wrinkles—after all, nobody wants a crumpled mess!
Familiarize yourself with ironing techniques to relax the fabric before cutting.
Set your fabric flat, consider seam allowance, and hem allowance. These steps will help you succeed with mitered corners.
Marking Corner Points for Accurate Seams
Now that your fabric is pressed, focus on marking corner points to get those seams just right.
Use chalk marking tools to outline the points clearly, ensuring your marks are visible but removable.
Different fabric types can impact visibility, so choose your marking tools wisely.
Remember, precise pinning techniques at these points form the foundation for accurate seams.
Drawing Sewing Lines for Seam Allowances
With markings in place, grab your favorite pencil or fabric marker.
It’s time to measure out those seam allowances!
Use a ruler to make sure you have straight lines, and remember, precision is your friend here.
These lines guide your sewing path, keeping everything neat.
A little tip: double-check your measurements—better safe than sorry, right?
Keep your tools handy for the best results!
Using a Rotary Cutter for Precise Cuts
For perfectly precise cuts, grab your trusty rotary cutter and make sure that blade is sharp as a tack.
Lay your fabric on a self-healing cutting mat; avoid slicing into your table, right? .
Keep fabric in neat layers.
Roll your cutter away from you in a straight motion, using firm pressure.
Safety first, precision next!
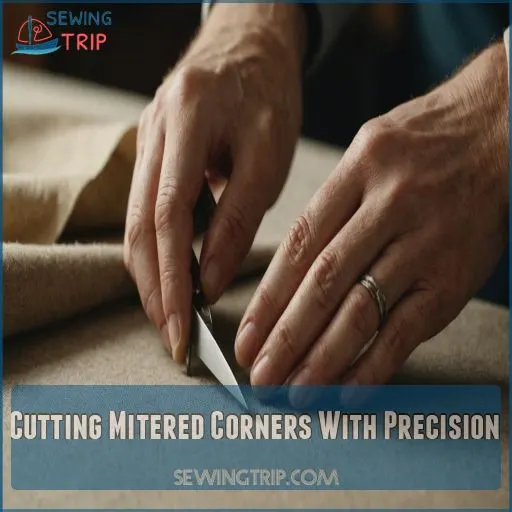
Cutting Mitered Corners With Precision
Cutting mitered corners with precision is key to achieving professional-looking results.
Align your ruler at the perfect 45-degree angle.
Then slice through the fabric layers with confidence using your rotary cutter and cutting mat.
Aligning The Ruler for 45-Degree Angles
Pressing fabric prepares the scene for ruler alignment.
Place your ruler securely for a 45-degree angle, ensuring precision like a pro.
Imagine you’re slicing a perfect pie, and you need that sweet spot.
Use marking techniques for extra accuracy.
To master the mitered corner, it’s essential to have a solid foundation in various sewing techniques, such as what are sewing techniques, which will help you understand how to properly press seams and stabilize curved edges. With fabric alignment and ruler placement, you’ll ace this step easily, becoming the master of rotary cutter adventures!
Cutting Fabric Layers With Confidence
Imagine this: You’ve got your fabric laid out, ready to master cutting mitered corners with precision.
Grab that rotary cutter and check that blade sharpness—it’s key to cutting accuracy and smooth edges.
Align the fabric layers carefully, like aligning stars in a constellation.
Embrace the process, because with practice, you’ll slice through fabric with confidence and flair.
Using a Cutting Mat for Guided Cuts
Grab your cutting mat and feel like a pro.
Choose a self-healing mat for fewer worries, and pick a size that suits your sewing space.
Align fabric along the lines, keeping layers stable.
With your rotary cutter, glide confidently, keeping fingers safe.
Follow markings for precise mitered corners, and soon you’ll be cutting like a maestro!
Saving Fabric Scraps for Future Projects
Mitered corners create excess fabric, but don’t toss those scraps!
Store them neatly for future project inspiration, like making fabric bookmarks or cute organizers.
Picture transforming scraps into colorful twine or a charming fabric tray.
Scrap fabric storage isn’t just sustainable; it’s a treasure trove of repurposing ideas.
So, keep that creativity alive and your sewing eco-friendly!
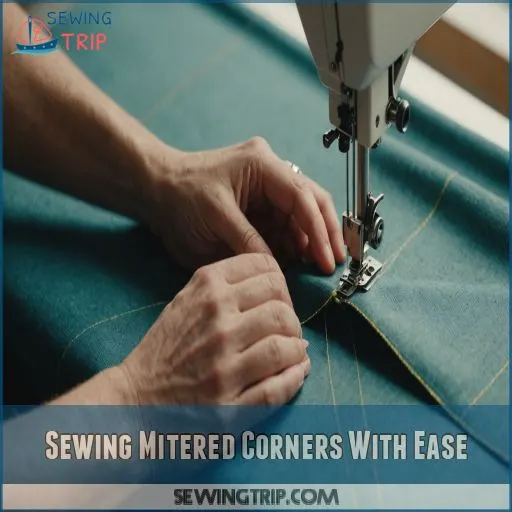
Sewing Mitered Corners With Ease
You’ve cut your fabric pieces with precision, and now it’s time to sew those mitered corners with ease.
With some careful alignment, a few pivot points, and small stitches, you’ll have sharp corners that would make even seasoned sewists a little envious.
Aligning Mitered Edges for Smooth Seams
You’ve cut your fabric precisely, and now it’s time to align those mitered edges.
Place right sides together, ensuring perfect corner alignment.
Use your favorite pinning method to keep everything snug.
Pay attention to seam allowance and fabric tension as you work.
This simple alignment trick prevents frustration later, making your seams smooth as silk.
Starting and Pivoting The Sewing Lines
Aligning the raw edges and seams, start sewing slowly in the direction of the marked corner point.
When you reach it, lift your foot, pivot the fabric 90 degrees, and continue stitching across the remaining seam.
This smooth pivoting motion is key to nailing those crisp, professional-looking mitered corners every time.
Using Small Stitches for Secure Seams
To create secure seams, try using small stitches.
As you smoothly pivot your sewing lines, adjust your machine settings for a shorter stitch length.
This gives your seams strength and reduces fraying.
Maintain tension control based on your fabric type.
Remember to align your seam allowances neatly, helping each seam hold tight and look polished.
You’ve got this!
Backstitching for Reinforcement
Picture backstitching as giving your seams a superhero cape—simple yet powerful.
Focus on getting:
- Correct backstitch length for seam reinforcement
- Adequate stitch density without crowding
- Perfect thread tension like strumming a guitar chord
- Spot-on backstitch placement at stress points
Mastering these boosts your sewing confidence and keeps seams secure through thick and thin.
Pressing and Finishing Mitered Corners
You’re almost at the finish line!
To get those mitered corners looking sharp, pressing and finishing are key steps that add a professional touch.
Pressing and finishing smooth out any wrinkles and set the seams perfectly.
Pressing Cut Edges for a Crisp Finish
You’ve sewn those beautiful mitered corners, now let’s make them stand out.
To achieve sharp, professional corners, use seam guides for alignment.
To ensure a crisp fold, especially when working with slippery fabrics like satin, consider installing a non-stick foot for sewing. Use proper ironing techniques and pressing tools for various fabric types.
Lightly press the cut edges for a sharp finish.
Here’s a quick guide:
Adjust pressure for best results!
Pressing Seam Allowances Open
Grab your favorite pressing tool, because seam allowances need some love.
To prevent bulkiness and distortion, especially when sewing curved seams, sew slowly and use the needle-down feature sewing curved seams. Press seam allowances open by following these steps for a professional finish:
- Start with the wrong side up.
- Use dragging fingers to open seams before pressing.
- Apply gentle pressure with your iron.
Different fabric types may demand a little finesse, but you’ve got this!
Using Steam to Flatten Seams
Steam brings out the magic of crisp, professional seams.
With your seams open, apply a steam iron for even pressure, using low steam settings for tricky fabric types.
Seam pressing tools help iron out the kinks, preventing pressing mistakes.
Try different steam iron types to find one you love—just don’t overdo it or you’ll end up all wet! (Source)
Troubleshooting Common Mitered Corner Issues
Oops, looks like you hit a snag with those mitered corners!
No worries, we’ve all been there.
First, check for puckered seams – try loosening tension and pressing gently as you sew.
If your edges are wavy, make sure your fabric pieces are perfectly aligned before stitching.
Shifting seams can be fixed by shortening your stitch length and backstitching more.
With a little troubleshooting, you’ll have those miters looking sharp in no time!
Frequently Asked Questions (FAQs)
Can you sew mitered corners?
You can definitely sew mitered corners!
First, fold, iron, and pin your fabric edges.
Then, stitch near the edge, pivoting at corners for that complete pro-look.
Who knew creating tidy corners could feel so satisfying?
Are mitered corners a secret for neat and expensive-looking sewing projects?
Crafting mitered corners is like turning straw into gold; they transform any sewing project from ordinary to high-end.
With practice, you’ll create durable, neat edges that elevate your work, making it look truly professional and expensive.
What are mitered corners?
Mitered corners often rely on a serged edge for a clean finish, which provides durability and professionalism by adjusting serger settings to handle different fabrics. Mitered corners are a sewing technique that creates a neat, professional finish by folding fabric edges at a 45-degree angle.
This reduces bulk, making them perfect for projects like napkins and tablecloths.
Giving your work that polished look (Source).
How do you make mitred corners stand out?
To add some visual interest to your mitred corners, consider using a zigzag stitch, which not only secures seam finishes and prevents fraying, but also creates texture and dimension on fabric, as seen in embellishments like attaching trims or ribbons. Just like adding sprinkles to a cupcake, make mitred corners pop by sewing a decorative stitch near edges.
Topstitch for emphasis.
Trim loose threads.
It’s all about those finishing touches that say, “Wow!” .
How to sew a mitered corner for beginners?
First, fold the fabric edges over 1/4-1/2 inch.
Then fold them again to your desired border width.
Crease the diagonal corners.
Stitch along the folds.
And you’ve got professional-looking mitered corners – it’s a cinch!
What is the formula for mitered corners?
To create mitered corners, use this formula: quilt side length plus twice the border width, adding 2-4 inches for flexibility.
Fold and stitch at a 45-degree angle for sharp, professional edges every time.
How to make neat corners when sewing?
Sewing sharp corners isn’t nearly as tricky as it seems!
Fold and press seams well.
Take a diagonal stitch.
Pull the corner out gently with a thread tail or chopstick.
Practice makes perfect, and pressing helps! (Source)
What is the alternative to mitered corners?
Try corner blocks or straight-grain binding to avoid mitered corners.
Corner blocks add a decorative touch, while straight-grain binding is easy-peasy and saves you the hassle of those tricky diagonal folds.
How do I troubleshoot uneven mitered corners?
Struggling with uneven mitered corners?
Check your saw’s blade alignment and cut angles slightly tighter.
Use finishing nails to secure gaps, and sand for a smooth fit.
A little patience goes a long way in perfecting miters!
Whats the best fabric for beginners?
Imagine fabric that’s easy as pie to work with!
That’s where cotton jumps in.
It’s sturdy, doesn’t slip around, and forgives your little mistakes.
Perfect for building confidence and crafting your first masterpiece.
Can I use a sewing machine foot guide?
You absolutely can use a sewing machine foot guide!
It’s a handy tool that helps you keep your stitches straight and even.
This is especially useful on tricky corners.
Attach it, adjust settings, and sew away confidently!
How to fix mismatched seams in corners?
Turns out, the secret to flawless corners is all in the prep work!
Prep work is key.
Start by carefully marking your seam allowances, then pin and stitch with precision.
A little pressing goes a long way too.
What tools ensure perfect 45-degree cuts?
To guarantee perfect 45-degree cuts, rely on a sharp miter saw with accurate angle settings and a fine tooth blade.
Adding a zero-clearance throat plate prevents tear-out, guaranteeing crisp, clean cuts every time.
Conclusion
Think of mastering mitered corners like crafting the perfect puzzle piece—when it fits just right, it’s magic.
You’ve learned about choosing fabric, marking precisely, and cutting with confidence.
Sewing those mitered corners smoothly brings everything together.
Remember, practice makes perfect, so don’t be shy about making a few mistakes along the way.
Ready to show off your newfound mastery in "how to sew a mitered corner"?
You’ve got this!

