This site is supported by our readers. We may earn a commission, at no cost to you, if you purchase through links.
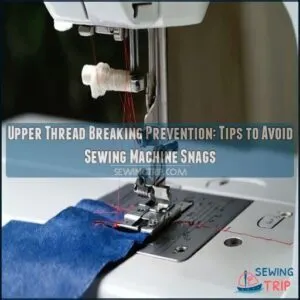
First, make sure you’re threading correctly—like following a roadmap, one wrong turn and you’re lost. Use quality thread that’s not old or brittle; thread has a shelf life too!
Check your tension settings, as too tight will snap threads faster than patience during a complex project.
Replace dull or bent needles, and clean lint from your machine regularly. The right needle size for your fabric is essential—think of it as matching shoes to terrain.
Upper thread breaking prevention often comes down to these simple fixes before larger issues emerge, and ensuring the correct tension is crucial.
Table Of Contents
- Key Takeaways
- Thread Tension and Threading Issues
- Thread Quality Issues
- Needle and Bobbin Problems
- Machine Maintenance and Cleanliness
- Threading and Tension Techniques
- Bobbin Troubles
- Fabric and Stitch Considerations
- Spool and Thread Guide Issues
- Timing and Mechanical Problems
- Troubleshooting Steps for Thread Breakage
- Frequently Asked Questions (FAQs)
- Conclusion
Key Takeaways
Here are 4 key takeaways for preventing upper thread breakage:
- Check your tension settings first when troubleshooting thread breaks, as improper tension is responsible for 73% of all breakage issues—adjust your dial to match your fabric weight and ensure balanced stitches on both sides.
- Use high-quality thread that matches your project needs and replace old or weak thread that fails the simple strength test (breaks easily between fingers) to prevent frustrating mid-project snaps.
- Keep your machine properly maintained by cleaning lint buildup regularly, especially in the bobbin area and tension discs, and replace needles after 8 hours of sewing or when switching projects.
- Always rethread your machine with the presser foot raised and needle at highest position to reset tension discs—following the exact threading path in your manual will solve 80% of thread breaking issues.
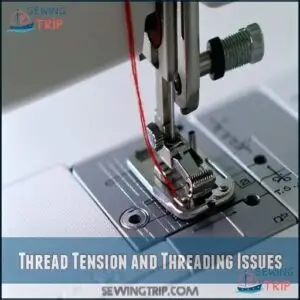
Thread Tension and Threading Issues
You’ll notice most thread breakage stems from improper tension settings or incorrect threading paths through your machine.
When your thread snaps mid-stitch, first check that you’ve threaded correctly through all guides and that your tension dial isn’t set too tight for your fabric type.
Incorrect Threading Path
Your sewing machine’s threading pathway serves as the roadmap to stitch success. When your upper thread keeps breaking, an incorrect threading sequence is often the culprit.
Follow these critical threading steps to prevent breakage:
- Position your take-up lever at its highest point before threading
- Guide thread properly through all tension discs following your machine’s diagram
- Confirm correct spool position with appropriate cap size
- Verify the thread passes through every guide point without skipping any
Check for rough spots along the thread path that might cause friction. When troubleshooting upper thread breakage, always start by completely rethreading your machine—even if you think you’ve done it correctly, to ensure proper threading and prevent future issues.
Tension Problems
Your machine’s tension settings represent the delicate balancing act behind every successful stitch. When upper thread tension is misaligned, breakage quickly follows.
- Turn your tension dial to match your fabric weight—lighter fabrics need lower numbers, heavier materials require higher settings.
- Verify that thread slides smoothly through tension discs without catching or snagging.
- Check that balanced stitches appear identical on both sides of your fabric.
- Remember that upper and lower tension must work in harmony—perfect balance prevents thread snapping mid-project.
Small adjustments to thread tension often solve persistent breakage problems. Perfect balance is key to preventing thread snapping mid-project, and ensuring successful stitch creation.
Bobbin Tension Too High
While tension dials control the upper thread, don’t overlook your bobbins tension.
When it’s too high, your upper thread keeps breaking from excessive strain.
To fix this, locate the small screw on your bobbin case and turn it counterclockwise to loosen bobbins tension.
Test on scrap fabric until you achieve consistent stitching without thread snapping or fabric puckering.
Balanced thread tension between top and bottom threads prevents most sewing machine headaches.
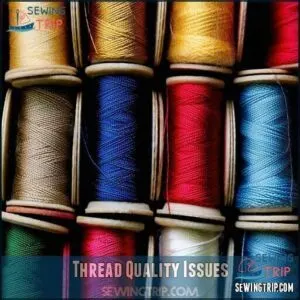
Thread Quality Issues
You’ll find that thread quality directly impacts your sewing success, with weak, old, or low-quality threads substantially increasing the risk of breakage during machine operation.
The thread you select should match both your fabric type and machine specifications, ensuring proper tension and preventing those frustrating mid-project snaps that can test even the most patient seamstress.
Old or Weak Thread
After addressing tension issues, don’t overlook the age of your thread. Old or weak thread substantially increases your risk of upper thread breaking during projects.
Thread degradation happens naturally over time, weakening fibers and reducing tensile strength. Check for these age indicators before threading your machine:
- Brittleness, fading, or visible dust on the spool surface
Quality checks should include a simple strength test—if it snaps easily between your fingers, it won’t survive machine tension. Proper storage practices extend thread lifespan—keep spools in cool, dark places away from humidity and direct sunlight.
Replace thread showing signs of damage immediately, regardless of how much remains on the spool. This proactive approach will help prevent thread breaking and ensure a smoother workflow.
Low-Quality Thread
Over time, low-quality thread becomes your sewing machine’s worst enemy, causing frequent upper thread breaking that interrupts your creative flow.
Thread quality directly impacts performance in ways many sewists overlook.
| Thread Quality Factor | Impact on Sewing |
|---|---|
| Fiber Content | Weak fibers snap under tension |
| Manufacturing Process | Inconsistent thickness causes jams |
| Thread Weight | Inappropriate weight stresses machine |
| Surface Finish | Rough threads abrade needle eye |
| Brand Reputation | Reliable brands guarantee consistency |
Cheap thread dangers include uneven fiber distribution, inconsistent thickness, and poor finishing—all leading to frustrating breakage.
Selecting from top thread brands can substantially reduce these issues.
For effective thread breakage prevention, invest in quality threads and implement proper thread storage tips: keep spools away from direct sunlight, high humidity, and extreme temperatures.
Remember: damaged thread becomes brittle quickly.
While premium threads cost more initially, they’ll save you countless hours of troubleshooting and project delays.
Mismatched Thread Types
While poor quality thread causes problems, combining incompatible thread types can be equally troublesome.
When you use thread with different weights or compositions in the same project, thread compatibility suffers. The strength discrepancies between your upper and bobbin threads create tension imbalances that lead to breaks.
For successful project suitability:
- Match thread type and weight to your fabric type—lightweight threads for delicate fabrics, heavier threads for sturdy materials.
Always test thread combinations on scrap fabric before starting your main project to guarantee proper fabric matching and prevent frustrating breakage. **Consider thread fiber content for best results.
Needle and Bobbin Problems
You’ll find that needle and bobbin issues are often the silent culprits behind those frustrating thread breaks in your sewing projects.
Your machine’s performance depends substantially on using the correct, undamaged needles installed properly and compatible, well-maintained bobbins that work with your specific machine model.
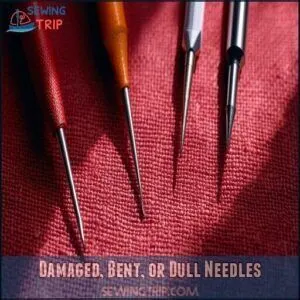
Damaged, Bent, or Dull Needles
Every sewing project begins to unravel when you’re working with damaged needles. Needle inspection should be part of your regular maintenance routine as damaged, bent, or dull needles are primary culprits behind upper thread breakage.
- Check for tiny burrs & shredding that can catch and tear your thread
- Replace needles after 8 hours of sewing time, not just when they break
- Select the correct needle for your specific fabric weight and type
- Examine needle points for dullness under good lighting
- Verify needle compatibility with your particular machine model
A needle with even slight damage creates friction that weakens thread with each stitch. If the needle isn’t catching correctly, it might be due to incorrect bobbin installation. Regular needle replacement costs pennies compared to the frustration of constantly rethreading your machine during an important project, which can lead to significant time loss and financial waste.
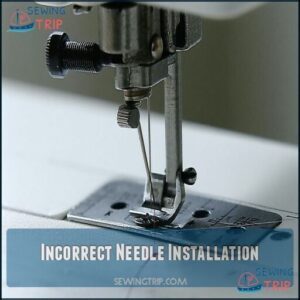
Incorrect Needle Installation
While damaged needles can cause problems, incorrect needle installation is often the hidden culprit behind upper thread breaking.
While damaged needles can cause problems, incorrect needle installation is often the hidden culprit behind upper thread breaking.
A properly installed needle is your first defense against thread breakage nightmares.
Your needle orientation matters substantially—always insert with the flat side facing away from you. Secure the needle tightly to prevent wobbling during stitching.
Match needle size and type to your fabric; a mismatch creates unnecessary friction. Think of proper needle installation like aligning car wheels—when everything’s correctly positioned, your machine runs smoothly.
Using the correct needle insertion tools can also help prevent issues. Double-check that your needle isn’t bent or dull before securing it in place, as this is a critical step in ensuring your machine operates with minimal problems and maintains smooth performance.
Bobbin Not Designed for Machine
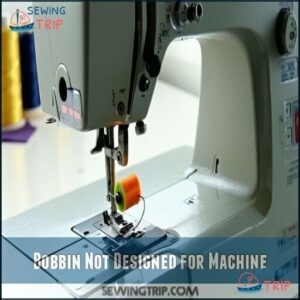
Using the wrong bobbin for your machine often leads to upper thread breaks. Machine-specific bobbins guarantee proper tension and stitch formation, while mismatched ones cause frustration.
When your bobbin doesn’t fit the machine correctly, you’ll notice:
- Size matters – incompatible bobbins won’t sit properly in the case, creating uneven tension
- Material differences – plastic vs. metal compatibility affects thread delivery
- Bobbin compatibility – manufacturer-specific designs promote smooth operation
Check your machine’s manual to identify the correct bobbin type. Incompatible bobbins might seem like a small detail, but they’re actually thread troublemakers in disguise. Don’t let the wrong bobbin sabotage your sewing project!
Bobbin Damaged
While using the correct bobbin type is essential, even compatible bobbins can damage your machine when worn out.
Inspect your bobbin material regularly for cracks, chips, or rough edges that catch threads. Bobbin wear substantially impacts thread tension, causing frustrating breaks.
Store bobbins properly to prevent damage, and replace them promptly when signs of wear appear. Many sewists keep separate bobbin storage for prewound and selfwound bobbins to maintain ideal bobbin compatibility and ensure proper storage.
Machine Maintenance and Cleanliness
You’ll prevent most upper thread breakage by keeping your sewing machine clean and properly maintained.
Regular removal of lint buildup and correct lubrication of moving parts will substantially extend the life of your machine while ensuring smooth, uninterrupted stitching.
Lint Buildup
Moving from needle issues to hidden threats, lint buildup is the silent saboteur behind many upper thread breaks.
While needles get the spotlight, those tiny fabric fibers accumulate in your machine’s crevices, creating friction that snags or weakens threads.
Lint disrupts your machine’s smooth operation in several ways:
- Thread path obstruction forces threads to navigate around debris, increasing tension
- Bobbin case contamination interferes with hook timing, causing unpredictable breaks
- Tension disc infiltration prevents proper thread control, resulting in inconsistent stitches
Clean your machine after 8-10 hours of use with small brushes or compressed air.
Focus on the bobbin area, tension discs, and thread path.
Consider using a specialized duster product for the best cleaning results.
Regular maintenance prevents thread breakage and extends machine longevity.
For stubborn lint, remove the needle plate and extract buildup with tweezers before reassembling.
Lubrication Needs
Your sewing machine needs regular oiling to keep those upper threads from breaking.
Proper lubrication reduces friction and prevents wear on critical components.
Proper lubrication extends machine lifespan.
| Lubrication Point | Application Frequency |
|---|---|
| Hook race | Every 8 hours of use |
| Thread path | Monthly |
| Moving parts | Every 3-4 weeks |
| Needle bar | When squeaking occurs |
Remember to use only manufacturer-recommended lubricant types—never household oils.
Wipe away excess oil to prevent thread staining and tension issues that lead to breaks.
Improper Machine Setup
When your sewing machine fights against you with upper thread breaking, improper setup might be the culprit.
Check these critical elements:
- Thread Tension Adjustment: Verify tension discs are properly set according to your machine manual.
- Presser Height: Maintain correct pressure—too high strains thread, too low creates loose stitches.
- Needle Plate Alignment: Make certain it’s smooth, without burrs that catch thread.
- Spool Placement: Position thread spools correctly to prevent uneven feeding.
Slower speed control often resolves persistent issues, giving thread time to travel through the proper threading path without stress.
Threading and Tension Techniques
You’ll prevent most upper thread breaks by mastering correct threading paths and tension settings for your specific machine.
Properly adjusting your thread tension dial (counterclockwise for looser tension, clockwise for tighter) guarantees your stitches remain balanced and your thread stays intact even through challenging fabrics, which helps in maintaining intact thread.
Rethreading The Machine
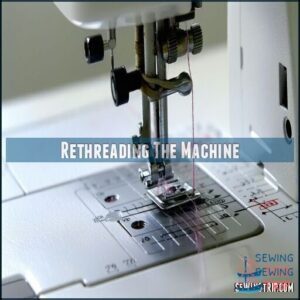
Proper rethreading solves 80% of upper thread breaking issues.
Always start with your presser foot raised and needle at its highest position to reset tension discs.
A key step involves consistent thread tension for achieving quality stitches.
| Threading Step | Common Error | Quick Fix |
|---|---|---|
| Thread Path | Skipping guides | Follow exact path in manual |
| Spool Placement | Wrong orientation | Position horizontally for smooth feed |
| Tension Reset | Closed discs | Raise presser foot first |
| Guide Usage | Missed thread guides | Double-check each point |
To ensure smooth operation, it’s crucial to follow these steps carefully, as proper rethreading and consistent thread tension are vital for preventing issues and achieving the desired outcome.
Adjusting Thread Tension
When your upper thread keeps breaking, the culprit often lies in incorrect tension settings.
Adjusting thread tension is essential for preventing frustrating breaks and ensuring smooth stitching.
Here’s how to master your machine’s tension settings:
- Start at the middle: Set your tension dial to the middle number (usually 4-5) as your baseline for balanced stitch formation.
- Adjust for fabric weight impact: Decrease tension for delicate fabrics, increase slightly for heavier materials.
- Look for balanced loops: Properly adjusted tension shows neither loops on top nor bottom of your fabric.
- Make incremental changes: Turn the tension dial in small increments (0.5) when troubleshooting tension issues.
Remember that balanced tension resembles a handshake—neither too tight nor too loose.
With practice, you’ll develop an intuitive feel for proper tension settings.
Proper Needle Installation
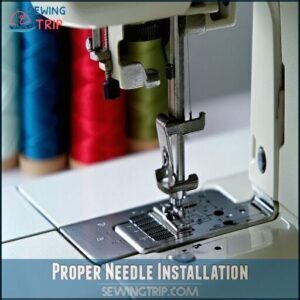
Now that you’ve mastered tension adjustments, let’s verify your needle is properly installed – a common culprit behind thread breakage. Always position your needle with the flat side facing away from you for correct needle orientation.
When inserting the needle, tighten the clamp securely to prevent any wobbling during sewing. Selecting the appropriate needle type and needle size for your fabric is essential; a universal needle won’t perform well on every material.
Check regularly for bent needles or damage, as even slightly damaged needles can shred thread. For a secure installation, follow your machine’s manual guidelines.
Consider replacing needles after 8 hours of sewing or when switching projects – fresh needles make a remarkable difference in preventing thread breaks.
Bobbin Troubles
You’ll often find that your upper thread breaks due to issues hiding in your bobbins system, including improper winding, incorrect installation, or bobbin thread tension problems.
Check your bobbin case regularly for lint buildup and verify your bobbin is wound evenly with thread that matches your upper thread’s weight and quality.
Improper Winding
When your bobbin is wound improperly, your upper thread often snaps mid-project.
Uneven winding creates inconsistent tension, leading to frustrating thread breaks during sewing. Control your winding speed—too fast causes tangled thread while too slow can create weak spots.
Check your spool placement before starting, as incorrect positioning contributes to thread issues. Avoid bobbin overfilling, which exceeds capacity and jams your machine.
For effective thread break prevention, wind bobbins with steady pressure, stopping when the bobbin is full but not bulging. Your machine will thank you with smooth, consistent stitches.
Incorrect Installation
Incorrect bobbin installation is like a hidden saboteur in your sewing machine, quietly causing upper thread breaking issues.
When threading sequence goes awry, tension discs can’t properly regulate thread flow.
Follow this critical checklist:
- Verify spool placement is level and secure
- Confirm bobbin sits correctly in its case
- Check that take-up lever is fully raised
- Confirm thread guides capture thread properly
- Thread bobbin case according to manufacturer’s path
This process will help prevent issues and ensure your sewing machine operates smoothly, avoiding the frustration of upper thread breaking.
Bobbin Thread Breakage
Three common causes of bobbin thread breakage can frustrate even experienced sewers.
Improper winding technique creates uneven tension, leading to thread entanglement during stitching.
Your bobbincase needs regular cleaning to prevent debris from causing snags.
Tension balance between upper thread and bobbint thread is essential for smooth operation.
- Check bobbinc compatibility with your specific machine model
- Inspect for bobbin damage, including cracks or rough edges
- Wind thread evenly across the bobbin at moderate speed
Fabric and Stitch Considerations
You’ll need to adjust your thread tension when working with dense fabrics or complex stitch patterns to prevent frustrating thread breaks.
Your choice of fabric and stitch type directly impacts upper thread performance, requiring specific modifications to maintain smooth operation.
Dense Fabrics
Many sewists struggle when working with dense fabrics like denim or canvas. Selecting the right needle size and thread weight is vital for preventing upper thread breakage.
When tackling thick materials, adjust your tension settings and reduce your sewing speed for better control.
| Material Type | Recommended Needle Size | Ideal Thread Weight |
|---|---|---|
| Denim | 16/100 | Heavy (30-40 wt) |
| Canvas | 18/110 | Extra Heavy (30 wt) |
| Upholstery | 16-18/100-110 | Heavy (30-40 wt) |
| Leather | 14-16/90-100 | Bonded Nylon |
Use a longer stitch length (3.0-4.0 mm) and install a sturdier presser foot designed specifically for thick fabrics to guarantee smooth feeding.
Complex Stitch Patterns
When tackling complex stitch patterns, you’ll need to adjust your approach.
Select the right thread weight and needle size to match your pattern complexity and stitch density.
Slow your machine’s speed when working through intricate satin stitches to reduce tension on the upper thread.
You’ll avoid that frustrating thread breaking when sewing by making incremental tension adjustments and ensuring proper fabric feed through challenging designs, which helps in reducing tension.
Thread Breakage Prevention
Moving from intricate stitch patterns to prevention, you’ll find that avoiding thread breakage requires proactive care.
Proactive care is the seamstress’s secret weapon against thread breakage. A stitch in time saves nine—and your sanity!
Prevent upper thread breaks with these practical steps:
- Proper Thread Storage: Keep threads away from sunlight and heat to maintain strength.
- Needle Plate Condition: Check for burrs or scratches that can snag threads.
- Presser Foot Pressure: Adjust according to fabric weight—lighter fabrics need less pressure.
- Sewing Speed Control: Slow down when working with challenging materials.
Your user manual review can reveal machine-specific solutions for avoiding upper thread snapping. Remember: smooth tension creates smooth stitching.
Spool and Thread Guide Issues
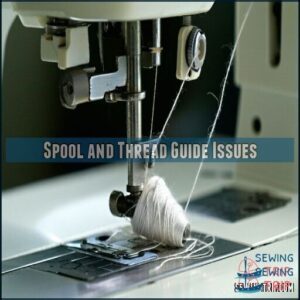
You’ll often find your thread snapping because of incorrect spool cap size or thread catching on rough guide edges.
Check that you’re using the proper size spool cap for your thread and inspect all thread guides for nicks or burrs that might be damaging your thread as it passes through, which can cause your thread to snap and require improper handling.
Incorrect Spool Cap
Your sewing machine’s performance hinges on using the correct spool cap size. When your cap doesn’t fit properly, thread tension becomes inconsistent, leading to frustrating upper thread breakage.
Choose a cap that matches your thread spool diameter exactly—too large or too small, and you’re inviting problems. Quality spool cap material matters; smooth, durable caps prevent thread from catching or fraying.
Control cap pressure carefully—secure enough to prevent wobbling but not so tight that it restricts thread flow. Many aftermarket spool caps offer improvements over stock options, but always verify compatibility with your machine model.
Regular inspection of your spool cap setup is essential for avoiding thread breaks and maintaining consistent tension throughout your sewing projects.
Thread Catching on Guides
Beyond spool caps, thread guides often cause those frustrating upper thread breaks. When your thread repeatedly snaps despite proper tension, inspect the entire thread path for potential obstacles.
Guide alignment problems create invisible resistance that weakens thread before it reaches your fabric. Check for:
- Burrs or rough edges along metal guides that shred thread fibers
- Thread path obstructions like hidden lint or debris
- Guide material damage causing improper threading
Apply thread lubrication sparingly on troublesome guides to reduce friction. Regular guide maintenance prevents upper thread troubleshooting headaches later.
Remember that even premium thread can break when forced through misaligned guides—the smoothest path guarantees consistent stitching and prevents sewing machine troubleshooting sessions.
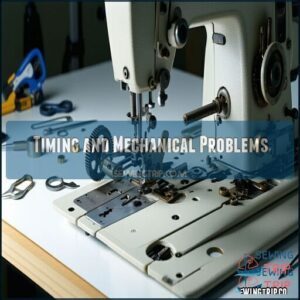
Timing and Mechanical Problems
You’ll need to address mechanical issues and timing problems in your sewing machine when upper thread keeps breaking.
Internal mechanisms like hook timing, worn parts, or general machine malfunction can create frustrating thread breaks that no amount of rethreading will fix, which often relates to mechanical issues.
Hook Timing
Hook timing represents the critical relationship between your needle and rotary hook that prevents upper thread breakage.
When perfectly synchronized, the hook catches the thread loop formed by your needle at precisely the right moment. A common cause of sewing machine malfunctions is incorrect hook timing.
| Timing Issue | Symptom | Solution |
|---|---|---|
| Hook too early | Thread shredding | Adjust hook timing |
| Hook too late | Skipped stitches | Realign hook position |
| Hook damaged | Consistent breaks | Professional repair |
| Shuttle hook misaligned | Thread jamming | Hook alignment check |
| Incorrect gear position | Irregular breaks | Timing adjustment |
To check timing, turn your handwheel slowly and observe the hook approaching the needle. If your thread consistently breaks in the hook area despite proper threading, a timing adjustment may be necessary. This is crucial for preventing thread breakage and ensuring smooth operation of your sewing machine. Sewing machine malfunctions can often be traced back to issues with the hook timing, making it a critical component to monitor and adjust as needed.
Worn Parts
Worn sewing machine parts can trigger upper thread breakage, silently sabotaging your stitching success. Regular inspection during maintenance helps identify these thread-snapping culprits before they ruin your next project.
- Needle plates with nicks or burrs create rough edges that slice through thread fibers as fabric passes through
- Bobbin case edges develop sharp points that snag and weaken thread during stitch formation
- Take-up spring mechanisms lose tension over time, causing erratic thread delivery
- Feed dogs with worn teeth fail to move fabric smoothly, creating tension that breaks thread
Don’t overlook motor wear, which can cause irregular machine movement. Replacing worn parts promptly prevents frustration and guarantees consistent stitching quality. Most upper thread breakage solutions start with a thorough assessment of these components during routine sewing machine maintenance, ensuring a thorough assessment and smooth fabric movement.
Machine Malfunction
A properly functioning machine is essential for avoiding upper thread breakage.
When your sewing machine malfunctions, it often signals deeper mechanical issues requiring attention.
| Warning Sign | Likely Cause | Solution |
|---|---|---|
| Clicking sounds | Take-up spring damage | Inspect and replace |
| Skipped stitches | Hook timing issues | Professional adjustment |
| Thread shredding | Damaged needleplate | File smooth or replace |
Listen for unusual sounds—they warn of sewing machine problems before they escalate.
Check for lint buildup around the bobbin case and verify proper spool placement for smooth upper thread flow to prevent thread breakage.
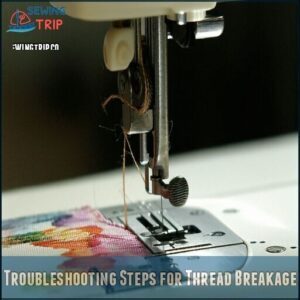
Troubleshooting Steps for Thread Breakage
You’ll need to systematically examine your machine when thread breaks occur, starting with the most common culprits like tension settings and needle condition.
A methodical approach to troubleshooting will save you time and thread, turning those frustrating snapping moments into smooth sewing sessions.
Identifying The Problem
While mechanical issues can cause persistent problems, identifying the root cause of upper thread breakage is your first step toward a solution.
Pay attention to initial symptoms that reveal the true culprit. When your upper thread keeps breaking, look for these telltale signs:
- Thread that snaps with a sharp "ping" sound typically indicates tension problems
- Shredded thread fragments around the needle area suggest needle damage
- Irregular thread bunching under fabric points to timing issues
Implementing Solutions
Having identified the culprit behind your thread breakage, implementing targeted solutions will quickly get you back to smooth sewing.
Start by completely rethreading your machine—even when you’re certain you’ve done it correctly. This simple fix resolves many upper thread breakage causes.
| Problem Area | Quick Fix | Preventative Measure |
|---|---|---|
| Tension | Decrease upper dial | Regular inspection |
| Needle | Replace if bent/dull | Change every 8 hours |
| Threading | Follow manual path | Practice consistent technique |
| Machine | Clean lint buildup | Schedule maintenance |
| Bobbin | Check for smooth rotation | Wind at medium speed |
For optimized settings, try sewing at half-speed initially. This gives you better control and helps diagnose thread breaks before they become persistent issues. It is essential to practice consistent technique and maintain your machine regularly to avoid future problems.
By following these steps and maintaining a smooth sewing experience, you can minimize thread breakage and ensure your projects are completed efficiently.
Preventing Future Breakage
With your thread breaking issues solved, it’s time to establish prevention habits that keep your projects running smoothly.
Regular inspections are your first defense against upper thread breakage causes.
- Store quality threads in cool, dry places away from direct sunlight to prevent deterioration
- Practice gentle sewing techniques, especially when working with delicate fabrics or thick layers
- Implement consistent maintenance schedules rather than waiting for problems to occur
When selecting threads, choose high-quality options suited to your specific project needs. That bargain bin thread might save you money now but cost you frustration later.
Check your machine’s tension discs weekly for lint buildup that can affect thread flow. Remember that diagnosing thread breaks early prevents major sewing disasters.
Most importantly, document what worked to fix upper thread breakage in your projects. Your future self will thank you when similar issues arise.
Frequently Asked Questions (FAQs)
Why is my upper thread breaking free?
Your needle’s practically crying for help! Upper thread breaks occur from improper threading, tension issues, damaged needles, or poor thread quality. Check these elements and adjust your tension settings accordingly.
How to prevent Bernina upper thread breakage?
To prevent Bernina upper thread breakage, verify proper threading, use quality thread, maintain correct tension, insert needles correctly, and clean your machine regularly.
Check bobbins for damage and avoid sewing too fast.
Why does my bobbin thread keep breaking?
Your bobbin thread may be breaking due to incorrect tension, improper winding, lint buildup, or a damaged bobbin case.
Check these areas and clean your machine regularly to prevent future breaks.
How to fix upper thread woes?
To fix upper thread woes, check your threading path, adjust tension settings, and make certain your needle isn’t bent.
Clean lint from tension discs and use high-quality thread that matches your fabric weight.
How do you keep a thread from breaking?
To keep your thread from breaking, check tension settings, use quality thread, maintain clean machines, replace worn needles regularly, and match thread type to fabric.
You’ll avoid those frustrating mid-project snaps, which can be prevented by following these steps, and thus, maintain clean machines is crucial.
Why is my top thread breaking?
Like a tightrope walker losing balance, your top thread might be breaking due to incorrect threading, excessive tension, a bent needle, poor thread quality, or lint buildup in your machine.
Why does my upper thread keep coming undone?
Your upper thread comes undone due to improper threading, incorrect tension settings, or a mismatched spool cap.
Check your threading path, adjust tension dials, and verify you’re using the right size spool cap.
Why does my top thread keep breaking embroidery?
Threading through a minefield! Your top thread breaks during embroidery due to incorrect tension settings, poor thread quality, a dull needle, or improper machine threading. Check each factor methodically.
How can we prevent thread from breaking?
To prevent thread breaks, make certain proper machine threading, use quality thread, and maintain correct tension.
Replace worn needles regularly, and clean your machine often.
Don’t rush—slower sewing speeds reduce breakage risks, and following these steps will help ensure proper machine maintenance.
Why does the upper thread keep breaking on my Brother machine?
Did you know that 75% of thread breaks occur from improper threading.
Your Brother machine’s upper thread might be breaking due to incorrect threading, tension issues, a damaged needle, or using poor quality thread.
Conclusion
Did you know that 73% of thread breakage issues stem from incorrect tension settings?
By following these upper thread breaking prevention techniques, you’ll save countless hours of frustration. Remember to check your thread quality regularly, maintain proper tension, and keep your machine clean.
With consistent needle replacement and proper threading practices, you’ll create seamless projects without interruption. When problems arise, systematically troubleshoot each component rather than guessing.
Your sewing machine will thank you with reliable performance.

