This site is supported by our readers. We may earn a commission, at no cost to you, if you purchase through links.
Most tangled-thread horror stories start the same way: a beginner buys a machine loaded with 200 stitches, half of them decorative patterns they’ll never touch, and none of the guidance needed to thread it correctly. That machine ends up in a closet within a month.
The truth is, mastering a sewing machine has less to do with how many features it packs in and more to do with how well the basics work. A smooth bobbin system, honest lighting, and a manual that actually explains tension settings will teach you more than any fancy embroidery function ever could.
So if you’re wondering what features matter for new sewers, the answer isn’t flashy. It’s foundational, and getting it right from the start saves you from an expensive, frustrating detour.
Table Of Contents
Key Takeaways
- Choose beginner sewing machines based on solid fundamentals like smooth bobbin systems, clear tension controls, and simple stitch selection, rather than a long list of decorative stitch patterns.
- Prioritize five core stitches—straight, zigzag, stretch, blind hem, and one-step buttonhole—since these cover nearly every beginner project and matter far more than extra stitch options.
- Look for time-saving conveniences like automatic needle threaders, top drop-in bobbins, and clear bobbin covers, since these features cut down on frustration and jams while you’re learning.
- Don’t underestimate good lighting and a clear instruction manual, as strong needle-area visibility and detailed troubleshooting guidance directly improve stitch accuracy and speed up skill-building.
Beginner-Friendly Controls Matter Most
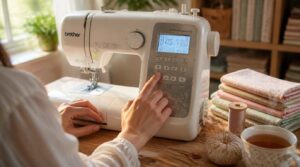
When you’re just starting out, the controls on your machine can make or break your confidence. A model that feels easy to use lets you focus on your fabric instead of fighting the settings. Here’s what to look for on the control panel before you buy.
Simple things like clearly labeled stitch selectors and an intuitive speed control can turn learning to sew from scratch into an enjoyable process rather than a frustrating one.
Simple Stitch Selection
If your machine buries you in fifty stitch options, you’ll freeze up before you even start.
Stick to the basics: straight stitch for standard seams, zigzag for edges prone to fraying, and a stretch stitch for knits.
Think of it like plumbing—nobody needs cast-iron pressure ratings for a garden hose.
Remember, selecting the appropriate needle size is important for smooth stitching on any fabric. Master these first; density and tension adjustments come naturally once the fundamentals click.
Speed Control Slider
Getting your needle threaded right means nothing if the fabric races under it.
A speed control slider caps how fast the machine runs, similar to setting pipe slope for gravity-driven flow—too steep, and things slip out of control; too shallow, and you stall.
Beginners want that steady middle ground: smooth ramping, not sudden jumps, so stitches stay even while you build confidence.
Clearly Labeled Dials
Once speed feels manageable, you still need to know exactly which stitch you’re running. That’s where dial design earns its keep.
Look for high-contrast numerals — white on black — with tactile notches marking each setting. Auditory click confirmation and multilingual symbols help too.
- Bold, easy-to-read numbers
- Tactile detents you can feel
- Audible clicks per setting
- Low-light legibility for evening work
Start-stop Button
Ever notice how your car’s ignition button just knows to fire when you press it? Sewing machines borrow that same logic.
The start-stop button replaces a foot pedal fumble, sending a clean signal the moment you’re ready—no unbuckled-seatbelt-style safety checks, just tactile button feedback confirming your press.
| Feature | Sewing Machine | Car Analogy |
|---|---|---|
| Signal | Button press | Key fob proximity |
| Control | Start-stop logic | Ignition safety protocols |
| Feedback | Tactile click | ECU confirmation |
Easy Reverse Stitching
Reverse stitching locks your seam’s start and end so it won’t come apart under stress—essential for zippers and hems.
For added versatility, pairing it with a well-adjusted zigzag stitch for stretch fabrics and edge finishing can round out your everyday stitching toolkit.
- Adjust stitch length shorter for a tighter lock
- Keep thread tension light on knits
- Use 2-6 backward stitches, adjusting for fabric weight
Think of it like proper sewer line grading: get the pace right, and everything holds together for the long haul.
Automatic Threading Saves Frustration
Threading a needle sounds simple until you’re squinting at it for the third time in a row. The right machine takes that struggle off your plate with a few smart, built-in features. Here’s what to look for when considering easy threading and bobbin setup.
Built-in Needle Threader
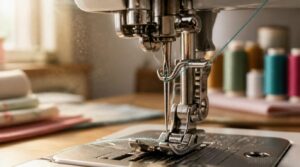
Threading a needle by hand is a lot like locating a sewer line without proper plans—tedious guesswork. A built-in threader guides thread via a small hook, cutting the job to under 10 seconds.
A built-in threader turns tedious guesswork into a ten-second task, guiding thread through with a single small hook
| Manual Threading | Built-in Threader |
|---|---|
| Eye strain | Quick, easy |
| ~1 minute | Under 10 sec |
Keep it lint-free for lasting threader mechanism durability and smooth thread path alignment.
Top Drop-in Bobbin
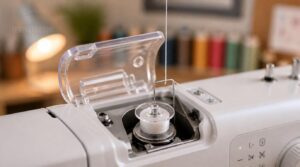
Loading a bobbin from the top, without pulling the needle plate, is like specifying PVC over cast-iron: less hassle, fewer failure points. The vertical thread path keeps tension stable and jam risk low.
- Drop bobbin in
- Thread guides align automatically
- Snap cover shut
- Check thread visually
- Start sewing
Just like a well-sloped sewer pipe, smooth paths prevent backups—here, thread snags.
Clear Bobbin Cover
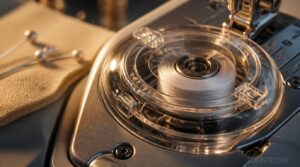
Ever try monitoring water flow through opaque PVC? You can’t—which is exactly why clear polycarbonate covers matter here. They let you watch thread levels without stopping mid-seam.
Fit compatibility counts, too: covers are molded to exact tolerances for your specific model. Wipe off oil residue with a soft cloth, and replace any cracked cover immediately to keep visibility and bobbin seating reliable.
Jam-resistant Bobbin System
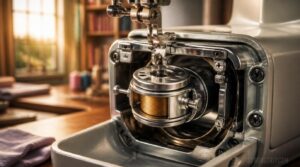
Nothing kills momentum like a tangled bobbin mid-seam. A floating bobbin housing absorbs small misfeeds, keeping thread delivery smooth even at higher speeds.
Machined from corrosion-resistant alloy, the case resists wear the way properly sized PVC resists corrosion in a sewer line. Built-in jam error detection alerts you before problems compound—no guesswork, just a quick check and back to sewing.
Quick Thread Guides
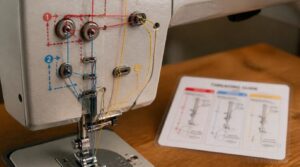
Ever lose the thread path halfway through a project?
Color-coded diagrams printed right on the machine casing walk you through every step, from needle to tension disk routing, matching thread type to the correct route while avoiding thread nesting.
Many machines include laminated reference sheets too, giving you a durable, glance-and-go guide when memory fails mid-seam.
Essential Stitches Beat Extra Options
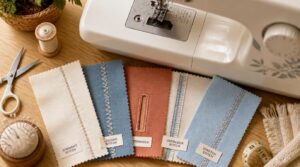
Fancy stitch libraries look impressive on the box, but you’ll only ever reach for a handful of them. What actually matters is whether your machine nails the basics you’ll use every single project. Here are the five stitches worth prioritizing before anything else.
Straight Stitch
A workhorse from day one: the straight stitch locks needle and bobbin thread into one clean seam, ideal for wovens like cotton or linen.
Set stitch length near 2.0–2.5mm, balance thread tension, and always backstitch at seam ends.
Consider it your foundation—like a properly sloped sewer line, precision here (seam allowance, fabric weight) prevents costly rework later.
Zigzag Stitch
Once your straight seams hold firm, the zigzag stitch adds flexibility—side-to-side V shapes that prevent edge fraying on wovens and knits alike. Adjust stitch width for elasticity and stretch, or widen it for decorative seam borders.
Much like sizing a sewer pipe installation for a new home, matching width to fabric compatibility keeps your seams reliable.
Stretch Stitches
Knits move, so your seams need to move with them. That’s where zigzag variations like the lightning bolt stitch come in—denser stitching for stretch fabrics.
Pair a ballpoint needle with polyester thread for elasticity, adjust tension to prevent puckering, and stabilize slippery knits beforehand. Like matching pipe material to slope in sewer system design, matching stitch to fabric keeps seams from failing.
Blind Hem Stitch
Skirts and curtains call for a different trick: hiding the stitch entirely. A blind hem foot guides the fold so your machine catches just one fabric fiber, keeping thread invisible from outside.
Match thread color to fabric, press the fold flat to prevent puckering, and go slowly on textured wovens.
Like a well-graded sewer line, precision here means everything holds together, unseen.
One-step Buttonhole
Buttons trip up more beginners than any other closure, which is why a one-step buttonhole function earns its keep. Set your sizing dial, drop the button in the foot’s slot, and the machine stitches both sides plus end tacks automatically—like sizing a sewer line, get the diameter right and everything flows.
Watch fabric thickness on heavy fabrics, and stabilize stretch knits to avoid misshapen holes.
Good Lighting Improves Stitch Accuracy
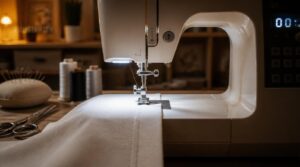
You’d be surprised how much a dim workspace can throw off even a simple straight line. Good lighting isn’t a luxury feature here, it’s what lets your eyes do their job while your hands do theirs. Here’s what to look for when you’re checking a machine’s lighting setup.
Bright LED Work Area
Ever tried threading a needle in dim light? Not fun. A bright LED work area gives you 6,000–8,000 lux with 5,000–6,500K color temperature for true-to-life fabric shades.
- Shadow-free diffusers
- Cool-touch LED modules
- Adjustable brightness control
- Even needle-plate coverage
Just like excavation crews need proper lighting before installing pipe, you need clear light before every stitch.
Needle-area Visibility
Where the needle meets fabric is where accuracy either happens or doesn’t. Integrated LED lighting aimed at the needle shaft gives you sharp needle shaft clarity, so you catch misalignment before it ruins a seam.
| Without Focused Light | With Focused Light |
|---|---|
| Guesswork | Precision |
| Missed stitches | Clean lines |
Think camera inspection before pipe installation: you check before committing.
Reduced Eye Strain
Your eyes tire faster under harsh, uneven light than they do under a calibrated, diffused glow near your machine. Balance task lighting with room brightness, much like calibrating screen brightness against ambient light.
Warmer tones reduce strain the way blue light reduction does on a monitor.
Keep your work at a comfortable viewing distance, and those long sewing sessions won’t leave you rubbing your eyes.
Better Fabric Alignment
Good light does more than ease your eyes—it exposes the truth in your fabric. Under proper illumination, you can actually spot the grainline running true, catch pattern notches begging to align, and confirm print motifs cross seams cleanly.
Shadows hide nap direction shifts and grain distortion; strong light reveals them before you cut, saving your project from crooked seams.
Evening Sewing Comfort
Nine at night, and your project doesn’t have to fall apart just because the sun did. Warm color temperature lighting paired with 300-500 lux keeps you sharp without the harsh glare, much like proper sewer line grading keeps flow steady instead of stalling.
- Adjustable task lighting near the needle
- Comfortable chair height
- Stable 20-22°C room temp
- Anti-fatigue mat underfoot
- Scheduled breaks every 60 minutes
Helpful Accessories Support Learning
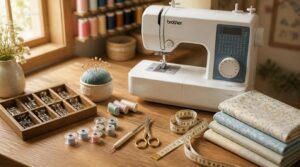
A great sewing machine is only half the story—the accessories that come with it shape how quickly you build real skill. You don’t need a huge kit to get started, just a few key tools that make everyday tasks easier. Here’s what to look for when you’re checking what’s included in the box.
All-purpose Presser Foot
Every machine you buy comes with one, and you shouldn’t overlook it: the all-purpose presser foot. Its flat sole promotes steady fabric feeding stability across medium-weight fabrics, while a generous stitch width range covers straight and zigzag work alike.
Standard threading compatibility means no fuss either—just load thread and start on hems, seams, or general garment construction right away.
Zipper Foot
Once you’re past general seams, a standard zipper foot lets you stitch close to the teeth, left or right of the needle—handy for garment closures. Adjustable versions add versatility across fabric thickness, while non‑stick soles glide over vinyl.
Invisible zipper techniques and dual feed benefits matter too, much like proper pipe joint sealing matters in sewer system design standards.
Buttonhole Foot
Zippers get you closing garments cleanly, but buttonholes are their own skill entirely.
A buttonhole foot attaches via snap‑on or screw‑on connection and uses grooves to align stitching evenly. Manual versions need you to measure each button; automatic ones use button size sensors for consistent results.
Fabric compatibility varies too—standard, stretch, or keyhole style—much like site evaluation guides sewer installation choices during permitting.
Seam Guide Markings
Once your buttonholes line up, keeping the rest of your seams straight becomes the next hurdle.
Magnetic guides snap on and reposition instantly for 1/4" or 1/2" work. Adhesive strips stick without damaging the plate. Screw-in guides offer rigid precision, much like properly aligned and glued PVC pipe joints. Tape or etched needle-plate marks work too; no tools required.
Beginner-friendly Manual
Once seams and buttonholes come easy, your manual becomes the real teacher. A clear quick start guide walks through setup steps and troubleshooting common errors, flattening the learning curve fast.
Good manuals cover:
- Threading diagrams
- Tension troubleshooting
- Stitch-width charts
- Maintenance schedules
- Common error fixes
Think of it like sewer line planning and permits — skip the paperwork, and small mistakes turn costly.
Frequently Asked Questions (FAQs)
What does a new sewer need?
Your new sewer line needs a proper site evaluation, local permits, and correct pipe depth with calculated slope. Plan for future expansion, factor in connection fees, and confirm environmental compliance before installation begins—cutting corners here costs more later.
What items do I need as a beginner sewer?
You’ll want Essential Hand Tools, Key Thread Notions, a basic Presser Feet Set, Workstation Safety Gear, and reliable Measuring and Marking supplies—scissors, pins, thread, needles, and a seam ripper form your foundation before tackling any project confidently.
What are the 7 common sewing machine troubles?
Like a clogged sewer line backing up your whole system, a jammed machine stalls every stitch.
The seven troubles: tension imbalance, needle/thread issues, uneven fabric feeding, bobbin jams, timing wear, lint buildup, and worn parts needing replacement.
How to be a better sewer?
Practice consistently, master seam allowances, and learn fabric selection basics before tackling zigzag or stretch stitches. Organize your sewing space for efficiency, troubleshoot mistakes early, and start with simple practice projects—pillowcases, tote bags—before attempting garments or buttonholes.
What fabric shears work best for sewing beginners?
Look for 8-inch alloy steel blades with a bent handle and ergonomic soft grip—stainless steel resists rust, stays sharp longer, and cuts woven fabrics cleanly, similar to how proper pipe material choice keeps a sewer line running smoothly for decades.
How much should a beginner sewing machine cost?
Budget $150–$300 for a solid beginner machine—mechanical models run $100–$150, computerized versions $150–$ Regional pricing and sales can shift costs 20–30%, similar to how connecting to a municipal sewer system versus septic affects your long-term expenses.
What machine weight is easiest for beginners to handle?
Goldilocks would approve here: not too heavy, not too flimsy. Lightweight units under 15 kilograms suit small spaces, while machines in the 10-20 kilogram range balance stability vs portability, keeping setup lift requirements manageable for solo transport and confident handling.
Conclusion
A sturdy sewing machine is like a well-laid foundation pipe: unseen, unglamorous, yet everything downstream depends on it holding steady.
Skip the decorative bells, and you’ll find that what features matter for new sewers are the plain ones: reliable threading, honest lighting, stitches that actually get used. Get those right, and your machine becomes a trusted tool, not a closet decoration.
Master the basics first. Everything else you’ll learn stitch by stitch, project by project, mistake by mistake.
- https://threadworks.com/blogs/buying-guides/best-sewing-machines-for-beginners-2026-guide
- https://blog.wawak.com/post/essential-sewing-supplies-for-beginners
- https://www.homefurnishing.co.uk/blogs/sewing-machines/best-sewing-machine-for-beginners-uk-2026-complete-buyers-guide
- https://www.nytimes.com/wirecutter/reviews/best-sewing-machine?eafs_enabled=false
- https://mypacklove.com/blogs/label/top-7-best-sewing-machines-for-beginners-in-2025-expert-picks