This site is supported by our readers. We may earn a commission, at no cost to you, if you purchase through links.
That denim jacket buried in your closet, the one with the busted button and a coffee stain you gave up on removing, still has plenty of life left. You don’t need it. But you’re not ready to toss it either. Sound familiar?
Here’s the thing: a repurpose denim jacket tutorial isn’t about hiding flaws, it’s about turning them into the whole point. Patchwork covers stains, embroidery distracts from that weird bleach spot, and strategic distressing makes "worn out" look intentional.
Grab a seam ripper and some scrap fabric. By the end, that "maybe donate pile" jacket becomes something you’ll actually fight your roommate to wear.
Table Of Contents
Key Takeaways
- Prep work matters most: pre-wash your jacket, inspect seams for weak spots, and gather the right tools like heavy-duty needles and fusible interfacing before cutting anything.
- Patchwork and appliqué techniques (cutting scraps 2×2 to 6×6 inches, pinning grid layouts, and using interfacing behind dense areas) turn stains and flaws into intentional design features.
- Embroidery details like satin stitches for petals, French knots for texture, and chain stitches for outlines transform plain denim into a personalized, handmade-looking canvas.
- Distressing techniques such as sanding hems, creating frayed edges, applying fabric paint, and adding studs or buttons give the jacket a finished, lived-in look while requiring careful drying and curing time.
Plan Your Denim Jacket Makeover

Before you touch a needle, scissors, or that bottle of bleach, let’s slow down for a second. A little planning now saves you from ripping out stitches later, trust me on this one. Here’s exactly what to sort out before your jacket meets its new personality.
If curved seams have you nervous, this guide to hand-sewing curved seams smoothly walks you through keeping those small stitches even as the fabric bends.
Choose Your Upcycling Style
Before you cut a single thread, ask yourself: what story do you want this jacket to tell? Maybe it’s eclectic and bold, mixing vintage patches with modern stitching.
Pick a color palette (neutrals plus one loud accent work great), decide on texture contrast like corduroy against denim, and choose your silhouette, cropped or oversized. That vision guides every decision ahead.
Consider the calming neutral palette to let your denim’s texture shine.
Inspect Seams and Fabric
Grab your seam ripper and get nosy. Check every seam for puckering or loose stitching before you commit to your vision.
- Stitch density and fabric weight should feel even
- No thinning near elbows or cuffs
- Seams lie flat, no weird tucks
Test any risky moves on fabric scraps first. Your denim jacket’s structural integrity depends on this five-minute detective work.
Pre-wash The Jacket
Once seams check out, toss that jacket in the wash before you cut a single stitch. Pre-washing prevents shrinkage headaches later and clears out sizing residue so thread grips properly.
| Factor | Recommendation | Why It Matters |
|---|---|---|
| Water Temp | 30-40°C | Preserves fibers |
| Detergent | Mild, no bleach | Protects indigo |
| Cycle | Gentle, short | Reduces pilling |
Air-dry flat—no dryer drama needed.
Mark Design Placement
Now that your jacket’s clean and dry, grab tailor chalk and start planning where everything goes—before any needle touches denim.
Mark your chest design 2-3 inches below the collar, keep back-panel motifs centered between shoulder blades, and work from center outward. Stay clear of seam lines to avoid distortion after washing. This is just planning; save your actual supply-gathering for the next step.
Gather Sewing Supplies
Before cutting anything, raid your sewing space and lay out what you’ll actually need.
- A sewing machine with straight and zigzag stitches
- Heavy-duty needles, matching thread, and embroidery thread for accents
- Fabric scraps, fabric paint, pins, and a sturdy, well-lit workspace
Keep your cutting tools sharp and your machine’s needle fresh—dull gear ruins denim fast.
For tougher jobs, pairing that fresh needle with a reliable sewing machine built for plush toys and heavy-duty fabrics makes stitching through thick denim seams much easier.
Prepare Tools and Materials
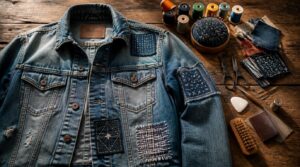
Before you cut a single thread, raid your sewing kit and see what’s missing. A good makeover lives or dies by the right tools, not just enthusiasm. Here’s exactly what to gather before you start.
Fabric Scissors or Rotary Cutter
Ever tried cutting perfect denim squares with scissors while your hand cramps into a claw? A rotary cutter slices multiple layers fast for patchwork—just use a mat and ruler. Fabric scissors win on curves and tight corners.
Denim dulls blades quick, so replace or sharpen often. Always keep fingers clear; that guard exists for a reason.
Matching Thread and Needles
A size 80/12 needle works with most denim seams with regular 40 weight thread. Going heavier? Bump up to 90/14 or 100/16 so the needle doesn’t bend mid-stitch.
Loosen top tension slightly and lengthen stitches to 2.5–3.0mm — this prevents skipped stitches and puckering.
Why it matters:
- Broken needles mid-project (rage-inducing)
- Puckered seams ruining your patch
- Thread nests tangling your bobbin
- Skipped stitches wasting fabric
Pins, Clips, and Marker
Denim doesn’t forgive sloppy alignment, so pinning matters. Use sharp steel pins for thin layers, switch to spring-loaded clips past four layers to avoid holes. Magnetic clips speed up layout; garment clips protect seam allowances.
For marking, grab a washable fabric marker or tailor’s chalk—mark balance points on the inside. Keep a seam ripper handy, because mistakes happen.
Interfacing for Added Panels
Panels flop without backbone, that’s where fusible interfacing earns its keep. Go light weight (12-25 gsm) for subtle reinforcement, medium for stand-alone panels. Fusing multiple layers can strain your machine’s needle and tension, so keep it running smoothly by following a sewing machine servicing intervals guide.
Woven resists stretch and keeps drape honest; nonwoven bonds fast with less fuss. Sew-in canvas survives cuffs and heavy wear better than fusible ever will.
Always match grain lines, and prewash everything—shrinkage after sewing is a heartbreaker.
Iron and Pressing Cloth
Your iron is the unsung hero here, but denim will fight back with shine and scorch marks if you rush it. Grab a cotton muslin pressing cloth—cheap, breathable, heat-resistant—and lay it over patches or embroidery before pressing.
It diffuses heat, lets steam through for smooth seams, and saves your soleplate from gunk. Medium heat, lifting motions, not sliding. Wash the cloth occasionally; retire it once it thins out.
Add Patchwork and Fabric Panels
This is where those old jeans in your scrap pile finally earn their keep. Grab your scissors and get ready to turn plain denim into something with real personality. Here’s exactly how to cut, arrange, and sew those panels so they actually stay put.
Cut Denim Scraps
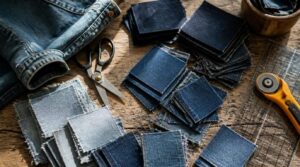
Cutting up old jeans feels a little like demolition day, oddly satisfying. Grab your scissors or rotary cutter and cut squares from 2×2 to 6×6 inches, mixing sizes for visual interest.
Watch thickness (0.6-2.0mm) and mix your color palette from stonewash to indigo. Choose frayed, squared, or selvage edges as accents. Keep scraps organized by color and cut.
Arrange Patchwork Pieces
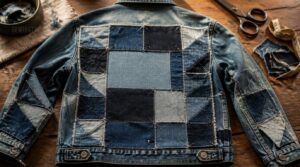
Okay, all those scraps are cut. Now comes the fun puzzle part.
Lay pieces on your denim jacket before sewing anything. Follow a grid layout strategy, keep seams meeting at right angles, and try these three moves:
- Center larger patches, frame edges with scraps
- Alternate light and dark washes for rhythm
- Pin everything first — test before committing
Good color balance beats matching. Trust the wobble.
Sew Front Panels
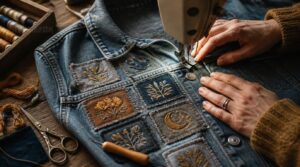
Time to make it permanent. Pin patches following your grid, checking grainline alignment so the fabric hangs right, not puckered sideways.
Stitch with a 1.5 cm seam allowance, backstitching at stress points.
| Step | Why It Matters |
|---|---|
| Pin first | Prevents shifting |
| Stitch slow | Panel symmetry |
| Press open | Reduces bulk |
Add interfacing behind dense patchwork before topstitching for crisp edges.
Attach Sleeve Accents
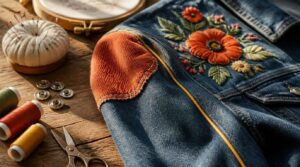
Sleeves are where you get playful without touching the jacket’s main real estate. Contrast fabric patches at the sleeve cap create instant separation from the body.
Try piping along the outer seam for a vertical line that elongates your arm. Want commitment issues? Use snaps for detachable trim methods. Embroidery or appliqués near the shoulder make a solid focal point.
Press Seams Flat
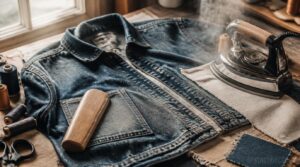
Grabbing your iron and pressing cloth now saves headaches later. Press each seam allowance flat before opening it, using short steam bursts to avoid scorching or shine.
For bulky patches, a garment clapper sets creases firmly. Let seams cool before handling; rushing causes new wrinkles. Finish by pressing the collar for that professional finish you’re after.
Decorate With Embroidery and Appliqué
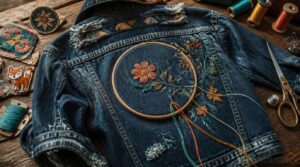
Now for the fun part: turning that plain denim back into a canvas. This is where needle and thread do the heavy lifting, and honestly, where your jacket starts looking less "thrift store find" and more "I made this." Here’s exactly how to stitch and stick your way to a back panel worth showing off.
Needle and thread turn plain denim into a canvas, making a jacket look less thrifted and more handmade
Stabilize Thick Denim Areas
Before any embroidery hoop touches your jacket, thick denim seams will fight you — pockets, plackets, and layered hems just don’t cooperate. Fix this with fusible interfacing behind stress zones, a jeans needle (90/14 or 100/16), and longer stitches (3.0mm) to cut bulk:
- Interface first, stitch second
- Calibrate tension on scraps
- Use a wooden clapper while pressing hot
- Reduce bulk before embroidering
- Test everything twice
Sketch The Back Design
Grab an erasable fabric marker and find your center back line first — that’s your symmetry alignment guide for everything else.
Sketch the silhouette before adding details, keeping shoulder and side seams visible. Scale motifs to fit a 12–14 inch zone, avoiding the shoulder blade area.
A light grid transferred from your sleeve or front designs keeps proportional design sketching consistent across the whole denim makeover.
Stitch Floral Details
Now for the fun part: turning that sketch into actual flowers. Pick your stitches based on the effect you want.
- Satin stitch for smooth, filled petals
- French knots for pollen texture
- Chain stitch to outline edges
Match stabilizer weight to denim thickness, load your embroidery hoop snug, and follow petal orientation with the fabric grain. Mix thread colors for gradient depth — light edges, darker centers.
Add Fabric Appliqués
Not every flower needs to be stitched from scratch — sometimes a fabric appliqué shortcut looks just as good.
Use fusible web application to bond fabric shapes before stitching for stability, or try raw edge styling for a frayed, casual look. Layering fabric depth with overlapping petals adds dimension.
Watch your stitch density — denser stitching means better appliqué garment care and fewer loose threads down the road.
Trim Loose Threads
That last stray thread is basically your denim jacket’s way of testing your patience. Use precision trimming tools—fine point scissors, not the seam ripper—and cut close without nicking stitches. Never yank threads; that’s how snags happen.
Trim uneven ends from multiple angles, press flat, then check the inside hem. Secured, tidy edges are what separate sloppy upcycle tutorials from real garment transformation.
Finish With Distressing and Accents
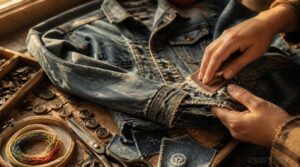
Your jacket’s looking good, but it’s missing that lived-in, "I’ve had this forever" vibe. That’s where distressing and a few finishing touches come in. Grab your sandpaper and buttons, because here’s exactly how to get there.
Sand Hems and Pockets
Since sandpaper is doing the heavy lifting here, pick your grit wisely: fine-grit for subtle fading, coarse for drama.
- Focus on hems and pocket edges
- Sand in one direction
- Check reinforced corners first
- Aim for gradient, not holes
- Rinse with a cold wash after
This is basically the world’s smallest denim jacket makeover party for your sanding block.
Create Frayed Edges
Once your sanding block’s put away, grab tweezers and a seam ripper for the good stuff: actual frayed edges.
| Technique | Tool Needed | Best For |
|---|---|---|
| Pull-thread | Tweezers | Subtle fringe |
| Razor edge | Seam ripper | Jagged drama |
| Layered fray | Both | Depth |
Snip small slits first, then pull threads loose. Stitch a stabilizing line above the fray so it won’t come apart into oblivion later.
Apply Fabric Paint
Now for color. Wipe the jacket clean and let it dry fully — paint won’t stick to dust or damp denim.
Test your shade on a hidden seam first. Use painter’s tape for stencil precision, then layer light colors before dark ones. Let each layer dry between coats.
Heat setting with a pressing cloth locks in paint durability. Wait 72 hours before washing.
Add Studs or Buttons
Wait 72 hours, then it’s hardware time. Grab a stud setting tool for a proper press — pliers work in a pinch but don’t bite as clean.
Match metal finish to your existing zippers for consistent custom denim. Mark spots with chalk first. Pre-punch pilot holes to reduce fraying, and add a backing washer on thick seams for extra hold.
Wash and Air-dry
Once every stud is set, give your jacket a cold, gentle wash to rinse away chalk marks and loose grit.
Skip the dryer. Lay patchwork sections flat on a mesh rack for even support, and reshape damp denim while it’s pliable. Dry in shade, 18–22°C, moderate humidity — this prevents dye migration and keeps your upcycled fashion masterpiece looking crisp, not crunchy.
Frequently Asked Questions (FAQs)
Can I bleach a jacket without any spraying?
Skip the spray bottle entirely and try immersion bleaching instead: submerge your denim jacket in a 1:3 bleach-to-water ratio for even fading. Wear gloves, work ventilated, and test a scrap first—fabric strength weakens with repeated dips.
How do I safely attach leather panels to denim?
Picture your jacket flapping open mid-stride, leather panel flying off like a renegade Frisbee. Avoid that: use Chicago screws or rivets with denim backing patches, a walking foot for even stitching, and test panel mobility before wearing.
Whats the best way to add metal studs?
Sew leather panels first, then hammer prong-back studs through both layers for grip. Space evenly along edges or cluster on pockets for a bold, customizable outerwear accent — wear gloves, protect your fingers from sharp prongs.
Can I use iron-on vinyl instead of sewing patches?
Iron-on vinyl skips needles entirely—press with medium-high heat, 15-30 seconds, cleaned denim only. It won’t match sewn patchwork’s durability, but for quick DIY clothing projects and bold vinyl design ideas, it’s a solid shortcut.
How do I attach bottle caps for removable accents?
For truly removable flair, go with pinbacks or magnetic discs instead of permanent glue. A hot glue gun works for semi-permanent caps, spaced 2-3 inches apart. Hand wash gently and check periodically for looseness.
Conclusion
Somewhere out there, a fast-fashion executive just felt a chill, because you turned trash into treasure without spending a dime on something new. That’s the quiet rebellion hiding inside every repurpose denim jacket tutorial: proving your hands still know how to make something real.
Stains gone, stitches everywhere, personality doubled. Stop hunting thrift racks for "the perfect jacket." You already made it. Now go wear it loud, coffee stains and all.
- https://craftgossip.com/?s=Diy+chalk
- https://www.newasiagarment.com/how-do-you-make-my-stretch-jeans-keep-their-shape-the-complete-guide-to-long-lasting-denim/
- https://linkinghub.elsevier.com/retrieve/pii/S0141029615005180
- https://sewingbecomeasy.com/how-to-soften-stiff-thick-jeans/
- https://merchantandmills.com/uk/blog/denim-guide