This site is supported by our readers. We may earn a commission, at no cost to you, if you purchase through links.
 Cap height in sewing is the vertical distance from your shoulder seam down to the underarm point of a sleeve. This measurement determines how your sleeve sits on your shoulder and affects the entire garment’s fit.
You’ll measure from the shoulder’s highest point straight down to where the sleeve meets the armpit. Getting this right means your sleeve won’t pucker at the shoulder or bunch awkwardly at the underarm.
It’s particularly essential for set-in sleeves, where the fabric needs to curve naturally over your shoulder’s shape. Too much cap height creates pulling and discomfort, while too little leaves excess fabric hanging loose.
The magic happens when you match cap height perfectly to your body’s proportions and the garment’s intended ease. This balance is crucial for a comfortable and well-fitting garment, making it essential to understand and apply correctly.
Table Of Contents
- Key Takeaways
- What is Cap Height in Sewing?
- How Does Cap Height Influence Garment Fit and Style?
- Understanding Sleeve Measurements and Fit
- Choosing The Right Cap Height for Sleeves
- Tips for Proper Sleeve Cap Placement
- Using Sleeve Heads for Support and Lift
- Sewing Techniques for Attaching Sleeves
- Additional Sewing Tips for Cap Height and Sleeve Length
- Understanding Cap Height in Relation to Body Measurements
- Frequently Asked Questions (FAQs)
- Conclusion
Key Takeaways
- You’ll measure cap height from your shoulder tip straight down to the underarm line (1.5cm below your armpit) – this vertical distance typically ranges 4-6 inches and determines how your sleeve sits and moves.
- You can’t ignore the balance between cap height and ease – higher caps (6-8 inches) create fitted, formal looks but restrict movement, while lower caps (around 4 inches) offer casual comfort and better arm mobility.
- You’ll need proper easing techniques to distribute fabric smoothly across the cap – use two parallel rows of longer stitches with reduced tension, then carefully pull threads to create even gathers without puckers.
- You should match cap height to your body proportions and garment purpose – consider your arm span-to-height ratio, shoulder slope, and whether you’re making activewear (needs lower caps) or formal wear (can handle higher caps).
What is Cap Height in Sewing?
Cap height in sewing represents the vertical distance from your sleeve’s shoulder point to the underarm seam line, typically measuring 4-6 inches for standard sleeve construction.
This vital measurement determines how your sleeve fits into the armhole and affects both comfort and appearance. When you’re working with sewing patterns, getting the cap height measurement right guarantees proper sleeve cap height distribution and smooth fabric drape.
Perfect cap height measurement transforms ordinary sleeves into professional-quality garments with flawless fit and drape.
Your measurement tools and fabric choice will influence this dimension, making accurate cap height sewing techniques essential for professional results in any sleeve construction project.
Understanding various sewing machine feet can also enhance your overall sewing experience and accuracy in constructing garments, which is crucial for achieving a professional look.
How Does Cap Height Influence Garment Fit and Style?
Understanding cap height measurement transforms your sewing from guesswork into precision crafting.
This vital dimension directly impacts three essential garment qualities:
- Sleeve Balance – Proper cap proportions create smooth armhole attachment without pulling or bunching
- Fit Issues – Incorrect cap height measurement causes restriction or excess fabric at the shoulder joint
- Style Variations – Different cap heights produce distinct looks, from casual dropped shoulders to custom set-in sleeves
Higher sleeve cap height creates formal, fitted silhouettes but reduces garment mobility.
Looking at the context from that paragraph about sleeve construction, here’s a fitting blockquote:
**Formal fit demands sacrifice—mobility pays the price for polish.
Lower measurements offer comfortable movement while producing relaxed styling.
Cap proportions must align with your design intent – whether you’re crafting professional blazers or weekend wear affects this critical measurement choice.
Accurate measurements are key to achieving a perfect fit, considering factors like pattern adjustment techniques to confirm a well-crafted garment.
Understanding Sleeve Measurements and Fit
Proper sleeve measurements establish the foundation for a well-fitted garment that moves naturally with your body.
Getting these measurements right prevents common fitting issues like tight armholes, pulling fabric, and restricted arm movement, which is crucial for a garment that allows for natural movement.
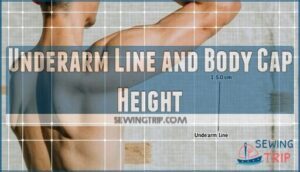
Underarm Line and Body Cap Height
Perfect sleeve fit starts with mastering your body measurements and underarm positioning.
You’ll achieve ideal arm mobility by placing the underarm line exactly 1.5 cm below your armpit – this becomes your reference point for all cap height calculations.
Your body cap height measures vertically from shoulder tip to this underarm line, typically averaging 6 inches for fitted sleeves.
Understanding sleeve cap height is essential for achieving a well-fitted sleeve.
| Measurement Type | Standard Distance | Purpose | Impact on Fit |
|---|---|---|---|
| Underarm Line | 1.5 cm below armpit | Movement ease | Better arm mobility |
| Cap Height | Shoulder to underarm | Sleeve shape | Controls sleeve fullness |
| Sleeve Ease | 1.25-1.75 inches | Comfort buffer | Prevents binding |
| Pattern Adjustment | +0.25-0.375 inches | Sewing allowance | Accommodates fabric thickness |
This underarm fit foundation determines how your sleeves move with your arms, making body measurements the cornerstone of professional sleeve construction.
It is crucial for achieving ideal arm mobility and ensuring a comfortable fit by allowing for movement ease and preventing binding with the right sleeve ease.
The sleeve cap height and pattern adjustment also play significant roles in the overall fit and comfort of the sleeve.
Fitted Sleeve Block and Sleeve Fullness
When creating fitted sleeves, you’ll frequently encounter the balance between sleeve fullness and cap height that determines your garment’s final appearance.
The fitted sleeve block serves as your foundation pattern, typically featuring 3.5" to 5" cap height with minimal ease for that custom look. Adding sleeve fullness requires strategic pattern modifications that affect both armhole depth and bicep fit.
Here’s what happens during the fullness process:
- Slash-and-spread technique – You’ll cut vertical lines from the cap apex toward the hem to create controlled fullness
- Cap height reduction – The sleeve cap height decreases to 2.5" to 3.5" as you spread the pattern pieces
- Increased sleeve ease – Your sleeve cap ease jumps from 1.5" to potentially 2.5" or more for gathering
This sleeve block transformation lets you achieve everything from subtle drape to dramatic puff sleeves while maintaining proper bicep fit and armhole depth compatibility.
Bicep Size and Sleeve Length
When measuring for sleeve fitting, accurate arm measurement becomes your foundation for success.
Take your bicep circumference at the fullest point, then add 5cm bicep ease for comfortable movement.
Your sleeve length should extend from shoulder to wrist bone, with sleeve proportion matching your arm span-to-height ratio.
This cap adjustment guarantees proper sleeve cap height while maintaining ideal fit through strategic sleeve measurement techniques.
Choosing The Right Cap Height for Sleeves
You’ll find that selecting the right cap height transforms how your sleeves fit and function on the finished garment.
Consider your fabric choice, intended style, and the wearer’s mobility needs when determining whether to use a high cap for polished looks or a low cap for casual comfort.
Factors to Consider
Several key factors will shape your cap height decisions, each influencing the final garment’s performance and appearance.
Fabric Choice affects how your sleeve drapes – heavier materials need more Cap Ease for smooth movement, while lightweight fabrics require less.
Arm Mobility demands vary by garment purpose: work clothes need lower cap heights (around 4 inches) for unrestricted movement, while formal wear can accommodate higher caps (6-8 inches) for that customized silhouette.
Consider these essential elements when planning your Sleeve Cap Height:
- Sleeve Length coordination – longer sleeves often pair better with moderate cap heights
- Garment formality level – casual pieces favor lower caps, formal wear accepts higher measurements
- Wearer’s activity level – active lifestyles require maximum mobility
Your Sewing Techniques must accommodate the chosen height, ensuring proper ease distribution prevents puckering while maintaining the intended fit.
Set-in Sleeves Vs. Other Sleeve Styles
Which sleeve style fits your garment vision best?
Set-in sleeves deliver precision through their customized cap height, creating that coveted fitted silhouette.
These sleeves require careful sleeve cap ease distribution but reward you with superior garment design control.
Raglan sleeves eliminate complex cap fitting entirely—their diagonal seams extend from neckline to wrist, offering maximum mobility for activewear.
Kimono sleeves provide the simplest construction with straight seams, though they can restrict movement if cut too narrow.
When comparing sleeve styles, consider your fit issues: set-in sleeves excel in formal wear but demand advanced sewing skills, while raglan and kimono styles forgive construction mistakes.
Your sleeve comparison should weigh aesthetics against practicality—structured blazers need set-in sleeves, casual tees work perfectly with simpler alternatives.
Tips for Proper Sleeve Cap Placement
Proper sleeve cap placement determines whether your sleeve hangs smoothly or creates unsightly wrinkles and pulls.
You’ll need to check the balance line alignment and master easing techniques to achieve that professional, custom look.
That makes all the difference in your finished garment, giving it a custom look that is visually appealing.
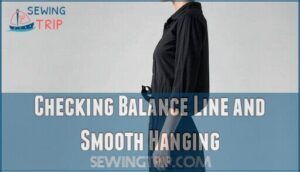
Checking Balance Line and Smooth Hanging
Perfect sleeve balance starts with examining how your garment hangs naturally.
The balance line across your sleeve cap should run parallel to the floor, creating a smooth silhouette without unwanted pulling or twisting.
When your sleeve cap alignment is off, you’ll notice telltale signs like fabric bunching at the armpit or the sleeve rotating awkwardly around your arm.
Here’s your sleeve balance checklist:
- Check that the balance line sits level when you’re standing relaxed
- Look for smooth fabric drape without puckers or pulls
- Ensure the sleeve hangs straight down from the shoulder point
- Verify that seam smoothing eliminates any gathered areas
- Confirm the cap height guide measurements match your pattern specifications
Proper hanging techniques involve adjusting the sleeve position until everything sits naturally, giving you that professional finish you’re after.
Achieving a smooth fit requires understanding sleeve sewing techniques to guarantee a well-crafted garment.
Sleeve Cap Ease and Easing Techniques
Creating perfect sleeve cap ease requires balancing fabric choice with proper easing techniques to achieve ideal cap height guide results.
Professional sewers understand that sleeve ease must be distributed evenly across the cap for smooth attachment and movement.
- Measure sleeve cap ease: Add 25-30mm extra length to your sleeve cap compared to the armhole circumference for proper sleeve cap height.
- Apply cap adjustment techniques: Use stitch length 2.5-3.5 with reduced thread tension to create two parallel easing rows within seam allowances.
- Consider fabric choice impact: Lightweight fabrics require gentler easing methods, while structured materials need more aggressive gathering techniques.
- Execute proper sewing techniques: Pull easing threads carefully, leaving 1cm unpulled at shoulder point to maintain balance line alignment.
- Test easing methods effectiveness: Check that sleeve hangs smoothly without puckers, adjusting tension as needed for professional results that maintain intended cap height.
Using Sleeve Heads for Support and Lift
You’ll discover sleeve heads transform your garments from homemade-looking to professionally fashioned by providing essential structure and lift to the sleeve cap.
These small batting strips, positioned along the armscye seam, create the smooth, rounded shoulder silhouette found in high-quality jackets and coats, which is a key factor in making garments look professionally fashioned.
Purpose and History of Sleeve Heads
During the late 19th century, tailors revolutionized garment construction by introducing sleeve heads to structured jackets and coats.
These innovative sleeve support elements, crafted from wool wadding or horsehair, filled the sleeve cap seam area to prevent pucking and collapse.
Sleeve heads became essential in Edwardian tailoring, counteracting gravity’s pull on heavy fabrics while maintaining the garment’s polished silhouette.
This cap history demonstrates how sewing techniques evolved to solve practical fitting challenges, transforming garment evolution through improved sleeve cap height control and enhanced drape quality.
Making Custom Sleeve Heads and Installation
The key to professional sleeve cap height lies in crafting custom sleeve heads that provide essential sleeve support.
These batting strips enhance cap ease distribution and create the structured silhouette you’re aiming for in bespoke garments.
- Cut bias-grain batting into a teardrop shape, extending slightly beyond your sleeve cap curve
- Stitch the sleeve head just inside the seam allowance using relaxed tension for smooth custom fitting
- Steam press gently, then hand-stitch lining over the batting, securing only seam allowances
This sewing technique transforms ordinary sleeve installation into professional-quality construction.
The sleeve head acts like scaffolding, supporting your carefully calculated sleeve cap height while ensuring the fabric drapes beautifully over the shoulder curve.
To achieve a perfect fit, consider sleeve alteration techniques when drafting your pattern.
Sewing Techniques for Attaching Sleeves
Mastering sleeve attachment requires precision in key technical steps that determine the final garment’s fit and appearance.
You’ll need to focus on accurate pinning, proper seam finishing, and strategic support elements to achieve professional results.
Pinning and Stitching Shoulder and Underarm Points
Before tackling the shoulder and underarm points, verify your fabric choice complements your sewing cap height goals. Pin the shoulder point first, aligning it precisely with the bodice shoulder seam for proper shoulder fitting.
Next, match the underarm points while maintaining adequate underarm ease—typically 1.5cm below the armpit. Check your seam alignment carefully before stitching. Adjust stitch tension slightly looser than normal when working around curves to prevent puckering.
This methodical approach prevents the dreaded "pulled sleeve" look that screams homemade. Remember, sleeve cap height success hinges on these foundational steps—rush here, and you’ll spend twice as long fixing issues later.
Understanding proper sewing machine maintenance is vital for achieving professional results.
Seam Allowance Trimming and Sleeve Head Creation
After sleeve attachment, strategic trimming creates the foundation for proper sleeve cap structure. Trim seam allowances only in the underarm curve while preserving the upper sleeve cap area to form a natural sleeve head.
Professional seam trimming and sleeve head creation require these essential steps:
- Trim selectively – Cut underarm seam allowances to 3/8 inch, leaving sleeve cap untouched
- Preserve cap ease – Keep full seam allowances from notch to notch for structural support
- Check fabric cutting angles – Use sharp sewing shears perpendicular to stitching line
- Mark sleeve head boundaries – Identify where trimming stops and sleeve head begins
- Test cap height balance – Verify that trimmed areas don’t compromise sleeve cap ease distribution
The untrimmed seam allowance naturally forms a sleeve head that lifts and supports the cap’s curved shape. This traditional sewing technique prevents collapse while maintaining the sleeve’s intended silhouette. Custom sleeve heads aren’t always necessary – the preserved seam allowance often provides adequate structure for most garments.
Additional Sewing Tips for Cap Height and Sleeve Length
Fine-tuning your machine settings guarantees professional-quality sleeve attachment results.
You’ll need to adjust needle and bobbin tension while monitoring feeding dog behavior to achieve consistent stitching throughout the cap height construction process.
Needle and Bobbin Tension Adjustment
Precision becomes your ally when adjusting thread tension for sleeve cap modifications.
Start by testing needle calibration and bobbin settings on fabric scraps before tackling your actual garment.
You’ll need to fine-tune stitch regulation when altering cap height or sleeve cap height dimensions.
Monitor how fabric tension affects your feeding dogs’ performance during these adjustments.
Loose needle tension creates visible loops on your fabric’s right side, while excessive bobbin tension causes unwanted puckering.
Make small incremental changes to your machine’s tension discs and springs.
The sweet spot balances thread take-up between your needle and bobbin threads.
This careful calibration prevents sleeve cap ease from becoming distorted during construction, ensuring your finished sleeve maintains its intended shape and drape.
Understanding proper machine tension settings is essential for achieving a professional finish.
Monitoring Feeding Dogs and Cap Width Measurement
Beyond tension adjustments, your sewing machine’s feeding dogs play a pivotal role in achieving proper cap width measurement.
These metal teeth beneath your presser foot control how fabric moves through your machine.
Watch them carefully when working with different fabric weights – they can cause puckering on delicate materials or fail to grip heavier fabrics adequately.
Accurate cap width measurement requires a flexible measuring tape placed perpendicular to your sleeve’s grainline.
Compare this measurement against your pattern piece before cutting, ensuring you’ve added the correct ease allowance.
This precision prevents common fitting issues like gaping armholes or restricted movement.
Think of feeding dogs as your fabric’s personal escorts – they need to work smoothly to maintain consistent seam quality throughout your sleeve cap height construction.
Proper cap width measurement combined with well-functioning feeding dogs creates the foundation for professional-looking sleeves that fit comfortably and hang correctly on the body.
Understanding Cap Height in Relation to Body Measurements
Your body’s unique proportions directly influence how cap height should be calculated and adjusted for the perfect sleeve fit.
Understanding the relationship between your arm span, torso measurements, and overall height helps you determine whether standard cap height formulas will work for your body type or if modifications are needed for ideal comfort and appearance.
Cap Height and Overall Body Proportions
Understanding cap height in relation to your unique body proportions transforms sleeve fitting from guesswork into precise craft.
Your body measurements directly influence how sleeves should be constructed for ideal Body Fit.
- Measure your arm length from shoulder point to wrist bone for accurate Proportion Guide calculations
- Calculate your arm span-to-height ratio – most people measure close to 1:1, but variations affect sleeve patterns
- Assess your Shoulder Slope angle, which impacts how sleeve cap height integrates with your armhole
- Determine required Cap Ease based on your arm circumference and movement preferences
- Adjust sleeve cap height proportionally – typically 35-40% of your armscye circumference works best
Your arm span measurements reveal whether standard patterns need modification.
Longer arms require sleeve cap height adjustments to maintain proper proportion between shoulder and underarm.
This relationship guarantees sleeves hang correctly while providing adequate movement range for your specific frame.
Arm Span-to-Height Ratio and Clothing Choices
Your arm span-to-height ratio reveals more about clothing fit than you might expect. Most people have arms spanning roughly equal to their height, creating a 1:1 ratio.
However, if you’ve got longer arms relative to your height, standard sleeve lengths often fall short. This ratio directly impacts your clothing choices.
Those with higher ratios—common among athletes—frequently struggle with sleeves that ride up uncomfortably. When selecting garments, measure your actual arm length rather than relying solely on size charts based on height alone.
Understanding your body proportions helps you choose appropriate sleeve styles. A higher arm span-to-height ratio might mean seeking brands offering extended sleeves or considering how sleeve cap height affects overall fit and movement in your garments.
Frequently Asked Questions (FAQs)
What is cap height in sewing?
Cap height measures the vertical distance from your shoulder tip to the underarm line, typically sitting 5cm below your armpit.
You’ll find standard cap heights range from 4-6 inches, directly affecting sleeve fit and mobility.
What is cap height?
In sewing, you’ll measure cap height from your shoulder tip straight down to the underarm line, typically 5cm below the armpit, determining sleeve fit and style.
How tall is a cap sleeve?
You’ll typically find cap sleeves measuring between 5 and 4 inches in length.
They start at your shoulder seam and gradually taper down, creating that signature "cap" effect that just covers your upper arm without extending under your armpit.
Does cap height affect a garment’s overall look?
Yes, cap height dramatically affects your garment’s overall appearance.
Higher cap heights create a custom, formal look with fitted sleeves, while lower cap heights produce a casual, relaxed style with greater arm mobility and comfort.
Why is cap height important?
You’ll achieve better fit and mobility when cap height matches your garment’s intended style. Higher caps create custom looks but restrict movement, while lower caps offer casual comfort and freedom.
How does cap height affect sleeve style?
Cap height directly controls your sleeve’s silhouette and fit.
Higher caps create custom, formal looks with restricted movement, while lower caps offer casual comfort and arm mobility.
You’ll find kimono sleeves use minimal cap heights, whereas structured jackets feature dramatically higher ones for that crisp, professional appearance.
What is an example of cap height?
A fitted sleeve might’ve a 6-inch cap height, while a casual t-shirt sleeve uses around 4 inches. You’ll measure this distance from your shoulder tip down to the underarm seam line.
Where is cap height?
You’ll find cap height on your sleeve pattern, measuring vertically from the shoulder tip down to the underarm line (about 5cm below the armpit).
This measurement controls how your sleeve fits and moves.
What is the height of a cap sleeve?
Cap sleeves are incredibly tiny compared to regular sleeves.
You’ll measure them from 5 to 4 inches in length.
They cover your shoulder and taper to nothing under your arm, creating that feminine cap-like appearance over the shoulder area.
What common mistakes ruin sleeve cap fit?
Poor sleeve cap fit stems from incorrect ease distribution, misaligned balance lines, and inadequate easing techniques.
You’ll ruin fit by forcing fabric instead of gently coaxing it into place during construction.
Conclusion
Perfect sleeve fit starts with understanding what’s cap height in sewing—it’s your garment’s foundation for professional results.
Like a perfectly custom-made suit that moves with your body rather than against it, proper cap height creates that seamless connection between shoulder and arm.
You’ve learned to measure accurately, choose appropriate ease, and apply professional techniques.
Master these fundamentals, and you’ll transform every sleeve from amateur attempt into polished perfection that enhances both comfort and style.
- https://www.wildginger.com/wiki/sleeveanatomy.htm
- https://www.threadsmagazine.com/project-guides/fit-and-sew-tops/on-fitting-sleeves
- https://www.youtube.com/watch?v=-m76yVt6q2I
- https://www.reddit.com/r/PatternDrafting/comments/1b0g9s2/sleeve_cap_height_measurment/
- https://stitchingvulture.com/wp-content/uploads/2021/04/drafting-a-sleeve-cap-handout.pdf


