This site is supported by our readers. We may earn a commission, at no cost to you, if you purchase through links.
 Hand sewing is the process of stitching fabric together using just your hands, a needle, and thread—no fancy machines required.
It’s a timeless skill that lets you repair a torn shirt, sew on a button, or even create something unique from scratch.
You’ll need a few basics: a good needle, strong thread, and maybe a thimble to save your fingers.
Think of it as both an art and a handy trick up your sleeve—quiet, portable, and oddly relaxing.
Want to start? Master some key stitches, like the running stitch, and watch your confidence (and creations) grow with every loop.
Table Of Contents
Key Takeaways
- You can hand sew with just a needle, thread, and fabric, making it accessible and portable.
- Mastering stitches like the running stitch or backstitch combines practical skills with personal creativity.
- Hand sewing is perfect for repairs, creating unique gifts, and preserving sentimental items.
- This timeless craft offers precision, stress relief, and a connection to historical traditions.
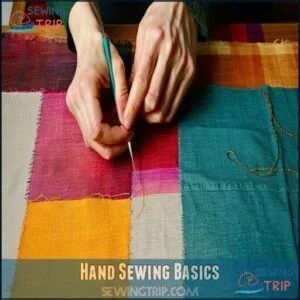
Hand Sewing Basics
You’ll need just a needle, thread, and fabric to start your hand sewing journey, a skill that connects you to countless generations of makers before you.
Hand sewing gives you precise control over your stitches, allowing you to create and repair items that machines simply can’t handle with the same care.
Hand sewing lets you control each stitch, crafting repairs and creations with unmatched care and personal touch.
History of Hand Sewing
Hand sewing’s rich history spans over 40,000 years, evolving from primitive bone needles and animal sinew thread to the refined craft we recognize today.
- Ancient Origins: Paleolithic humans created the first eyed needles around 45,000 years ago
- Medieval Sewing: Iron needles appeared in the 14th century, revolutionizing garment creation
- Industrial Revolution: Machine sewing emerged in the 1800s
- Global Traditions: Techniques like Sashiko and Bayeux Tapestry showcase cultural significance
- Modern Revival: Hand sewing persists in couture, tailoring, and hobby crafting
Essential Tools for Hand Sewing
Every successful hand sewing project begins with the right tools. You’ll need quality hand sewing needles (sizes vary by fabric type), sturdy thread types, and sharp scissors.
Don’t forget a seam ripper for mistakes and fabric marking tools for precision. A needle threader saves frustration, while measuring tools guarantee accuracy.
Good lighting solutions prevent eye strain—a desk lamp works wonders! Thimbles protect your fingers, and organized sewing supplies keep everything accessible.
Selecting the correct needle sizes matters for different fabrics. Start with these essentials, and you’ll be stitching confidently in no time.
Remember, the right tools make all the difference when working with needle and thread, and having the correct tools is crucial for a successful project.
Benefits of Hand Sewing
While machines dominate the sewing world, hand stitching offers unique benefits you’ll appreciate.
It’s incredibly portable—just tuck supplies in your pocket. You’ll enjoy significant cost savings compared to expensive machines.
Hand sewing fosters mindfulness and creative expression as you develop valuable skills.
Beyond the practical aspects, you can also experience significant stress relief through the rhythmic, repetitive motions.
Whether you’re mending a tear or crafting a keepsake, this sewing machine alternative connects you to centuries of tradition while providing a satisfying sense of accomplishment and allowing for creative expression.
What is Hand Sewing

Beyond the hum of machines lies the quiet art of hand sewing—a timeless craft where needle and thread transform fabric through human touch alone.
At its essence, hand sewing is the original fabric manipulation technique, dating back thousands of years before electricity existed. You’re participating in stitch origins that connect you to countless generations of needle craft artisans.
Hand sewing offers three distinct advantages:
- It provides precise control for delicate work where machines can’t reach
- It creates a meditative, stress-relieving rhythm as you work
- It requires minimal tools, making it accessible anywhere
This thread art involves guiding a threaded needle through layers of fabric to create functional or decorative connections. With just basic stitches like running stitch or whipstitch, you can repair, create, or embellish almost anything. When working with thicker materials, remember to wax the thread to prevent frustrating tangles.
Hand sewing gives you the freedom to work at your pace, connecting you to a sewing definition that’s both ancient and personally meaningful.
Hand Sewing Needles
You’ll need the right needle for successful hand sewing, with larger numbers ironically indicating smaller needle sizes.
Your needle choice matters greatly, as finer needles work best with delicate fabrics while heavier needles handle thicker materials with ease.
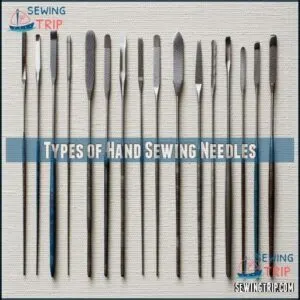
Types of Hand Sewing Needles
After learning what hand sewing is, you’ll need the right tools for the job. Choosing proper sewing needles can make your project easier.
Explore these main needle types:
- Sharps: Medium-length with round eyes for general sewing on light to heavy fabrics
- Betweens: Shorter needles perfect for quilting and detailed work
- Ballpoints: Specially designed for knit fabrics
- Darners: Long needles with large eyes for mending and threading yarn
Each type comes in various sizes to match your fabric. You can find a wide array available for different projects.
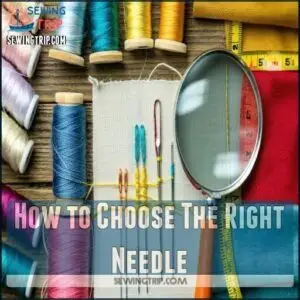
How to Choose The Right Needle
Now that you understand needle types, selecting the right one is simple.
Match your sewing needle to your Fabric Thickness—thinner fabrics need finer needles, heavier materials require sturdier ones.
Consider the Needle Point (sharp for wovens, ballpoint for knits) and Eye Size (larger for thicker threads).
Needle Length affects handling comfort during hand sewing.
Always think about your Project Type too—embroidery, quilting, and basic repairs all demand different hand sewing needles.
When in doubt, test on scrap fabric first!
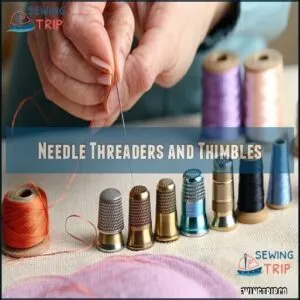
Needle Threaders and Thimbles
After selecting your ideal needle, the next challenge is threading it. Needle threaders come to your rescue when your eyes strain or threads refuse to cooperate. Modern threader types include wire-loop, retractable, and combination tools that also feature thread cutters. For those with arthritis, a magnetic needle threader can provide additional ease.
Thimbles protect your fingers from painful pricks during hand sewing. Available in various thimble materials and sizes, you’ll find options in metal, silicone, or leather to match your preference.
- Your first perfect stitch with a threaded needle feels like winning a tiny victory
- That moment when a thimble saves you from a painful prick is pure relief
- Finding ergonomic thimbles that fit just right brings unexpected joy
Hand Sewing Stitches
You’ll need to master a few key hand sewing stitches to tackle almost any mending or creative project at home.
From the simple running stitch for quick repairs to the nearly invisible slip stitch for professional-looking hems, these techniques form the backbone of your sewing skillset.
Running Stitch
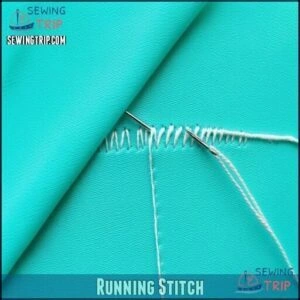
The running stitch is the most fundamental hand sewing technique.
You’ll create this basic stitch by weaving your needle in and out of fabric at even intervals. Perfect for basting, curved seams, and even decorative running patterns.
For different fabric types, adjust your stitch length accordingly. It’s quick to master, easily undone if needed, and forms the foundation for more advanced sewing techniques.
Many resources offer a running stitch tutorial for further learning.
Backstitch
I’ll provide an improved, 60-word description of the backstitch for your hand sewing article.
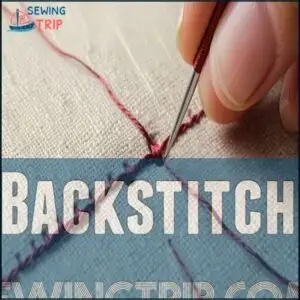
The humble backstitch stands as the powerhouse of hand sewing techniques.
You’ll create incredibly strong seams by working one stitch back, then two forward.
Perfect for repairing torn garments, securing zippers, and reinforcing stress points in your fabric.
Its continuous line of thread provides durability that’s unmatched by other basic stitches, making it essential for any serious hand stitching project.
Slip Stitch
I’ll help you rewrite and improve the content about the slip stitch, focusing on making it more detailed and engaging while maintaining the specified word count and tone.
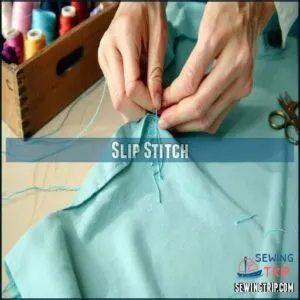
The slip stitch works like a magician behind the fabric’s curtain.
For invisible hems, this technique creates seams that practically vanish.
When working with curved hems or different fabric types, control your thread tension carefully.
Begin inside the fold to hide your knot, then take tiny stitches that barely catch both layers.
Securing ends properly guarantees your hand stitching remains durable yet completely hidden.
Whipstitch
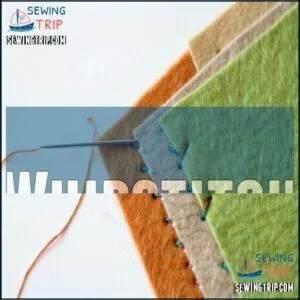
The whipstitch serves as your secret weapon for securing edges with minimal effort. This diagonal hand stitch creates nearly invisible seams when done properly.
Want to master this essential hand sewing technique? Here’s how:
- Position your fabric layers edge-to-edge.
- Insert your needle diagonally through both layers, keeping stitches small and even.
- Continue along the entire edge, maintaining consistent tension for professional results.
Perfect for felt projects or quick repairs, this versatile stitch belongs in every sewer’s toolkit. The whip stitch is also effective for securing fraying edges, making it a great technique for every sewer to know, and it’s useful for achieving nearly invisible seams with minimal effort.
Hand Sewing Techniques
You’ll need to master a few key techniques before your hand sewing projects can truly shine.
From threading needles and tying secure knots to attaching buttons and creating decorative elements, these practical skills form the foundation for all your future sewing adventures, including mastering a few key techniques and creating decorative elements.
Threading and Knotting
Before starting any hand sewing project, mastering threading and knotting is essential.
Cut your thread at a 45-degree angle to prevent fraying, then slightly stiffen it with water or wax for easier needle threading. Place a white background behind your needle to improve visibility.
When knotting thread, simply wrap it around your pointer finger twice, slide the loops off, and tug firmly for knot security.
For challenging threading, needle threaders are invaluable tools that save time and frustration, especially with smaller needle eyes.
Sewing on Buttons
Now that you’ve mastered threading, let’s move on to a practical skill: sewing on buttons. With just a needle and thread, you can fix any popped button in minutes.
Sewing buttons is straightforward when you follow these steps:
- Choose strong thread (button thread or doubled all-purpose thread works best)
- Mark button placement with a pin or pencil dot
- Create an "X" pattern through button holes
- For shank buttons, stitch through the loop instead
- Finish by wrapping thread around stitches underneath the button
Remember, different button types need different approaches, but the basic technique stays the same.
Creating a Fabric Yo-Yo
Fabric yo-yos are circular fabric embellishments that add charm to any hand sewing project.
Simply cut fabric circles, fold edges inward, and use a running stitch around the perimeter. Pull your thread to gather the fabric, creating a dimensional pucker. Secure with a knot and you’re done!
These versatile decorations work beautifully on quilts, bags, or clothing. Mix fabric patterns for eye-catching yo-yo combinations.
Basting and Gathering
Many novice sewers overlook basting, yet it’s your most versatile temporary stitching technique for perfect fabric control before final seams.
Use basting for:
- Testing placement without commitment
- Creating even distribution in gathered fabrics
- Holding slippery materials in place while machine sewing
When gathering, simply pull your basting threads to create beautiful ruffles. Remember, these stitches aren’t permanent—they’ll be removed once your project’s secure!
Hand Sewing Applications
You’ll find hand sewing useful for everything from fixing torn seams to creating personalized gifts that show your care.
Your newly learned stitches can transform simple fabric into meaningful projects, whether you’re mending a favorite shirt or crafting handmade decorations for your home, which can be considered personalized gifts.
Repairing and Altering Clothing
With just a needle and thread, you can rescue worn clothing from the donation pile.
Hand sewing enables simple repairs like seam reinforcement, zipper replacement, and hem adjustments.
Whether you’re patching holes in favorite jeans or darning worn socks, these mending techniques extend garment life while saving money.
Sewing alterations let you customize fit and style, turning basic pieces into personal fashion statements. It’s practical, sustainable, and surprisingly satisfying.
Embellishing Home Decor
Give your home a personal touch with creative hand embroidery and decorative stitches.
Try these simple ideas to elevate your space:
- Use Fabric Yo-Yos for playful pillow embellishments.
- Add Blanket Stitching to edges for a polished look.
- Create Customized Curtains with decorative stitching.
- Enhance tablecloths with intricate fabric crafts or seasonal hand sewing patterns.
Turn everyday items into stunning, unique treasures!
Creating Unique Gifts
Turn your creativity into personalized gifts with hand sewing! From fabric scrap projects like custom jewelry to handmade ornaments and pouches, DIY sewing transforms ideas into treasures.
Elevate projects with unique embellishments and decorative stitching that make each piece memorable.
Here’s some inspiration:
| Gift Idea | Description | Skill Needed | Occasion |
|---|---|---|---|
| Embroidered Totes | Add custom designs to tote bags | Basic Embroidery | Birthdays, Holidays |
| Stuffed Animals | Sew small, adorable plush toys | Simple Stitching | Baby Showers |
| Fabric Scrap Jewelry | Create earrings or necklaces | Fabric Assembly | Everyday Chic |
| Patchwork Pouches | Sew colorful fabric keepsakes | Basic Patchwork | Party Favors |
Try these ideas and sew unique gifts everyone will adore!
Preserving Memories Through Hand Sewing
With needle and thread, hand sewing becomes a powerful way to preserve stories.
Hand sewing transforms fabric into memories, stitching together stories that last a lifetime.
Projects like memory quilts or textile mementos transform clothing scraps into heirloom treasures. Hand stitching adds sentimental value, creating unique sewn stories, whether it’s repairing a loved one’s shirt or embroidering meaningful dates.
These sewing projects turn the ordinary into sentimental repair, offering beginners and experts alike a chance to craft timeless keepsakes that carry memories, one stitch at a time.
Many quilters now utilize a Gammill Longarm machine for detailed designs.
Frequently Asked Questions (FAQs)
How difficult is hand sewing?
Hand sewing isn’t too difficult once you get the hang of it.
It takes patience, practice, and the right tools.
Start with simple stitches like running or backstitch, and you’ll improve in no time.
What are the pros and cons of hand sewing?
Every coin has two sides, and hand sewing is no different.
It’s precise and portable, great for delicate fabrics, but it’s time-consuming and tiresome for big projects.
Perfect for detail, not speed.
How to tell if something is hand sewn?
You’ll spot hand-sewn work by its uneven stitches and slight imperfections.
Unlike machine sewing, the stitches may vary in size, showing a personal touch.
Check for visible knots, as they’re common in hand sewing.
Can you make clothes by hand sewing?
Imagine crafting a favorite dress stitch by stitch.
Yes, you can hand-sew clothes!
With patience, proper stitches, and fabric know-how, you’ll create unique, durable garments while embracing slower, more personal artistry.
How do I prevent thread tangling while sewing?
Keep your thread short, around 18-24 inches, to prevent tangling.
Use wax or thread conditioner for smooth sewing.
Sew slowly and untwist your thread often by letting the needle dangle. Patience helps, too!
What fabrics work best for hand sewing beginners?
Starting with cotton is like learning on training wheels—it’s forgiving and easy to handle.
Fabrics like muslin or broadcloth offer a smooth ride, while avoiding slippery silks or stretchy knits keeps things frustration-free, making the experience frustration-free.
How do I reinforce seams for durability?
Reinforce seams by using a backstitch—it’s strong and locks stitches together.
Double up your thread for extra strength.
Focus on even tension and use smaller stitches for areas under strain.
Strong seams last longer!
How can I sew evenly without guidelines?
Use your needle as a ruler by eyeballing even stitch lengths.
Keep your fabric taut, maintain consistent hand pressure, and slow down.
Practice helps too—think of it like handwriting; steady hands create straight stitches!
What’s the best way to store needles safely?
Store your needles in a needle case or magnetic holder to avoid losing them.
A simple pin cushion works too.
Keep them grouped by size or type, so you can grab the perfect one easily.
Can hand sewing strengthen fabric edges effectively?
Don’t underestimate hand sewing—it’s a game changer for securing fabric edges.
Techniques like blanket and whip stitches both strengthen edges and prevent fraying.
You’ll love blending durability with a polished, professional touch.
Conclusion
Picture yourself holding a needle and thread, stitching fabric as your hands bring something old or new to life.
Hand sewing is more than a skill; it’s a creative outlet and a practical tool.
Whether you’re fixing a tear, adding a personal touch, or mastering stitches like the running or backstitch, it’s a timeless craft you can use anywhere.
As you practice, you’ll see how hand sewing combines art, utility, and relaxation into one rewarding process.
- https://diyprojects.com/sewing-hacks/
- https://masterclass.com/articles/how-to-write-a-great-first-line-for-your-novel
- https://www.thestitchsitch.com/
- https://www.diaryofaquilter.com/quilting-with-a-purpose-preserving-memories/
- https://absolutelybrazos.com/creating-and-preserving-memories-one-stitch-at-a-time/

