This site is supported by our readers. We may earn a commission, at no cost to you, if you purchase through links.

These jams aren’t random bad luck—they’re warning signs pointing to specific mechanical issues you can fix. Needle problems account for 30% of all machine jams, followed by poor maintenance at 25% and thread tension errors at 20%.
Each jam stems from a traceable cause, and once you identify the culprit, you’ll stop fighting your machine and start working with it.
Table Of Contents
Key Takeaways
- Most sewing machine jams stem from three preventable causes: needle problems (30%), poor maintenance like lint buildup and skipped oiling (25%), and incorrect thread tension settings (20%).
- Replace your needle every 8-10 hours of sewing time and match needle type and size to your fabric weight—mismatched combinations cause over 41% of machine jams and lead to skipped stitches, timing issues, and damaged fabric.
- Regular maintenance prevents most jams: clean the bobbin area after every 3-4 projects, oil your machine every 8-10 hours of sewing, and schedule annual professional checkups to catch problems before they cause breakdowns.
- When a jam occurs, stop immediately, power off the machine, remove fabric by pulling backward (never forward), check for tangled thread or debris in the needle and bobbin areas, and systematically troubleshoot tension, threading, and needle condition before restarting.
Why Sewing Machines Jam?
When your sewing machine jams at the worst possible moment, it’s usually trying to tell you something about how you’re using it. Most common causes of sewing machine jams trace back to needle problems, poor maintenance, or incorrect thread tension.
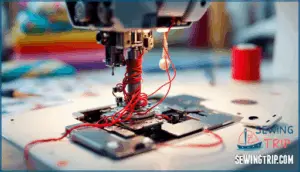
Dull or bent needles can’t pierce fabric cleanly, leading to skipped stitches and timing belt slippage. Neglecting to clean lint from the bobbin case or forgetting to oil your machine creates friction that causes motor overload.
Incorrect thread tension produces loops and tangles, while misplaced thread paths contribute to shuttle hook snags. Low-quality thread shreds easily, and fabric feed issues arise when feed dogs sit too low.
Understanding what causes jamming helps you troubleshoot sewing machine jams before they ruin your project. Stop immediately when jams occur, remove the fabric carefully, and inspect for damage.
Common Causes of Jamming
When your sewing machine jams, it’s rarely a mystery. The problem usually traces back to a handful of common issues that you can identify and fix.
Let’s look at the main culprits that cause your machine to seize up during a project.
Needle Problems
Your needle is the sharp edge of every seam—and when it’s working against you, your machine comes to a grinding halt. A bent needle causes deflection, forcing the point away from the bobbin hook and creating jams. Dull needles scar fabric instead of piercing cleanly, while eye damage shreds thread mid-stitch.
Check for correct insertion before each project. Replace your needle every 8-10 hours of sewing to prevent these needle issues from stopping your work.
Machine Maintenance Neglect
Skipping routine care is like running your car without oil changes—eventually, the machine fights back. Lint buildup chokes feed dogs, infrequent oiling creates friction, and debris turns smooth mechanics into grinding frustration.
Regular maintenance schedule prevents these issues:
- Debris Buildup: Clean lint from bobbin area after each project.
- Oiling Frequency: Follow manufacturer’s intervals for lubrication.
- Part Replacement: Swap worn components before they fail.
- Manual Consultation: Reference your guide for specific maintenance tasks.
Schedule a professional checkup annually to catch problems early.
Incorrect Thread Tension
Thread tension acts like a balancing scale—too much pull on one side creates loops, too little causes thread to bunch and tangle. When tension disks grip incorrectly, your stitch quality suffers. Check both upper thread tension and bobbin tension before starting any project.
| Problem | Cause | Fix |
|---|---|---|
| Top loops | Upper thread tension too loose | Increase tension dial setting |
| Bottom loops | Bobbin tension too loose | Adjust bobbin case screw |
| Thread breaks | Excessive tension | Decrease dial, check fabric compatibility |
| Puckered fabric | Tension too tight for material | Lower setting for delicate fabrics |
| Uneven stitches | Inconsistent tension disk threading | Re-thread through all tension disks |
Adjust thread tension based on your fabric type. Heavy materials need different settings than silk. If thread tension problems persist after adjustment, consult your manual for tension troubleshooting steps specific to your model.
Thread Misplacement
When thread wanders off its designated path, your machine stops cooperating and starts creating tangled messes instead of clean stitches. Thread misplacement happens when thread slips from thread guides or bypasses tension disks during setup. This incorrect threading prevents proper tension balance and causes jams in the bobbin area.
Check these critical thread pathing points:
- Spool placement: Thread must unwind smoothly from the correct spool pin position.
- Thread guides: Each guide holds thread along its designated route to maintain bobbin alignment.
- Tension disks: Thread must sit completely between tension disks for proper tension control.
Thread Quality and Type
Your machine’s performance depends heavily on thread quality and type. Low-quality thread shreds or knots easily, increasing jamming frequency by up to 25% and requiring two to three times more rework. Thread material, thickness, and fabric compatibility all matter. Polyester thread delivers enhanced seam strength in denim, while nylon works best with leather. When thread thickness mismatches fabric weight, jamming risk jumps 22%. Thread stiffness also affects seam thickness and overall machine performance.
Premium thread reduces machine wear by 30% and cuts thread breakage by 40% compared to cheap alternatives. Using high-quality threads can also reduce friction.
Needle Issues
Your needle is often the first thing to check when your machine starts acting up. A bent, dull, or wrong-sized needle can throw everything off balance and turn smooth stitching into a frustrating jam.
Let’s walk through the needle-related issues that cause most sewing machine problems.
Dull or Bent Needles
A dull needle is like trying to write with a pen that’s run out of ink—it just won’t do the job right. When your needle loses its sharpness, it can’t pierce fabric cleanly. This leads to skipped stitches and thread tangles. A bent needle is even worse—it throws off your machine’s timing and can damage internal parts.
Here’s what happens with needle problems:
- Dull needles struggle to penetrate fabric, causing thread loops and poor stitch quality
- Bent needle risks include damaged bobbin components and broken machine timing
- Worn needles create friction that strains your machine’s motor
Needle inspection should happen regularly. Check for burrs or bends before each project. Proper needle disposal and preventative measures include replacing needles every 8-10 hours of sewing time to maintain peak needle lifespan and performance.
Fabric and Needle Mismatch
Pairing the wrong needle with your fabric is one of the fastest routes to a jam. Industrial audits show that over 41% of machine jams trace back to needle and fabric mismatch—a staggering figure that highlights how critical proper needle selection really is. When you use a thin needle on heavy denim or a thick one on silk, you’re asking for trouble.
Over 41% of machine jams stem from needle-fabric mismatch, making proper needle selection critical to avoiding jams
Fabric compatibility demands attention to needle type and size. Mismatched combinations lead to tension issues, damaged material, and poor stitch quality—38% of garment samples show seam puckering from this error alone. Regular cleaning can help prevent sewing machine jamming.
Needle Types and Sizes
Choosing the right needle isn’t just about grabbing one from your drawer—it’s about matching three key factors: needle type, size, and fabric weight. Universal needles work well for everyday cotton and polyester. Ballpoint needles prevent snags in knits by pushing through fibers instead of piercing them. For delicate silks or tight weaves, sharp needles deliver clean penetration without puckering.
Needle size matters just as much. Sizes range from 60/8 (finest) to 120/19 (heaviest). Your fabric weight dictates which you need:
- Lightweight fabrics (chiffon, organza) require size 60/8 to 75/11 needles
- Heavy materials (denim, canvas) need size 100/16 to 110/18 needles
Specialty needles—like leather, embroidery, or topstitch varieties—address specific needle point styles and fabric compatibility demands. Choosing correctly prevents needle problems and eliminates needle and fabric mismatch issues before they jam your machine.
Lack of Cleaning
Dust, lint, and thread fragments don’t just disappear—they pile up in your machine’s inner workings until something gives. Lint buildup clogs the shuttle, feed dogs, and tension discs. Debris removal stops sewing machine jams before they start.
| Cleaning Task | Frequency |
|---|---|
| Bobbin case and shuttle cleaning | After every 3-4 projects |
| Feed dog lint removal | Weekly |
| Tension disc debris check | Monthly |
Regular sewing machine maintenance prevents mechanical failure. Clean the bobbin area weekly and inspect the shuttle for trapped threads. Use a stiff brush for component inspection around the needle plate. Without consistent cleaning, even high-quality machines lose precision and jam repeatedly.
Infrequent Oiling
Cleaning alone won’t keep your machine in top shape—without proper lubrication, metal parts grind against each other and wear down fast. Oiling frequency matters just as much as cleaning sewing machine components. Most machines need component lubrication every 8-10 hours of sewing time. Preventative maintenance includes applying the correct oil type—always use sewing machine oil, never household oils.
Without regular oiling, you’ll face:
- Increased friction causing parts to seize
- Lint buildup combining with dust to form abrasive paste
- Grinding noises indicating metal damage
- Residue buildup from improper lubricants
Sewing machine maintenance requires consistent oiling to prevent jams and extend your machine’s lifespan.
Ignoring Adjustments
Your machine needs more than oil and cleaning—skipping basic adjustments like thread tension, presser foot pressure, and feed dog height sets you up for constant jams. Tension neglect creates uneven stitches and thread tangling. When you ignore presser foot pressure settings, fabric won’t feed properly through the feed dog mechanism. Wrong stitch length or loose bobbin case adjustments multiply your problems.
Troubleshooting sewing machine jams starts with checking these settings before every project. Regular adjustments prevent fixing jammed sewing machine emergencies and keep your sewing machine jams from happening altogether.
Troubleshooting and Fixing Jams
When your sewing machine jams, don’t panic—most problems can be fixed quickly with a few basic troubleshooting steps. The key is working through the issue systematically rather than forcing anything that might cause damage.
Here’s what you need to do when a jam occurs.
Stop and Assess
When your machine suddenly freezes mid-stitch, the first thing you need to do is stop and assess what went wrong. Troubleshooting sewing machine jams starts with immediate actions that prevent further damage. Here’s what you do:
- Turn off the machine completely
- Examine the needle area for visible damage
- Check the bobbin compartment for debris removal
- Look for tangled threads or broken parts
This damage inspection helps you identify the causes of jamming before fixing your jammed sewing machine.
Remove Fabric and Thread
Once you’ve assessed the situation and powered down, the next move is to carefully extract any trapped fabric and thread from the machine’s grip. Start by gently lifting the presser foot to release tension. Pull the fabric backward—never yank it forward—to prevent snags that worsen jams.
Inspect thread paths for tangled thread, then use tweezers or a seam ripper for careful removal of stubborn bits. Assess damage to the needle and bobbin area while you work. This methodical approach reveals the causes of jamming and sets you up for fixing sewing machine jams efficiently.
Seek Professional Help
Sometimes, even the most thorough DIY troubleshooting hits a wall—and that’s when bringing your machine to a skilled technician makes all the difference. A qualified repair shop can diagnose hidden mechanical failures you can’t see.
They’ll check warranty coverage before starting work, perform complex repairs involving timing or motor issues, and give you honest cost considerations.
If repair costs approach your machine’s value, a professional can advise when to upgrade instead of sinking money into an aging model.
Preventing Future Jams
You’ve already solved the immediate jam, but the real goal is keeping your machine running smoothly from here on out. A few smart habits can save you from dealing with the same headaches again.
Here’s what you need to focus on to keep jamming in the rearview mirror.
Best Practices for Proper Sewing
Think of every stitch as a promise between you and your machine—one that’s only kept when you follow a few essential rules. These proper sewing practices and preventative measures become second nature with time:
- Cutting Precision and Pattern Layout set the foundation for clean seams.
- Fabric Grain Awareness prevents distortion and puckering.
- Consistent Seam Allowance keeps your project accurate.
- Pressing Techniques smooth each seam before moving forward.
Following these best practices for sewing and sewing machine maintenance tips will prevent most jams before they start.
Regular Maintenance Schedule
Consistently following a sewing machine maintenance schedule separates smooth operators from frustrated sewers. Monthly deep-cleaning of the bobbin area and throat plate prevents dust buildup, while weekly inspection checklists catch issues before they escalate.
Oiling frequency depends on your model—older machines need manual oiling every few bobbin changes, while modern self-lubricating types only require professional servicing annually.
Recording downtime and cleaning procedures helps you spot patterns and maintain peak performance. This proactive approach reduces breakdowns and keeps your machine humming reliably for years.
Proper Needle and Thread Selection
Matching the right needle to your thread and fabric isn’t just a suggestion—it’s the difference between perfect seams and a frustrating tangle. Fabric compatibility determines everything. Heavy denim demands a size 16 needle, while delicate silk needs a size 9 or 11. Thread weight must align with needle size—thick thread through a small eye causes shredding and jams.
Consider these essential pairings:
- Use ballpoint needles for knits to prevent snags
- Match universal needles with medium-weight cotton fabrics
- Select sharp needles for tightly woven materials
- Choose topstitching needles for specialty threads
- Replace needles every project to avoid fabric and needle mismatch
Quality needle brands prevent breakage mid-seam, keeping your workflow smooth and jam-free.
How to Fix a Jamming Machine
When your machine jams, you don’t need to panic or call a repair shop right away. Most jamming issues can be fixed at home with a few straightforward adjustments.
Let’s walk through the key fixes that’ll get your machine running smoothly again.
Adjusting Thread Tension
Thread tension might seem like a minor detail, but it’s the difference between smooth stitches and a tangled nightmare. Start by locating your tension dial and adjust it gradually. Test each setting on scrap fabric before committing to your project. Incorrect thread tension creates loops on either the top or bottom of your fabric.
Different fabrics require thread tension adjustments. Heavy materials need looser settings, while delicate fabrics work best with tighter tension. Check your tension spring and thread guide for debris that blocks smooth thread flow. Balanced stitches mean you’ve nailed the ideal setting.
| Tension Issue | What You’ll See | Quick Fix |
|---|---|---|
| Too tight | Fabric puckers, thread breaks | Lower tension dial number |
| Too loose | Loose loops on fabric bottom | Raise tension dial number |
| Bobbin tension off | Unbalanced stitches both sides | Check bobbin case spring |
Bobbin Reinsertion and Cleaning
Your bobbin area collects lint and debris like a magnet, and ignoring it turns minor snags into full-blown jams. Power off your machine and remove the bobbin case completely. Use a small brush to sweep away lint buildup from every corner of the bobbin area. Check the bobbin thread tension by pulling the thread gently—it should have slight resistance.
Follow these steps for proper bobbin reinsertion and cleaning:
- Wind your bobbin evenly without overfilling it beyond the rim
- Insert the bobbin so the thread unwinds in the correct direction according to your manual
- Pull the bobbin thread up through the needle plate, leaving several inches trailing behind
Correct bobbin placement prevents most bobbin issues before they start.
Changing Needles
A worn-out needle is often the hidden culprit behind persistent jams, even when everything else looks fine. Replace your needle every eight hours of sewing or after completing a project. A bent needle or dull needle creates tension problems and skips stitches.
Insert the flat side of the needle facing backward and tighten the screw firmly. Match specialized needle types to your fabric—ballpoint for knits, sharp for wovens. Proper needle replacement prevents most jamming issues instantly.
Frequently Asked Questions (FAQs)
Why is my sewing machine jamming?
Machines lock up when common causes of sewing machine jams strike—like needle problems, fabric buildup, bobbin issues, thread snapping, timing problems, or user error.
Troubleshooting sewing machine jams starts with identifying which part failed.
What should I do if my sewing machine jams?
Stop sewing immediately when a jam occurs. Turn off the machine and remove the fabric carefully.
Check the needle area and bobbin compartment for tangled thread or debris. Assess for damage before restarting.
What causes a sewing machine to jam & refuse to sew?
Ever wonder why your machine suddenly stops cooperating? Sewing machine jams happen when needle problems, bobbin case issues, incorrect tension, poor threading, or feed dog height conflicts arise.
Shuttle hook timing, fabric thickness limits, and machine age also impact performance.
How do I know if my sewing machine is jamming?
When your machine starts stitch skipping or making unusual noises, you’re likely facing a jam. Fabric bunching underneath signals trouble. If you feel resistance while sewing or the machine stopping mid-stitch, these are telltale signs of jamming.
Does sewing speed affect Jam frequency?
Ironically, slower speeds often cause more frequent jams than moderate speeds. Speed and Tension settings interact with Fabric Thickness, causing Motor Overload at extremes.
Stitch Consistency suffers when you rush through heavy material.
User Experience improves with steady, appropriate pacing for your sewing machine jams prevention tips.
How do you fix a bobbin Jam on a sewing machine?
Turn off your machine immediately and lift the presser foot. Open the bobbin case and carefully remove any tangled thread or fabric caught in the bobbin area.
Check the bobbin compartment and shuttle hook for debris, then reinsert the bobbin correctly. Rethread your machine and test.
How to fix a sewing machine that keeps jamming?
When things go sideways mid-seam, don’t panic. Stop sewing immediately and remove your fabric carefully.
Clean lint from the bobbin area and feed dogs. Re-thread top and bobbin correctly, checking tension adjustments.
Replace worn needles, oil the machine lightly, and test stitch quality on scrap fabric before continuing.
Why is my sewing machine bunching up the fabric?
Fabric bunching happens when feed dogs can’t grip material properly or when thread tension goes haywire.
Check your presser foot pressure first, then rethread both the bobbin and top thread. Clean lint from the bobbin case tension area, adjust stitch length settings for fabric thickness issues, and replace your needle.
Why does my fabric keep getting caught in my sewing machine?
Fabric snagging happens when your feed dogs aren’t moving material properly, lint buildup clogs the stitch plate, or presser foot pressure is wrong. Dull needles and tangled thread underneath also trap fabric.
Check threading, clean debris around feed dogs, and replace worn needles.
Why is my sewing machine not moving smoothly?
Your machine might feel like it’s fighting you every step of the way. Rough movement often stems from tension problems, feed dog lint buildup, or gear wear affecting the flywheel movement.
Clean the shuttle hook area and check motor belt slippage to restore smooth fabric feeding.
Conclusion
An ounce of prevention beats a pound of cure when dealing with sewing machine jams. You’ve learned why sewing machines jam, from worn needles to neglected maintenance. Each jam traces back to a specific cause—dull needles, improper tension, or dirty mechanisms.
Apply these diagnostic steps when trouble strikes: stop immediately, remove fabric carefully, and check each component systematically.
Replace your needle every eight hours of sewing, clean your machine weekly, and use quality thread matched to your fabric. These habits transform frustrating breakdowns into rare interruptions.
- https://blog.ricoma.com/2024/06/24/why-is-my-sewing-machine-jamming/
- https://nancysnotions.com/learn-how-to-troubleshoot-sewing-machine-tension/
- https://archaicarcane.com/bobbin-along-bobbin-tension/
- https://www.reddit.com/r/sewhelp/comments/1aib2hf/the_problem_w_poor_quality_thread_from_the/
- https://pubs.nmsu.edu/_c/C202/index.html

