This site is supported by our readers. We may earn a commission, at no cost to you, if you purchase through links.
 If your sewing machine wheel won’t turn, don’t panic! It’s like your trusty steed refusing to gallop. First, check for thread tangles – they’re the sneaky culprits behind many wheel woes.
Give your machine a good clean; lint buildup can make wheels as stubborn as a mule. Make sure you’ve threaded correctly – one wrong move and it’s game over.
Worn belts or mechanical issues might need a pro’s touch. Try turning the wheel backward to release any jams.
If all else fails, a drop of oil might just grease those gears back into action. Remember, a stuck wheel doesn’t mean your sewing dreams are over – there’s always a fix waiting to be stitched together.
Table Of Contents
- Key Takeaways
- Common Causes of Stuck Sewing Machine Wheels
- Signs Your Sewing Machine Wheel Needs Attention
- Quick Fixes for a Stuck Handwheel
- Tools Needed to Troubleshoot Wheel Problems
- Step-by-step Guide to Freeing a Stuck Wheel
- Preventing Future Sewing Machine Wheel Issues
- When to Seek Professional Repair Services
- Understanding Your Sewing Machine’s Wheel Mechanism
- Troubleshooting Backwards-turning Sewing Machine Wheels
- Maintaining Smooth Wheel Operation Long-term
- Frequently Asked Questions (FAQs)
- Conclusion
Key Takeaways
- You’re not alone if your sewing machine is giving you the silent treatment. Common culprits like thread jams, lint buildup, or worn parts can turn your trusty sidekick into a stubborn mule.
- Don’t throw in the towel just yet! A little TLC goes a long way. Regular cleaning, oiling, and gentle use can keep your wheel spinning smoother than butter on a hot pan.
- When in doubt, play detective. Check for tangled threads, mismatched bobbins, or bent needles. Sometimes, the simplest fix is right under your nose – or under your presser foot!
- If you’ve tried everything and your wheel is still stuck, it might be time to call in the cavalry. A professional tune-up can work wonders and save you from a full-blown sewing crisis.
Common Causes of Stuck Sewing Machine Wheels
Ever found yourself wrestling with a stubborn sewing machine wheel that just won’t budge?
From pesky thread jams to sneaky lint buildup, there’s a handful of usual suspects that can turn your smooth sewing session into a frustrating standoff with your machine.
Thread Jams and Tangling
Ever felt like your sewing machine’s having a bad hair day? Thread jams can turn your smooth sewing dreams into a tangled nightmare.
- Play detective: Hunt for hidden thread bits with a flashlight
- Check your needle: A bent needle can cause chaos
- Rock the boat: Gently rotate the handwheel back and forth to dislodge stubborn thread
Don’t let thread tension tie you up in knots!
Lint and Debris Buildup
While thread jams can be pesky, lint and debris buildup is the silent saboteur of your sewing machine handwheel. It’s like a tiny dust bunny party in there! Over time, these fuzzy invaders can bring your wheel to a standstill.
Let’s take a look at how to keep your machine spick and span:
| Area | Cleaning Frequency | Lint Removal Tool |
|---|---|---|
| Bobbin Case | After every project | Soft brush |
| Feed Dogs | Weekly | Compressed air |
| Tension Discs | Monthly | Lint cloth |
| Handwheel | Bi-monthly | Cotton swab |
Regular cleaning is your secret weapon for smooth sewing and a happy handwheel.
Worn or Damaged Belts
You’ve tackled the lint monster, but your sewing machine’s still as stubborn as a mule?
Time to play detective with your machine’s belt. A worn or damaged belt can turn your trusty stitching companion into a temperamental diva.
Look for signs of wear, fraying, or looseness. If your belt’s singing the blues, it’s time for a quick replacement. Don’t worry, you’ve got this – it’s easier than threading a needle in the dark!
It’s a manageable task that requires minimal effort, leaving you to get back to your sewing project in no time, with your machine running smoothly like a trusty stitching companion.
Mechanical Issues in the Wheel Mechanism
How’s your sewing machine’s wheel acting up? Sometimes, it’s not just about thread jams or worn belts. The culprit might be hiding in the wheel mechanism itself.
Let’s take a closer look at some common mechanical issues:
- Wheel gear wear: Your trusty machine’s gears might be showing their age.
- Internal friction: Parts rubbing where they shouldn’t can cause a real headache.
- Wheel shaft misalignment: When things aren’t lining up right, it’s like trying to dance with two left feet!
Remember, a little TLC goes a long way in keeping your machine humming along smoothly.
Incorrect Machine Threading
Mechanical gremlins got you down? Let’s thread our way to smoother sewing! Incorrect threading can turn your trusty machine into a stubborn mule. It’s like trying to feed spaghetti through a straw – it just won’t budge.
Check out this quick guide to keep your threads in line:
| Problem Area | Common Issue | Quick Fix |
|---|---|---|
| Top Thread | Missed guide | Rethread carefully |
| Bobbin | Incorrect winding | Wind evenly |
| Needle | Wrong size/type | Match to fabric |
Remember, a well-threaded machine is a happy machine. Keep it clean, and you’ll be stitching up a storm in no time!
Signs Your Sewing Machine Wheel Needs Attention
Let’s talk about your sewing machine’s cry for help. Just like a car making weird noises, your trusty stitching companion has its own way of saying, "Hey, I need some TLC!"
Keep your eyes and ears peeled for these telltale signs:
- Your needle’s doing the cha-cha instead of straight stitches
- The fabric’s bunching up like it’s trying to form its own mountain range
- You’re hearing more racket than a toddler with pots and pans
- The handwheel’s as stubborn as a mule, refusing to budge
- Your stitches look like they’ve had one too many at the thread party
If you’re nodding along, thinking "That’s my machine to a T!", don’t fret. These quirks are your machine’s way of waving a white flag. It’s time to put on your detective hat and get to the bottom of why your sewing machine wheel won’t turn . Remember, a stitch in time saves nine!
Quick Fixes for a Stuck Handwheel
Got a stubborn sewing machine wheel that won’t budge? Don’t sweat it – we’ve got your back with some quick fixes that’ll have you stitching again in no time.
Cleaning the Wheel Area
Out of the blue, your sewing machine’s wheel decides to play hard to get.
Don’t sweat it! Grab your lint removal toolkit and let’s play detective.
A soft brush is your best friend for banishing dust bunnies.
Remember, prevention is key – a quick clean after each project keeps things running smooth.
For stubborn grime, a gentle swab with rubbing alcohol works wonders.
Your wheel will be spinning freely in no time!
Rethreading the Machine
Your sewing machine’s tangled threads might be causing more than just a headache. Rethreading can work wonders for a stuck handwheel.
- Raise the presser foot to open tension discs
- Remove old thread and clean tension path with scrap fabric
- Follow the thread path precisely, ensuring proper tension
Remember, threading is an art. With practice, you’ll thread that needle faster than a speeding bobbin!
Adjusting Thread Tension
Thread tension can be a real thorn in your side when your wheel won’t budge.
Think of it as a tug-of-war between top and bottom threads.
To troubleshoot, start by adjusting the top tension dial. If it’s too tight, your fabric might pucker; too loose, and you’ll see loops.
Don’t forget to check your bobbin tension too – it’s the unsung hero of smooth stitching.
Lubricating Moving Parts
Squeaky wheels get grease, and so should your sewing machine!
Apply a drop of sewing machine oil to moving parts every few months (Source). Avoid using gun oil or 3-in-1 oil.
Grab a cotton swab for precision application . Be careful not to over-lubricate; a little goes a long way.
If you’re unsure, consult your manual or a pro to avoid common lubrication mistakes.
Checking and Replacing the Needle
Sometimes, a stubborn wheel isn’t just about oiling. Let’s tackle the needle next.
A bent or dull needle can throw a wrench in your sewing plans. Check your needle’s condition – is it straight as an arrow? If not, it’s time for a swap.
Remember, different fabrics need different needle types and sizes. Don’t be a stick in the mud – change your needle regularly for smooth sailing!
Tools Needed to Troubleshoot Wheel Problems
You’ll need a few handy tools to fix that stubborn sewing machine wheel.
Think of it like a mini rescue kit.
Screwdrivers, brushes, oil, and maybe some replacement parts to save the day.
Screwdrivers for Disassembly
Tinkerers, grab your trusty screwdrivers! You’ll need the right tools to crack open your sewing machine’s mysteries. Don’t just jump in without a plan; proper technique is key to avoiding a mechanical mishap.
- Flathead: For those pesky slotted screws
- Phillips: The cross-shaped workhorse
- Precision set: Tiny screws, big impact
- Magnetic tips: No more lost screws in the abyss
- Torque-controlled: Gentle touch for delicate parts
Remember, patience is your secret weapon. Take it slow, and you’ll be a disassembly pro in no time!
Cleaning Brushes and Lint Removers
Now that you’ve got your screwdrivers ready, let’s tackle the fuzzy culprits! Cleaning brushes and lint removers are your secret weapons against wheel-jamming debris.
You’ll want to arm yourself with a variety of brush types to reach every nook and cranny.
| Brush Type | Emotion it Evokes |
|---|---|
| Soft bristle | Gentle TLC |
| Wire brush | Tough love |
| Lint roller | Satisfying clean |
Remember, regular lint trap cleaning is like giving your machine a spa day. Your sewing buddy will thank you!
Sewing Machine Oil
With a drop of the right oil, your sewing machine can purr like a contented cat. You’ll need proper sewing machine oil – not just any household lubricant will do .
The oil’s viscosity matters; it should flow easily but not be too runny.
Apply a tiny amount to moving parts, following your machine’s manual.
Regular oiling keeps things smooth, but don’t overdo it. No oil? In a pinch, silicone spray can work as a temporary fix, for a tiny amount.
Replacement Belts and Needles
Two essential tools for your sewing machine’s wheel woes are replacement belts and sewing machine needles
.
Don’t let a worn-out belt leave you in stitches! Different belt types suit various machines, so choose wisely.
As for needles, size matters – match them to your fabric for smooth sailing.
Remember, belts have a lifespan, so keep spares handy.
And when it comes to needle compatibility, think of it as matchmaking for your machine.
Regular needle replacement keeps your stitches looking sharp!
Pliers and Tweezers
A pair of trusty pliers and nimble tweezers are your sewing machine’s secret weapons.
These handy tools let you play detective, fishing out pesky threads and lint from tight spots.
Got a stubborn thread tangle? Tweezers to the rescue! They’ll help you gently remove debris without damaging delicate parts.
For tougher jobs, pliers give you the grip to tackle stuck needles or loosen tight screws , making them a great tool for tougher jobs.
Step-by-step Guide to Freeing a Stuck Wheel
Ready to tackle that stubborn sewing machine wheel?
Let’s roll up our sleeves and get that wheel spinning again with this no-nonsense guide. We’ll walk you through each step, from unplugging your trusty machine to celebrating its smooth rotation once more.
Unplugging and Preparing the Machine
You’ve got your tools ready, but before you start, let’s set the stage for a safe sewing machine rescue mission. First things first, unplug that stubborn machine – safety first, folks!
Now, let’s get your workspace in tip-top shape:
- Clear your area of any potential hazards
- Position your machine on a stable surface
- Give it a quick once-over to remove any obvious debris
Remember, a clean workspace after proper machine maintenance is like a blank canvas for your sewing machine wizardry
!
Identifying the Source of the Problem
Time to play detective with your stubborn sewing machine!
First, check for tangled thread in the take-up lever, bobbin case, or bobbin winder areas. Give the handwheel a gentle turn backward – it might just need a little nudge to free up.
If that doesn’t work, inspect the needle plate and bobbin case. Sometimes, a sneaky broken needle can cause the whole show to grind to a halt!
Clearing Obstructions and Debris
Determination is key when facing a stubborn sewing machine wheel. Let’s roll up our sleeves and tackle those pesky obstructions!
Start by removing the needle plate and bobbin case, following the steps for removing the needle plate cover
. Now, channel your inner detective and search for the culprit:
- Use tweezers to extract any rogue threads hiding in the bobbin area
- Sweep away lint with a small brush, paying extra attention to lint traps
- Remove fabric scraps or broken needle pieces lurking in hard-to-see spots
With these steps, you’ll be stitching up a storm in no time!
Reassembling and Testing the Wheel
Let’s put Humpty Dumpty back together again! Start by aligning the wheel carefully, ensuring it sits snugly in place.
Tighten those screws with a gentle touch – not too tight, not too loose. It’s like Goldilocks finding the perfect porridge!
Check the belt tension; it should have a slight give.
Verifying Proper Functionality
You’ve reassembled your sewing machine, and now it’s time to put it through its paces.
Turn the handwheel toward you and listen for any unusual noises. Check for smooth needle movement and even stitches.
Feed a scrap of fabric to test the bobbin tension and fabric feed. If everything’s humming along nicely, you’ve hit the jackpot!
Your machine’s back in business, ready to tackle your next project.
Preventing Future Sewing Machine Wheel Issues
You’ve fixed your sewing machine wheel, but now let’s keep it spinning smoothly.
A little TLC goes a long way in preventing future hiccups, so we’ll explore some easy habits that’ll keep your machine purring like a well-oiled cat.
Regular Cleaning and Maintenance Schedule
Now that you’ve freed your stuck wheel, let’s talk prevention. A stitch in time saves nine, especially for your trusty sewing machine.
- Dust off your machine after every project
- Oil moving parts monthly (use sewing machine oil, not WD-40!)
- Schedule a professional tune-up annually
Remember, a clean machine is a happy machine. Your future self will thank you for keeping those gears purring like a well-fed cat.
Proper Storage Techniques
Proper storage can be a game-changer for your sewing machine’s longevity. Think of it as tucking your trusty companion in for a good night’s sleep.
Use dust covers to keep lint at bay, and aim for climate-controlled spots to avoid moisture buildup.
When it comes to placement, you’ve got options: vertical storage saves space, while flat storage keeps everything level.
Either way, your machine will thank you with smooth-turning wheels for years to come.
Using the Correct Thread and Needles
Selecting the right thread and needles is like choosing the perfect dance partners for your sewing machine. Your wheel’s smooth turns depend on this dynamic duo!
- Match thread weight to fabric type
- Pick needle size based on thread thickness
- Consider your sewing machine type when selecting thread, as it can influence the thread’s compatibility and performance. choosing the right thread and needle
- Adjust thread tension for each project
Remember, a happy machine is all about balance. Don’t let mismatched threads and needles trip up your sewing groove!
Avoiding Overuse and Overheating
Your trusty sewing machine isn’t a marathon runner—it needs breaks too! To avoid overheating, work in short bursts and give your machine cooling periods.
If you’re tackling a big project, try the "ice pack trick": pause every hour, turn off the machine, and let a cold pack rest on the motor for 15 minutes.
Your machine will thank you, and you’ll be stitching smoothly for years to come!
Periodic Professional Servicing
Regular tune-ups are a stitch in time that’ll save your sewing machine nine, just like regular sewing machine maintenance can prevent a lot of headaches down the road
! Don’t let your trusty sidekick become a cantankerous old machine. Schedule professional servicing every two years to keep it purring like a kitten.
- Expert diagnostics catch issues before they become major headaches
- Thorough cleaning and lubrication in hard-to-reach spots
- Calibration makes sure precise stitches and smooth operation
Think of it as a spa day for your machine – it’ll thank you with years of use and the type of projects you typically work on, and needs with years of reliable service!
When to Seek Professional Repair Services
Sometimes, even the most dedicated DIY-er needs to wave the white flag and call in the pros. You’ve tinkered, troubleshot, and maybe even sweet-talked your machine, but that stubborn wheel still won’t budge. Don’t fret!
| Scenario | Action | Expected Outcome |
|---|---|---|
| Recurring issues | Seek expert diagnosis | Long-term fix |
| Unusual noises | Professional inspection | Prevent further damage |
| Damaged parts | Specialized repair | Restore functionality |
If you’re hearing grinding sounds that make you wince, or if your attempts at fixing have left you more tangled than a bobbin gone rogue, it’s time to call a pro. Complex repairs, especially those involving internal gears or electrical components, are best left to the experts (Source). Remember, if your machine is still under warranty, attempting DIY repairs might void your coverage. So, before you turn your sewing room into a surgical theater, consider letting a professional work their magic.
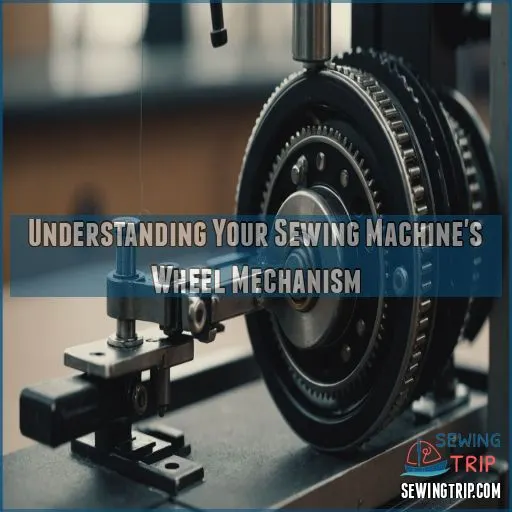
Understanding Your Sewing Machine’s Wheel Mechanism
Your sewing machine’s wheel isn’t just for show – it’s the heart of your stitching action.
Understanding how it works will help you troubleshoot issues faster and keep your projects running smoothly.
Function of the Handwheel
The humble handwheel, that faithful sidekick on your sewing journey, packs quite a punch. It’s your secret weapon for precision stitching and machine control.
Let’s unravel its magic:
- Advances the needle manually
- Controls stitch placement with pinpoint accuracy
- Raises or lowers the needle for pivoting
- Acts as a manual override on electric machines
- Helps you feel the rhythm of your sewing
Master this wheel, and you’ll be spinning yarns in no time!
Connection to Internal Components
Your sewing machine’s handwheel isn’t just a pretty knob – it’s the conductor of an intricate symphony of internal components.
As you turn it, you’re setting in motion a complex dance of internal gears, belt tension, and motor connections.
Think of it as the puppet master, pulling the strings of your machine’s inner workings.
When it’s stuck, it’s like the whole orchestra has hit a sour note. Let’s get that wheel spinning and your sewing back in harmony.
Relationship to Needle Movement
Now that we’ve peeked under the hood, let’s see how your wheel’s dance moves affect the needle. It’s like a puppet master controlling its star performer!
- Needle rises and falls
- Thread loops form beneath the fabric
- Bobbin hook catches the upper thread
- Feed dogs move the fabric forward
Getting this timing just right is key for perfect stitches. If your wheel’s stuck, you’re in a real pickle – no wheel turning means no needle boogie!
Impact on Stitch Formation
Deep inside your sewing machine, the wheel’s turning impacts stitch formation like a conductor leading an orchestra. When it’s off-beat, your fabric’s symphony can turn into a cacophony. Let’s break down how this tiny maestro affects your sewing:
| Wheel Function | Stitch Impact | Emotion Evoked |
|---|---|---|
| Needle timing | Even stitches | Satisfaction |
| Tension control | Balanced look | Relief |
| Fabric feed | Smooth seams | Pride |
| Thread type | Proper lockstitch | Confidence |
Remember, good thread is like good food for your machine . Keep it well-fed, and you’ll be stitching up a storm in no time!
Differences in Manual and Electric Machines
Stitch formation isn’t the only thing that sets machines apart.
Manual and electric sewing machines are like night and day in terms of their wheel mechanisms.
With manual machines, you’re the power source, turning the wheel by hand or foot treadle.
Electric models, however, use a motor to drive the needle movement.
You’ll control stitch speed with a foot pedal, and might hear some motor noise as you sew.
It’s like comparing a bicycle to a motorcycle!
Troubleshooting Backwards-turning Sewing Machine Wheels
Is your sewing machine wheel spinning backwards like it’s trying to undo all your hard work?
Don’t worry, this pesky problem is often easier to fix than threading a needle with shaky hands after too much coffee.
Checking Bobbin Compatibility
Before you throw in the towel, let’s talk bobbin compatibility. It’s like finding the perfect dance partner for your machine. Your wheel might be doing the moonwalk if you’ve got a mismatched bobbin.
- Bobbin size: Is it the right fit for your machine?
- Bobbin type: Plastic or metal? Make sure it’s compatible.
- Bobbin winding: Did you wind it evenly? Wonky winding can cause chaos.
Remember, a happy bobbin means a smooth-sailing sewing session! (Source)
Inspecting for Bent or Dull Needles
A detective’s eye might spot the culprit: a bent or dull needle. You’d be surprised how often this tiny troublemaker causes big sewing problems.
Check your needle’s condition by running it along a flat surface. If it catches or wobbles, it’s time for a change.
A fresh needle can work wonders for stitch quality and prevent fabric damage. Don’t let a worn-out needle put a wrinkle in your sewing plans!
Lubricating Inner Wheel Parts
Now that you’ve checked your needle, let’s grease those inner wheel parts!
Proper lubrication is like giving your sewing machine a spa day. Choose the right oil – sewing machine oil or 30-weight motor oil work wonders.
Apply a drop to the bobbin shaft each time you change bobbins. Don’t go overboard; a little oil goes a long way. Your machine will purr like a well-oiled kitten!
Adjusting Wheel Tension
Once you’ve oiled those inner parts, let’s talk about wheel tension. Is your wheel spinning backwards like a stubborn mule?
It might be time to adjust the tension. Start by checking your thread tension – both upper and bobbin. If they’re off-kilter, your wheel could throw a fit.
Tweak the settings gradually, testing after each adjustment. Remember, finding the sweet spot is like Goldilocks – not too tight, not too loose, but just right , which is very similar to searching for a stubborn mule.
Resetting Machine Settings
Has your sewing machine wheel gone rogue, spinning backwards like it’s auditioning for a circus act? Don’t throw in the towel just yet! Resetting your machine’s settings might be the magic trick you need. It’s like giving your trusty sidekick a fresh start.
- Return to default settings, including stitch selection and tension adjustment
- Double-check needle position and speed control
- Perform a full power cycle, unplugging for a minute before restarting
Remember, even machines need a reboot sometimes!
Maintaining Smooth Wheel Operation Long-term
You’ve fixed your sewing machine wheel, but how do you keep it spinning smoothly?
Let’s look at some easy ways to prevent future hiccups and keep your sewing projects humming along without a hitch.
Proper Oiling Techniques
You’ve tackled those backwards-turning wheels like a champ! Now let’s keep your sewing machine purring like a well-oiled kitten.
Proper oiling is the secret sauce to smooth operation. Apply a drop of sewing machine oil to moving parts every 8-10 hours of use.
Don’t go overboard – a little goes a long way. Think of it as giving your machine a spa day.
Store your oil in a cool, dry place to keep it fresh and ready for action, and remember a little goes a long way.
Keeping the Machine Area Clean
Behind every smooth-running sewing machine is a clean workspace. Don’t let dust bunnies hop all over your creativity.
Regularly wiping down the machine exterior and sewing table can also help prevent issues like lint and debris blocking the handwheel’s movement, which can be fixed by checking for common handwheel problems.
Use a small brush to gently remove lint from the needle plate and feed dogs. Think of it as giving your trusty machine a spa day. Your wheel will thank you by turning like butter.
Storing the Machine Correctly
The secret to a smooth-running sewing machine lies in proper storage. Treat your trusty stitching companion like royalty, and it’ll reward you with years of trouble-free service.
- Dust covers: Shield your machine from lint’s sneaky invasion
- Climate control: Protect it from humidity’s rusty embrace
- Machine position: Give it a cozy home, away from bumps and jostles
- Vertical vs. flat storage: Choose wisely, based on your space and model
Remember, a well-stored machine is a happy machine!
Regular Practice and Gentle Use
Regular practice keeps your sewing machine purring like a well-oiled cat. Treat your machine gently, and it’ll reward you with smooth operation for years.
| Do’s | Don’ts |
|---|---|
| Treadle smoothly | Force the wheel |
| Practice at low speeds | Overuse in one session |
| Clean after each use | Ignore strange noises |
| Oil moving parts regularly | Leave thread tangled |
| Store in a dust-free space | Rush through projects |
Remember, a happy machine means happy sewing!
Upgrading Outdated Components
Even with gentle use, old parts can put a wrench in your sewing plans.
Modernizing your machine isn’t just about keeping up with the Joneses – it’s about smooth sailing for years to come.
Consider swapping out that rusty bobbin winder spindle or upgrading to a smooth-as-butter handwheel.
These cost-saving upgrades can breathe new life into your trusty sidekick, saving you from the dreaded mid-project meltdown.
Remember, a stitch in time saves nine!
Frequently Asked Questions (FAQs)
Why is my sewing machine wheel not turning?
Stuck wheels can drive you nuts!
Your sewing machine’s likely culprits are thread jams, locked shafts, or misaligned parts.
Check for tangled thread, oil those shafts, and make sure everything’s in place.
Don’t force it—gentle persistence is key to unraveling this stitchy situation.
Why does my sewing machine have a stuck handwheel?
You’re threading along when suddenly—halt.
Your handwheel’s frozen.
Don’t panic. It’s likely a thread jam or stubborn shaft.
Oil those bearings, check for sneaky thread tangles, and you’ll be stitching again in no time.
Why does my sewing machine turn the wrong way?
Your sewing machine’s not playing nice, huh?
Chances are, there’s a thread tangle or tension issue throwing a wrench in the works.
Check for jams, adjust the tension, and give it a good clean.
You’ll be stitching smoothly in no time.
What to do if a sewing machine handwheel is hard to turn?
Picture a smooth-running machine.
To revive your stubborn handwheel, clean out lint, lubricate moving parts, and check for thread jams.
Adjust tension if needed.
If it’s still stuck, loosen the clutch or seek a pro’s touch.
How do you fix a stuck sewing machine handwheel?
Stuck handwheel? Don’t sweat it!
First, check for thread jams and debris. Clean the bobbin area and lubricate moving parts.
If that doesn’t do the trick, inspect the gears. Sometimes, a gentle nudge is all it takes to get sewing again.
What causes a sewing machine to lock up?
Thread tangled like a spider’s web?
Sewing machines lock up due to hidden thread jams, misaligned bobbins, or timing issues.
Clean the bobbin area, check needle placement, and oil moving parts.
If problems persist, it’s time for a pro tune-up.
Why is my handwheel hard to turn?
Your handwheel’s giving you grief?
It could be thread jams, dust buildup, or even incorrect threading.
Don’t force it – that’s a recipe for more trouble.
A good clean and proper lubrication might just do the trick.
Why is my sewing machine motor not spinning?
Spinning troubles? Check the motor’s connections, clean out lint, and lubricate gears.
If it buzzes but doesn’t turn, a bearing might be locked.
For silence, internal wiring could be the culprit.
Time for a pro’s touch!
Why does my wheel turn but needle doesnt move?
Needle immobility with a turning wheel often signals a disconnected drive mechanism.
Check for broken gears or a disengaged clutch. Don’t let this needle dilemma leave you in stitches – a quick inspection could reveal the culprit.
Can old thread cause wheel turning problems?
A stitch in time saves nine, especially with old thread.
It can indeed cause wheel turning problems. Thread jams in the take-up lever, bobbin case, or bobbin winder area can block rotation.
Regular cleaning prevents sticky situations.
How often should I service my sewing machine?
Regular tune-ups keep your sewing machine humming.
Aim for a professional service once a year.
Between visits, clean lint every 2-3 bobbins and oil if needed.
Listen for unusual sounds – they’re your machine’s way of asking for TLC.
Why is my stitch selector dial stuck?
Your stitch selector’s likely stuck due to built-up gunk or disuse.
Try warming it with a hairdryer for 20 minutes to loosen things up.
If that doesn’t work, you might need to oil those stuck parts.
How do I properly load a bobbin case?
Imagine this: a seamstress struggling with a tangled mess. Don’t let that be you!
Hold the bobbin case with the metal extension at 12 o’clock. Push it in until it clicks. Turn the handwheel in your direction if it’s stubborn.
Conclusion
Tackling a stubborn sewing machine wheel is like untangling a knotted necklace – it takes patience and the right touch. Remember, whether it’s thread jams, lint buildup, or mechanical hiccups, there’s always a solution.
Don’t let a stuck wheel derail your crafting dreams. With these quick fixes in your arsenal, you’ll be stitching up a storm in no time.
And if you’re still wondering, "Why won’t my sewing machine wheel turn?", don’t hesitate to call in the pros. Happy sewing, and may your wheels always spin freely, with your wheels always spin freely.

