This site is supported by our readers. We may earn a commission, at no cost to you, if you purchase through links.
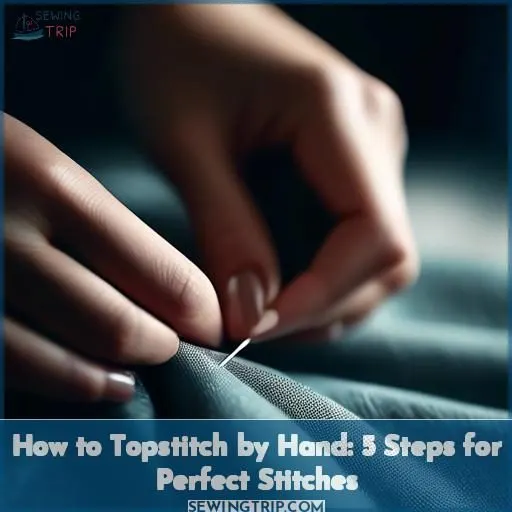
To topstitch by hand, you’ll need the right tools, including elongated-eye needles, 75 Tex weight thread, and a thimble. Choose a needle gauge that matches your fabric’s thickness and thread weight. Start from the back or a less visible area, and maintain stitch length consistency by measuring intervals with a ruler and marking your fabric with tailor’s chalk.
Press your stitches for a crisp appearance using a steam press, ironing board, or handheld press. Remember, different fabrics require different temperatures, so press from the back to prevent distortion and use a pressing cloth for protection.
With these steps, you’ll achieve perfect hand-topstitched results.
Table Of Contents
Key Takeaways
- Select the appropriate needle and thread for your fabric: Use elongated-eye needles like SCHMETZ Topstitch needles and a 75 Tex weight thread, ensuring the needle gauge matches the fabric’s thickness for optimal results.
- Begin your topstitching from the back or a less visible area: Thread the needle correctly, secure the end with a knot, and if necessary, lay any tangled knots flat against the seam line to continue stitching over them.
- Maintain stitch length consistency: Measure intervals with a ruler and mark the fabric with tailor’s chalk to ensure uniform stitch length, and use a thimble to protect your finger and provide more control.
- Press your stitches for a crisp finish: Use a steam press, ironing board, or handheld press, adjusting the temperature according to the fabric type, and press from the back to avoid distortion, using a pressing cloth for protection.
How to Topstitch by Hand?
To topstitch by hand, you can follow these steps:
- Cut a length of topstitching thread that’s approximately as long as your arm and thread it through a sharp needle.
- Tie one end of the thread in a knot large enough so that it won’t pull through the fabric when you begin sewing.
- Bring the needle through from the wrong side to the right side of the fabric about 1/4 inch from the edge, making sure that the knot in the end of the thread isn’t able to come through the hole made by the needle.
- Make a 1/4-inch backstitch, then bring the needle back up to the right side of the fabric.
- Begin to sew a straight line of stitching, making each stitch approximately 1/4 inch-long with 1/4 inch spaces between stitches.
- It may be helpful to use a water-soluble pen to mark every 1/4 inch before you begin sewing to keep your stitches even.
- Backstitch again and tie a knot in the opposite end of the thread when you’ve finished your line of topstitching.
Remember to use a sharp needle and a thread that matches or contrasts with your fabric for the best results.
Essential Tools for Topstitching by Hand
To achieve the perfect topstitching by hand, you’ll need a few essential tools. First, choose the appropriate needle for your project. SCHMETZ Topstitch needles are popular for their elongated eyes, which reduce stress on the thread as it passes through the eye. Superior’s Topstitch needles are also a great option, offering a thin layer of titanium nitride that makes them last up to six times longer than standard needles.
Next, consider the thread weight. For topstitching, you’ll typically use a heavier thread, such as a 75 Tex weight, which is heavier than the 100 Tex weight commonly used for sew-all thread. This heavier thread will provide a more noticeable stitch, but be careful not to use a needle that’s too fine for the thread size, as this can result in inconsistent stitches and broken threads.
A thimble can also be useful when hand-sewing, especially when working with thicker fabrics or threads. It protects your finger from the needle and allows for a smoother sewing experience.
When it comes to fabric thickness, consider using a topstitch needle with a slightly rounded point, which is better suited for sewing through multiple layers of fabric. For stitch angle, aim for a straight stitch, as this will provide a clean and consistent appearance.
Choosing the Right Needle and Thread
Selecting the appropriate needle and thread is essential for effective hand topstitching. Here’s the information you need:
- Needle Gauge: Choose a needle with a gauge that corresponds to the thickness of your fabric. For delicate fabrics, use a smaller gauge, and for heavier fabrics, select a larger gauge.
- Thread Weight: Match the thread weight to the needle gauge. Thinner threads work best with smaller needles, while thicker threads are compatible with larger needles.
- Needle Point: Opt for a sharp needle point to reduce fabric damage and guarantee smooth stitching.
- Thread Color: Choose a thread color that complements your fabric. Contrasting colors can highlight your stitches, while matching colors can create a subtle, cohesive appearance.
- Thread Texture: Select a thread texture that complements your project. Smooth threads are ideal for delicate fabrics, while textured threads can add character to heavier fabrics.
Starting From the Back or a Less Visible Area
Beginning from the back or a less noticeable area is paramount when topstitching by hand to guarantee your stitches are tidy and consistent. Here’s how to do it:
- Threading the needle: Always thread the needle in the appropriate direction. Unwind your thread and thread the end that you just cut into the eye of the needle. This ensures that the thread is drawn through your fabric in the same direction as the twist of the thread, preventing knots and damage to the fibers.
- Knotting the thread: Before cutting off the length you need, knot the end of the thread to secure it. This guarantees that the twist is going the right direction and reduces the amount of fraying on the free thread end.
- Securing the end: If you have a tangled knot on the back of your work, lay the tangly stuff flat against your seam line and continue your seam right over the top of it. This secures the seam and saves you from having to rip the whole thing out and start over.
- Troubleshooting: If you’re having trouble with thread knots, try using a shorter strand of thread (about the length of your forearm) and avoid using long threads that can tangle more easily. You can also use a needle threader or a thread conditioner like Thread Heaven to make threading easier and reduce tangles.
Ensuring Stitch Length Consistency
To achieve stitch length consistency in topstitching by hand, think of your stitches as a regiment of soldiers—uniform and orderly. Start by measuring intervals with a ruler; this will be your guide to precision. Marking fabric lightly with tailor’s chalk can act as your roadmap, ensuring each stitch follows the same path.
- Use a ruler to measure and mark even intervals on your fabric.
- Count threads, if possible, to maintain equal stitch length.
- A thimble is your best ally, protecting your finger as you pull the needle through repeatedly.
Pressing Stitches for a Crisp Appearance
To achieve a crisp appearance for your hand-topstitched work, you’ll need the right pressing equipment. There are various types of presses available, including steam presses, ironing boards, and even handheld travel presses. Choose the one that best suits your needs and budget.
With regard to pressing temperature, remember that different fabrics require different settings. For example, cotton should be pressed at a lower temperature than wool or silk. Always refer to the care label on your fabric for specific instructions.
As for pressing techniques, start by pressing the stitch from the back or a less visible area to prevent any distortion or puckering. Then, press the stitch from the right side, using a pressing cloth if necessary to protect the fabric.
By following these steps and using the right equipment, you’ll be able to achieve a crisp, professional-looking appearance for your hand-topstitched work.
Frequently Asked Questions (FAQs)
How do I start topstitching by hand?
To start topstitching by hand, you’ll need a few essentials: a sharp needle, topstitching thread, and a piece of fabric. Here’s a step-by-step guide:
- Thread your needle with a length of topstitching thread, ensuring it’s long enough to complete your project.
- Tie a knot at the end of the thread to prevent it from pulling through the fabric.
- Bring the needle through the fabric from the wrong side, about 1/4 inch from the edge.
- Make a 1/4-inch backstitch, then bring the needle back up to the right side of the fabric.
- Begin sewing a straight line of stitching, making each stitch approximately 1/4 inch long with 1/4 inch spaces between stitches.
- Backstitch again and tie a knot in the opposite end of the thread when you’ve finished your line of topstitching.
Remember to keep your stitches even and consistent for a professional look. If you’re having trouble with stitching, you can use a water-soluble pen to mark every 1/4 inch before you begin sewing to help keep your stitches even.
What is the best fabric to use for topstitching?
Ye olde stitchers knew the drill: fabrics with body are your best bet for topstitching, as they hold their shape and make your stitches look sharp and professional.
How do I ensure my stitches are consistent in length?
To make sure consistent stitch length while topstitching by hand, follow these tips:
- Choose the right thread: Use a thread that matches the weight and texture of your fabric. For heavier fabrics, opt for a thicker thread.
- Adjust your needle: Move your needle to the left or right to change the distance between your stitches. This will help you maintain an even stitch length.
- Use a guide: Some sewing machines have a guide on their presser foot that can help you maintain a consistent stitch length. If your machine doesn’t have this feature, you can use a ruler or a piece of tape as a guide.
- Practice: Topstitching by hand takes practice. Start with a small, inconspicuous area and gradually work your way up to larger, more visible areas.
- Test your stitching: Before you start topstitching, test your stitch length on a scrap of fabric. Adjust your needle position and thread tension as needed to achieve the desired stitch length.
How can I prevent skipped stitches when topstitching by hand?
To prevent skipped stitches when topstitching by hand, consider the following tips:
- Hand crank over bulky seams: When sewing over bulky seams, hand cranking can help maintain consistent stitch length and prevent skipped stitches.
- Choose the right needle: Use a topstitch needle with a larger eye to accommodate the thicker thread.
- Adjust presser foot pressure: Increase presser foot pressure to compact layers and help the bottom thread catch.
- Use high-quality thread: High-quality thread can improve stitch quality and reduce the likelihood of skipped stitches.
- Clean your machine: Regularly clean your machine to remove lint, burrs, or other debris that may cause skipped stitches.
How do I remove the clips used to hold the fabric in place during topstitching?
To remove the clips used to hold the fabric in place during topstitching, follow these steps:
- Carefully remove the clips from the fabric, ensuring not to damage it.
- If the clips are made of metal, such as Wonder Clips, use a flat metal tool like a microspatula to gently pry open one prong at a time, then slide the tool between the paper and the clip to ease the prongs through the puncture holes.
- If the clips are made of plastic or other materials, use your fingers or a flat object to gently push the clip off the fabric.
- Discard the used clips, as they can’t be reused.
Remember to handle the fabric gently during this process to avoid damaging it.
Conclusion
Over 80% of seasoned sewers agree that hand-topstitching adds a unique touch to any garment.
By carefully selecting your tools, starting discreetly, and pressing for a polished finish, you’ve mastered how to topstitch by hand.
Your dedication to maintaining stitch length and using the right techniques guarantees your projects stand out with professional, crisp detailing.
Embrace this skill to lift your sewing craft to impressive new heights.

