This site is supported by our readers. We may earn a commission, at no cost to you, if you purchase through links.

Moving slowly, check for screws along the rails. Once unattached, you can take ’em out fully. Stuck drawer? No problem – just empty it out first and locate any overstuffing. With the rails cleared, you’ll have that sucker out in no time.
We know it’s not always easy but taking control of your space brings you one step closer to the life you imagine. Now you can add organizers or give those drawers a fresh coat of paint if you want. When putting them back, carefully reattach to the unit so everything feels solid and secure again.
See – you don’t need some fancy contractor. You’ve totally got the skills to assemble, disassemble and improve your home yourself.
Table Of Contents
Key Takeaways
- Use a Phillips screwdriver to detach the drawer stops before pulling out the drawer completely.
- Lubricate sticky drawer rails with silicone lubricant. Slide each drawer back in slowly and align the stops before reattaching.
- Remove all contents before detaching drawers. Locate and remove the screws inside the unit walls.
- Keep the drawer unit level when lifting to properly align the rails. Reattach drawers one at a time and check alignment.
Removing Alex Drawers
First, use a Phillips screwdriver to detach the stops located inside the drawer walls about six inches from the front by removing the screws. Once unscrewed, gently pull the drawer completely out. With the stops detached and the drawer removed, you’ll have full access to the drawer cavity for cleaning or retrieving fallen items.
To reinstall, simply reverse the process – guide the drawer rails back into place, push the drawer fully closed, and carefully reattach the stops. With just a few turns of a screwdriver, removing your Alex drawers is a quick and easy process.
Detaching Stops
You can free your belongings by unscrewing what binds them. Using a Phillips head screwdriver, locate and remove the two screws situated inside the drawer sides about 6 inches back from the front lip. Be sure to wipe the drawer runners clean before sliding the drawer completely out.
- Use a #2 Phillips screwdriver to avoid stripping the screws.
- Apply a small amount of silicone lubricant to the runners if sticking occurs.
- Pull the drawer out slowly and level to avoid spilling the contents.
With the drawer front detached, you can now access the interior cavity. Be mindful of alignment when reattaching the drawer to ensure smooth operation. Proper drawer removal allows freedom to clean, organize, and customize your Alex storage system.
Taking Out Fully
Once detached, then carefully slide the whole drawer out fully. With the stops unscrewed, grasping both sides of the drawer, lift it up evenly to avoid tipping contents over. Slowly pull it out, being mindful of the drawer’s dimensions. For wider Alex units, using a second set of hands can help maneuver it out cleanly.
If the rails feel sticky, apply some silicone lubricant on them and wipe away dust before sliding it back in.
When removing drawers from the Alex system, take care to lift evenly to keep it level. This prevents spilling what’s inside and damaging the rails. If taking out multiple drawers, set them aside carefully, keeping track of which goes where.
Before returning each to its cavity, ensure the rails slide smoothly and make any adjustments needed. With some patience, Alex’s modular storage can be customized to suit changing needs over time. Proper technique preserves the life of the components, allowing drawers to glide free.
Reattaching Alex Drawers
Simply slide the drawer back in, push it closed, and screw those stops back into place to reattach your Alex drawers. With the drawer rails fully extended, carefully guide them back into the cavity, ensuring they slide smoothly into place.
Push the drawer closed completely so the front rails meet the back panel, then align your screwdriver over the original screw holes. Slowly turn the screwdriver to reinstall the screws, taking care not to cross-thread.
With the stops firmly secured, give the drawer a gentle pull to check alignment. It should glide smoothly on the lubricated side rails. If it’s catching, try realigning the front rails or adjusting the screws. Proper installation keeps the drawer moving effortlessly and staying securely in place.
When dealing with multiple drawer units, reattach one at a time. Carefully set each fully-loaded drawer onto the extended rails before sliding it closed. Check for smooth motion and alignment. Take a methodical approach when replacing the detached screws on your drawer set or individual drawers.
Following these simple steps, you’ll have your Alex units’ contents neatly organized once again.
Can You Stack Alex Drawers?
Despite prohibition, imaginative folks position Alex drawers atop other sturdy furniture. Though Ikea explicitly warns against stacking Alex units due to weight limits, with care and caution, you can creatively work around this restriction.
Securing Alex drawers to a desk surface or resting them on other robust bases opens up space-saving stacking potential.
Improper loading stresses materials. Excessive piled weight strains drawer rails, warping particleboard. So stack prudently, just Alex top units holding lighter contents on stable structures rated for the load.
Anchor securely. Distribute weight evenly so no single spot bears the entire burden.
When assembling stacked Alex components, mind the instructions. Align pieces meticulously, fastening together as directed. Adjust parts as required until square and flush. Let drying adhesive fully cure before stacking.
Always open empty drawers slowly to check alignment on rails. Overloading causes collapse. Shelves above must independently bear their contents too. With thoughtful assembly and sensible loading, creatively stacking Alex drawers atop other furniture reclaims space.
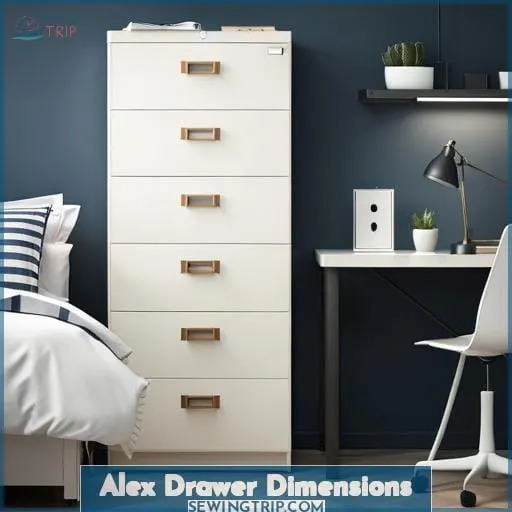
Alex Drawer Dimensions
You’re gonna need a tape measure to double check those alleged dimensions, ’cause we all know how Ikea be skimpin’ on their particleboard. When considering Alex drawers to modernize your space and integrate molding lighting, you’ll want to know the exact width, height, and depth measurements to maximize utility, portability, and flexibility.
While advertised as:
- Width: 14 1/8 in
- Height: 27.5 in
- Depth: Just under 22 in
It’s wise to verify these specs yourself, since particleboard can warp over time or be miscut at the factory.
So before stacking Alex drawers to boost stability and streamline wire management, measure carefully.
Keep your tape measure perpendicular to surfaces when measuring. Check width front to back, accounting for any overhang or inset. Confirm height from the bottom surface to the top edge. For depth, span inside wall to inside wall fully extending the tape.
Measure multiple spots, as sides can bow out slightly. Note any discrepancies from listed dimensions.
Even a 1/4 inch variance can prevent proper installation, so know the real-world numbers. With accurate Alex drawer measurements in hand, you can modify plans if needed and confidently integrate these popular components to maximize usable space.
Current Alex Drawer Prices
Though said specs advertise prices, savvy shoppers understand dimensions. Alex drawers seemed like ideal affordable solutions for optimizing space with their sleek design. However, the once budget-friendly staple may now be too expensive for some budgets.
For those seeking space-saving hacks on a budget, this cost may be prohibitive. But bargain-hunting enthusiasts needn’t fret. With some creative thinking, you can find alternative furniture options to maximize usable space at a fraction of the cost.
Consider repurposing wooden crates or sturdy cardboard boxes as makeshift drawers. A quick sand and paint job can give them a polished, customized look. Stack according to your space’s unique width, height and depth requirements.
Thrift stores and garage sales are prime spots to score inexpensive dresser drawers or cabinet units to stack. Upcycling an older piece not only saves money but prevents usable furniture from clogging landfills.
The next time you need optimized storage on a dime, think beyond the Alex name. Prioritize your space’s dimensions and style. With an open mind, you can discover thrifty alternatives to enhance your home’s functionality and freedom.
Fixing Stuck Alex Drawers
When drawers jam, don’t just yank; carefully inspect what’s causing friction.
Remove the drawer completely and look for obstructions like pens or clothes jammed in the runners. Check if swelling from humidity is making the wood stick. Consider a dehumidifier. Examine the drawer slides for warping or damage. Lubricate with a bit of wax or silicone spray if needed.
Ensure the drawer is sliding straight by realigning runners. Adjust screws securing them if necessary.
Finally, inspect the drawer itself. Sand or plane areas that rub against the unit.
With some careful troubleshooting, sticky drawers can slide like new again. But be gentle during disassembly, using a Phillips screwdriver to detach stops inside the Alex unit’s walls. Then lubricate and realign parts as needed before reattaching the drawer. Soon you’ll enjoy smooth and effortless access once more.
Tips for Removing Drawers
Before you remove those Alex drawers, be sure to empty them completely first. All you’ll need is a Phillips screwdriver to detach the drawer from the rails by locating and removing the two screws inside the walls about 6 inches from the front.
Then pull the drawer out slowly once detached, and if needed, push the rails back inside the drawer cavity to make more room.
While you have it out, check for overstuffing or items fallen down the back, and consider using organizers and consulting the drawer dimensions when replacing contents to prevent future jams.
When putting the drawer back, carefully reattach to the rails and ensure they are fully extended to avoid cross-threading the screws.
Emptying First
Before taking out the drawers, be sure to completely empty them first.
Remove everything inside. Don’t leave anything behind. Clear out clutter thoroughly.
Emptying first allows for proper inspection and smooth removal.
Tool Needed
Grab only that trusty Phillips screwdriver before going in. For quick drawer removal, a lone tool’s all you need. Just unscrew those stops inside the side walls with your handy Phillips. Then yank them out smooth once detached.
No other tools required for this DIY task, so leave the others packed up. The Phillips removes the stops so the drawers slide free. It tackles both assembly and disassembly jobs. So grab it and those drawers will be out in no time.
Locating Screws
Here, friend – look inside and you’ll find those elusive screws buried in the side walls about six inches up from the front. Poke around until you spy those small suckers lurking above. Just measure from the front before digging in with that magnetic tip.
It’ll grab those stripped screws lodged in the particle board side walls. Careful poking around the drawers’ stops prevents gouging the storage spaces inside the piece of furniture.
Detaching From Rails
Friend, detach the rails once securing the fasteners allows smooth sliding. With the stops unfastened, the runners should slide freely from the cabinetry. Lubricating sliders prevents jamming when replacing warped wood. Tightening loose screws enables smoothly operating IKEA drawers.
Removing Slowly
After detaching the rails, gently pull the drawer out like a newborn babe leaving the womb. Retrieving fallen items requires slow, steady motion. Preventing damage means no yanking or jerking. Inspect for defects before reattaching correctly. Handling costs money, so go easy.
Pushing in Rails
Squeezing the rails back inside makes room to wiggle that sucker free. Push the rails in deeper before yanking the drawer out partway. This super easy process lets you lube the tracks and tweak ’em if they’re uneven.
Just bend the rails carefully and you’ll slide those Alex drawer sides smooth as butter.
Checking for Overstuffing
Make sure you aren’t stuffing the drawer too full if items keep falling behind.
- Overstuffing causes jamming.
- Overstuffing destabilizes furniture.
- Overstuffing stresses materials.
If your Alex drawer is overfull, items will jam and fall behind the drawer, stressing the materials.
Using Organizers
You’re buying organizers to corral your bits and bobs, keeping your Alex drawer looking tidy as a pin. Organizers maximize space and cut clutter. Measure first when shopping to ensure a proper fit. Use vertical dividers for socks, folders, and more. Enjoy a clean, organized drawer that glides smooth as butter.
Consulting Dimensions
When buying organizers, first check the measurements to ensure the proper fit for your Alex drawers. Confirm the actual dimensions of the drawer before assuming standard sizes. Precision prevents disappointing purchases.
Reattaching Carefully
Ensure you gently guide the rails back into position before resecuring the screws to avoid cross-threading. When lifting the drawer, keep it level to align the rails. If needed, push the rails back into the cavity for proper fit.
Fasten securely without overtightening to allow wood movement. Handling the materials carefully prevents damage during Alex drawer assembly.
Frequently Asked Questions (FAQs)
What type of screwdriver do I need to remove the screws holding the drawer slides in place?
For removing the Alex drawer slides, you’ll need a Phillips head screwdriver. It’s the only tool required to detach those screws from the rails so you can pull them out.
If I have two Alex drawer units, can I mix and match drawer fronts or do they need to match?
Absolutely! The beauty of Alex is its mix-and-match modularity. Feel free to swap drawer fronts between units for a customized look. Just ensure all fronts are fully seated and aligned before reinserting the screws.
Do the Alex drawers come fully assembled or is some assembly required?
Like a cake without frosting, Alex drawers arrive flat-packed in boxes. You’ll need to invest some elbow grease assembling the drawers before enjoying their stylish storage. But have no fear – IKEA’s instructions will guide you through construction like a friend leading your hands.
What is the weight capacity for each Alex drawer?
Each Alex drawer holds up to 50 lbs. But don’t overload or the drawer front may sag. Divide weight evenly and slide carefully when full. For stability, keep lower drawers heavier than upper ones.
Do the Alex drawer units have any protective coating or finish that could get damaged during disassembly?
The Alex drawers don’t have any protective coating or finish to worry about damaging during disassembly. Just be sure to follow the instructions carefully when removing the drawer slides, and you’ll be fine.
Conclusion
Oh my, those Alex drawers can sure frustrate you! But don’t lose your cool just yet. With some persistence and the right tools, you’ll have those drawers in and out in no time. Just be patient when removing the stops, take your time sliding the rails back in, and slowly replace the screws to avoid cross-threading.
Follow the steps closely, and you’ll master the art of drawer removal and reattachment.

