This site is supported by our readers. We may earn a commission, at no cost to you, if you purchase through links.

But, where do you start?
First, choose the right grease for your machine, considering factors like temperature range, consistency, and application method.
Don’t overdo it – too much grease can lead to sticky residue and poor performance.
By lubricating your sewing machine gears properly, you’ll reduce wear on moving parts, extend its lifespan, and enjoy a quieter, smoother ride.
Ready to get started? Let’s get into the details of finding the perfect grease for your machine.
Table Of Contents
- Key Takeaways
- Choosing the Right Grease for Sewing Machine Gears
- Importance of Lubricating Sewing Machine Gears
- Oiling Your Sewing Machine: a Step-by-Step Guide
- Safety Precautions When Lubricating Your Sewing Machine
- Common Mistakes to Avoid When Lubricating Sewing Machine Gears
- How to Lubricate Gears on Different Sewing Machine Models
- Maintenance Tips for Your Sewing Machine
- Troubleshooting Common Issues With Sewing Machine Gears
- Expert Advice for Lubricating Sewing Machine Gears
- Frequently Asked Questions (FAQs)
- Conclusion
Key Takeaways
- You’re one step away from a silky-smooth sewing experience – just remember to lubricate those gears regularly! By doing so, you’ll reduce wear on moving parts, extend your machine’s lifespan, and enjoy a quieter, smoother ride.
- Don’t overdo it with the grease, or you’ll end up with a sticky mess! Choose the right type and amount for your machine, considering factors like temperature range, consistency, and application method.
- A well-lubricated machine is like a happy cat – it purrs and runs smoothly! Proper lubrication reduces friction, prevents wear on critical parts, and makes your sewing experience more enjoyable. Plus, it’s a great way to prevent costly repairs and extend your machine’s lifespan.
- Your sewing machine is like a car – it needs regular TLC to keep it running smoothly! Make lubrication a priority, and don’t forget to clean and dust your machine regularly to prevent lint buildup and dust accumulation.
Choosing the Right Grease for Sewing Machine Gears
You’re about to learn the secret to making your sewing machine purr like a contented cat – choosing the right grease for its gears. With so many options out there, it’s important to pick the one that’ll keep your machine running smoothly and prolong its lifespan.
Considerations for Selecting the Right Grease
When selecting the right grease for your sewing machine, consider the consistency, temperature range, and application method. SEW-RETRO Grease is a top choice for its compatibility and water resistance. Think of it like choosing the perfect recipe for your machine’s maintenance – it’s all about the right ingredients!
Factors Affecting Grease Performance
When choosing the right grease, consider the temperature your machine operates at, as well as the grease’s viscosity, consistency, and resistance to oxidation and contamination. These factors affect how well the grease performs and how long it lasts in your sewing machine.
Grease Types for Different Machine Models
Choosing the right grease for your sewing machine gears can be tricky. Here are three key considerations:
- Viscosity: Thicker greases for heavier machines, thinner for lighter ones.
- Temperature range: Make sure the grease can handle your machine’s operating temperature.
- Brand reputation: Research reputable brands for quality and longevity.
Recommended Grease for Featherweight Motors
For Featherweight motors, you’ll want to use the good stuff – SEW-RETRO grease is the only recommended type. Here’s a handy breakdown:
| Grease Type | Application Tips | Frequency |
|---|---|---|
| SEW-RETRO | Apply to motor ports | Every 6-12 months |
| Lithium-based | Not recommended | – |
| Synthetic blend | Not recommended | – |
Stick with SEW-RETRO for a smooth-running Featherweight.
Importance of Lubricating Sewing Machine Gears
You’re probably itching to get sewing, but before you start, it’s important to understand why lubricating your sewing machine gears is a must — after all, you want your machine to last, right? Proper lubrication can really make a difference in how long your machine lasts, while inadequate lubrication can lead to expensive repairs or even make it unusable.
Effects of Proper Lubrication on Machine Life
Proper lubrication is like giving your sewing machine a spa day – it keeps things running smoothly and quietly! By reducing wear on moving parts, you’ll enjoy a longer machine lifespan, fewer repairs, and a more enjoyable sewing experience. So, what’re the benefits of proper lubrication?
- Reduced wear on critical parts like the stitch plate and shuttle hook
- Noticeable noise reduction for a more peaceful sewing experience
- Smoother operation means less frustration and more productivity
- Extended lifespan for your trusty machine
- Fewer repairs and less downtime means more time for creating
Consequences of Inadequate Lubrication
Inadequate lubrication can wreak havoc on your sewing machine. Gear wear increases, noise levels rise, and the machine slows down. You may notice stitch issues, and the machine’s life is seriously reduced. As a beginner, you might struggle with sewing projects like making bias tape or a drawstring bag. Regular lubrication and cleaning with compressed air can save the day!
Relationship Between Lubrication and Friction
You know the drill – friction is the enemy of smooth operation!
Lubrication is key to reducing friction and preventing wear on your sewing machine gears.
By keeping those gears well-lubricated, you’ll enjoy a longer machine life, reduced maintenance, and silky-smooth stitching.
It’s a win-win!
Regular lubrication is especially important for the hook race in black, tan, and white Featherweight machines.
Oiling Your Sewing Machine: a Step-by-Step Guide
You’re just a few steps away from becoming a sewing machine whisperer! To keep your machine running smoothly, follow these simple steps to oil it properly: clean the machine, identify the lubrication points, apply the right amount of oil, and wipe away any excess.
Step 1 – Cleaning the Machine
Let’s get started with Step 1 – Cleaning the Machine. Grab a soft-bristled brush and some compressed air to gently sweep away dust and lint. Don’t forget to wipe down surfaces with a dry cloth to prevent any debris from getting stuck.
Step 2 – Identifying Lubrication Points
Now that your machine is squeaky clean, it’s time to find the lubrication points. Consult your manual or a lubrication chart specific to your model, like the Featherweight models. Don’t guess – incorrect lubrication can lead to costly mistakes!
Step 3 – Applying the Right Amount of Oil
- Start with a small amount: A drop or two is usually sufficient.
- Consider the oil viscosity: Thicker oils may require less application.
- Don’t overdo it: Excess oil can attract dust and lint, causing more harm than good.
Step 4 – Wiping Away Excess Oil
Now that you’ve applied the right amount of oil, grab a lint-free cloth and gently wipe away any excess oil. This prevents oil build-up and lint accumulation. Microfiber cloths work great for this step. Your machine will thank you for the TLC!
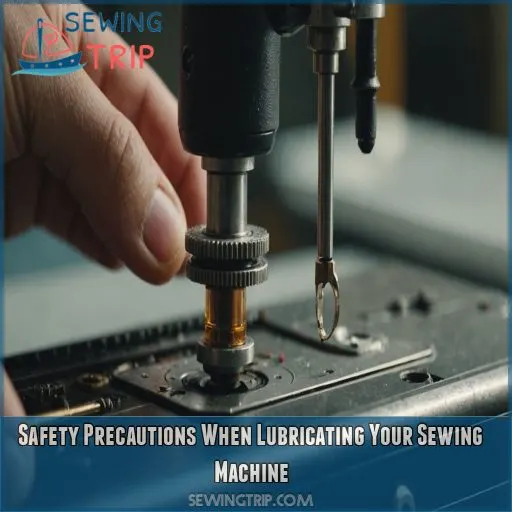
Safety Precautions When Lubricating Your Sewing Machine
As you get ready to lubricate your sewing machine, you should take a few safety precautions to avoid any mishaps. Before you start oiling, make sure to unplug your machine to prevent any accidental starts or electrical shocks – your safety is worth the extra few seconds of caution.
Unplugging the Machine Before Oiling
Now that you’ve cleaned and prepped your machine, it’s time to oil it. But before you start, unplug it to prevent any electrical hazards or shocks. This essential precaution makes sure you’re safe while performing routine machine maintenance. Safety first, always!
Avoiding Harsh Chemicals and Solvents
When lubricating your sewing machine, ditch harsh chemicals and solvents for eco-friendly choices. Opt for natural cleaning methods and gentle cleaning products. Here are 4 safe alternatives:
- White vinegar: A natural cleaning agent for tough grime.
- Baking soda: A non-abrasive scrubber for delicate parts.
- Castile soap: A gentle cleaner for surfaces.
- Microfiber cloths: For dusting and polishing without chemicals.
Preventing Over-Lubrication
When lubricating your sewing machine, remember that a little oil goes a long way. Watch for signs of over-lubrication, such as oil build-up or drips. Remove excess oil with a clean cloth and maintain a regular cleaning frequency to prevent problems.
Storing the Machine Properly
When you’re done lubricating, store your machine in a dry, climate-controlled space to prevent dust buildup and humidity damage. Cover it with a breathable cloth or machine cover to keep it clean and protected. This simple step will prolong your machine’s life.
- Control the climate: Store your machine in a room with stable temperature and humidity levels.
- Dust prevention is key: Use a soft cloth or machine cover to keep dust at bay.
- Choose the right storage space: Avoid storing your machine in attics, basements, or areas prone to moisture.
- Invest in a good machine cover: Look for one that’s breathable, durable, and fits your machine snugly.
Common Mistakes to Avoid When Lubricating Sewing Machine Gears
You’re probably ready to get started, but before you do, let’s cover some common mistakes to avoid when lubricating your sewing machine gears. By steering clear of these pitfalls, you’ll be able to keep your machine running smoothly and prolong its lifespan.
Using the Wrong Type of Oil
Using the wrong type of oil can lead to oil build-up, sticky residue, and machine damage. To avoid this, consider the following:
| Oil Type | Pros | Cons |
|---|---|---|
| Synthetic | Excellent lubrication, consistent performance | May not be suitable for older machines |
| Synthetic Blends | Suitable for cleaning and lubricating older machines | May leave residue |
| Petroleum-based | Inexpensive, widely available | May cause gear wear |
Choose the right oil for your machine to prevent damage.
Over-Oiling the Machine
Don’t overdo it! Too much oil can lead to sticky residue, oil build-up, and poor machine performance. Remove excess oil with a clean cloth and check your machine’s manual for the recommended cleaning frequency to keep your machine running smoothly.
Not Cleaning the Machine Regularly
Don’t let lint build-up, dust accumulation, and oil residue slow you down! Regular cleaning is really important to prevent decreased performance and machine wear. Set aside time to tidy up your machine, and it’ll reward you with smooth stitches and a longer lifespan.
Neglecting to Refer to the Owner’s Manual
Don’t skip the owner’s manual – it’s your best friend for lubricating your sewing machine gears. Ignoring it can lead to machine damage, warranty void, and improper lubrication. Take a few minutes to read it and avoid costly mistakes.
How to Lubricate Gears on Different Sewing Machine Models
You’re probably wondering how to lubricate the gears on your specific sewing machine model, and you’re not alone.
With so many different models out there, it can be tough to know where to start.
In this section, we’ll break down the lubrication process for various sewing machine models, including Featherweights, drop-in bobbin machines, and front-load bobbin machines, so you can keep your machine running smoothly.
Lubricating Gears on Black and Tan Featherweights
You’re a proud owner of a Black or Tan Featherweight sewing machine! To keep it running smoothly, remember to lubricate the gears on the drive shaft with grease. Here are some tips to get you started:
- Clean the machine before greasing to prevent dirt buildup.
- Apply a small amount of grease to the top and bottom gears.
- Avoid getting grease on the internal drive belt to prevent damage.
Lubricating Gears on White Featherweights
You’re working with a White Featherweight! Lubrication is only necessary if your motor has motor ports. Check under the spool pin coverplate. Use SEW-RETRO grease, and lubricate about once or twice a year. Here’s a quick reference table:
| Model | Motor Port Location | Lubrication Frequency |
|---|---|---|
| White Featherweight (early) | Under spool pin coverplate | Once or twice a year |
| White Featherweight (late) | No motor ports | Not necessary |
| Black and Tan Featherweight | Top and bottom of drive shaft | Once or twice a year |
| Belt-driven models | Varies by model | Consult owner’s manual |
Lubricating Gears on Drop-in Bobbin Sewing Machines
To lubricate gears on drop-in bobbin sewing machines, start by consulting your manual for specific guidance. Generally, apply a small amount of grease to the gears every 1-2 years, depending on usage. Regular lubrication reduces gear noise and wear, ensuring smooth operation.
Lubricating Gears on Front-load Bobbin Machines
Now that you’ve mastered lubricating gears on drop-in bobbin sewing machines, let’s move on to front-load bobbin machines! You’ll want to focus on the gear system located under the front-load bobbin case. Here are some key tips to keep in mind:
- Use a high-quality grease specifically designed for sewing machine gears.
- Apply a small amount of grease to the gears, as excess grease can attract dust and lint.
- Make sure to clean the area around the gears before applying new grease.
- Use a soft brush to gently spread the grease evenly.
- Refer to your machine’s manual for specific lubrication instructions, as different models may have varying requirements.
Maintenance Tips for Your Sewing Machine
You’ve invested time and money into your sewing machine, so it’s important to keep it running smoothly with regular maintenance. By following simple tips and tricks, you can prevent costly repairs, reduce wear and tear, and make sure your machine continues to serve you well for years to come.
Regular Cleaning and Dusting
You know the saying: "a clean machine is a happy machine." To keep your sewing machine running smoothly, you need to make cleaning and dusting a priority. Here’s a simple routine to follow:
| Cleaning Task | Frequency | Tools Needed |
|---|---|---|
| Dusting | Daily | Soft brush, compressed air |
| Lint removal | Weekly | Lint roller, small vacuum |
| Deep clean | Monthly | Cleaning solution, soft cloth |
| Oil wipe-down | After each use | Soft cloth, oil |
| Bobbin area clean | Every 3 months | Small brush, cleaning solution |
Consulting the Owner’s Manual for Specific Maintenance Instructions
For keeping your sewing machine in tip-top shape, the owner’s manual is your best friend. It’s like having a personal guide to keep your machine running smoothly. Check your manual for specific maintenance instructions, including recommended oil types and lubrication points. Don’t skip this step – it can void your warranty or lead to costly repairs.
- Always refer to your owner’s manual for maintenance instructions
- Check the manual for recommended oil types and lubrication points
- Follow safety precautions to avoid accidents or injuries
- Keep your manual handy for troubleshooting and quick reference
- Look for online resources or manufacturer support if you’ve lost your manual
Troubleshooting Common Issues With Sewing Machine Gears
You’re humming along, sewing up a storm, when suddenly your machine starts making weird noises or skipping stitches – it’s probably a gear issue. In this section, we’ll help you troubleshoot common problems with your sewing machine gears, from identifying signs of inadequate lubrication to diagnosing and repairing damaged gears.
Identifying Signs of Inadequate Lubrication
You’re probably wondering how to spot inadequate lubrication in your sewing machine. Here are the telltale signs:
| Signs of Inadequate Lubrication | What’s Happening Inside Your Machine |
|---|---|
| Machine noise increases | Friction builds up between moving parts |
| Stitch quality suffers | Gears and mechanisms start to wear down |
| Slow speed and reduced performance | Motor strain increases due to lack of lubrication |
| You notice a burning smell | Overheating occurs due to excessive friction |
Keep an ear out for unusual noises and an eye on stitch quality to catch lubrication issues early.
Diagnosing Problems With Gear Wear
When diagnosing problems with gear wear, listen for unusual gear noise or grinding sounds. Check for gear slipping or tightness issues. Inspect gear alignment to make sure the teeth mesh properly. If you notice any of these symptoms, it’s time to take action. Don’t ignore these warning signs, as they can lead to costly repairs or even machine failure.
Repairing or Replacing Damaged Gears
When repairing or replacing damaged gears, you’ll need the right tools for the job. Don’t worry, it’s not as hard as it sounds. With a little patience and practice, you’ll be fixing gears like a pro. Here are some tips to get you started:
- Use gear repair tools specifically designed for your machine model.
- Assess the damage to determine if a DIY gear fix is possible.
- Consider the gear replacement cost and weigh it against the machine’s overall value.
- Look for damaged gear signs, such as worn teeth or excessive wear, to determine the best course of action.
Expert Advice for Lubricating Sewing Machine Gears
You’ve come to the right place to discover the insider tips and tricks for lubricating your sewing machine gears like a pro. In this section, we’ll share expert advice from seasoned sewists and technicians, so you can keep your machine humming along smoothly.
Tips From Experienced Sewists and Technicians
 View On Amazon
 - "Featherweight maintenance is key. Those babies are finicky about oil. Too much, and it’ll gunk up the works. Once or twice a year is plenty."
- "Oiling frequency depends on use. Daily with heavy use, weekly otherwise. But always clean first! A dirty machine is a sad machine."
- "Gear cleaning is important. Use a soft brush and compressed air to nix dust and old oil. No harsh chemicals!"
- "Troubleshooting tips: If your machine’s acting up, check the manual. Often, it’s a simple fix like proper lubrication or a loose screw.
Recommendations for Specialized Lubricants and Tools
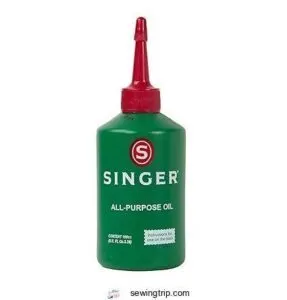
You’re ready to take your sewing machine lubrication game to the next level! To make the process smoother, consider investing in specialized lubricants and tools. Here are some expert-approved recommendations:
- Grease application tools: Use a precision grease applicator to target those hard-to-reach areas.
- SEW-RETRO Grease: The go-to choice for Featherweight motors, offering superior lubrication and protection.
- Low-viscosity oils: Perfect for modern machines, these oils reduce friction without leaving residue.
- Lubricant longevity testers: Check if your lubricant is still effective and not compromising your machine’s performance.
Frequently Asked Questions (FAQs)
What kind of grease do you use on sewing machine gears?
About 70% of sewing machine problems are caused by poor maintenance. For your gears, use a high-quality grease like SEW-RETRO, specifically designed for sewing machines, to keep them running smoothly and prolong their lifespan.
How do you lubricate gears?
To lubricate gears, you’ll need to apply a small amount of suitable grease, such as SEW-RETRO, to the gear points, usually located under the spool pin coverplate or underneath the bottom tray, about once or twice a year.
Can I use gear oil in a sewing machine?
Did you know 70% of sewing machine problems are caused by poor maintenance? When it comes to gear oil, you can use it in a sewing machine, but choose a light, synthetic-based oil to avoid gumming up the works.
How to lubricate your sewing machine?
To lubricate your sewing machine, start by cleaning it thoroughly, then identify the lubrication points specified in your machine’s manual. Apply a small amount of oil, wipe away excess, and run the machine for a few minutes.
Can I use WD-40 to lubricate sewing machine gears?
Don’t even think about using WD-40 to lubricate your sewing machine gears! It can leave a sticky residue and attract dust, causing more harm than good. Instead, opt for a sewing machine oil or synthetic blend specifically designed for the job.
How often should I lubricate my rarely used sewing machine?
A well-oiled machine is a happy machine." Like a car, your sewing buddy needs regular TLC. For a rarely used machine, a light coating of oil once or twice a year should keep things running smoothly.
Will lubricating my sewing machine gears fix all problems?
No, lubricating your sewing machine gears won’t fix every issue. While it’s an essential step in maintenance, it’s just one part of keeping your machine happy and healthy.
Can I mix different types of grease for sewing machines?
Imagine baking a cake with mixed-up ingredients – not a great idea, right? Similarly, mixing different types of grease for your sewing machine isn’t recommended, as it can create an inconsistent lubricant that might harm your machine.
Is it necessary to lubricate every single gear and part?
You don’t need to lubricate every single gear and part, just focus on the ones that move and interact with each other. Over-lubricating can lead to gumming and clogging, so stick to the recommended lubrication points.
Conclusion
The secret to a silky-smooth sewing experience is finally in your hands!
Think of lubricating your sewing machine gears properly as giving your trusty machine a spa day – it’ll purr with joy and reward you with years of faithful service.
By mastering the art of lubricating your sewing machine gears properly, you’ll say goodbye to pesky problems and hello to stress-free sewing.


