This site is supported by our readers. We may earn a commission, at no cost to you, if you purchase through links.
That embroidered logo on your favorite jacket doesn’t have to be permanent. Whether you’re staring down an outdated company logo, a monogram that no longer fits your style, or a botched stitching job, you have the power to reclaim your fabric.
Remove embroidery the right way, and you’ll open up a world of possibilities—transforming corporate hand-me-downs into fresh pieces, rescuing thrift store gems from branding purgatory, or simply fixing mistakes before they become permanent eyesores.
The process demands patience and the right tools, but it’s far more accessible than most people think. With proper technique, you can erase unwanted stitches without destroying the fabric underneath, leaving you with a clean canvas ready for whatever comes next.
Table Of Contents
Key Takeaways
- You can remove embroidery from most fabrics using a seam ripper, stitch eraser, embroidery scissors, and tweezers—working from the back protects the garment’s front surface while loosening stitches cleanly.
- Machine embroidery requires aggressive tools like stitch erasers for dense stitching, while hand embroidery comes out easier with gentle seam ripper work and patience.
- Prevent fabric damage by working slowly in small sections, testing your technique on hidden areas first, and matching your removal method to your specific fabric type.
- Steam pressing and strategic patches restore fabric texture after removal, turning needle holes and impressions into opportunities for fresh designs or clean slates.
Why Remove Embroidery?
You don’t have to keep that outdated logo or mistake staring back at you every time you open your closet. Removing embroidery gives you control over your wardrobe and creative projects, letting you transform garments into exactly what you want them to be.
Once you’ve cleared the slate, you can start fresh with machine embroidery digitizing software to create personalized designs that truly reflect your style.
Removing embroidery gives you control over your wardrobe, transforming garments into exactly what you want them to be
Here’s why you might want to grab your tools and reclaim that fabric.
Repurposing or Updating Clothing
Stripping embroidery unlocks fresh design possibilities and breathes new life into old favorites. You can transform dated garments into on-trend pieces through DIY fashion and crafting, aligning them with sustainable fashion principles.
Garment upcycling and clothing restoration preserve perfect fit and fabric quality while reducing textile waste. Master embroidery removal techniques to reclaim control over your wardrobe, turning fabric reuse into garment alteration and repair that reflects your personal style.
Before diving into embroidery removal, it helps to build confidence with simpler repairs like learning to sew a 4-hole button, which teaches you foundational hand-stitching skills that carry over into more advanced restoration work.
Removing Unwanted Logos or Designs
Beyond revitalizing your wardrobe, logo erasure and design reversal let you reclaim fabric restoration from corporate branding or outdated graphics. Removing embroidery from clothing transforms branded uniforms into blank canvases. Use these embroidery removal techniques:
A quality seam ripper designed for quilting makes precise embroidery removal much easier, especially when working around delicate stitching or layered fabrics.
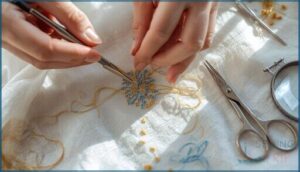
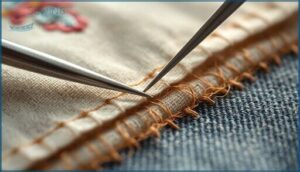
- Slide your seam ripper under stitches for controlled thread removal
- Work from the back to minimize visible damage during stitch removal
- Snip threads in small sections with embroidery scissors
- Pull loosened threads gently using tweezers for complete embroidery stitch removal
Fixing Embroidery Mistakes
Embroidery mistakes don’t have to ruin your project. Start stitch removal by adjusting thread tension on your machine—test on scrap fabric until stitches lie flat.
For embroidery realignment, carefully undo stitches using a seam ripper, then re-hoop your fabric with precision.
Address fabric repair needs by adding stabilizer before restitch. Color matching ensures your stitch correction blends seamlessly, erasing embroidery mistakes like they never happened.
Learning how to use embroidery stabilizer correctly makes the difference between amateur-looking fixes and professional-grade repairs that hold up through washing and wear.
Preparing Fabric for New Projects
Once you’ve mastered thread removal and embroidery removal methods, your fabric’s ready for a fresh start. Fabric preparation begins with prewashing to remove chemicals and shrink material to expected dimensions. Press with a clean iron to smooth wrinkles, then focus on grain alignment using a ruler—straighten edges for precise cuts.
This fabric care ensures weave realignment and stain prevention, setting you up for impeccable fabric repair and restoration.
Keeping your embroidery tools and supplies in top condition—like needles free of burrs and scissors properly sharpened—directly supports your ability to repair delicate fabrics without causing further damage.
Tools Needed for Embroidery Removal
You can’t tackle embroidery removal without the right gear in your hands. The tools you choose depend on whether you’re working with machine or hand embroidery, plus the fabric type you’re dealing with.
Here’s what you need to strip away those stitches cleanly and efficiently.
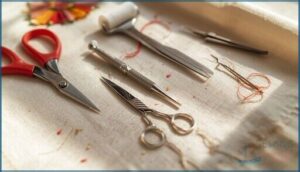
Seam Ripper and Stitch Eraser
Your two must-have embroidery tools are the seam ripper and stitch eraser—one cuts, one erases. A seam ripper slips under thread and slices stitches with its curved blade, perfect for removing stitches from most fabrics.
The stitch eraser uses a small wheel to break fibers without cutting fabric, ideal for dense machine embroidery removal. Both protect fabric care and simplify undoing stitches when you’re reclaiming your gear.
Embroidery Scissors and Tweezers
Fine-tipped embroidery scissors cut threads cleanly without snagging fabric—stainless steel blades stay sharp through repeated use and resist rust. Tweezers grip individual threads you’ve snipped, pulling them free without damaging the weave underneath.
Keep your scissors sharp through occasional honing, and wipe both tools clean after each session. Together, they give you precision control when removing stitches, letting you reclaim fabric like a pro.
Magnifying Lens and Lint Roller
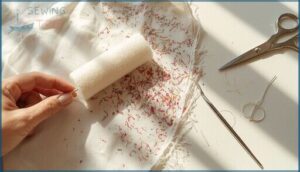
Close inspection transforms guesswork into precision—grab a magnifying lens to spot thread types, adhesive residues, and stitch density before you rip anything out. A lint roller sweeps away stray fibers and backing scraps after you’ve freed the embroidery, keeping your workspace clean and your fabric ready for its next life.
Detail Enhancement Essentials:
- Thread Inspection: Use 2x to 5x magnification to identify polyester versus cotton threads.
- Fabric Analysis: Check for fraying before aggressive removal with your stitch eraser.
- Magnifier Uses: Distinguish backing materials to choose the right embroidery removal approach.
- Lint Removal: Microfiber lint rollers collect loose fibers without abrading delicate weaves.
- Cleanup Step: Confirm backing is fully loosened under magnification before final embroidery eraser passes.
Specialty Tools for Machine Embroidery
Machine embroidery demands serious firepower. Rotary cutters slice through stubborn stabilizer, while needle threaders extract threads without finger cramps. Peggy’s stitch eraser and seam rippers with micro blades demolish dense stitching that laughs at standard tools.
Hooping aids crack open tight embroidery areas, and specialty embroidery erasers handle what hand tools can’t touch. Equip yourself right, and embroidery removal becomes fast work instead of torture.
Step-by-Step Embroidery Removal Methods
Now that you’ve got your tools ready, it’s time to break free from that unwanted embroidery. The method you choose depends on whether you’re tackling machine or hand embroidery, but the core approach stays the same: work carefully, stay patient, and let the right technique do the heavy lifting.
Here’s how to reclaim your fabric step by step.
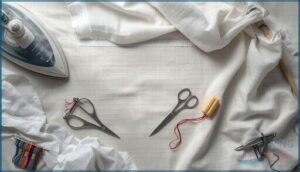
Preparing The Fabric and Workspace
Set yourself up for success by building a proper foundation before you attack those stitches. Your workspace setup and fabric preparation make the difference between clean removal and damaged goods.
Follow these essential steps for fabric stabilization and proper tool selection:
- Iron or steam your fabric to relax fibers and prevent distortion during stitch removal.
- Arrange all tools within arm’s reach—seam ripper, embroidery eraser, scissors, and tweezers.
- Use a clean, flat surface with light-colored protective cloth to inspect stitches clearly.
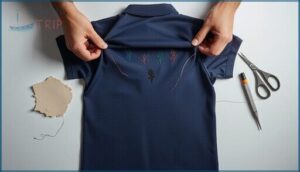
- Turn the garment inside-out and secure it with clamps to keep fabric taut without stretching.
Removing Machine Embroidery
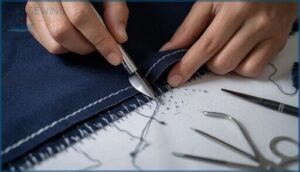
You’ll cut through those tight, industrial-quality stitches faster with a stitch eraser than any seam ripper. Start by flipping the garment inside-out and sliding the eraser’s blade under the thread lines—work in three-inch sections to avoid nicking the fabric.
Snip remaining threads with embroidery scissors, then extract stubborn bits using tweezers. This DIY embroidery removal technique transforms fabric restoration from tedious to doable.
Removing Hand Embroidery
Hand embroidery comes out easier than machine work—you’re dealing with looser stitches that practically beg for freedom. Slide your seam ripper under each stitch and lift gently, working small sections to protect the fabric. Here’s your arsenal for thread removal:
- Sharp embroidery scissors for precise cuts
- Tweezers to extract stubborn bits
- Magnifying lens for pinpoint accuracy
- Fabric stabilization under delicate weaves
- Lint roller for final cleanup
Pull threads slowly to avoid distorting your fabric.
Working From The Back of The Garment
Flip your garment inside-out to attack embroidery from the backside—this keeps the front surface spotless while you work. Embroidery sits thinner on the reverse, making it easier for your seam ripper or stitch eraser to slice through without butchering the fabric.
Tear away any stabilizer before you start, then snip threads systematically using sharp scissors for damage minimization.
Cleaning Up Loose Threads
After the embroidery’s gone, you’ll face a fuzzy battlefield of loose threads clinging to your fabric.
Grab a lint roller and sweep across the surface—it’ll snatch those stray fibers without pulling or snagging. For stubborn ends, use sharp scissors or a seam ripper to trim them flush.
A needle works wonders for tucking in loose ends along the weave, giving you clean fabric ready for whatever comes next.
Preventing and Repairing Fabric Damage
You’ve broken free from the embroidery, but your fabric might show some battle scars. Don’t worry—most damage from removing stitches can be fixed or minimized with the right approach.
Here’s how to protect your fabric during removal and restore it afterward.
Avoiding Holes and Snags
You’re about to reclaim your fabric, but one wrong move can leave holes or snags behind. Minimize damage by controlling thread tension during removal—tight pulls distort the weave and create gaps. Work with fabric integrity in mind:
- Use a seam ripper at low angles to avoid catching underlying fibers
- Support the fabric as you cut to prevent stress on the weave
- Remove stitches in small sections for better snag prevention
Needle holes shrink when you respect the fabric’s natural structure.
Treating Needle Holes and Impressions
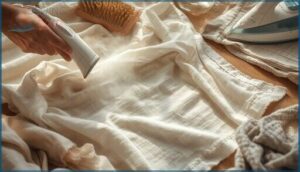
Needle punctures weaken your fabric’s structural weave and leave behind impressions that fight your fresh-start vision. Damp pressing with a low-heat iron relaxes fibers, while steam lifts temporary creases without setting them. Work from the reverse side to lessen visible marks.
| Technique | Purpose |
|---|---|
| Damp pressing | Relaxes compressed fibers around needle holes |
| Steam application | Lifts impressions without permanent setting |
| Reverse-side pressing | Reduces mark transfer to garment front |
Using Patches or Appliqué for Repairs
Strategic patch placement transforms damage into design opportunity. Select patch materials that match your garment’s weight—denim demands heavy canvas, silk needs delicate overlays. Appliqué techniques using fusible adhesive bond patches instantly, while satin stitch secures edges against fraying. Round patch corners to prevent lifting. Edge finishing with zigzag or overlock stitches extends repair longevity across wash cycles.
- Heavy-duty patches anchor high-stress zones without surrender
- Fusible adhesive bonds layers faster than traditional hand-sewing
- Decorative stitching around appliqué edges camouflages repair work
- Fabric compatibility prevents stiff, bulky patches that scream “fix”
- Stretch-friendly patches move with knit garments, not against them
Pressing and Restoring Fabric Texture
Iron with care to reclaim your garment’s original hand. Steam relaxes fibers after embroidery removal, while proper heat settings prevent synthetic shine or cotton scorch. Press lightly, then let fabric rest 24 hours for natural texture restoration. Brush nap fabrics gently to restore pile direction.
| Fabric Type | Heat Setting | Restoration Technique |
|---|---|---|
| Cotton/Linen | Medium-High | Press with steam, air-dry flat |
| Velvet/Corduroy | Low-Medium | Brush nap, vacuum lightly |
| Silk/Rayon | Low | Use pressing cloth, minimal moisture |
| Polyester Blends | Low-Medium | Light steam, avoid pressure |
Tips for Successful Embroidery Removal
Removing embroidery doesn’t have to end in disaster if you match your approach to the fabric you’re working with. The key is knowing when to push forward and when to back off before you cause permanent damage.
Here’s how to navigate different fabrics, pacing, and situations where calling in a pro makes the most sense.
Choosing The Right Method for Fabric Type
Match your fabric to your removal method—it’s the difference between a clean slate and a disaster. Delicate cotton and linen handle gentle snipping and seam ripper work, while knit fabrics demand extra care to prevent runs during thread removal.
Test synthetic blends with solvents on hidden spots first.
Leather needs specialized techniques that skip aggressive embroidery removal tools entirely, protecting the surface from permanent fabric damage.
Working Slowly and Carefully
Rush this job and you’ll shred your fabric before you know it—embroidery removal demands patience, not speed. Take your time with each thread cut, use sharp precision tools like your seam ripper and embroidery scissors, and give yourself proper lighting to spot every stitch.
- Allocate enough time to avoid missing threads during removal
- Keep your tools sharp for better control and fabric handling
- Work in good lighting to identify all embroidery threads clearly
- Take breaks to reduce hand fatigue and maintain steady workflow
- Use tweezers for gentle techniques when extracting stubborn bits
Caring for Delicate or Specialty Fabrics
Silk, lace, and specialty fabrics need extra caution—one wrong move with your seam ripper and you’ll tear right through. Test your removal technique on an inconspicuous area first, then work with a needle instead of scissors to avoid snagging delicate weaves.
Support fragile fabric in an embroidery hoop during removal, and always use cold-water soaks to loosen stabilizer fibers without damaging the textile.
When to Seek Professional Help
Some projects are too risky to tackle alone. Hand your garment to a professional if embroidery spans multiple seams, covers large areas, or if you’re dealing with vintage restoration on delicate fabrics.
Watch for these red flags:
- Previous attempts caused fabric damage or fraying
- The piece is valuable or irreparable if mistakes occur
- You lack specialized equipment for dense machine work
- Emergency repairs demand perfect results
Professional fees beat ruining irreplaceable garments.
Frequently Asked Questions (FAQs)
Can embroidery be removed?
Yes, you can remove embroidery from most woven fabrics with the right tools and careful work. Machine embroidery on stable cotton or denim comes off cleanly, while delicate fabrics need extra caution.
How do you remove embroidery from a sewing machine?
Ever wonder why your sewing machine jams after embroidery removal?
Power off, unplug, then remove the presser foot and needle plate. Use a seam ripper for thread removal, clean the bobbin area, and test stitch for fabric protection and sewing safety.
How do you remove embroidery from a garment?
Turn your garment inside-out and work from the back. Use a seam ripper to slice stabilizer threads, then gently peel the embroidery away. Trim escape threads as you progress to prevent fabric damage.
How to remove embroidery stitches without damaging fabric?
Like defusing a bomb, you need steady hands and the right tools.
Work from the back with embroidery scissors and tweezers, cutting just a few stitches at a time to protect your fabric.
How do you remove embroidery from a jacket?
Flip your jacket inside-out and work from the back. Use a seam ripper to lift threads, then pull them through with tweezers. This fabric restoration approach protects the outer surface during embroidery removal.
What is the fastest way to remove embroidery?
A stitch eraser tears through machine embroidery like butter, making it your fastest option.
Push the eraser over stitches from the back, then pluck loose threads with tweezers for quick, clean removal.
What is the easiest way to remove embroidery?
Work from the back with a seam ripper and tweezers. Cut stabilizing stitches slowly, lift threads carefully, then finish with a lint roller for quick fabric prep and thread removal.
Can embroidery be removed without damage?
You can remove embroidery without damaging fabric by using proper removal techniques and working slowly. Choose tools suited to your fabric type, test methods first, and consider professional help for delicate materials or complex designs.
Will removing embroidery leave holes?
Yes, embroidery removal can leave holes, especially with dense machine stitching.
You’ll minimize fabric damage by working from the back, using proper thread removal tools, and applying heat or patches for effective embroidery repair.
How to remove logo from clothing?
Cut from the back using a seam ripper, then lift threads with tweezers. For dense logos, try an embroidery eraser.
Steam and press afterward to restore fabric texture and minimize visible marks.
Conclusion
Like erasing pencil marks before inking the final draft, learning how to remove embroidery gives you complete control over your wardrobe’s identity. You’ve gained the skills to strip away unwanted logos, rescue old favorites, and prepare fabric for fresh designs.
Work slowly, respect your tools, and trust the process. The needle holes will fade, the threads will vanish, and what remains is yours alone—a clean slate waiting for transformation or simply freedom from someone else’s branding.

