This site is supported by our readers. We may earn a commission, at no cost to you, if you purchase through links.
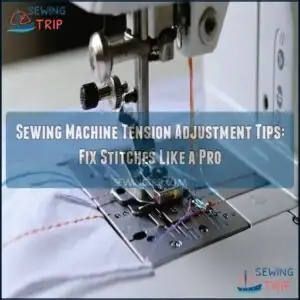
If your stitches look uneven, check the top thread tension dial first—it’s usually the culprit. Too tight? Your fabric might pucker. Too loose? The bobbin thread could show on top.
Make sure the machine is threaded correctly because a simple threading mistake can throw everything off. For bobbin tension, tweak the little screw on the bobbin case, but go slow—small changes make a big difference.
Test on scrap fabric until it’s just right. Want confident, professional-looking stitches? Mastering tension is a game-changer—and it’s easier than you think!
Table Of Contents
- Key Takeaways
- Identifying Tension Issues
- Preparing Your Sewing Machine
- Understanding Your Tension Settings
- Adjusting Top Thread Tension
- Adjusting Bottom Thread Tension
- Troubleshooting Tension Issues
- Advanced Tension Adjustment Techniques
- Fine-Tuning Your Tension Settings
- Frequently Asked Questions (FAQs)
- Conclusion
Key Takeaways
- Check your machine’s threading mistakes first, as most tension problems come from threading mistakes or lint buildup.
- Use the tension dial carefully: turn it clockwise to tighten or counterclockwise to loosen, testing each adjustment on scrap fabric.
- Balance top and bobbin thread tension to prevent loops or uneven stitches—small changes, like turning the bobbins screw slightly, make a big difference.
- Match your tension settings to fabric weight and thread type for smoother stitching; lightweight fabrics need less tension, while heavy ones require more.
Identifying Tension Issues
When your stitches start looking messy or uneven, it’s usually a sign of tension troubles.
Don’t worry—spotting these problems is easier than you think, and a quick fix can get your sewing back on track.
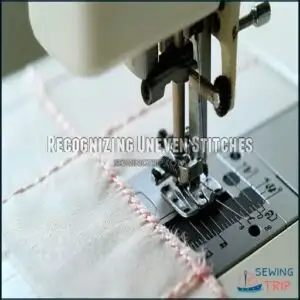
Recognizing Uneven Stitches
Uneven stitches can mess with your project’s look and durability.
Uneven stitches throw off your project’s style and strength—fix them fast to keep things looking sharp and sturdy.
If you spot loops underneath your fabric or notice thread visibility where it shouldn’t be, it’s time for sewing machine tension adjustment.
Watch out for puckered fabric or distorted seams as well.
These sewing tension tips can save your seam integrity. Don’t forget skipped stitches—especially on zigzags—are a surefire hint of tension trouble.
Fix it before your project unravels (literally)!
Signs of Too Much or Too Little Tension
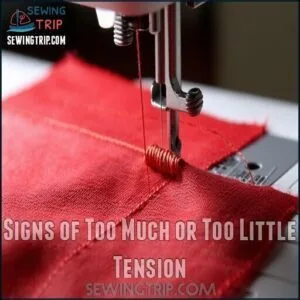
If your fabric looks like it’s auditioning for a ruffle contest, that’s fabric puckering caused by tension that’s too tight.
Thread looping underneath? Tighten your top thread tension.
Skipped stitches or uneven seams? It’s likely top and bobbin tension aren’t balanced.
Thread breakage screams excessive tension, while saggy, loose stitches mean it’s too low.
Remember, sewing tension tips, like carefully adjusting sewing tension dials, can save you from fixing these pesky sewing machine problems!
Common Causes of Tension Problems
Sometimes, sewing machine problems are like mysteries waiting to be solved.
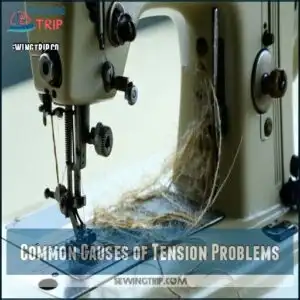
Thread tension problems often come down to three usual suspects:
- Incorrect Threading: If your machine isn’t threaded correctly, stitching chaos is bound to happen.
- Lint Buildup: Dust and lint love to mess with your sewing machine tension, so clean regularly.
- Needle Condition and Thread Quality: Bent needles, damaged bobbins, or bad thread can throw everything off balance.
Tension troubleshooting doesn’t need to be overwhelming.
Keep your machine clean, use quality supplies, and stay alert for little issues to avoid full-blown tension disasters!
Importance of Proper Threading
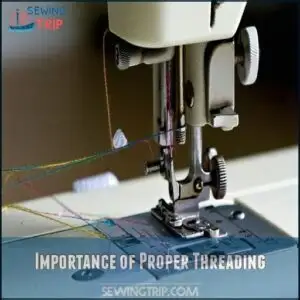
Getting your threading right is like tuning an instrument—it sets the stage for smooth sewing.
Follow the threading path your machine outlines, ensuring the spool placement and thread guides are properly used. Always thread with the presser foot up for even tension.
Double-check bobbin insertion, too; a small hiccup here can wreak havoc.
Proper threading isn’t just a step—it’s the secret sauce to sewing machine maintenance, tension troubleshooting, and perfect thread tension adjustment.
Identifying Tension Problems in Different Fabrics
Spotting tension issues on different fabrics is like being a sewing detective. Signs like fabric puckering, skipped stitches, or uneven seams mean your sewing machine tension isn’t set right for fabric weight or thread type.
Here’s a quick guide to tackle tension problems:
- Lightweight fabrics: Drop tension to 2-3 to avoid puckering.
- Thick fabrics: Set tension higher, around 4-5, for smooth stitches.
- Stretchy fabrics: Lower tension slightly, and don’t pull fabric—let the machine guide it.
- Mismatched threads: Balance top and bobbin tension when mixing thread types.
- Skipped stitches: Check needle size matches fabric, and test stitch length.
Always test on a scrap first—it saves tears and torn seams!
Preparing Your Sewing Machine
Before you start adjusting tension, make sure your sewing machine is ready to go.
A clean, properly threaded machine with the right needle and bobbin can save you from endless frustration.
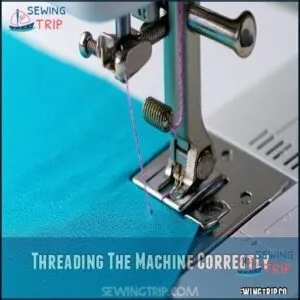
Threading The Machine Correctly
Tension troubles? Start with proper threading! Place the spool correctly, ensuring smooth thread flow.
Guide the thread through the tension discs, thread guides, and up through the take-up lever. Keep the presser foot raised while threading—it prevents tension issues.
Think of threading as your machine’s road trip; follow the path carefully, and you’ll avoid stitch hiccups. Double-check each step for perfection! It’s all about ensuring a smooth process, which is crucial for proper threading.
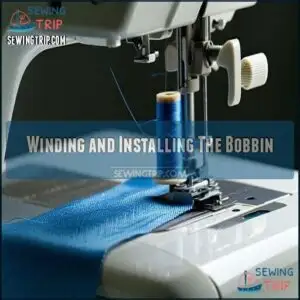
Winding and Installing The Bobbin
The bobbin’s like the sidekick to your top thread—quietly, but vitally, holding everything together.
Proper bobbin winding and installation set the stage for flawless stitching.
Here’s how to nail it every time:
- Keep the thread spool placement steady, ensuring the thread stays taut during winding to avoid weak spots.
- Watch for even bobbin thread quality; no clumps, no gaps—just a smooth, level wind.
- After inserting it, make sure your bobbin rotates clockwise. It’s a small detail, but it makes a big difference.
- Confirm it’s seated properly with that satisfying click when accessing the bobbin case.
A poorly wound or installed bobbin throws off everything, including bobbin tension balance. Take the extra second to double-check, and you’ll save yourself countless headaches when adjusting your bobbin case later on, ensuring a smooth and proper functioning of your sewing machine.
Cleaning The Machine and Bobbin Area
Dust and lint love to sneak into your machine, but regular cleaning keeps things in check.
Dust and lint are sewing’s silent villains—cleaning regularly is your best defense for smooth, frustration-free stitching.
Unplug it, remove the needle plate, and use a small brush to clear feed dogs, the bobbin case, and shuttle hook.
Add a few oil drops to key mechanisms for a smoother run.
This simple sewing machine maintenance improves sewing machine tension and bobbin tension, helping you avoid frustrating troubleshooting.
Make cleaning part of your routine!
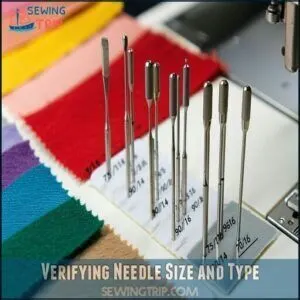
Verifying Needle Size and Type
Picking the right sewing machine needle is like choosing the right tool for the job—it’s all about having the right match.
- 75/11: Perfect for delicate fabrics like chiffon or silk.
- 90/14: Great for everyday cotton or polyester.
- 100/16: The go-to for heavyweights like denim or canvas.
Using the correct needle size, paired with thread matching, guarantees smoother stitches.
Selecting the right sewing machine needles is vital for peak performance. Don’t forget specialty needles for tasks like quilting or embroidery—they can make all the difference!
Checking for Bent Needles or Damaged Bobbins
Keeping your sewing machine in top shape means spotting problems early. A crooked needle or damaged bobbin can send your stitches spiraling into chaos but fixing these is easier than you think.
Grab a white sheet of paper and hold your needle against it. Any bend, even a tiny one, means it’s time for a new one—this is your quick Needle Straightness Check. Don’t forget to inspect the needle eye for wear, which can cause skipped stitches.
Bobbin trouble? Look closely for Bobbin Case Scratches or Burrs and Dents that snag thread. Run your fingernail along the bobbin case edges to feel for rough spots. Check the Bobbin Shape Integrity—any cracks or warping can throw your sewing machine tension out of balance.
A damaged needle may require replacement sewing supplies.
Listening to odd noises during sewing? That’s your machine’s way of saying, “Help!”
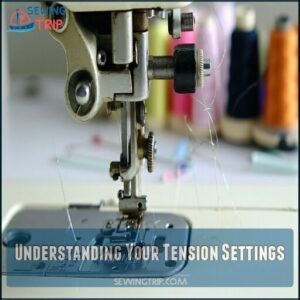
Understanding Your Tension Settings
Your sewing machine’s tension settings control how smoothly the threads come together to make a stitch, and getting them right can save you from some serious stitch disasters.
Don’t worry—it’s easier than it sounds, and a little practice goes a long way, which can help you master the tension settings and avoid stitch disasters.
Top Thread Tension Mechanics
Top thread tension mechanics are like a balancing act—it’s all about harmony.
The tension dial function controls how tight the needle thread flows through the discs and springs. Thread path influence plays a big role too, so verify it’s threaded right.
Adjusting top thread tension depends on fabric type, needle size, and thread weight. Start with a middle setting and test on scrap fabric.
Increasing or decreasing top tension lets you fine-tune stitches, guaranteeing perfection for every project.
Bobbin Thread Tension Mechanics
The bobbin thread isn’t just along for the ride—it’s the backbone of balanced stitches.
To nail bobbin thread tension mechanics, try these steps:
- Start with smooth winding for even thread balance—no bobbin drama!
- Place the bobbin snugly under the spring mechanism in the bobbin case.
- Adjust the tension screw; tighten clockwise, loosen counterclockwise.
- Check tension presets using a gauge; the factory tension preset often works unless you’re experimenting.
Relationship Between Top and Bobbin Tension
Think of sewing machine tension as a balancing act between upper and lower thread tension. They work together like two performers on a tightrope, creating perfect stitch formation right in the middle of your fabric.
If one side pulls too hard, the balance breaks—loops on the underside suggest the upper thread tension is slacking, while loops on top mean the bobbins tension needs tweaking.
The relationship between top and bobbins tension affects everything, from stitch quality to fabric impact. Adjustments should be gradual and tested on scrap fabric.
Addressing Singer sewing machine bobbins tension is vital for balanced stitches. Thread weight also plays a big role—heavier threads may demand more tension, while lightweight threads need less.
Patience and small tweaks are your troubleshooting guide to achieving tension balance.
Default Tension Settings on Sewing Machines
Factory defaults for sewing machine tension set the stage for great stitching.
Typically around 4 or 4.5 on the tension scale, this mid-range tension handles most fabrics and guarantees smooth straight stitches.
If stitches go wonky, reset to this starting point before testing further.
Think of it as your sewing safety net—reliable, balanced, and always ready to support your tension adjustments.
How to Use The Tension Regulating Dial
The tension regulating dial, often near the needle assembly, has numbers to guide you.
Turn it clockwise to tighten, counterclockwise to loosen. Treat it like tuning a radio—small moves matter!
Test stitches on fabric scraps after each adjustment. Watch how the threads behave and aim for balance.
- Dial Location: Near needle assembly.
- Tension Increments: Adjust in small steps.
- Fabric Testing: Always use scraps.
- Clockwise Tightens/Counterclockwise Loosens: Simple tweaks fix tension.
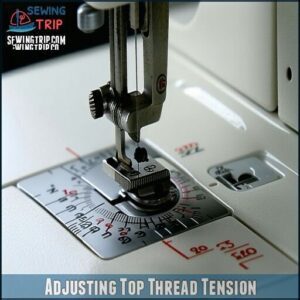
Adjusting Top Thread Tension
Adjusting the top thread tension might sound tricky, but it’s easier than you think.
With just a little twist of the dial and some quick tests, you’ll have your stitches looking perfect in no time.
Locating The Tension Regulating Dial
The tension regulating dial controls your sewing machine tension.
It’s usually on the front or side, marked with numbers or symbols—easy to miss if you’re not looking! Use your machine manual to confirm its exact location.
Dial Type Symbol Location Example
Increasing or Decreasing Top Tension
Now that you’ve found the tension dial, it’s time to make adjustments.
Turn the dial clockwise (toward higher numbers) to increase top thread tension for heavier fabrics. Turn counterclockwise (toward lower numbers) to decrease needle thread tension for lightweight materials.
Make incremental changes (½ number at a time) based on fabric weight and thread type.
Your sewing machine tension should feel just right—not too tight, not too loose!
Testing Tension Settings on Scrap Fabric
Every successful sewing project starts with a quick tension test on scrap fabric identical to your main material.
Run a few test stitches, examining both sides for perfect tension balance.
- Use identical fabric type and thread combination for accurate results
- Look for thread loops or puckering that signal tension problems
- Check stitch appearance from both sides of the fabric
- Make tiny incremental adjustments to your tension dial
- Document working settings for future reference
No guesswork needed—just reliable stitches! Proper tension prevents puckered seams.
It ensures a professional finish with perfect tension balance, and this is crucial for the overall quality of the project.
Adjusting Top Tension for Different Fabrics
Now that you’ve tested your settings, it’s time to match tension to your fabrics.
Different materials demand different approaches:
| Fabric Type | Tension Setting | Needle Size | Thread Type | Stitch Length |
|---|---|---|---|---|
| Lightweight | 2-3 (looser) | 9-11 | Fine | 1.5-2.0 |
| Medium | 4-5 (default) | 12-14 | All-purpose | 2.0-2.5 |
| Heavyweight | 5-6 (tighter) | 16-18 | Heavy-duty | 3.0-4.0 |
| Stretch | 3-4 (moderate) | Ballpoint | Polyester | 2.5-3.0 |
| Specialty | 2-3 (looser) | Specific | Specialty | Varies |
Remember: fabric weight affects how thread passes through—like trying to push string through sand versus air, which is a critical factor in sewing, and understanding this concept is key to achieving the desired outcome.
Tips for Adjusting Top Thread Tension
Moving from fabric-specific adjustments to mastering technique, let’s fine-tune your top thread tension with precision.
When adjusting top thread tension, remember these emotion-saving tips:
- Start small – quarter-turn dial increments prevent frustration
- Test on scraps – avoid ruining your precious project
- Match to materials – heavier fabric weight needs higher tension
- Keep notes – tension documentation saves future headaches
Don’t panic when stitches look wonky—small adjustments work wonders!
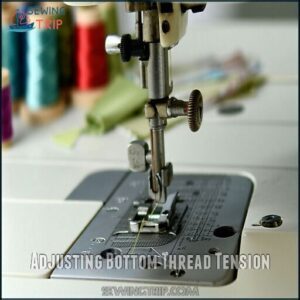
Adjusting Bottom Thread Tension
You’ll need to adjust your bottom thread tension when your stitches look like a roller coaster on the underside of your fabric.
With a tiny turn of that bobbin screw (the one that’s always hiding from you), you’ll transform your sewing from "**what happened here?
" to professional-looking** in seconds.
Accessing The Bobbin Case
The hidden world of your bobbin case isn’t as mysterious as it seems.
To access it, turn off your machine and remove the needle plate cover by sliding or clicking it open.
Gently extract the bobbin case, noting its orientation for reinstallation.
This access point serves double duty—allowing for both tension adjustments and essential cleaning maintenance that prevents many common stitch problems.
Turning The Bobbin Tension Screw
Let’s get started with the precise art of turning the bobbins tension screw – your gateway to perfect stitches.
When adjusting your bobbin tension screw, remember these golden rules:
- Think of it as tuning a delicate instrument – each quarter-turn matters
- Imagine the screw as a clock – right tightens (clockwise), left loosens (counterclockwise)
- Picture yourself as a surgeon making micro-adjustments with steady hands
Always test between adjustments – patience creates perfect stitches!
Increasing or Decreasing Bobbin Tension
Every small turn of the boblin screw creates a world of difference in your stitching results.
Turn clockwise to tighten tension or counterclockwise to loosen it, making just quarter-turn adjustments for precision.
| Adjustment | Effect | When to Use |
|---|---|---|
| Clockwise | Tighter tension | Heavy fabrics, thin threads |
| Counterclockwise | Looser tension | Delicate fabrics, thick threads |
| No adjustment | Factory setting | Standard sewing projects |
Remember, you’ll rarely need to adjust your boblin tension unless you’re working with unusual thread weights or specialty threads.
Testing Bobbin Tension Settings
Testing your bobbin tension out on a journey toward perfect stitches makes all the difference in your sewing projects.
For an accurate bobbin drop test, hold the bobbin case by its thread and watch—it should descend slowly, indicating balanced tension.
- Sew zigzag stitches on fabric scraps to check if threads interlock properly
- Make quarter-turn tension screw adjustments when testing specialty threads
- Compare before-and-after samples to track your progress toward consistent results
Tips for Adjusting Bobbin Thread Tension
Mastering bobbin tension takes a little finesse. Open your bobbin case carefully, checking the setup.
To tweak tension, turn the bobbin tension screw clockwise for tighter tension or counterclockwise to loosen it. Always test changes on scrap fabric first!
For different thread adjustments, fine-tune gradually, noting results. A smooth, balanced stitch means you’ve nailed it.
Remember, small changes make a big impact—no need to overdo it!
Troubleshooting Tension Issues
If your stitches look messy or your thread keeps breaking, it’s time to tackle tension trouble.
Don’t worry—fixing common issues is easier than you think with a few quick checks and adjustments.
Common Tension Problems and Solutions
When tension problems strike—like fabric puckering, thread breaks, or uneven stitches—you’ve got options to fix them fast.
- Re-thread carefully: A missed guide can cause chaos.
- Adjust dials slowly: Gradual tweaks smooth out missteps.
- Stitch test scraps: It’s like a dress rehearsal for your seams.
- Inspect the needle: Bent needles lead to skipped stitches and looping threads.
Sewing machine tension adjustment isn’t magic—just patience, testing, and a bit of troubleshooting know-how!
Identifying Obstructions and Damage
If your machine’s tension issues have you stumped, check for pesky culprits like lint buildup around the bobbin, needle damage, or thread snags.
A tiny nick on the plate can snag threads too. Spool caps should sit snugly, and tension discs must be clean.
Don’t forget: bobbins issues can spiral into bigger sewing machine tension problems. Keep things clean—your stitches will thank you, and remember that tension issues can be resolved with proper maintenance.
Adjusting Tension for Different Threads
Switching threads? It’s like swapping shoes—some fit better than others.
Adjusting tension for different threads starts with the top thread tension dial. Lightweight threads call for lower tension, while heavier or specialty threads may need more.
Test stitches on scrap fabric until you find the right thread tension balance. Don’t forget the bobbin thread tension—it plays a role too!
Matching thread weight with fabric compatibility guarantees your sewing machine tension adjustment keeps everything stitching smoothly.
Using The Correct Needle and Thread
Think of needle size and thread weight as sewing’s dynamic duo—they’ve got to work together.
Choose a needle that matches your fabric type and thread material; otherwise, your stitches will scream trouble.
Heavy fabrics need big, strong needles, while delicate ones call for fine, light needles.
Stick with quality thread brands to avoid constant breakage or snarls.
Using the correct needle and thread guarantees smooth sewing and balanced tension that’ll leave your projects looking flawless.
A proper choice impacts needle thread compatibility and is key to flawless results with balanced tension.
Troubleshooting Tension Issues for Specific Fabrics
Dealing with tricky fabrics? Here’s the lowdown:
- Delicate Fabrics: Lower the tension to avoid fabric puckering or skipped stitches.
- Stretch Fabrics and Knits: Loosen tension slightly for flexible, smooth seams.
- Heavy Fabrics: Tighten tension for strong, clean stitches without thread breakage.
Always test on scrap fabric first—uneven stitches or loose threads can derail any project!
Advanced Tension Adjustment Techniques
When basic tension tweaks aren’t cutting it, it’s time to master some advanced tricks to get your stitches looking flawless.
Don’t worry, with a little practice, even tricky fabrics and thread combinations won’t stand a chance.
Adjusting Tension for Machine Quilting
When tackling machine quilting, tension adjustment can feel tricky.
Use a scrap quilt sandwich to fine-tune quilting tension balance. Keep these steps handy:
- Test stitch on scraps with your chosen quilting thread types.
- Gradually adjust the tension dial for free-motion tension.
- Check both sides for smooth, even stitches.
- Repeat until your stitches look polished without puckering or loops.
Using Different Threads for Top and Bottom
Mixing thread types? Don’t fret—it’s doable! Pairing a thicker top thread with a thinner bobbin thread can spark creativity, especially for decorative stitching or unique color combinations.
But here’s the rub: thread tension balance is key. Adjust the top thread tension and bobbin thread tension slowly, like fine-tuning a guitar.
Test your settings on scrap fabric first until stitches blend seamlessly. Nail this technique, and your sewing machine tension will handle any thread weight or material like a champ!
Adjusting Tension for Heavy or Lightweight Fabrics
Getting the perfect stitch on heavy or lightweight fabrics isn’t rocket science. It’s about balance—like finding the sweet spot between too tight and too loose.
Heavier fabrics, like denim or canvas, need extra support. Increase your sewing machine tension, use a sturdy thread, and consider a larger needle. Pair that with a longer stitch length to avoid jamming your machine.
For lightweight fabrics, such as chiffon or silk, dial down the tension to prevent puckering. Use fine thread and a small needle to keep everything smooth. Your presser foot should lightly guide the fabric without crushing it.
Here’s a quick list:
- Heavy fabrics: More tension, thicker thread, longer stitches.
- Lightweight fabrics: Less tension, thinner thread, shorter stitches.
- Test settings on scraps.
- Adjust as needed for fabric weight, wrinkles, or stretch.
Proper tension adjustment techniques are essential for achieving professional results with various fabrics.
Tips for Advanced Tension Adjustment
Fine-tuning tension settings takes patience, practice, and a little finesse. Start with tension calibration by testing stitch optimization.
For advanced threading, balance different top and bobbin threads carefully. Quilters, slightly lower the tension dial for smoother stitches.
Use the “2-inch bobbin drop test” for accuracy. Advanced tension adjustment blends fabric compatibility and thread balance—think of it like learning the perfect recipe for flawless stitches.
Fine-Tuning Your Tension Settings
Getting your sewing machine’s tension just right might feel like tuning a guitar—small tweaks make all the difference.
With a little patience and a scrap of fabric, you’ll fine-tune those settings for perfect stitches every time.
Testing and Refining Tension Settings
Sew test stitches on scrap fabric to check for balanced tension—stitches should be smooth, with even thread tension balance on both sides.
Use tension testing to tweak settings for fabric compatibility and stitch quality. Keep a tension log to remember what works.
Think of fine-tuning as adjusting a guitar string—small changes lead to perfect harmony.
Regularly cleaning helps prevent tension device malfunctions, which is crucial for maintaining stitch quality.
Making Small Adjustments for Optimal Results
Small tweaks make a big difference when fine-tuning tension settings. Grab some fabric scraps and experiment! Make micro adjustments to the tension dial and see how it affects the stitch balance.
Here’s your quick checklist:
- Sew on a scrap; review stitches.
- Turn the tension dial slightly.
- Test different thread types for consistency.
- Jot down what works—small changes matter.
- Practice for consistent stitch quality.
Tension adjustment tips? It’s almost therapeutic!
Documenting Your Tension
How do you keep tension drama out of your sewing projects? Start a tension logbook! Jot down everything—fabric samples, tension settings, thread weights, stitch lengths, and favorite brands.
Think of it as your Thread Library, a one-stop shop for solving future tension mysteries.
Whenever you test tension on scrap fabric, write quick notes about adjustments that worked. Trust me, it’s a lifesaver when tackling tricky fabrics later. Label your settings with details like "best for quilting" or "lightweight fabrics only."
Documenting tension isn’t boring—it’s like future-proofing your projects. With a solid settings reference, your future projects will run smoother than ever.
Frequently Asked Questions (FAQs)
How do you adjust tension on a sewing machine?
Tinker with tension thoughtfully!
Turn the top tension dial clockwise to tighten, counterclockwise to loosen.
Test on scrap fabric, aiming for balanced stitches.
Start small—about a half-turn—so your stitches don’t go haywire!
When should I adjust my sewing machine tension?
You should adjust your sewing machine tension when stitches look uneven, fabric puckers, or threads bunch up.
Treat your machine like a team—it needs balanced effort from the top and bobbin threads for harmony.
How do you tighten a sewing machine?
To tighten your sewing machine tension, turn the top tension dial clockwise in small increments.
Test stitches on scrap fabric after each adjustment.
Aim for balanced stitches—no loops or puckering.
Think of it as fine-tuning harmony!
What happens if you don’t adjust your sewing machine tension?
If you skip adjusting your sewing machine tension, your stitches might look like a tug-of-war gone wrong—looped, puckered, or loose.
It’s like expecting perfect pancakes without flipping them.
Balance keeps everything smooth!
How do I know if my sewing machine tension is correct?
Picture sewing smooth stitches that vanish seamlessly into the fabric. That’s balanced tension!
Check your stitches: no loops, no puckering, just perfect balance on both sides.
If stitches look wonky, tension needs tweaking.
How do I fix a thread tension problem on a sewing machine?
When threads misbehave, rethread both top and bobbin paths with the presser foot up, then test on scrap fabric.
Adjust the tension dial slowly until stitches balance.
Sometimes, a dirty bobbin area is the culprit!
What should my sewing machine tension be set at?
Set your sewing machine tension around 5 for standard straight stitches.
Adjust slightly higher for thicker fabrics and slightly lower for delicate ones.
Test on scrap fabric first—perfect tension keeps stitches smooth and balanced!
Why is my thread looping underneath?
Your machine’s throwing a tantrum because the top thread tension’s too loose or it’s threaded wrong.
Check the threading path, tighten the tension dial slightly, and watch those loops vanish into smooth stitches.
These steps should resolve the issue with your machine.
Is a higher number tighter tension?
Yes, higher numbers on the tension dial mean tighter tension.
Think of it like tightening a faucet—more tension squeezes the thread tighter.
But don’t go overboard, or your stitches might look like overcooked spaghetti!
How to know what tension to use when sewing?
Imagine sewing silky fabric, and it puckers—annoying, right?
Your tension depends on fabric and thread type.
Start testing scraps.
Lighter fabrics need lower tension, heavier ones need higher. Balance threads until stitches look even.
Balance is key to achieving professional-looking results, so testing is crucial.
Conclusion
Who knew sewing machine tension adjustment tips could save your sanity?
Uneven stitches, puckered fabric, or thread tangles don’t stand a chance when you master tension. From spotting issues to tweaking that top thread dial or bobbin screw, you’ve got the tools to fix stitches like a pro.
Remember, a small change goes a long way, so test on scrap fabric first. Adjust at your own pace and enjoy smoother sewing with every project!

