This site is supported by our readers. We may earn a commission, at no cost to you, if you purchase through links.
For light use, oil it every few months, but if you sew daily or tackle heavy projects, aim for every 8-10 hours of sewing.
Always clean out lint and dust first—no one likes oiling over a mess! Check your manual for specific spots to oil, as every machine’s needs differ.
Avoid over-oiling; a drop or two usually does the trick. And stick to sewing machine oil—no cooking oil experiments here!
If your stitches start skipping or the machine sounds rough, it’s a clear sign it’s time for some TLC.
Table Of Contents
- Key Takeaways
- Why Oil Your Sewing Machine
- Choosing The Right Sewing Machine Oil
- How Often to Oil Your Sewing Machine
- Preparing Your Machine for Oiling
- Applying Oil to Moving Parts
- Oiling The Bobbin Case and Needle Bar
- Common Mistakes to Avoid
- Cleaning Your Sewing Machine
- Maintaining Your Sewing Machine
- Tips for Old or Vintage Machines
- Frequently Asked Questions (FAQs)
- Conclusion
Key Takeaways
- Clean your sewing machine before oiling it to remove lint and debris, ensuring smooth lubrication.
- Oil your machine every 8-10 hours of use for heavy projects or monthly for light use to maintain performance.
- Use only sewing machine oil, not substitutes like cooking or motor oil, to protect and lubricate moving parts properly.
- Apply just 1-2 drops of oil to key areas like the rotary hook, feed dogs, and needle bar, and wipe off any excess to avoid mess.
Why Oil Your Sewing Machine
Oiling your sewing machine keeps its moving parts running smoothly and prevents unnecessary wear.
Keep your sewing machine happy—oil it regularly for smooth stitches, consistent tension, and a longer lifespan!
It’s a simple step that guarantees consistent stitches and a longer lifespan for your trusty machine.
Reduces Friction and Wear
Regular oiling is essential for sewing machine maintenance. It minimizes friction, prevents wear, and keeps your machine running like clockwork. Think of it as giving your machine a tune-up for durability and smooth operation.
- Friction reduction guarantees seamless performance
- Wear prevention protects moving parts
- Oil viscosity supports proper lubrication
- Machine lubrication tips improve longevity
- Part durability reduces costly repairs
Maintains Stitch Quality
Thread tension and stitch consistency can unravel fast without proper machine lubrication.
Picture working on delicate fabric selection, only to face skipped stitches or uneven bobbin alignment—it’s frustrating, right?
Keeping up with oiling frequency guarantees smooth sewing machine maintenance. A well-oiled machine reduces mechanical hiccups, safeguarding needle maintenance and overall performance.
Use sewing machine oil designed specifically for this purpose; it’s a small investment with big rewards. These machine lubrication tips keep every stitch flawless, saving time and effort while guaranteeing your sewing machine delivers perfection every time.
Extends Lifespan
Think of oiling your sewing machine like giving it a spa day—it’s all about pampering for the long haul.
Oiling your sewing machine is like a spa day—pure pampering that keeps it running smoothly for years to come.
Proper lubrication reduces friction, preventing wear and tear that can cut its life short.
Here’s why sewing machine lubrication matters:
- Friction Reduction: Keeps parts gliding smoothly.
- Machine Longevity: Delays costly repairs.
- Durability Tips: Use quality sewing machine oil regularly.
Regular maintenance guarantees your machine stays reliable for years.
Prevents Inconsistent Stitching
Skipping stitches, uneven thread tension, or messy seams? These hiccups often stem from neglecting your sewing machine maintenance schedule.
Oiling sewing machines sharpens needle action, stabilizes thread tension, and guarantees consistent stitch quality.
| Issue | Cause | Solution |
|---|---|---|
| Skipped Stitches | Dry Moving Parts | Apply Sewing Machine Oil |
| Uneven Tension | Poor Lubrication | Adjust Oiling Frequency |
| Snagged Fabric | Sticky Mechanisms | Regular Maintenance |
| Bobbin Issues | Dirty Rotary Hook | Clean Before Oiling |
| Calibration Problems | Lack of Care | Follow Maintenance Schedule |
Don’t let fabric choice or needle selection suffer—keep oiling consistent! Regular maintenance is key to preventing issues like skipped stitches and uneven tension, ensuring your sewing projects turn out perfectly with consistent stitch quality and without bobbin issues.
Choosing The Right Sewing Machine Oil
You can’t just grab any oil off the shelf and expect your sewing machine to run smoothly. Choosing a high-quality, sewing machine-specific oil guarantees proper lubrication without causing damage.
Types of Oil
Choosing the right sewing machine oil is key to keeping things running smoothly.
Among machine oil types, mineral oils and synthetic oils are popular choices, offering different lubricant types with varying oil viscosity.
Always stick to sewing oils designed for your machine. Avoid household substitutes—they’ll gum up the works.
A good sewing machine oil guarantees seamless stitching and long-lasting performance. Using the right sewing machine oil is vital for maintaining your device.
Synthetic Oil Vs White Mineral Oil
Synthetic oil benefits include superior stability and reduced maintenance, making it ideal for heavy-duty tasks.
On the other hand, mineral oil benefits shine in affordability and fabric safety.
Here’s how they compare:
- Viscosity comparison: Synthetic oil handles heat better, while mineral oil suits general use.
- Long-term effects: Synthetic lasts longer, reducing reapplication.
- Oil purity: Both guarantee smooth sewing, but synthetic excels under pressure.
Avoiding Wrong Types of Oil
Using the wrong oil can wreak havoc on your machine. Stick to sewing machine oil—it’s designed for precision.
Avoid cooking oils or motor oils; they’re better suited for frying or engines, not sewing.
Here’s a quick comparison:
| Oil Type | Usefulness |
|---|---|
| Sewing Machine Oil | Perfect for sewing |
| Synthetic Oils | Sometimes compatible |
| Mineral Oils | Limited use |
| Cooking Oils | Causes damage |
| Motor Oils | Too thick |
For superior performance, choosing the right sewing machine oil is vital. Follow your oil application guide for smooth stitching and long-lasting performance!
How Often to Oil Your Sewing Machine
How often you oil your sewing machine depends on how much you use it and the type of machine you have.
Regular oiling keeps it running smoothly and prevents unnecessary wear over time, which is a complete concept in maintaining your sewing machine.
Frequency Based on Usage
Daily use? Stick to a daily oil change schedule.
For weekly use, a weekly oiling keeps things smooth. Light or infrequent use calls for monthly upkeep.
Regularly applying sewing machine oil to moving parts guarantees consistent performance and longevity. Tailor your oil application guide to your project frequency, and always check your manual for specific sewing machine upkeep recommendations.
Oiling After Cleaning
After cleaning, it’s time to oil your machine for peak performance.
Use just 1–2 drops of sewing machine oil—less is more! Focus on key moving parts and follow these steps:
- Check for excess oil and wipe it off.
- Stick to sewing machine-specific oil for safety.
- Inspect post-cleaning to guarantee smooth operation.
Your machine will glide effortlessly!
Daily or Weekly Oiling
If you’re sewing daily, a daily oiling schedule is your best bet to keep your machine purring smoothly.
After about 8–10 hours of use, add a few drops of sewing machine oil to key areas like the feed dogs and bobbin case.
For lighter use, a weekly oiling schedule works perfectly. Always clean first—dust and lint can sabotage lubrication.
Worried about over-oiling risks? Just wipe away any excess. Remember, consistent oiling frequency depends on how much you sew.
Determining usage helps you decide when to oil sewing parts. Master how to oil sewing machines, and enjoy flawless stitches!
To maintain your machine, check the oil change frequency regularly for peak performance.
Preparing Your Machine for Oiling
Before oiling your sewing machine, you’ll need to prep it properly to avoid any mess or missed spots.
Start by unplugging it, removing the thread, and giving it a thorough cleaning to guarantee smooth maintenance.
This will ensure that your sewing machine is ready for oiling and will function properly afterwards.
Unplugging and Removing Thread
Unplugging your sewing machine guarantees safe sewing machine maintenance.
Follow these steps:
- Power Safety: Unplug the machine to avoid accidents.
- Thread Removal: Remove threads carefully to prevent tangles.
- Cable Management: Wrap the cord neatly to avoid tripping.
- Machine Reset: Detach needles and bobbins for a smooth oiling process.
This simple routine preps your machine for care.
Cleaning The Machine
Once unplugged, it’s time for thorough sewing machine cleaning. Use a stiff lint brush for lint cleaning, tweezers for tricky spots, and compressed air for hidden dust. Don’t skip this step—clean parts guarantee smooth lubrication.
Check the table below for quick tips:
| Task | Tool Used | Frequency | Notes |
|---|---|---|---|
| Dust Removal | Compressed Air | Weekly | Avoid blowing lint deeper |
| Lint Cleaning | Stiff Brush | After Each Use | Focus on moving parts |
| Oil Residue Wipe | Soft Cloth | Monthly | Prevents gunk buildup |
| Surface Sanitizing | Mild Cleaner | Quarterly | Keep exterior spotless |
Regular lint brush tools are essential for effective lint removal processes. Keep your machine spotless for flawless stitches!
Removing Presser Foot and Handwheel
Before oiling sewing parts, tackle Presser Foot Removal and Handwheel Removal for better access to mechanisms.
Use a screwdriver and steady hands—no rushing!
- Stay calm: A stuck handwheel isn’t the end of the world.
- Organize screws: Misplaced ones can delay reinstalling components.
- Check alignment: Ensure parts fit smoothly during reassembly.
This step guarantees proper sewing machine care and smooth sewing machine maintenance.
Applying Oil to Moving Parts
You’ll want to focus on oiling the moving parts like the rotary hook, shuttle hook, and feed dogs to keep your machine running smoothly.
Just a drop or two in the right spots can make a big difference in preventing wear and tear.
Oiling The Rotary Hook
Keeping the rotary hook lubricated guarantees smooth stitches and prevents wear.
Use high-quality sewing machine oil with proper viscosity—skip WD-40 or car oil.
A detailed sewing machine oiling guide offers detailed instructions and tips.
Clean the hook first, then apply 1-2 drops directly using precise oiling techniques.
Stick to a frequency of every 8 hours of use or monthly. Avoid over-oiling, as excess can attract grime, affecting performance.
Oiling The Shuttle Hook
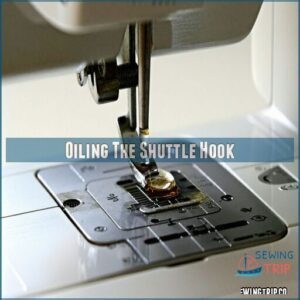
After tending to the rotary hook, it’s time to focus on the shuttle hook—a key piece for smooth stitching. Proper oil application here promotes longevity and consistent performance.
Follow these steps:
- Apply 1-2 drops of high-quality sewing machine oil directly onto the shuttle hook.
- Wipe away excess oil with a clean cloth to avoid mess.
- Check your manual for specific guidance on your machine’s shuttle hook type.
- Stick to your sewing machine oiling schedule for peak hook maintenance.
Regular lubrication tips like these help maintain the right machine oil viscosity, ensuring flawless stitches and reliable rotary care.
Oiling The Feed Dogs
After tackling the shuttle hook, it’s time to focus on the feed dogs—those hardworking teeth that keep fabric gliding smoothly.
Start by cleaning them with a brush to remove lint. Apply a tiny drop of sewing machine oil to each dog oil point for proper feed dog lubrication. This guarantees the feed mechanism stays aligned and prevents wear.
| Task | Tools Needed | Frequency | Purpose | Result |
|---|---|---|---|---|
| Clean Feed Dogs | Stiff lint brush | Before oiling | Remove lint and debris | Better oil penetration |
| Apply Oil | Sewing machine oil | Per oiling session | Maintain sewing alignment | Smooth fabric movement |
| Wipe Excess | Soft cloth | After oiling | Avoid over-lubrication | Clean machine surface |
| Inspect Mechanism | Flashlight | Monthly | Check for damage or wear | Prolongs machine lifespan |
| Review Manual | Machine manual | As needed | Confirm oil change schedule | Proper lubrication routine |
A little oil keeps your feed dog maintenance
Oiling The Bobbin Case and Needle Bar
Keeping the bobbin case and needle bar properly oiled guarantees smooth movement and consistent stitches.
Focus on these areas during maintenance to avoid unnecessary wear and keep your machine running like new.
Removing The Bobbin Case
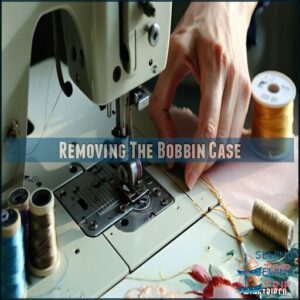
Removing the bobbin case is simpler than it sounds! Locate it in your machine’s underbelly, then gently slide the latch or lever to release it. Got it? Great!
Before reassembly, give it a quick clean to keep your sewing machine maintenance on point. Use a soft-bristled brush or cotton swab for cleaning the bobbin case and spring.
Here’s what to check during cleaning:
- Lint removal: Look for buildup around the bobbin case.
- Bobbin case types: Verify compatibility for smooth operation.
- Bobbin case assembly: Note how it fits for easy reassembly.
- Inserting bobbin case: Practice for seamless stitching later.
Applying Oil to The Outer Ring
With the bobbin case removed, focus on Outer Ring Lubrication for smooth stitching.
Apply a single drop of sewing machine oil to your fingertip and gently spread it around the outer ring. Remember, less is more—over-oiling can create a mess. Wipe away any excess with a lint-free cloth.
Here’s a quick guide:
| Step | Action | Tip |
|---|---|---|
| 1 | Remove bobbin case | Confirm it’s clean first. |
| 2 | Apply oil | Use one drop only. |
| 3 | Spread evenly | Cover the outer ring gently. |
| 4 | Wipe excess oil | Use a lint-free cloth. |
| 5 | Reassemble carefully | Confirm smooth movement. |
Your sewing machine will thank you with flawless performance!
Oiling The Needle Bar
Needle bar lubrication is vital for smooth stitching. This hardworking component deserves proper care to stay efficient.
Follow these steps for ideal needle care:
- Locate the needle bar: It’s the metal rod holding your needle.
- Apply sewing machine oil: Add one drop to the top and bottom.
- Rotate the handwheel: This distributes the lubricant evenly.
- Wipe excess oil: Prevent fabric stains by cleaning spills.
Consistent bar maintenance with proper oil application guarantees your machine’s needle bar operates flawlessly.
Common Mistakes to Avoid
It’s easy to make mistakes when oiling your sewing machine, but a few missteps can cause more harm than good.
By avoiding common errors like using the wrong oil or over-oiling, you’ll keep your machine running smoothly for years.
Using Wrong Type of Oil
Using the wrong oil can wreak havoc on your machine.
Vegetable oil, WD-40, motor oil, silicone spray, and petroleum jelly might seem handy, but they’ll gum up the works and ruin proper machine lubrication.
Always stick to sewing machine oil designed to lubricate sewing machines.
It’s light, clean, and won’t clog moving parts.
Using anything else risks long-term damage, leaving your machine sluggish and far from its smooth, reliable performance.
Over-Oiling
It’s easy to assume that more lubrication equals better performance, but too much sewing machine oil can backfire.
Over lubrication creates an oily mess, attracting dust and lint that clog moving parts.
This buildup can cause skipped stitches, uneven sewing, or even permanent oil damage.
Stick to one or two drops per spot and always wipe away excess oil.
Remember, a well-oiled machine isn’t drenched—it’s just enough to keep things running smoothly, with the right amount of lubrication being key to preventing permanent oil damage.
Neglecting Hard-to-Reach Spots
It’s easy to forget those hidden areas and tight spaces in your sewing machine, but neglecting them can lead to clogged parts and costly sewing machine repair.
Dust, lint, and old oil residue often accumulate in these neglected corners, disrupting moving parts and proper lubrication.
Use a flashlight to locate debris and a small brush or compressed air for thorough cleaning.
Regular attention to these spots is necessary for effective sewing machine maintenance. Skip this step, and you might face stitching issues or even damage down the line.
Proper sewing machine maintenance requires understanding common sewing mistakes to guarantee smooth operation.
Cleaning Your Sewing Machine
Keeping your sewing machine clean is just as important as oiling it. By removing lint and debris regularly, you’ll guarantee smooth operation and protect your machine from unnecessary wear.
Using a Stiff Lint Brush
A quality lint brush with sturdy bristles is a must for sewing machine maintenance.
Choose one with the right size and shape to reach tight spots like the bobbin area, feed dogs, and under the needle plate.
Use effective brushing motions to clear lint without damaging parts.
Regular maintenance includes cleaning the brush itself—just a quick rinse or wipe keeps it ready for action.
Pair this with sewing machine oiling for smooth, reliable performance.
Removing Compact Lint
Compact lint can be stubborn, but removing it’s essential for sewing machine performance.
When your lint brush falls short, switch to more precise lint removal tools like tweezers. Carefully pluck out debris, treating your machine like a delicate puzzle.
For tighter spaces, compressed air or vacuuming lint with small attachments works wonders—just avoid blowing with your breath to prevent moisture.
- Lint Removal Tools: Tweezers for precision.
- Compressed Air: Blast lint from hard-to-reach areas.
- Vacuuming Lint: Use small attachments for deep cleaning.
- Brush Techniques: Tackle visible lint first.
Cleaning The Bobbin Case Area
Lint loves to hide in the bobbin case, but ignoring it can lead to uneven stitches and frustrating thread jams.
Keep your sewing machine running smoothly with proper Bobbin Case Cleaning.
- Blast stubborn lint with compressed air (but avoid blowing debris deeper).
- Brush gently with a lint brush to clear out hidden fibers.
- Vacuum the area for a deeper clean after removing the bobbin case.
A clean bobbin area guarantees smoother stitching, easier Oil Application, and better overall Machine Maintenance, which involves regular bobbin case cleaning.
Don’t let lint sabotage your sewing projects!
Maintaining Your Sewing Machine
Keeping your sewing machine in top shape means regular cleaning and proper oiling. Follow your manual, stay consistent, and you’ll enjoy smooth stitches for years to come.
Regular Cleaning and Oiling
Regular cleaning and oiling are the backbone of sewing machine longevity.
Stick to a sewing machine cleaning schedule to keep it humming.
| Task | Frequency |
|---|---|
| Clean lint | After each use |
| Oil moving parts | Every 8 hours |
| Deep clean | Monthly |
| Routine checks | Bi-weekly |
Don’t skip oil changes—machine lubrication guarantees smooth stitches.
A little effort in sewing maintenance goes a long way toward keeping your machine happy!
Checking The Manual
Your sewing machine manual isn’t just a booklet—it’s your maintenance lifeline.
It holds essential manual checks, oil guidelines, and sewing basics suited to your machine’s unique needs.
Skimming it could save you hours of frustration and costly repairs. Each model has quirks, so don’t rely on generic advice—trust the user instructions.
From machine specs to cleaning tips, the sewing machine user manual guarantees proper care.
Keep it handy for regular sewing machine maintenance or when scheduling a sewing machine service. Your stitches (and sanity) will thank you!
Learning Machine Features
Understanding your machine’s features boosts confidence and precision.
- Bobbin mechanism: Learn smooth winding for even stitches.
- Feed dog function: Confirm fabric feeds evenly without jams.
- Tension assembly: Adjust for balanced stitches.
Explore the stitch length dial to customize patterns and the presser foot lever for fabric control.
Pair these with regular maintenance—like cleaning and applying sewing machine oil—to keep moving parts in top shape.
Check your sewing machine manual for specifics!
Tips for Old or Vintage Machines
Caring for old or vintage sewing machines takes a bit more attention, but it’s worth it to keep them running smoothly.
Use the right oil and handle parts gently to avoid unnecessary wear or damage.
Taking Extra Care
Older sewing machines deserve extra TLC to keep them humming.
Dust loves settling in their nooks, so clean them often with soft brushes to avoid scratches.
A detailed vintage sewing machine repair guide offers further assistance.
Stick to a strict sewing machine lubrication schedule—every 4-6 hours of use is ideal.
Use sewing machine oil sparingly and focus on moving parts for smooth operation.
Think of these vintage machines as heirlooms; with proper machine lubrication, regular maintenance, and care, they’ll reward you with consistent thread tension and beautiful stitches.
Using The Right Type of Oil
Finding the right lubricant choice for your vintage sewing machine is essential for smooth operation and long-term sewing machine health. Older models often need oil with a higher oil viscosity to handle their metal components.
Here’s how to pick the perfect match:
- Oil Types: Use sewing machine oil designed for vintage models.
- Synthetic Oil or Mineral Oil: Both work well, but synthetic options resist gumming better.
- Manufacturer Recommendations: Always follow their guidelines.
Store your oil properly in a cool, dark spot, and stick to your sewing machine lubrication schedule to keep your machine running like a dream.
Avoiding Damage
When caring for vintage machines, balance is key to avoiding damage.
Over-oiling can lead to messy oil leaks and even part failure, while skipping oiling risks overheating and wear.
Stick to sewing machine oil—never car oil or WD-40—for proper lubrication.
Harsh cleaners? They’re a no-go, as they can harm delicate parts.
Follow a consistent sewing machine lubrication schedule and prioritize regular maintenance.
Treat your machine like a classic car, and it’ll reward you with lasting sewing machine health.
Frequently Asked Questions (FAQs)
How often should a sewing machine be oiled?
You should oil your sewing machine before every project if used frequently, or once a month for light use.
Heavy users may need to oil after hours of operation.
Always check your machine’s manual, and remember to oil is crucial for maintenance.
How often should you lubricate a sewing machine?
You should lubricate your sewing machine based on use.
Frequent users should oil it weekly or before projects, while occasional users can aim for monthly.
Follow your manual—modern machines often don’t need as much oiling.
How often should you clean your sewing machine?
Think of your sewing machine as a car—it needs regular cleaning to run smoothly.
Clean it after every 8-10 hours of use or whenever lint builds up.
A clean machine guarantees flawless stitches!
Is it necessary to oil a sewing machine?
Yes, sewing machines need oiling to keep parts moving smoothly and prevent wear.
Frequency depends on usage and model, but always follow your manual.
Skip it for sealed mechanisms or risk creating a greasy disaster!
Why does my sewing machine work better after oiling?
Like a well-oiled bicycle chain, your sewing machine runs smoother after oiling because friction is reduced.
The oil keeps moving parts gliding effortlessly, prevents wear, and guarantees consistent stitching, making your projects stress-free and precise, with friction reduced.
What should I do if my sewing machine is oily?
Wipe off excess oil with a clean, lint-free cloth to avoid staining fabric.
Check for over-oiling signs like drips or sluggish movement.
Use less oil next time—just a drop or two per spot, this is a key instruction to follow for optimal results.
How do I know if my sewing machine needs oil?
When your machine sounds like a squeaky door or stitches get uneven, it’s begging for oil.
Check the manual for oiling points, and if parts feel stiff or sluggish, it’s time.
What are the guidelines for oiling the sewing machine?
Start by cleaning your sewing machine.
Then apply 1-2 drops of sewing machine oil to moving parts.
Focus on rotary hooks and avoid over-oiling.
Use only machine-specific oil for superior performance and longevity.
How often should a sewing machine be serviced?
You should service your sewing machine annually if you sew often.
Light use may only require servicing every 2-3 years.
Regular maintenance catches hidden issues early, ensuring smoother stitches and a longer-lasting machine.
At what interval should you oil your machine?
Think of your sewing machine as a bike—it runs smoother with the right oil.
Regular users should oil every 5–10 days of use, while infrequent sewers can aim for once a month.
Conclusion
Did you know a well-maintained sewing machine can last over 25 years?
Oiling your machine regularly is key to achieving this, whether it’s every few months for light use or every 8-10 hours of heavy sewing.
Clean out lint first, follow your manual, and use proper sewing machine oil to avoid mistakes.
Skipping oil maintenance can lead to rough sounds or skipped stitches, so stick to a schedule. A little care goes a long way!
- https://www.thecraftygentleman.net/2020/04/14/how-to-clean-a-sewing-machine/
- https://www.reddit.com/r/sewing/comments/xlw7hw/how_many_times_do_you_oil_your_sewing_machine/
- https://leatherworker.net/forum/topic/9390-how-often-do-you-oil-the-shuttle-hook-area-of-your-machine/
- https://forum.missouriquiltco.com/forum/we-don-t-know-much-but-we-know-quilters/general-discussion/58676-how-often-do-you-oil-your-sewing-machine
- https://www.quora.com/How-often-should-I-oil-my-Singer-sewing-machine


