This site is supported by our readers. We may earn a commission, at no cost to you, if you purchase through links.
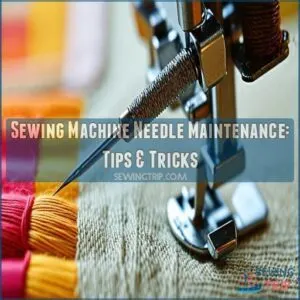
Regularly change needles, ideally after sewing through 2-3 bobbins, since dull needles mess up stitches and break threads.
Think of changing them like replacing your toothbrush—easy to forget but oh-so-important.
Store needles in a labeled container to avoid the infamous "needle in a haystack" scenario.
If your machine starts acting moody with skipped stitches or broken threads, swapping needles is the first trick up your sleeve.
Stay sharp in needle care, and your sewing projects will thank you with perfect seams.
Table Of Contents
- Key Takeaways
- Choosing The Right Sewing Machine Needle
- Importance of Regular Needle Replacement
- Basic Needle Care and Handling
- Specialty Needles for Specific Fabrics
- Daily and Weekly Sewing Machine Maintenance
- Troubleshooting Tension Issues
- Essential Tools for Sewing Machine Maintenance
- Creating a Maintenance Routine
- Professional Servicing and Repair Considerations
- Frequently Asked Questions (FAQs)
- Conclusion
Key Takeaways
- Change your sewing machine needle regularly, ideally after 8-10 hours of use, to prevent skipped stitches and fabric damage.
- Match the needle size and type to your fabric and thread for optimal stitching and to avoid breakage.
- Store needles in labeled containers to keep them organized and easily accessible, reducing the risk of mixing them up.
- Clean needles with a soft brush or cloth after each project to remove lint and prevent stitching issues.
Choosing The Right Sewing Machine Needle
Choosing the right sewing machine needle is like picking the perfect ingredient for your favorite recipe—it makes all the difference.
By matching the needle to your fabric and thread, you’ll prevent those pesky skipped stitches and keep your projects looking fabulous.
Needle Anatomy and Point Types
Think of sewing machine needles as tiny warriors with distinct anatomy.
The needle shank anchors securely, while the needle blade cuts through fabric with precision.
At the end, the needle butt guarantees a snug fit in your machine.
Understanding these bits helps avoid a sewing disaster. Here’s a quick rundown:
- Shank: Anchors needle.
- Blade: Slices fabric.
- Butt: Guarantees fit.
Types of Sewing Machine Needles
When you’re stitching, the variety of sewing machine needles keeps everything running smoothly.
Just like picking the right tool for a job, each needle type—universal, ballpoint, or sharp—has its superpower.
With different needle points and materials, you’re ready for any challenge.
Brands offer versatile choices, making the sewing experience as smooth as that first sip of coffee.
Consider Fabric Weight When Selecting Needle Size
Finding the right needle size means matching it with your fabric’s weight.
A thinner fabric, like voile, needs a fine needle, while canvas demands something sturdier.
Imagine using a straw to dig a hole; it just won’t cut it!
When choosing the right sewing machine needle, consider the type of fabric you’re working with, such as cotton fabric guide, to avoid skipped stitches and fabric damage. Refer to a fabric weight chart and needle size guide to avoid skipped stitches and fabric damage.
Consider Thread Weight and Type When Choosing Needle
Fabric weight‘s just the start; now consider thread weight and type!
Each thread brings its own quirks to sewing.
Matching the right thread weight with the correct needle size is key, as outlined in the sewing machine needle types guide.
Here’s a quick list to keep things running smooth:
- Thicker threads need larger needles to prevent breakage.
- Delicate threads prefer smaller needles for reduced tension.
- Polyester threads, tough as nails, work well with universal needles.
Find your match and tackle sewing challenges head-on!
Needle Size Recommendations by Fabric Type
Choosing the right needle size for your fabric type is like finding the perfect puzzle piece for your sewing project.
Light fabrics need smaller needles; think of silk with a 70/10 size.
Heavier fabrics like denim require larger needles, such as a 100/16.
Grab a needle size chart to keep stitch quality in check and your projects purring smoothly.
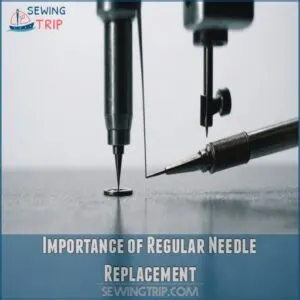
Importance of Regular Needle Replacement
You’ll find that using the correct needle type for the fabric, such as a sharp needle for woven fabrics, is crucial check needle selection guidelines. You’ll find that regularly replacing your sewing machine needle is important for preventing frustrating problems like broken threads and skipped stitches.
Think of it as giving your sewing machine a little TLC – a fresh needle helps things run smoothly and prevents those projects from turning into miniature disasters!
Signs of a Worn or Damaged Needle
Here’s a quick tip: if you hear popping sounds or see broken threads, your needle might be telling you it’s time for a replacement.
Skipped and uneven stitches, or larger-than-necessary fabric punctures, are the needle’s way of waving a red flag.
A dull or bent needle can seriously disrupt your sewing flow, so keep an eye—and ear—out for these signs.
Consequences of Not Replacing Needles
Ignoring the signs of a worn needle is asking for trouble.
Skipped stitches and broken thread become the norm, dancing on your last nerve.
Not replacing your needle every 8 hours of sewing, as recommended, can lead to more frequent Stitch Quality Issues.
That dull needle isn’t just lazy; it bullies your fabric, causing damage and even needle breakage.
Before you know it, machine damage lurks around the corner.
Treat your needle like a tire—replace before the blowout.
Recommended Replacement Frequency
Think of your sewing needle like a car tire—it won’t last forever!
Needle lifespan is roughly 8-10 hours of sewing, affected by your project frequency and fabric type.
If you switch projects or fabrics often, replace more frequently.
Your sewing habits can shorten or extend this, so regularly swap needles to prevent frustration and faulty stitches.
Basic Needle Care and Handling
To keep your sewing machine needles in tip-top shape, store them in labeled containers to avoid mix-ups and accidental pricks.
A quick clean after each project makes sure they’re not harboring unwelcome fabric fuzz or lint, so you can sew without a hitch!
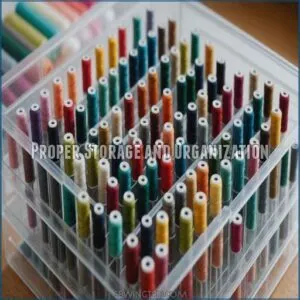
Proper Storage and Organization
Imagine your sewing space as a finely tuned orchestra, with needle organizers leading the symphony.
Keep your needles in check with these friendly tips:
- Needle Organizers: Sort by size and type.
- Labeled Boxes: Mark for quick find.
- Drawer Dividers: Prevent needle tangles.
- Storage Containers: Protect from dust and damage.
Organized needles, fewer mishaps!
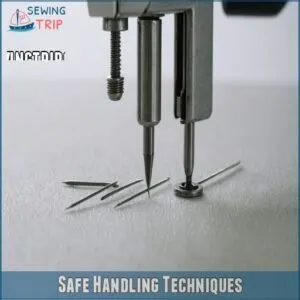
Safe Handling Techniques
Handling sewing machine needles safely is a breeze with a few tricks up your sleeve.
Grip needles firmly to prevent them from slipping.
Always keep them in a dedicated safety needle holder after use to prevent injuries.
Use a needle threader to save your eyes—and temper—from squinting.
Dispose of dull needles responsibly; no one likes surprise pin pricks!
Cleaning and Disinfecting Needles
After each sewing session, your needles deserve some TLC.
Cleaning and disinfecting them isn’t just about keeping them spick and span; it’s about extending their life and preventing nasty infections.
Here’s how:
- Use a soft brush to remove lint.
- Wipe with a slightly damp cloth.
- For stubborn residue, use a cotton swab dipped in rubbing alcohol.
- Store needles in a designated case.
- Remember, needle sterilization is key!
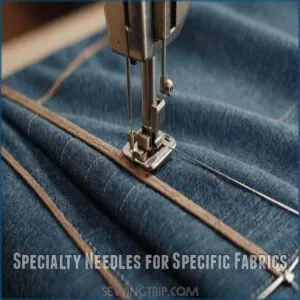
Specialty Needles for Specific Fabrics
Choosing the right needle for your fabric isn’t just a stitch in time, it can save your entire project from unraveling chaos.
From machine embroidery needles to ballpoint and sharp varieties, it’s essential to choose the right one for your project, considering factors like needle sizes and coatings. Each is designed to keep your work smooth and seamless, even if your last attempt at sewing looked more like abstract art than a straight line.
Machine Embroidery Needles and Their Uses
When you’re diving into machine embroidery, knowing your needles can make all the difference!
Embroidery needles come in different types and sizes, perfect for intricate designs on various fabrics.
| Needle Type | Size Guide | Fabric Types |
|---|---|---|
| Embroidery | 75/11 | Lightweight cotton |
| Tapestry | 80/12 | Linen |
| Microtex | 60/8 | Delicate silks |
Keep them sharp and ready, and your stitches will shine!
Ballpoint Needles for Knit Fabrics
Ballpoint needles are perfect for knit fabrics, as they effortlessly glide between fibers without snagging. Their rounded tips prevent damage and skipped stitches, making them a favorite for stretchy materials.
When working with various fabrics, it’s essential to select the right needle type, such as universal needles for basic projects, to ensure smooth sewing. Consider using a needle size guide to match your fabric type.
Embrace the ballpoint’s benefits for smooth seams—the ideal companion for sewing anything from t-shirts to cozy sweaters!
Sharp Needles for Thicker Fabrics
Crafting with denim or leather? You’re in the thick of it—literally. Sharp needles are your go-to for these robust fabrics, sliding through like a hot knife through butter.
Avoiding skipped stitches is simple: match needle size to fabric thickness. A sharp 90/14 or 100/16 needle pairs perfectly, ensuring your project doesn’t unravel.
Keep those stitches smooth and strong!
Daily and Weekly Sewing Machine Maintenance
Keeping your sewing machine in top shape is as satisfying as a perfectly stitched seam, and it starts with removing lint and dust daily.
Weekly, show your machine some love by cleaning the bobbin case and oiling moving parts to guarantee smooth operation and prevent stitching hiccups.
Removing Lint and Dust
Regular cleaning can prevent issues like a loose needle clamp screw. Keeping your sewing machine lint-free is like giving it a fresh start.
Use a lint brush to gently sweep away fabric fuzz.
Don’t forget to dust those hard-to-reach spots.
Make this part of your weekly routine to avoid lint buildup.
It’s akin to brushing your teeth—skipping it just leads to trouble down the line!
Cleaning Bobbin Case Area
Regular bobbin case cleaning prevents those frustrating jams.
Grab a small brush and gently sweep away lint and threads.
For stubborn bits, use compressed air or a cotton swab dipped in rubbing alcohol.
Do this weekly; it’s a small step for huge results!
A clean bobbin case makes for smooth sewing and prevents bobbin case problems.
Remember, a happy bobbin means happy stitching!
Oiling Moving Parts
Your trusty sewing machine craves some love, and oiling moving parts is key. Here’s a quick rundown:
- Types of Oil: Stick to sewing machine oil.
- Frequency: Weekly oiling keeps it humming.
- Techniques: Apply a drop where parts meet.
- Storage Tips: Cool, dark places are best for oil.
- Safety Precautions: Avoid over-oiling.
Troubleshooting Tension Issues
When your sewing project’s smooth sailing takes a nosedive into the chaotic world of tension troubles, it’s time to tackle the problem head-on.
With a few tweaks and adjustments, you’ll restore harmony to your stitches, avoiding the stress of puckered seams and broken threads.
Identifying Tension Problems
Struggling with uneven stitches or thread breakage? That’s your sewing machine’s way of saying, "Hey, check my tension!"
Puckered fabric might point to a bobbin tension twist, while top tension tantrums can cause threading trouble.
Here’s a quick table to help decode these mysteries:
| Issue | Likely Cause |
|---|---|
| Uneven Stitches | Bobbin Tension |
| Thread Breakage | Top Tension |
| Puckered Fabric | Overall Tension |
Sort these issues to keep smooth sewing!
Step-by-Step Tension Adjustment Process
You’ve spotted the tension problem, now what? Adjusting your sewing machine’s tension is like tuning a guitar.
Start with the tension dial:
- Turn in small steps: Tiny changes make a big impact.
- Check the top thread: Make sure it flows smoothly.
- Test bobbin tension: Shouldn’t be too tight.
- Sew samples: Inspect stitch quality.
Happy stitching!
Common Tension Issues and Solutions
Mastering tension adjustments is half the battle, but let’s face it—common issues like thread breakage or puckered fabric can still sneak up on you.
Uneven stitches often stem from incorrect bobbin tension or needle size mismatches.
Keep an eye on these quick fixes, and remember, sometimes it’s just about finding that sweet spot with a simple tweak.
Essential Tools for Sewing Machine Maintenance
When maintaining your sewing machine, having the right tools is like having your own little repair kit at the ready.
Lint brushes, sewing machine oil, and a trusty screwdriver or Allen wrench are essential companions in keeping your machine running smoothly, much like a good friend who always knows when to hand over the chocolate during a crisis.
Lint Brushes and Cleaning Cloths
Your sewing machine’s best friend? A good lint brush and cleaning cloths! Keeping your machine clean is key to smooth sewing. You’ll need the right tools for the job. Investing in a high-quality sewing machine brush can make all the difference in maintaining your machine’s performance.
- A soft-bristled brush tackles those hard-to-reach spots.
- Microfiber cloths are perfect for wiping down surfaces.
- Lint-free cloths prevent lint from getting back into the machine.
Proper storage keeps your cleaning supplies ready for action.
Regular cleaning prevents build-up and keeps your sewing machine running smoothly.
Sewing Machine Oil and Lubricants
When you’ve tackled lint, it’s time to grease the wheels—literally!
The right sewing machine oil can make your machine purr.
Look for low-viscosity oils designed specifically for sewing machines, ensuring smooth movement without sticky residue.
Keep your oil in a cool, dry spot to maintain its magic.
And if you’re feeling adventurous, explore eco-friendly oil alternatives!
Screwdrivers and Allen Wrenches
Imagine this: a sewing machine that runs smoothly because you’ve got the right tools.
Screwdrivers and Allen wrenches are like trusty sidekicks.
They help tighten bolts and fix loose screws, preventing pesky jams.
Having the right toolset, including those found in common sewing machine repair tools, can make all the difference in getting the job done.
Ever struggled with a repair?
Grab various screwdriver sizes and practice on those tricky spots.
It’s like giving your machine a well-deserved tune-up!
Creating a Maintenance Routine
Establishing a maintenance routine for your sewing machine isn’t just practical—it’s an art form that keeps your creations flowing smoothly.
By regularly cleaning, oiling, and giving proper attention to your needles, you’ll prevent hiccups like thread jams or fabric tears, all while ensuring your machine runs like a well-oiled sewing wizard.
Scheduling Regular Cleaning and Oiling
Think of regular sewing machine cleaning and oiling as routine car maintenance—skip it, and trouble may loom.
Set a weekly cleaning schedule to tackle lint build-up, while monthly oiling keeps parts running smoothly.
Use sewing machine oil, applying it sparingly to moving parts.
This simple preventative care guarantees your machine purrs like a kitten, avoiding costly repairs down the road.
Incorporating Needle Maintenance
You’ve got your cleaning and oiling routine set; now, let’s weave needle maintenance into the mix.
Keep an eye on needle wear to prolong their lifespan.
Regularly inspect them for dullness or bends.
A quick needle cleaning after each project helps prevent issues.
Remember, timely needle replacement is your stitching’s best friend—avoid turning your fabric masterpiece into Swiss cheese!
Tips for Staying Organized
Your sewing space’s organization is key! Designate a specific spot for needle storage; a labeled container prevents mix-ups.
Keep your work area setup tidy; a clean space means fewer distractions.
Proper tool organization saves you time searching.
Maintain a supplies inventory to avoid mid-project surprises.
Smart project planning minimizes chaos and maximizes efficiency.
A well-organized sewing area is a happy sewing area!
Professional Servicing and Repair Considerations
When your sewing machine needles start playing a symphony of skipped stitches or making loud clunking noises, it might be time to call in the pros.
Finding a qualified technician and preparing your machine can be as easy as pie—just remember to clean up those stray threads that your cat didn’t claim first!
Signs Your Machine Needs Professional Service
Ignoring telltale signs like loud noises or thread jams could turn your sewing project into a comedy of errors.
When your machine starts skipping stitches, producing uneven stitching, or parts mysteriously become broken, and especially if you notice issues like thread tension troubles, it’s time to call in the pros.
Here’s when to raise the red flag:
- Persistent thread jams
- Loud, unusual noises
- Consistent, uneven stitching
Finding a Qualified Technician
Finding a technician isn’t as scary as it sounds. You want someone with good referrals, stellar reviews, and solid experience.
Check their certifications: it’s like a badge of honor proving they’re more than your average Joe.
To make sure they’re up-to-date on the latest needle sizes, check out a trusted resource for sewing machine needles, which can help you understand the different types and sizes available.
Remember, even the best machines need a bit of TLC, just like relationships!
| Criteria | Why It Matters | Tips |
|---|---|---|
| Referrals | Word-of-mouth trust | Ask fellow sewing enthusiasts |
| Reviews | Honest experiences | Check online forums and feedback |
| Certifications | Proof of expertise | Look for industry-recognized badges |
Preparing Your Machine for Service
Preparing your sewing machine for service is like giving your trusty car a little TLC. Here’s a quick service checklist:
- Machine cleaning: Wipe off dust bunnies and stray threads.
- Troubleshooting tips: Jot down any odd noises or skipped stitches.
- Safety precautions: Unplug to avoid surprises.
- Machine history: List past repairs to clue in your technician.
Frequently Asked Questions (FAQs)
How do you change needles on a sewing machine?
Let’s get this done!
First, unplug your machine.
Then, loosen the needle clamp screw, gently remove the old needle, and insert the new one, flat side back, tightening the screw firmly.
Easy peasy!
How to maintain a sewing machine?
Regularly clean your sewing machine by removing lint and dust, oiling moving parts weekly, and ensuring tension is balanced.
Simple maintenance keeps your machine running smoothly and extends its lifespan.
Replace needles and check cords for damage.
Why is changing a sewing machine needle important?
Changing your sewing machine needle regularly prevents stitching disasters like thread breaks or fabric snags.
A fresh needle guarantees smooth stitching and protects your fabric.
It’s like tuning a guitar—essential for hitting the right notes.
How often should you replace your sewing needles?
Replace your sewing machine needle after 8-10 hours of use or with each new project.
A dull needle’s like a dull comedian—it won’t get the job done, causing skipped stitches or fabric damage.
When should I change my sewing machine needle?
Think of your sewing machine needle like a bicycle tire—it needs changing after every 8-10 hours of use, each new project, or if stitches skip, fabric snags, or you hear unsettling noises during sewing.
Are low quality sewing machine needles bad?
You might think cheap sewing machine needles save money, but they often cause skipped stitches, thread breaks, and fabric snags.
Investing in quality needles guarantees smoother sewing, fewer headaches, and a happier you at your machine!
How do you take care of a sewing needle?
Handle sewing needles with care: store them in labeled containers, keep them clean, and swap dull or bent needles regularly.
Wiping them with a soft cloth keeps them sharp—think of it as treating them like little fabric piercing swords!
How often should you change your machine needle?
Don’t let dull needles ruin your masterpieces!
Replace your sewing machine needle every 8-10 hours of sewing, or at least with each new project.
A sharp needle prevents skipped stitches and fabric tears.
What is the life of a sewing machine needle?
A sewing machine needle typically lasts about 8-10 hours of active sewing.
Consider replacing it if you hear popping sounds, experience skipped stitches, or see fabric snags to keep your projects running smoothly.
Should I oil my sewing machine?
Oiling your sewing machine isn’t just a chore; it’s the secret sauce keeping your stitches smooth and your machine purring like a contented cat.
Regular oiling prevents jams, reduces noise, and extends your machine’s life.
How to identify a bent sewing needle?
To avoid using a bent sewing needle, make sure to match needle size to thread and fabric thickness. Spot a bent sewing needle by rolling it on a flat surface.
Watch for wobbling—it’s like a mini seesaw.
A bent needle can lead to stitching troubles, so keep your stitching smooth by replacing it pronto.
What causes needle to break frequently?
Imagine a needle apocalypse: frequently breaking needles often result from using the wrong type or size for your fabric, sewing over pins, or misaligned presser foot.
It’s your machine’s plea for attention and proper maintenance!
Are some needles better for metallic threads?
When using metallic threads, go for needles labeled as "metallic" or "topstitch."
They’ve larger eyes and special coatings to reduce friction and prevent breaking.
This keeps your sewing smooth and avoids frustrating metallic thread snags.
How to clean needles without specialized tools?
Wipe sewing machine needles with a soft cloth soaked in rubbing alcohol.
This simple method removes residue and disinfects effectively.
If alcohol’s not handy, a bit of vinegar on the cloth does the trick too.
Can incorrect needle cause skipped stitches?
A dull or bent needle’s a stitch-wrecker. Skipped stitches? It’s likely a culprit. Replace it; smooth sailing follows. Trust me, your fabric will thank you.
Conclusion
When you’re giving your sewing machine "the royal treatment," focusing on sewing machine needle maintenance is very important.
A fresh needle guarantees your stitches stay loyal and true, avoiding those pesky mishaps.
Remember, regularly tending to your needles is like offering a spa day—they’ll serve you better, stitch after stitch.
Stay organized, replace them often, and your sewing projects will thank you with flawless seams, making every creative endeavor a pleasure rather than a pain.


