This site is supported by our readers. We may earn a commission, at no cost to you, if you purchase through links.

Start by choosing the right needle and thread combination for your fabric – they’re like dance partners, they need to match!
Keep your machine clean by removing lint after each use, and don’t forget to change needles regularly.
Your thread tension should be just right – not too tight, not too loose.
Always use quality thread and make sure you thread it correctly through all guides.
When fabric feeds smoothly and stitches look balanced, you’re in control.
There’s nothing quite like the satisfaction of a perfectly running machine.
Table Of Contents
- Key Takeaways
- Common Causes of Sewing Machine Jams
- Importance of Proper Threading
- Choosing The Right Needle
- Presser Foot and Fabric Considerations
- Maintaining a Clean Machine
- Troubleshooting and Fixing Jams
- Preventing Future Jams
- Feed Dog Issues and Solutions
- Thread Quality and Management
- Knowing When to Seek Help
- Frequently Asked Questions (FAQs)
- Conclusion
Key Takeaways
- You’ll prevent most jams by matching your needle and thread to your fabric type – use lightweight needles (60/8-70/10) for delicate materials and heavy-duty ones (100/16-110/18) for thick fabrics.
- Keep your machine clean by removing lint after each use, checking the bobbin area regularly, and scheduling professional servicing annually to maintain optimal performance.
- Your thread tension should be balanced – start with middle-range settings (4-5) and adjust gradually while testing on scrap fabric until your stitches look identical on both sides.
- Don’t ignore feed dog maintenance – ensure they are properly positioned, free from lint buildup, and adjusted to the right height for your fabric thickness to maintain smooth fabric feeding.
Common Causes of Sewing Machine Jams
You’ll find that most sewing machine jams happen because of five main problems: wrong thread tension, misplaced thread, bobbin troubles, worn-out needles, or using the wrong needle for your fabric.
If you’re experiencing frequent jams that make you want to toss your machine out the window, don’t worry – understanding these common causes will help you get back to smooth sewing in no time.
Incorrect Thread Tension
With improper needle selection and incorrect settings for fabric, such as those discussed in sewing machine skipping stitches, your sewing machine’s stitches can quickly turn from perfect to problematic.
When your top and bottom threads aren’t balanced, you’ll notice loops, puckering, or thread nests forming underneath your fabric.
Think of tension like a dance – both partners need to move in harmony.
- Test tension on scrap fabric before starting your project
- Start with middle-range tension settings (usually 4-5)
- Check if your thread thickness matches your needle size
- Clean your tension discs regularly to prevent buildup
- Adjust tension gradually, making small changes at a time
Thread Misplacement
Thread misplacement frequently causes machine jams when you skip thread guides or take shortcuts.
Your thread must follow the exact path through each guide to maintain proper tension.
Check that your thread isn’t caught under the spool or tangled around guides.
If you’re using specialty threads like metallic or elastic, they need extra attention to stay on track and avoid snags.
Bobbin Issues
Your bobbin can make or break your sewing success.
If you’re experiencing jams, check that your bobbin’s wound evenly and inserted correctly in its case.
A loose or poorly wound bobbin creates uneven tension, leading to frustrating snags and breaks.
Keep your bobbin area clean, make sure you have proper thread tension, and always use the right bobbin size for your machine.
Dull or Bent Needles
Every experienced sewist knows that dull or bent needles spell trouble.
When your needle’s looking worse for wear, it’ll snag fabric and create uneven stitches faster than you can say "seam ripper."
Regular needle inspection is vital – hold it up to the light and check for bent tips, burrs, or bluntness.
For smooth sailing, replace your needle after 6-8 hours of sewing or at the start of each new project.
Fabric and Needle Mismatch
Beyond dull needles, matching fabric to needle type prevents most machine headaches.
Using a ballpoint needle on woven fabric is like trying to cut butter with a fork – it just won’t work right.
Check your fabric weight and pick the perfect partner: lightweight fabrics need smaller needles (60/8-70/10), while heavy fabrics demand stronger ones (100/16-110/18).
The right match keeps your machine humming smoothly.
Importance of Proper Threading
You’ll save yourself hours of frustration and countless broken threads when you take the time to thread your sewing machine correctly through every guide point.
If you’ve ever found yourself ready to throw your machine out the window over a stubborn jam, proper threading is your ticket to smooth, hassle-free sewing sessions.
Upper Threading Techniques
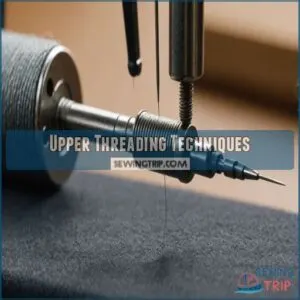
Threading a sewing machine correctly is like following a treasure map – one wrong turn can lead to disaster.
Start by placing your thread on the spool pin with the cap secured, then guide it through each tension disc and thread guide in sequence.
Make sure to follow the correct thread tension guidelines to avoid common issues.
Double-check that your thread flows smoothly through every point before attempting to thread the needle eye.
Bobbin Threading Methods
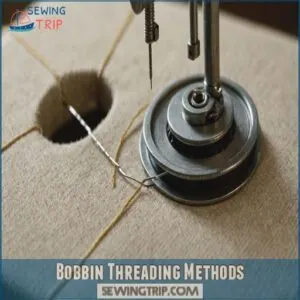
When your bobbin is threaded correctly, you’ll notice an immediate difference in your sewing quality.
Here’s what you need to know about proper bobbin threading:
- Check your bobbin case for lint or debris before inserting
- Wind your bobbin at medium speed for even distribution
- Place the bobbin in its case following your machine’s arrow direction
- Make sure thread pulls clockwise (most machines)
- Guide thread through all designated slots and notches
Thread Placement and Tension
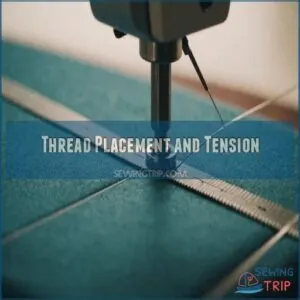
The sweet spot of proper thread placement and tension can make or break your sewing success.
Your thread should glide smoothly through each guide without resistance.
Check that your upper thread tension dial sits between 4 and 5 for most fabrics.
Fine-tune your bobbin tension by adjusting the small screw – clockwise tightens, counterclockwise loosens until stitches look balanced.
Avoiding Thread Snags and Breakage
Proper thread handling can make or break your sewing experience.
Keep your spool cap snug – it’s like putting a seatbelt on your thread to prevent unwanted loops and snags.
You’ll also want to store your thread away from direct sunlight and dust.
When winding bobbins, maintain steady pressure and speed.
A well-wound bobbin and the right thread tension work together like a well-oiled machine.
Choosing The Right Needle
You’ll save yourself countless headaches and jams by matching your needle to both your fabric type and project needs.
While it might be tempting to use the same needle for everything, choosing the right size and style will keep your machine running smoothly and your stitches looking professional.
Needle Types and Uses
Getting your thread in place is just step one – now let’s talk needles.
Understanding needle types means you’ll spend less time fixing jams and more time creating.
With over 9 types of sewing machine needles available, including specialized options like jersey and stretch needles, choosing the right one is essential for top-notch results, ensuring impeccable stitches learn more about sewing machine needles.
Universal needles work for everyday projects, but ballpoint needles glide through knits without snagging.
Sharp needles pierce woven fabrics cleanly, while leather needles have a wedge-shaped point to avoid damaging tough materials.
Selecting Needles for Fabric Type
After learning about needle types, matching them to your fabric is like finding the perfect dance partner.
Light fabrics need smaller needle gauges (60/8 or 70/10), while denim demands sturdy 100/16 needles.
Think of it this way: delicate silk wants a gentle touch, while heavy canvas needs more muscle.
You’ll know you’ve got it right when your stitches look clean and even.
Needle Size and Thread Compatibility
Your sewing machine’s sweet spot lies in matching needle size with thread weight. Using the correct needle size for your fabric, as outlined in guidelines for avoiding needle problems, is crucial for preventing issues like skipped stitches and thread breaks.
Think of it like pairing wine with dinner – a size 60/8 needle works beautifully with delicate silk thread, while size 100/16 handles heavy-duty thread like a champ.
For stretch fabrics, you’ll want a ballpoint needle that glides between fibers instead of piercing them.
Remember, thickness matters – both for your fabric and thread.
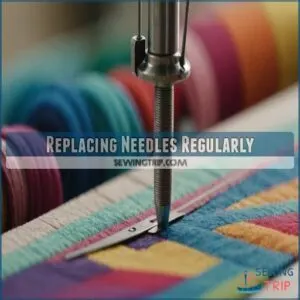
Replacing Needles Regularly
A dull sewing needle can turn your project into a frustrating mess faster than fabric through a feed dog.
Think of needles like kitchen knives – they need regular replacement to stay sharp and effective.
Here’s when to swap in a fresh needle:
- After 8-10 hours of active sewing time
- When you hear popping sounds while stitching
- If you spot skipped stitches or fabric snags
Presser Foot and Fabric Considerations
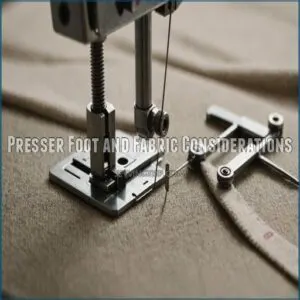
You’ll need to match your presser foot to your fabric type, just like you’d pick the right shoes for different activities, to prevent those frustrating machine jams.
Whether you’re working with slippery silks or thick denims, choosing the correct presser foot and adjusting its pressure will help your fabric glide through your machine smoothly.
Presser Foot Types and Uses
Just like having the right shoes for different activities, sewing machines need specific presser feet for various tasks.
Standard presser feet work well for straight stitching, while walking feet help move multiple layers evenly.
Zipper feet make installing zippers a breeze, and buttonhole feet create perfect buttonholes every time.
Remember to keep your presser feet clean and stored properly to prevent rust.
Choosing Presser Feet for Fabric
Matching presser feet to fabric prevents jams and creates professional results.
Like picking the right shoes for different terrains, selecting appropriate presser feet makes all the difference.
Here’s what you’ll need for different fabrics:
- All-purpose foot for cotton, linen, and basic wovens
- Walking foot for leather, vinyl, and multiple layers
- Non-stick foot for suede and oilcloth
- Roller foot for velvet and silk
- Zigzag foot for stretchy knits
Adjusting Presser Foot Tension
Proper presser foot tension keeps your fabric moving smoothly without puckering or getting stuck.
Think of it like a dance partner – too much pressure and you’ll step on toes, too little and you’ll lose the rhythm.
Here’s a quick guide to nail the perfect tension:
| Fabric Type | Tension Setting | Common Issues |
|---|---|---|
| Lightweight | 1-2 | Slipping, skipped stitches |
| Medium | 2-3 | Minimal issues when set right |
| Heavy | 3-4 | May need extra clearance |
| Multiple Layers | 4-5 | Can bunch at seams |
| Delicate | 1 | Fabric damage if too tight |
Using Specialized Presser Feet
Specialized presser feet open up a whole new world of sewing possibilities.
A walking foot helps tackle tricky fabrics like leather or multiple layers, while a zipper foot lets you get close to those pesky zippers without a hitch.
For buttonholes, the automatic buttonhole foot works like magic – no more wonky, uneven holes.
Think of these feet as your trusty sidekicks in the battle against jams.
Maintaining a Clean Machine
You’ll notice a dramatic decrease in sewing machine jams when you keep your machine clean and lint-free, just like how a car runs smoother with regular oil changes.
Your daily cleaning routine and monthly maintenance schedule will protect your machine’s moving parts from thread bits and fabric dust that often cause frustrating jams.
Daily Cleaning Routine
A clean sewing machine is a happy machine.
Start your daily routine by removing lint from the bobbin case with a small brush – it takes just seconds but saves hours of frustration.
Check your needle plate for thread bits, and give those thread guides a quick wipe.
Don’t forget to inspect your foot pedal for dust buildup.
These quick steps prevent 90% of common jams.
Weekly Deep Cleaning
Keeping your sewing machine in tip-top shape requires a weekly deep clean.
Set aside 15 minutes to wipe down the exterior with a soft cloth, removing dust and debris.
Focus on cleaning behind the needle plate and around the feed dogs – you’d be amazed at the lint that hides there!
Don’t forget to oil any moving parts according to your machine’s manual.
Monthly Maintenance Schedule
Once a month, take your sewing machine on a date with your maintenance checklist, which should include checking and replacing your needle every 8-10 hours of sewing, as explained in sewing machine needle maintenance.
Start by double-checking those tension settings – they can drift like a wandering thread.
Give your bobbin a thorough once-over, ensuring it’s spinning smoothly.
Don’t forget to inspect your needle’s condition and replace it if needed.
A quick oiling of moving parts keeps everything running like a well-oiled dream.
Annual Professional Servicing
Professional servicing takes your monthly maintenance to the next level.
A skilled technician will give your machine a thorough inspection and tune-up, helping you avoid costly repairs down the road.
During your annual service appointment, the technician will:
- Test and adjust the timing mechanism
- Deep clean hard-to-reach components
- Calibrate tension settings and verify electrical connections
Think of it as your machine’s yearly health check-up.
Troubleshooting and Fixing Jams
When you’re faced with a sewing machine jam, you’ll need to tackle the problem systematically to get your machine running smoothly again.
You can fix most jams by carefully removing the fabric, cleaning out any thread tangles, and following the proper re-threading sequence for your machine.
Assessing The Problem
When your sewing machine starts acting up, take a moment to be a detective.
Listen for unusual machine noise – it’s like your machine telling you what’s wrong.
Watch for signs of trouble: thread breakage, fabric bunching, or skipped stitches.
If you’re unsure about a specific problem, check out sewing machine troubleshooting for guidance.
Check the needle position and note if issues happen at specific sewing speeds.
These clues will lead you to the root cause.
Removing Fabric and Thread
Turn off your machine before you start untangling any fabric or thread.
Gently pull the fabric straight back, never forcing it forward or sideways.
If you feel resistance, stop immediately – forcing it could damage your machine.
Remove any visible threads by cutting them close to the fabric.
For stubborn tangles, try rotating the handwheel backward while carefully easing the fabric out.
Cleaning and Re-threading
Carefully remove all lint and debris from your machine’s bobbin case using a small brush.
Next, tackle the feed dogs and needle area, ensuring no thread bits remain.
Once spotless, rethread your machine from scratch – don’t skip any thread guides.
Double-check your bobbin’s placement and threading path, making sure it’s seated correctly and spinning freely.
Testing The Machine
After re-threading your machine, it’s time to put it through its paces.
Test your machine on a scrap piece of fabric similar to your project material.
Here’s your quick testing checklist:
- Start with slow, steady stitches to check tension settings
- Listen for any unusual sounds that might signal misalignment
- Watch your bobbin winding pattern for smooth, even feed
You’ll know you’re back in business when your stitches look clean and even.
Preventing Future Jams
You’ll save yourself hours of frustration by following a regular maintenance routine that includes proper threading, tension adjustments, and using the right needle for your fabric.
With these simple habits in place, you can focus on bringing your creative projects to life instead of battling with pesky machine jams.
Regular Maintenance Schedule
Four key maintenance checkpoints keep your sewing machine purring like a well-oiled cat.
Daily, wipe down your machine and check the needle.
Weekly, give it a thorough cleaning and oil the essential parts.
Monthly, inspect tension settings and thread quality.
Every 3-6 months, do a deep clean of components.
Proper Threading and Tension
Getting your thread tension right is like finding the sweet spot on your car’s steering wheel – it keeps everything running smoothly.
You’ll want to rethread your machine completely if you notice skipped stitches or loops forming.
Start with the upper thread, following each guide point carefully, then adjust your tension dial between 3 and 5.
Test on scrap fabric until stitches look balanced.
Using The Right Needle and Thread
Matching your needle and thread is like finding the perfect dance partners – they need to work together smoothly.
To avoid jams, it’s also essential to choose the right needle type, such as universal needles for various fabrics.
Pick needles designed for your thread weight: lightweight threads need smaller needles (60/8 to 70/10), while heavier threads require larger ones (100/16 to 110/18).
Keep your needle sharp by selecting the correct needle type for your fabric, such as a sharp needle for woven fabrics or a ballpoint needle for knit fabrics sewing needle charts, and replace it every 6-8 hours of sewing time to prevent snags and breaks.
Choosing The Right Fabric
Your fabric choice can make or break your sewing success.
Just like pairing wine with food, each fabric demands specific handling.
You can find a variety of fabrics for your sewing machine at a specialized store for sewing machine fabric.
Here’s what to check before you start:
- Fabric weight – light, medium, or heavy determines needle size
- Fiber content affects tension settings and needle type
- Weave type influences stitch length and pressure
- Fabric stretch requires special needles and adjustments
Keep these in mind, and you’ll sail through your project smoothly.
Feed Dog Issues and Solutions
You’ll find that those little metal teeth under your presser foot, known as feed dogs, can be the hidden culprits behind frustrating sewing machine jams.
If your feed dogs are too low, covered in lint, or improperly adjusted for your fabric’s thickness, they won’t grip and move your fabric smoothly through the machine.
Low Feed Dogs
The secret to smooth sewing lies in properly positioned feed dogs.
If these metal teeth sit too low beneath the throat plate, they won’t effectively grip your fabric.
Check that they rise above the needle plate when you’re sewing.
Most machines have an adjustment lever or dial to raise the feed dogs.
Give them a quick test by running a scrap piece of fabric through.
Lint Buildup and Cleaning
Just like a car needs regular oil changes, feed dogs need consistent cleaning to keep your sewing running smoothly.
This regular maintenance can help prevent issues like dust and lint accumulation, which can hinder the feed dogs’ ability to grip the fabric, as discussed in sewing machine feed dogs.
Here’s what you’ll want in your cleaning toolkit:
- Small lint brush or old toothbrush for tight spaces
- Mini vacuum attachment for hard-to-reach areas
- Compressed air can for stubborn debris
- Tweezers for thread removal
- Clean, dry cloth for final wipe-down
Make cleaning feed dogs part of your weekly routine to prevent frustrating jams and skipped stitches.
Adjustable Feed Dogs
Modern sewing machines come equipped with adjustable feed dogs that can be fine-tuned for different fabric types.
Understanding these settings helps prevent frustrating jams and uneven stitches.
| Feed Dog Setting | Best For | Common Issues |
|---|---|---|
| High Position | Heavy fabrics | Can mark delicate materials |
| Medium Position | Most everyday fabrics | May need periodic adjusting |
| Low Position | Free motion quilting | Could cause fabric bunching |
Consider checking feed dog height before starting each project to make sure fabric movement is smooth.
Ensuring Proper Fabric Feeding
Maintaining proper fabric feeding can make or break your sewing experience.
By keeping feed dogs at the right height and adjusting foot pressure, you’ll avoid those frustrating fabric tangles.
Here’s what experienced sewers do to keep fabric moving smoothly:
- Check feed dog height before each project
- Guide fabric gently without pushing or pulling
- Adjust presser foot pressure based on fabric thickness
Let your machine do the work – it’s smarter than you think!
Thread Quality and Management
You’ll be amazed at how much thread quality affects your sewing machine’s performance, as using cheap or old thread can turn your peaceful sewing session into a frustrating battle with jams and breaks.
By choosing high-quality thread and storing it properly, you’ll prevent most common threading problems before they even start.
Choosing High-Quality Thread
Choosing high-quality thread can make or break your sewing project.
You’ll want to stick with trusted brands like Gutermann, Coats & Clark, or Aurifil for reliable results.
Match your thread weight to your fabric – lighter weights (50-60) for delicate materials, medium weights (40) for everyday sewing, and heavier weights (30) for decorative stitching or denim.
Quality thread prevents frustrating breaks and snags.
Thread Storage and Organization
Once you’ve invested in quality thread, proper storage keeps it ready for action.
Store your thread spools in clear containers away from sunlight and dust – think of them as tiny treasures that need protection.
Label each container by color and type, and keep frequently used threads within arm’s reach.
Wind loose threads neatly around their spools to prevent tangling and unnecessary waste.
Thread Tension and Adjustment
Thread tension can make or break your sewing project.
Think of it as finding the sweet spot between too loose and too tight – just like Goldilocks.
Start by checking your upper tension dial (usually numbered 1-9), then test on scrap fabric.
If you’re seeing loops underneath, decrease the number.
Seeing loops on top? Increase it.
Your stitches should look identical on both sides.
Knowing When to Seek Help
While you can fix many sewing machine jams on your own, you’ll need a professional’s expertise when you notice unusual noises, timing issues, or damage to internal components.
You’ll save time and prevent further damage to your machine by recognizing when a problem is beyond your skill level and seeking help from a qualified repair technician.
Identifying Complex Issues
You’ll know you’re facing a complex issue when your machine starts making unusual noises or behaving erratically despite your best troubleshooting efforts.
Issues like thread bunching, which can be caused by poor thread quality or incorrect tension, may also be a sign that something is wrong.
If you’ve cleaned, rethreaded, and adjusted tensions but problems persist, don’t push your luck.
Listen for grinding sounds, watch for timing issues, or notice irregular stitch patterns, such as those that can happen when the needle and shuttle hook are out of sync due to needle timing problems.
These signs often indicate internal complications that need professional attention.
Understanding Machine Damage
Signs of machine damage can range from grinding noises to smoke or burning smells.
Watch for stripped gears, bent shafts, or timing problems that cause your needle to hit the needle plate.
Many internal issues start with a small problem that snowballs – like a jammed bobbin that damages the hook race.
If your machine makes unusual sounds or movements, stop sewing immediately.
Seeking Professional Assistance
Everyone reaches a point where DIY fixes won’t cut it.
When your machine makes unusual noises, skips stitches consistently, or has timing issues, it’s time to call a professional.
Look for certified technicians who specialize in your machine’s brand and check warranty coverage before repairs begin.
Getting cost estimates upfront helps avoid surprises, and sharing your machine’s history makes sure a thorough diagnosis is done.
Avoiding Further Damage
When facing persistent sewing machine issues, resist the urge to force components or attempt repairs beyond your expertise.
Taking matters into your own hands might lead to costly damage.
If you do decide to replace a part, consider purchasing from a reputable online retailer that sells a wide range of sewing machine parts.
Here are three critical steps to protect your machine:
- Stop sewing immediately if you hear unusual noises
- Document the problem with photos or videos for your repair professional
- Use original replacement parts when available
Frequently Asked Questions (FAQs)
What is keep jamming on a sewing machine?
Your sewing machine’s jamming likely stems from incorrect threading, a misplaced bobbin, or a dull needle.
Check your thread tension, make sure you’re following the correct threading paths, and verify you’re using appropriate needles for your fabric.
What causes a jammed sewing machine?
Common culprits behind sewing machine jams include issues such as thread tension problems, which can cause uneven stitches, puckered seams, or thread bunching. Common culprits behind sewing machine jams include incorrect thread tension, improper threading, dull needles, or mismatched fabric and needle combinations.
Regular cleaning and maintenance of your machine’s parts can prevent these issues.
How to prevent sewing machine jams and clogs?
Regular cleaning, proper threading, and using the right needle for your fabric help prevent jams.
Jams can be avoided by keeping the bobbin area lint-free, maintaining correct tension settings, and not forcing thick materials through the machine.
What happens if a sewing machine jams?
When a sewing machine jams, you’ll notice the thread bunching up or getting tangled underneath your fabric.
You’ll need to stop immediately, remove the fabric carefully, and rethread the machine completely.
How to stop a sewing machine from jamming?
Tired of your machine acting up?
To prevent jamming and maintain your sewing machine’s performance, establish a regular cleaning schedule, including wiping off dust and de-linting, and consider learning how to clean and maintain a sewing machine. Keep your sewing machine running smoothly by cleaning it regularly.
Using the right needle size is crucial.
Maintaining proper thread tension is also important.
Ensure correct threading through all guides.
Replace old needles often.
Why does my fabric keep getting stuck in my sewing machine?
Fabric getting stuck usually means your feed dogs are low or clogged with lint.
You’ll want to clean under the throat plate and check that your feed dogs are properly raised during sewing.
Why does my sewing machine keep getting tangles?
Picture your thread as a dance partner – it needs the right steps to flow smoothly.
Check your threading path, tension settings, and make sure you’re using the correct needle size for your fabric type.
How do I stop my sewing machine from bunching?
To prevent bunching, check your thread tension, rethread both top and bobbin threads, clean your feed dogs, and use the right needle for your fabric.
Regular maintenance keeps stitches smooth and tangle-free.
Can old sewing machine oil cause unexpected jams?
Time waits for no one, and neither should old oil!
Yes, sticky, hardened oil can cause unexpected jams by interfering with moving parts.
You’ll need to clean old residue and apply fresh oil regularly.
Does humidity affect how often machines get stuck?
High humidity can cause your machine’s metal parts to stick and your thread to swell, leading to more frequent jams.
You’ll notice this especially during summer months – try using a dehumidifier nearby.
Will using stabilizers help prevent jamming issues?
While you might think stabilizers are just fancy fabric backings, they’re actually your secret weapon against jamming.
They’ll help control fabric movement and prevent bunching, especially when you’re working with stretchy or delicate materials.
Do certain stitch patterns jam more than others?
Complex decorative stitches and tight zigzags are more likely to jam due to their intricate thread movements.
You’ll have better luck with straight stitches and simpler patterns when your machine’s being finicky.
Can machine speed settings contribute to jamming problems?
Running your machine too fast can definitely cause jamming, especially with delicate fabrics or complex stitches.
You’ll want to adjust your speed based on the fabric type and stitch pattern you’re using.
Conclusion
Like a skilled conductor leading an orchestra, you now have the knowledge to prevent sewing machine jams and keep your creative rhythm flowing smoothly.
By following these expert maintenance tips, choosing the right tools, and staying consistent with cleaning routines, you’ll spend less time troubleshooting and more time bringing your projects to life.
Remember, a well-maintained machine is your most reliable partner in crafting success.
When in doubt, take it slow and trust your instincts.

