This site is supported by our readers. We may earn a commission, at no cost to you, if you purchase through links.
Choose between spun silk for a cotton-like feel or filament silk for extra shine and strength.
Before sewing, prep your fabric by pre-washing with cool water and gentle detergent – trust me, this step’s worth its weight in gold.
Use a fine needle (60/8 for lightweight silks, 70/10 for medium) and shorten your stitch length to 2mm for better control.
When pressing, always work from the wrong side with low heat and a pressing cloth to protect that luxurious surface.
And just wait until you discover the magic of hand-basted seams.
Table Of Contents
- Key Takeaways
- Choosing The Right Silk Thread
- Preparing Fabric for Sewing With Silk
- Cutting Silk Fabric Successfully
- Sewing Silk Fabric With Ease
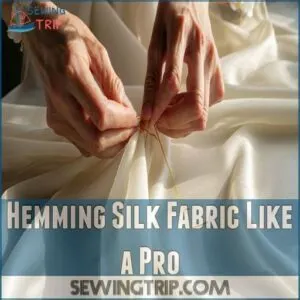
- Hemming Silk Fabric Like a Pro
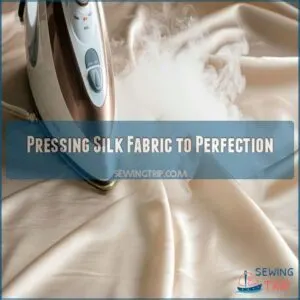
- Pressing Silk Fabric to Perfection
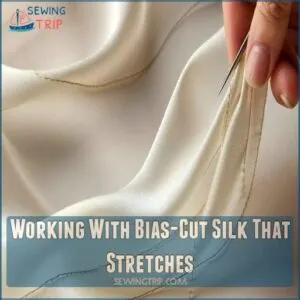
- Working With Bias-Cut Silk That Stretches
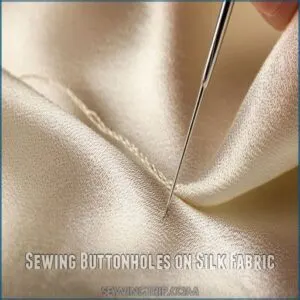
- Sewing Buttonholes on Silk Fabric
- Tips for Hand Sewing With Silk Thread
- Advanced Techniques for Sewing With Silk
- Frequently Asked Questions (FAQs)
- Conclusion
Key Takeaways
- You’ll get the best results by matching your thread type to your project – use spun silk for a softer feel or filament silk for shine and strength.
- You’ll need to pre-wash your silk fabric with cool water and gentle detergent, then use a fine needle (60/8 or 70/10) with a shortened 2 mm stitch length.
- You’ll want to press silk from the wrong side using low heat and a pressing cloth, and avoid steam to prevent water spots.
- You’ll achieve professional results by stabilizing buttonhole areas with interfacing and keeping silk thread lengths short (around 16 inches) when hand sewing.
Choosing The Right Silk Thread
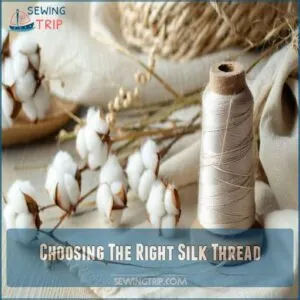
You’ll want to choose between spun silk thread for its softer, cotton-like feel and filament silk for its eye-catching shine and strength.
Just like picking the perfect coffee blend for your morning brew, selecting the right silk thread can make or break your sewing project’s final look and durability.
Types of Silk Thread
When it comes to silk thread, you’re looking at quite a few options – each with its own personality.
Let’s unravel the mystery behind these luxurious fibers:
- Natural silk thread comes straight from silkworm cocoons, offering unmatched strength and sheen
- Hand-dyed silk threads provide unique color variations for one-of-a-kind projects
- Synthetic silk thread gives you durability at a lower price point
The key is matching the thread type to your project’s needs.
Spun Silk Vs Filament Silk
Now that you’re familiar with silk thread types, let’s compare spun silk and filament silk.
When choosing the best silk thread, consider factors like colorfastness and durability.
Think of spun silk as your reliable daily driver – it’s softer, more forgiving, and perfect for beginners.
Filament silk, on the other hand, is your luxury sports car – sleek, shiny, and stronger.
While spun silk’s made from broken cocoons, filament silk comes from single, unbroken strands, giving it that unmistakable luster.
Preparing Fabric for Sewing With Silk
You’ll want to give your silk fabric some special treatment before you start your sewing project, just like you’d pamper yourself before a big event.
Before the first stitch, you can make your silk easier to work with by pre-washing it.
You can also give it a quick spritz of starch spray or a gelatine bath to add just the right amount of structure.
Pre-wash and Dry Silk Fabric
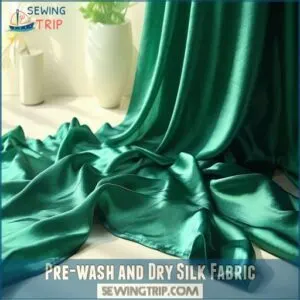
Pre-washing silk fabric might seem scary, but it’s your best defense against unwanted surprises later.
Start with cool water and a gentle detergent specially made for silk.
Run your washing machine on its delicate cycle, or hand wash if you’re feeling extra cautious.
Once clean, lay your silk flat to dry in a shaded spot – direct sunlight’s a no-go for these delicate fibers.
Stiffen Fabric With Starch Spray or Gelatine
Ready to take control of that slippery silk?
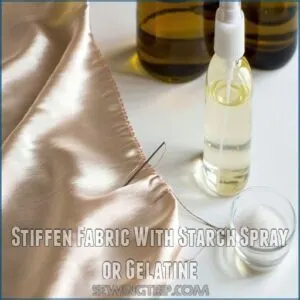
After your fabric’s clean and dry, you’ve got two secret weapons: starch spray or gelatine.
For light stiffening, a quick spritz of starch spray will do the trick.
Want paper-like stability? Mix up a gelatine bath (1 tablespoon per cup of water), soak your silk for 30 minutes, then hang it to dry.
You’ll love how manageable your silk becomes!
Transferring Pattern Markings on Silk
After you’ve stiffened your silk, marking your pattern accurately becomes your next challenge.
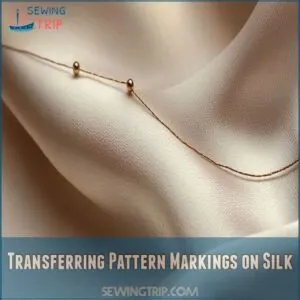
Traditional chalk marks can damage delicate silk, but don’t worry – there are gentler methods at your disposal.
- Use tailor’s tacks with fine silk thread for precise, damage-free marking
- Try a sliver of bar soap for temporary lines that wash away
- Skip the tracing wheel – it can snag and tear your fabric
- Place tissue paper underneath when marking to prevent fabric distortion
You’ll want to test your chosen marking method on a scrap piece first to make sure it won’t leave permanent marks or damage your precious silk.
Cutting Silk Fabric Successfully
You’ll save yourself hours of frustration (and possibly a few tears) by mastering the art of cutting silk fabric one precise layer at a time.
For the smoothest results you’ve ever achieved, sandwich your silk between tissue paper layers and use sharp scissors.
To prevent any sneaky shifting or distortion that could throw off your whole project.
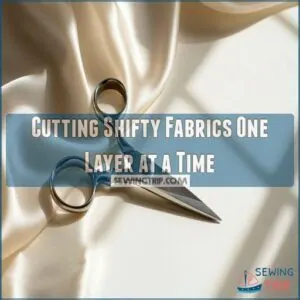
Cutting Shifty Fabrics One Layer at a Time
The secret to taming shifty silk fabric lies in cutting one layer at a time.
Let your fabric rest flat on a smooth surface, and secure it with pattern weights rather than pins.
Keep your scissors sharp and glide them smoothly through the fabric – any tugging will cause distortion.
For extra stability, sandwich your silk between tissue paper layers before cutting. This technique guarantees precise, professional results.
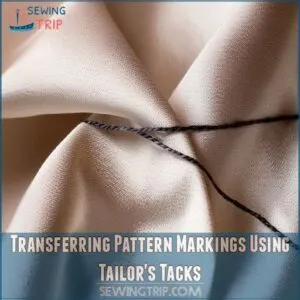
Transferring Pattern Markings Using Tailor’s Tacks
When working with delicate silk, tailor’s tacks are your secret weapon for transferring pattern markings with precision.
Thread a needle with contrasting silk thread and create small loops through both fabric layers at marking points.
Pull the layers apart gently, and snip the loops in the middle.
These temporary thread markers won’t damage your fabric and stay put until you’re ready to remove them.
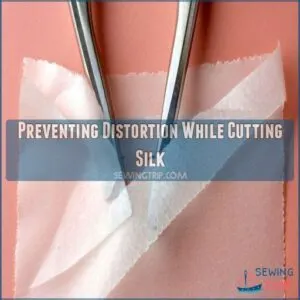
Preventing Distortion While Cutting Silk
Making those tailor’s tacks look easy?
Now let’s keep your silk from sliding around like a bar of soap in the shower! Sandwich your silk between two layers of tissue paper for rock-solid stability – it’s your secret weapon against distortion.
Pin strategically at the corners and along the edges, and remember to cut one layer at a time.
You’ll thank yourself later when every piece fits perfectly.
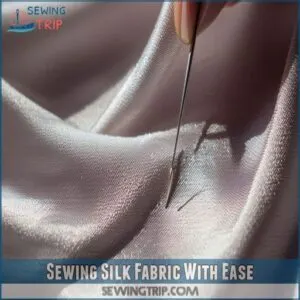
Sewing Silk Fabric With Ease
You’ll feel like a sewing pro once you master these game-changing tricks for working with silk fabric.
With the right needle size and a few smart techniques up your sleeve, you’ll transform those tricky silk projects from frustrating to fantastically smooth sailing.
Using Finer Sewing Machine Needles
Through the delicate dance of silk sewing, choosing the right needle makes all the difference. Your machine’s success with silk fabric hinges on using finer needles that won’t damage these luxurious threads.
Here’s what you need to know:
- Start with a size 60/8 microtex needle for lightweight silks
- Use 70/10 for medium-weight silk fabrics
- Reserve 80/12 needles for heavyweight silk varieties
Think of these needles as your silk’s best friends – they’ll protect your fabric while creating those perfect stitches you’re after.
Shortening Straight Stitch Length for Shifty Silks
Now that you’ve got the right needle, let’s tackle those tricky silks that seem to have a mind of their own.
Shortening your stitch length to 2mm creates more points of contact, helping to control those slippery silks.
Here’s a quick guide to stitch lengths and their effects:
| Stitch Length | Best For | Results |
|---|---|---|
| 1.5mm | Delicate silks | Ultra-secure, may pucker |
| 2.0mm | Most silk fabrics | Perfect balance |
| 2.5mm | Heavy silk | May allow shifting |
| 3.0mm | Not recommended | Too loose, causes problems |
Hand Basting Seams for Stability
Before diving into machine sewing your silk pieces, hand basting seams can be your secret weapon for perfect stability.
You’ll want to use long, loose stitches about 1/4 inch from your seam line.
Pin your fabric pieces together first, then work with a single thread and longer needle.
This extra step prevents slipping and guarantees your final stitches will be impeccable. This ensures perfect stability.
Hemming Silk Fabric Like a Pro
You’ll be amazed at how a perfectly hemmed silk garment can transform your sewing from amateur to couture-worthy in minutes.
Whether you’re working with a flowy dress or a structured jacket, you’ll find the right hemming technique to showcase your silk fabric’s natural elegance and drape.
Leveling The Hem of a Garment
Getting your hem level can feel like trying to catch a cloud – silk has a mind of its own. Invest in the best silk thread for a professional finish, which you can find and purchase at a store that sells top-rated silk threads.
Take these game-changing steps to nail that perfect hem:
- Let your garment hang for 24 hours to let gravity work its magic
- Stand still while a friend marks your hem with pins
- Use a hem gauge to measure from the floor up
- Double-check your marks with a ruler before cutting
This groundwork sets you up for hemming success, and you’ll thank yourself later when everything lines up just right.
Options for Hemming Silk Fabric
Several beautiful hemming options await your silk creations.
Hand-rolled hems create an almost invisible finish perfect for delicate scarves.
Blind hems offer a professional look for dresses and skirts. Slipstitch hems are ideal for lightweight silks, creating a barely-there finish.
For added flair, try decorative hem finishes using hand embroidery or tiny seed beads – they’ll transform your piece into a true masterpiece. decorative hem finishes
Machine Rolled Hems for Silks With Body
With the right technique, machine rolled hems can transform your silk projects into professional masterpieces. The key lies in matching your fabric’s body with the proper hem width and stitch tension.
- Use a 2mm rolled hem foot for lightweight silks to achieve that coveted "invisible" finish
- Adjust your stitch length to 1.5mm for best control
- Practice on scraps first – there’s nothing worse than a wonky hem on your silk masterpiece!
Pressing Silk Fabric to Perfection
You’ll love how your silk creations look when you master the art of pressing, which can transform even the most stubborn wrinkles into crisp, professional results.
While it might seem tricky at first, you’ll quickly discover that pressing silk fabric is like conducting a gentle symphony.
Your iron, pressing cloth, and careful technique work together in perfect harmony to create stunning results.
Pressing From The Back to Avoid Bruising
After perfecting those silk hems, let’s master the art of pressing. To prevent unsightly bruising on your silk fabric’s delicate surface, always press from the wrong side.
Here’s your go-to guide for flawless pressing results:
| Action | Purpose |
|---|---|
| Set iron temperature to low | Prevents scorching |
| Test on scrap fabric | Confirms safety |
| Press in straight lines | Maintains shape |
| Apply gentle pressure | Avoids marking |
| Cool completely | Sets creases |
Remember, you’re not ironing back and forth – you’re pressing down and lifting. Think of it like stamping rather than sliding.
Using a Pressing Cloth to Protect The Fabric
You’ll never regret using a pressing cloth – it’s like giving your silk fabric a protective shield while ironing.
Using a pressing cloth is especially important when working with delicate fabrics, as it helps prevent scorching and shine, and is a key part of the properly pressing fabric technique.
Here are three game-changing options:
- Silk organza offers excellent visibility while protecting delicate fabrics
- Cotton muslin provides reliable heat distribution and moisture control
- Specialty pressing cloths with heat-resistant coatings prevent scorching and shine
Choose a clean, lint-free cloth and adjust your iron’s heat setting based on your fabric’s weight.
Avoiding Steam to Prevent Water Spots
Now that your pressing cloth is ready, let’s tackle a common silk-ruining culprit: steam.
The hot, moist air from your iron can leave permanent water spots on silk, turning your gorgeous fabric into a spotty mess.
Stick to dry heat at a low temperature setting, and you’ll avoid those telltale watermarks.
Let the fabric cool completely on your ironing board before moving it to maintain that perfect press.
Working With Bias-Cut Silk That Stretches
You’ll love working with bias-cut silk once you’ve mastered a few tricks that keep it from becoming a slippery nightmare.
While bias-cut silk can stretch and wiggle like a playful puppy, you’ll find it’s actually your best friend when you learn to handle it with the right combination of stay-stitching and careful seam choices.
Stay Stitching Everything for Stability
Slippery silk fabric can be as tricky as trying to catch a soap bubble, but stay stitching is your secret weapon for keeping everything in place.
Think of it as giving your fabric a firm foundation before the main construction begins.
- Stay stitch within the seam allowance, about 1/8 inch from the cutting line
- Work from the edge toward the center on both sides
- Use a shorter stitch length (1.5-2mm) for better control
Using Zig Zag Seams for Stretchy Silks
Working with bias-cut silk requires a special touch.
When those gorgeous silk fibers start to stretch, zig zag seams become your best friend, especially when working with stretchy knits that have rows of loops with crosswise and lengthwise stretch, which makes key the best stitch for stretchy fabric.
Here’s a quick guide to mastering different seam types for various silk stretch scenarios:
| Silk Type | Best Stitch Width |
|---|---|
| Light Charmeuse | 1.5mm – 2.0mm |
| Medium Crepe | 2.0mm – 2.5mm |
| Heavy Satin | 2.5mm – 3.0mm |
| Silk Jersey | 3.0mm – 3.5mm |
| Silk Chiffon | 1.0mm – 1.5mm |
Avoiding Stretching and Sewing
Bias-cut silk’s sneaky stretch can turn your sewing dreams into a wrinkled mess.
Here’s your game plan for taming that slippery beast:
- Let the fabric rest flat for 24 hours before cutting to prevent unwanted stretching
- Use a walking foot attachment to keep layers moving together smoothly
- Support your fabric with tissue paper underneath while sewing to maintain control
Stay-stitch curved edges immediately after cutting, and remember: patience beats speed every time.
Sewing Buttonholes on Silk Fabric
You’ll love how professional your silk garments look when you master the art of creating perfect buttonholes with the right interfacing and stabilizing techniques.
Buttonholes on silk aren’t as tricky as you might think, especially when you’ve got the right tools and tips at your fingertips.
Whether you’re working with hand or machine methods, you’ll discover that sewing buttonholes on silk isn’t as tricky as you might think, especially when you’ve got the right tools and tips at your fingertips.
Interfacing The Buttonhole Area
Since buttonholes can make or break your silk project, proper interfacing is really important.
When sewing buttonholes, it’s important to stabilize the fabric with interfacing to prevent stretching during the buttonhole sewing process.
You’ll want to apply a lightweight fusible interfacing to the wrong side of your fabric, extending it about an inch beyond your marked buttonhole area.
For extra stability, consider using a double layer of interfacing, with the second layer cut smaller than the first to avoid bulk at the edges.
Using a Stabilizing Material for Buttonholes
After reinforcing your buttonhole area, you’ll want to add stabilizing material for extra support.
Think of it as giving your silk a safety net – it prevents those dreaded puckers and tears.
Here’s what works best:
- Tear-away stabilizer beneath your marked buttonhole
- Water-soluble stabilizer on top for clean results
- Fusible interfacing strips for added structure
- Organza strips for invisible reinforcement
The right stabilizer makes buttonholes on silk feel less intimidating than walking a tightrope without a net.
Sewing Buttonholes by Hand or Machine
Now that your fabric is stable, you’ve got two paths for creating buttonholes: by hand or machine.
To achieve a professional finish, consider investing in high-quality silk thread options.
Hand-sewn buttonholes offer a classic, couture finish with silk thread – just work slowly and mark your lines carefully.
For machine buttonholes, test on scraps first and use a sharp needle.
Both methods work beautifully, but hand-sewn ones give you more control over the final look.
Tips for Hand Sewing With Silk Thread
You’re about to transform your hand sewing game with the luxurious touch of silk thread, and trust me, your fingers will thank you later.
Whether you’re creating delicate buttonholes or adding elegant embellishments, these pro tips will help you master the art of working with this premium thread that’s known for its softness and stunning sheen.
Using Shorter Lengths of Silk Thread
The golden rule of working with silk thread is keeping your lengths short and sweet – around 16 inches is perfect.
You’ll save yourself from those frustrating moments when longer threads start to tangle or fray.
Think of it like handling delicate jewelry: shorter lengths give you better control and prevent those pesky knots that can turn your peaceful stitching session into a test of patience.
Blending Silk Thread in Stitches
Blending silk thread in stitches is like conducting a symphony of colors and textures.
You’ll find that silk naturally creates smoother shifts between shades, making it perfect for long-and-short stitch work.
Mix different silk types – try combining spun silk with filament silk for depth, or experiment with variegated threads like Caron Waterlilies to add subtle dimension.
Historical samplers often showcase this beautiful blending technique.
Creating a Soft, Luxurious Feel With Silk
Creating that coveted luxurious feel with silk thread starts with understanding its unique properties.
When hand sewing, you’ll discover silk’s natural ability to create elegant, refined finishes that elevate your work.
- Use gentle tension to maintain silk’s natural sheen
- Let the thread glide through fabric without pulling
- Keep your hands clean and moisturizer-free
- Work in a well-lit area to appreciate silk’s subtle color variations
These simple steps transform ordinary stitches into sophisticated details that whisper luxury.
Advanced Techniques for Sewing With Silk
You’ll be amazed at how silk thread can transform your sewing projects from ordinary to extraordinary when you combine it with other fibers like metallic threads or wool.
Whether you’re creating a stunning historical reproduction or adding visual interest to modern designs, you’ll find that silk’s natural sheen and strength make it the perfect choice for elevating your needlework.
Combining Silk Thread With Other Fibers
Now that you’ve mastered hand sewing basics, let’s explore mixing silk with different fibers.
You’ll find that silk thread plays nicely with wool, creating subtle texture variations in your work.
Try combining spun silk with metallic threads for unexpected depth, or pair filament silk with cotton for controlled contrast.
Remember to test your combinations on a scrap piece first – different fibers can behave uniquely together.
Creating Visually Appealing Combinations With Silk
The true magic of silk lies in its versatility for creative combinations.
When working with silk, mastering hand sewing techniques, including threading a needle with precision, can greatly enhance your results.
You’ll find endless possibilities by pairing silk thread with metallic accents for eye-catching sparkle, or blending different silk weights to create depth in your embroidery.
Try combining spun silk’s soft texture with filament silk’s high shine, or mix silk threads in complementary colors for stunning dimensional effects in your needlework projects.
Using Silk Thread for Historical Reproductions
When you’re bringing historical designs back to life, silk thread becomes your time machine.
Building on those stunning visual combinations we discussed, silk’s authentic connection to the past makes it perfect for period-accurate creations.
For a wide range of high-quality silk threads, consider shopping for silk thread embroidery supplies.
Here’s what makes silk thread so special for historical pieces:
- Samplers from the 1800s sparkle with the same luminous sheen you’ll achieve today
- Medieval blackwork patterns pop with silk’s crisp definition
- Traditional Chinese embroidery gains its characteristic glow
- Ecclesiastical pieces capture that timeless, sacred elegance
Frequently Asked Questions (FAQs)
Can you use cotton thread to sew silk?
Cotton thread can damage delicate silk fabrics, potentially causing puckering and tears.
Silk thread is the best choice to match the fabric’s properties and guarantee your garment’s longevity and professional finish.
What can I use silk thread for?
You’ll love silk thread for embroidery projects, historical reproductions, and creating cherished heirlooms.
It’s perfect for highlighting intricate stitches in quilts, adding luxurious texture to samplers, and crafting stunning ecclesiastical pieces.
Can you use silk thread for embroidery?
Silk thread is perfect for embroidery projects!
You can use two strands on 14-count Aida or over two threads on 28-count linens.
It’s ideal for creating heirloom-quality pieces with beautiful sheen and durability.
What is the best thread for sewing silk?
For the smoothest sailing through your silk project, choose fine silk thread in sizes 60/8 or 70/ You’ll also want a microtex needle to prevent snags and damage to your delicate fabric.
What if silk thread were a person?
Picture meeting someone refined yet resilient, with a natural elegance and adaptability that stands out.
You’d find they’re strong but gentle, able to weave seamlessly between social circles while maintaining their luxurious charm.
How do you knot silk thread?
Before knotting, dampen your fingers slightly to control slippage. Make a simple knot by wrapping the thread around your index finger twice, then roll it off and pull tight.
What tension should I use for silk?
Like tuning a delicate harp, you’ll want to keep your silk thread tension light but consistent.
Set your machine’s top tension between 2-3 and adjust the bobbin tension slightly looser than normal.
Should you sew silk with silk thread?
Yes, you’ll want to use silk thread when sewing silk fabric.
It’s gentler on delicate silk fibers and creates smoother seams.
Plus, silk thread’s natural sheen matches your fabric perfectly for a polished finish.
How to stabilize silk for sewing?
A stitch in time saves nine" rings true when stabilizing silk.
You’ll want to pre-wash your fabric, then stiffen it with starch spray or soak in gelatine solution.
How long does silk thread last before deteriorating?
When properly stored in a cool, dark place, your silk thread can last 10-15 years without significant deterioration.
Silk thread will last longer if you protect it from direct sunlight, moisture, and extreme temperatures.
Conclusion
Now that you’ve mastered these silk thread usage tips, you’re ready to create stunning pieces that showcase your skills.
Remember, working with silk isn’t just about the right techniques – it’s about patience and practice too.
Start with smaller projects to build confidence, then work your way up to more complex designs.
Whether you’re hand-sewing delicate details or machine-stitching seams, these pro secrets will help you achieve that perfect, professional finish every time.

