This site is supported by our readers. We may earn a commission, at no cost to you, if you purchase through links.
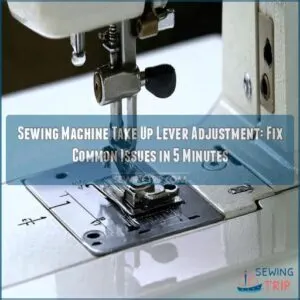
If you’re noticing skipped stitches or fabric puckering, it’s time for a quick adjustment. Start by cleaning any lint build-up and checking for smooth movement.
For computerized machines, restore factory settings to resolve high/low lever issues.
Regular maintenance, including proper thread routing and tension settings starting at 4, keeps your machine humming along.
Beyond these basics lies a world of advanced techniques that’ll transform your sewing game.
Table Of Contents
- Key Takeaways
- Importance of Take-Up Lever Adjustment
- Locating The Take-Up Lever on Your Sewing Machine
- Troubleshooting Common Take-Up Lever Problems
- Adjusting The Take-Up Lever for Smooth Operation
- Maintaining Your Sewing Machine to Prevent Take-Up Lever Issues
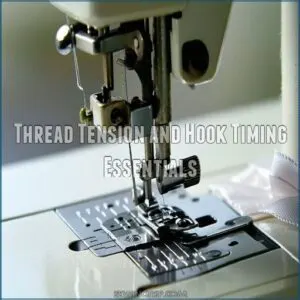
- Thread Tension and Hook Timing Essentials
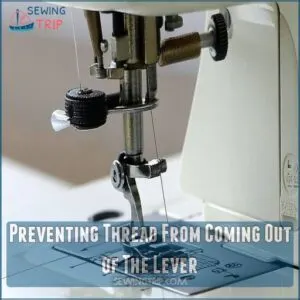
- Preventing Thread From Coming Out of The Lever
- Troubleshooting Take-Up Lever and Needle Immobility
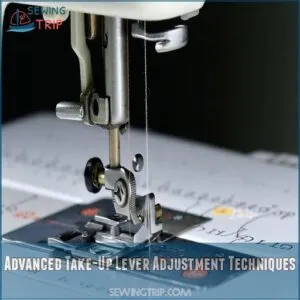
- Advanced Take-Up Lever Adjustment Techniques
- Frequently Asked Questions (FAQs)
- Conclusion
Key Takeaways
- You’ll find your sewing machine’s take-up lever at the top or side; its smooth operation is crucial for even stitches.
- Regularly clean lint and debris from around the lever to prevent jams and ensure it moves freely.
- If you’re having trouble, start by setting your machine’s tension to 4 and rethreading it completely; this often resolves many issues.
- For computerized machines, restoring factory settings can fix high/low lever problems.
Importance of Take-Up Lever Adjustment
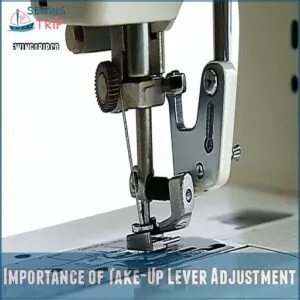
You’ll save hours of frustration and prevent thread breaks when you properly adjust your sewing machine’s take-up lever, the essential component that controls thread tension and timing.
If you’ve ever wondered why your stitches look messy or your thread keeps breaking, your take-up lever might need a quick tune-up.
to get your sewing projects back on track.
Role of The Take-Up Lever in Sewing Machines
Every modern sewing machine relies on the take-up lever for flawless stitch formation. This essential component orchestrates the delicate dance between thread and needle, creating that perfect rhythm you’re after.
The take-up lever’s magic happens in four key ways:
- Pulls thread tight after each stitch forms
- Controls thread slack during needle descent
- Lifts thread clear of fabric during needle rise
- Times thread delivery with hook rotation
Common Issues Caused by Incorrect Adjustment
When your sewing machine take up lever isn’t adjusted correctly, you’ll notice some telltale signs.
Skipped stitches and uneven tension are just the start – you might also face constant thread breakage or looping stitches that make your fabric look like a mess.
Adjusting the take up lever can also affect the overall sewing machine tension which leads to a smooth sewing experience.
Watch out for fabric puckering too.
These issues aren’t just frustrating; they can turn simple projects into time-consuming headaches that waste both thread and fabric.
Benefits of Proper Take-Up Lever Adjustment
Your sewing machine’s take up lever adjustment opens a world of benefits. With proper alignment, you’ll enjoy consistent stitches and even fabric feed that prevents jams.
The right take up lever adjustment improves tension control and reduces thread breakage dramatically.
You’ll notice even stitch length across all your projects, eliminating those frustrating skipped stitches.
Best of all, your machine runs smoother and quieter, making every sewing session a breeze.
Locating The Take-Up Lever on Your Sewing Machine
You’ll find the take-up lever at the top or side of your sewing machine.
Newer models often have a more subtle design.
This might need a quick look at your manual to spot.
If you’re having trouble seeing it, simply turn the handwheel and watch for the moving part that helps pull your thread up and down.
Identifying The Take-Up Lever in Newer Machines
Looking for that elusive take-up lever on your modern sewing machine? Newer models often tuck these essential components away in subtle spots.
To prevent issues like thread tension problems, you need to regularly check and adjust the take-up lever, especially when working with different fabric types.
Don’t worry if you can’t spot it right away – the lever might be hiding behind sleek panels or integrated into the machine’s streamlined design.
To improve visibility, try turning the handwheel slowly while watching for movement near the top or side of your machine.
Checking The Manual for Lever Location
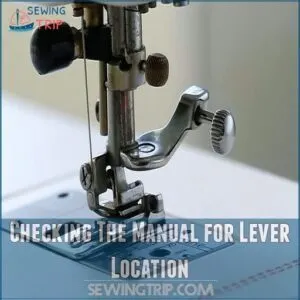
The sewing machine manual is your trusty map for finding that elusive take-up lever.
Start by checking the manual’s diagrams section – it’ll show you exactly where this important part sits on your specific model.
If you can’t find a physical copy, you can also purchase a sewing machine manual online from retailers like Sewing Machine Manuals.
Can’t spot those manual diagrams?
Most manufacturers offer digital copies online; just search your model number.
Many manuals include detailed troubleshooting steps for locating parts.
Improving Visibility of The Lever
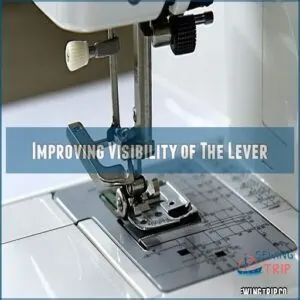
Now that you’ve found the lever location in your manual, let’s make it easier to spot.
Turn the handwheel slowly while shining a bright light on your machine’s upper housing. A desk lamp works great here!
Watch as the take-up lever moves up and down – this motion helps identify its exact position.
For better visibility, use a magnifying glass to inspect the mechanism and remove any dust or lint.
Troubleshooting Common Take-Up Lever Problems
You’ll find that most take-up lever problems come from thread jams or debris buildup.
These issues can turn your smooth-running machine into a stubborn mule.
If you’ve noticed your machine acting up lately, don’t worry – we’ll show you how to spot these common issues and get your sewing buddy back to its happy humming self in no time.
Identifying Stuck or Jammed Levers
When your sewing machine take up lever feels stuck or won’t budge, it’s important to identify the root cause before attempting repairs.
Watch for visible thread jams around the lever mechanism, listen for unusual clicking sounds, and check if the handwheel turns smoothly.
Regular machine maintenance, including cleaning thread path, can help prevent issues.
A completely immobile lever often signals thread buildup or a broken internal component, while intermittent sticking usually points to debris accumulation.
Removing Obstructions and Cleaning The Lever
Stubborn thread tangles got your take-up lever in a twist?
Start by turning off your sewing machine and removing visible debris around the lever.
Use tweezers to gently extract trapped threads, then clean the area with a small brush.
Check the spring and tension assembly for buildup.
Replacing a Broken Take-Up Lever
A broken take-up lever doesn’t mean your sewing machine’s destined for the scrapyard.
While DIY repair is possible, sourcing parts and attempting replacement yourself might void your warranty.
For most sewists, professional help is the smartest route – repair costs typically range from $50-150.
If your machine’s under warranty, contact the manufacturer first. They’ll guide you through warranty claims or connect you with authorized repair centers.
Resolving Thread Coming Out of The Lever
Almost every thread takeup lever issue can be resolved by following these quick steps. If you notice thread problems or skipped stitches, here’s what to do:
- Check your needle size matches your thread type – thicker threads need larger needles
- Adjust tension issues by setting the dial to 4 and rethreading your machine completely
- Clean the bobbin case and verify the take up lever isn’t catching on debris
Adjusting The Take-Up Lever for Smooth Operation
You’ll need to adjust your sewing machine’s take-up lever properly to prevent those frustrating thread snags and uneven stitches.
These issues can turn a simple project into a headache.
With a few quick adjustments to the tension pulley and spring action, you’ll have your machine purring along smoothly in no time.
Verifying Tension Pulley Adjustment
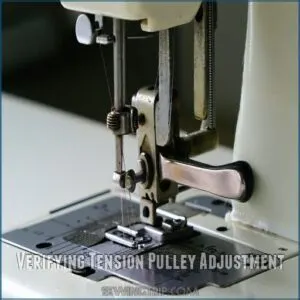
A loose tension pulley can turn your sewing machine into a thread-tangling nightmare.
To verify your pulley tension, start by removing any built-up lint with a soft brush.
Check if the pulley moves smoothly without resistance or catching.
If the pulley moves smoothly without resistance or catching.
For best performance, make sure that your thread tension is properly balanced by understanding thread tension dial problems.
If you notice any sticking points during the take-up lever’s movement, apply a drop of sewing machine oil.
The pulley should rotate with consistent resistance.
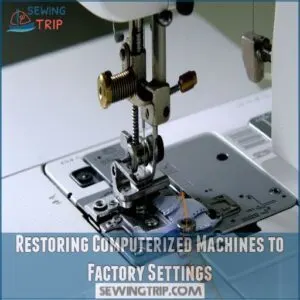
Restoring Computerized Machines to Factory Settings
Factory resets can be a lifesaver when your computerized sewing machine‘s take-up lever isn’t working right.
If you’re seeing error codes or the lever’s stuck at an odd height, don’t panic.
Start by backing up your custom stitches, then hold the needle up/down and start buttons while powering on.
Your machine will return to its original settings, often resolving those pesky high/low take-up lever issues.
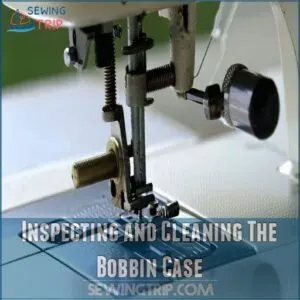
Inspecting and Cleaning The Bobbin Case
Now that your machine’s back to normal settings, let’s check that bobbin case – it’s like giving your car’s engine a quick once-over. Your take-up lever‘s performance directly depends on a clean, well-maintained bobbin area.
Here’s your quick bobbin case inspection checklist:
- Remove lint with a small brush and check for nicks or rough spots
- Verify the case rotates smoothly without resistance
- Look for thread fragments caught in tension springs
- Apply a single drop of sewing machine oil to recommended spots
Remember, a clean bobbin case is happy bobbin case. When it’s running smooth as silk, your take-up lever will thank you.
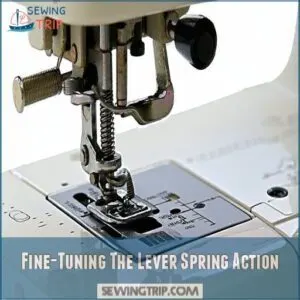
Fine-Tuning The Lever Spring Action
Before adjusting your take up lever height, check the spring tension to guarantee smooth action. You’ll need to assess the lever strength carefully – too tight and it’ll stick, too loose and your stitches will loop.
| Spring Issue | Fix | Tools Needed | Time |
|---|---|---|---|
| Weak tension | Replace spring | Screwdriver | 10 min |
| Sticky movement | Clean & oil | Lubricant | 5 min |
| Broken spring | New spring install | Repair kit | 15 min |
| Height misalignment | Adjust screw | Allen wrench | 8 min |
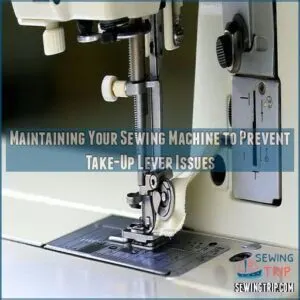
Maintaining Your Sewing Machine to Prevent Take-Up Lever Issues
You’ll save yourself hours of frustration by giving your sewing machine’s take-up lever the same attention you’d give your car’s oil changes.
Just like your morning coffee routine, a simple schedule of cleaning the thread path and replacing needles will keep your machine humming smoothly for years to come.
Regular Cleaning of The Thread Path and Tension Assemblies
Getting your take-up lever running smoothly starts with a solid cleaning schedule.
Clear lint from your thread path using a small brush – those tiny fibers love hiding in tension assemblies.
For preventative maintenance, run a dry cloth along the thread guides weekly.
After oil application, do a quick tension check by testing on scrap fabric. Your sewing machine troubleshooting efforts will be much easier with clean components.
Replacing The Needle Regularly
Everyone knows the golden rule of sewing machine maintenance: change your needle regularly to prevent take-up lever issues. A worn or bent needle can wreak havoc on your machine’s performance.
Here’s what a damaged needle can do to your sewing machine:
- Create jagged, uneven stitches that snag your fabric
- Cause thread breakage and tension problems
- Damage your machine’s delicate timing mechanism
- Lead to take-up lever misalignment and stitch skipping
Scheduling Annual Servicing
Now that you’ve mastered needle replacement, let’s talk about the unsung hero of sewing machine longevity – annual servicing.
Professional maintenance keeps your take up lever running smoothly and prevents costly repairs down the road.
| Service Type | Cost Range | Frequency |
|---|---|---|
| Basic Tune-up | $75-$100 | Yearly |
| Deep Clean | $150-$200 | Every 2 years |
| Full Overhaul | $250+ | As needed |
Schedule your sewing machine maintenance with a certified technician to maintain warranty coverage and guarantee peak performance.
Using The Correct Thread Type
While regular servicing keeps your machine running smoothly,
choosing the right thread type can prevent take-up lever headaches. Stick with polyester thread for best thread tension and fewer snags.
Like matching shoes to an outfit, proper needle-thread match matters – it affects your sewing machine stitch quality.
Thread issues often stem from using low-quality threads, so invest in reliable brands that won’t stress your take-up lever.
Thread Tension and Hook Timing Essentials
You’ll fix most thread and timing headaches by checking three key areas: your thread path, tension settings, and hook timing.
If you’re seeing skipped stitches or hearing strange noises, don’t worry – we’ll show you how to get your machine humming along smoothly again.
Verifying Correct Thread Routing
Regular maintenance sets the stage for proper thread routing, which can make or break your sewing experience.
Think of thread path like a road map – one wrong turn and you’re headed for trouble.
Here’s your quick troubleshooting guide for proper routing:
- Start at the spool pin, following each threading guide in sequence
- Check that thread sits properly in all guides and the takeup lever
- Look for worn or damaged guides that could cause thread to jump
Adjusting Tension Settings
Thread tension adjustment doesn’t have to feel like rocket science.
Set your tension dial to 4 as a starting point for most sewing machine tension problems.
If you’re seeing uneven stitches, adjust in small increments – higher for loose top stitches, lower for loose bottom ones.
Remember to match your thread types and needle size to your fabric weight for best results. Test on scrap fabric before tackling your project. Best results. Thread tension adjustment.
Ensuring Proper Hook Timing
To achieve perfect sync, remember that issues like skipped stitches, thread jams, or unusual noises can be signs of underlying timing problems, which can be resolved by learning how to fix sewing machine timing.
Now that you’ve got your tension dialed in, let’s tackle hook timing basics. Your take-up lever should work in perfect sync with your hook – it’s like a dance partner that never misses a beat. When the lever hits its lowest point, that’s when the hook should grab your thread.
- Proper timing feels like butter – smooth, consistent stitches every time
- Bad timing sounds like your machine’s having a bad day
- Perfect sync means you’ll spend less time fixing thread nests
Preventing Thread From Coming Out of The Lever
You’ll save yourself a lot of frustration by learning how to keep your thread from jumping out of the take-up lever while you sew.
If you’ve ever had your thread pop out mid-stitch, you’re not alone, but there’s a simple fix that’ll keep your sewing smooth and tangle-free.
Using The Correct Needle Size
Getting your needle size right is like finding the perfect dance partner for your thread.
If you notice thread popping out of your take-up lever, check if your sewing machine needle matches your thread weight.
A needle that’s too small strains the thread, while one that’s too large creates loose loops.
Consult a needle size chart and stick to universal needles (size 80/12) for everyday projects.
Ensuring Correct Thread Routing
Once you’ve got the right needle in place, proper thread routing becomes your next line of defense.
Your thread path should flow smoothly through each guide alignment point like a well-choreographed dance.
Start at the spool placement, guide it through the tension discs, and up to the take-up lever.
Remember, even one missed threading guide can cause thread slippage and those frustrating thread takeup lever issues.
Using a Felt Pad Under The Thread Spool
Beyond proper threading, a felt pad under your thread spool acts as a stabilizer, preventing thread slippage that can jam your take up lever.
Place a small felt pad (DIY or store-bought) beneath the spool – it’s like giving your thread a cozy cushion.
This simple addition smooths thread flow and reduces friction, keeping your take up lever running without hiccups.
For stubborn spools, flip them upside down for even better results.
Troubleshooting Take-Up Lever and Needle Immobility
When your sewing machine’s take-up lever and needle won’t budge, you’re probably dealing with a thread jam.
That’s making your machine as stubborn as a teenager on Monday morning.
You’ll need to quickly check for tangled threads and fabric pieces.
These might be playing hide-and-seek in your machine’s mechanisms.
Retreading The Machine
When your take-up lever’s stuck, a fresh start with proper threading can work wonders.
Before you adjust take-up lever settings, clear the thread path completely.
Here’s your quick fix roadmap:
- Remove all thread from guides, tension discs, and the needle
- Clean each threading point with a soft brush
- Follow your machine’s threading diagram precisely, ensuring the thread slides smoothly through the highlow take-up lever motion
Removing Jammed Thread or Fabric
Got a stubborn fabric jam in your take-up lever? First, turn off your sewing machine – safety first!
Carefully remove the presser foot and gently pull any visible threads.
For those pesky hidden jams, check your bobbin area and tension discs. Use tweezers to extract trapped fabric bits, and clear any debris around the feed dogs.
A clean machine means smoother sewing ahead.
Inspecting and Replacing The Needle
Facing sewing machine needle problems? Take a close look at your needle for signs of wear or damage.
A bent needle can wreak havoc on your stitches and take-up lever. Hold the needle up to a light source – if it’s curved even slightly, it’s time for a replacement.
Choose the right needle size for your fabric weight, and remember to change your needle after every major project.
Cleaning The Bobbin Case
Now that your needle’s in top shape, let’s focus on the bobbin case cleaning – it’s like giving your machine a spa day!
Remove the bobbin case and use a small brush to sweep away lint buildup.
Check for scratches or rough spots that could snag your thread. Apply a tiny drop of oil to keep things running smooth.
Regular case inspection prevents those frustrating skipped stitches and bobbin problems.
Advanced Take-Up Lever Adjustment Techniques
You’ll be amazed at how a few precise adjustments to your take-up lever’s timing can transform your sewing machine’s performance.
With the right hook timing and thread stand setup, you’ll say goodbye to those frustrating thread jams and skipped stitches that have been driving you crazy.
Adjusting Hook Timing
Hook timing issues can throw your whole sewing project off track.
To adjust it, check if your machine’s hook spins smoothly and catches the thread at just the right moment.
When your take-up lever hits its lowest point, the hook should grab the thread loop. If you notice skipped stitches or tension problems, try tweaking the hook’s position using your machine’s timing adjustment screws. This is crucial for proper sewing.
Synchronizing The Take-Up Lever and Bobbin Case
Getting your thread to behave starts with perfect lever synchronization.
When your take-up lever reaches its lowest point, the hook should smoothly wrap thread around the bobbin case – it’s like a perfectly timed dance.
Adjust the hook alignment if you notice skipped stitches or timing hiccups.
Keep your thread tension steady around 4, and watch how the bobbin timing matches the lever’s movement.
Using a Thread Stand for Optimal Performance
While mastering take-up lever timing, you’ll notice thread tension can still act up. That’s where a thread stand becomes your secret weapon. Think of it as your thread’s personal elevator – it guides your thread spool smoothly to prevent those pesky tangles and keeps your sewing machine parts working in harmony.
- Position your thread stand height just above your machine’s highest point
- Match stand stability with your spool size impact
- Thread the stand before the take-up lever for best flow
Frequently Asked Questions (FAQs)
What is a thread take-up lever on a sewing machine?
The thread take-up lever on a sewing machine moves up and down, guiding your thread during stitching.
It guarantees proper tension and prevents thread tangles.
It works like a steady hand to create even, flawless stitches.
Where is the take-up lever on a sewing machine?
Did you know most sewing machine take-up levers complete their up-down cycle 1,000+ times a minute?
You’ll usually find it on the machine’s front, above the needle, or tucked inside the housing.
Check your manual!
How do I thread the take-up lever?
Guide the thread through the upper tension assembly.
Then pull it to the take-up lever.
Slide it into the lever’s eye from right to left.
Double-check it’s secured before threading the remaining guides and needle.
How do I fix a thread take-up lever problem?
When your thread take-up lever gets stuck, think of it like untangling a tough knot.
Clear thread debris, rethread carefully, and clean moving parts.
Make sure tension is set around
Consult your manual for adjustments.
How do I know if my sewing machine has a take-up lever?
Your sewing machine likely has one!
It’s a small lever that moves the thread up and down.
Check your manual; it’ll show you where it’s and what it does.
It’s pretty important for smooth sewing.
What is thread take-up lever synchronization?
Timing is everything!
Thread take-up lever synchronization guarantees the lever moves precisely with the sewing machine’s hook and needle.
This alignment lets the thread loop smoothly around the bobbin, preventing skipped stitches or thread jams.
How Do I Know if the Take-up Lever is Missing?
Look for an empty slot or hole where the lever should move up and down.
If there’s no visible mechanism or movement when turning the handwheel, the take-up lever might be missing.
What is the Best Way to Clean a Stuck Take-up Lever?
Cleaning a stuck take-up lever is like freeing a jammed zipper.
Patiently clear thread and debris, use a soft brush, and lubricate lightly.
Check the manual for specific cleaning spots, ensuring smooth movement for future sewing.
How Can I Prevent Thread From Coming Out of the Lever?
Keep the take-up lever threaded by lifting the presser foot when threading.
Setting tension to around
Avoid incompatible needle-thread combinations. Use consistent, smooth threading paths and check for thread snags or rough machine edges.
What Should I Do if the Take-up Lever and Needle Are Not Moving?
When your take-up lever and needle won’t budge, unplug the machine.
Check for jammed threads or fabric, remove the needle and presser foot, and cut tangles carefully.
Rethread everything.
If unresolved, professional repair may help.
Conclusion
Think of your sewing machine’s take-up lever like the unsung hero of a retro mixtape—it keeps everything in perfect sync.
Regular cleaning, proper thread tension, and adjustments guarantee smooth stitches and fewer headaches.
By keeping your take-up lever in check, you’ll prevent common problems like thread slipping out or lever jams.
Don’t forget, a quick review of your manual and occasional servicing go a long way. Mastering sewing machine take-up lever adjustment keeps your projects running seamlessly.

