This site is supported by our readers. We may earn a commission, at no cost to you, if you purchase through links.

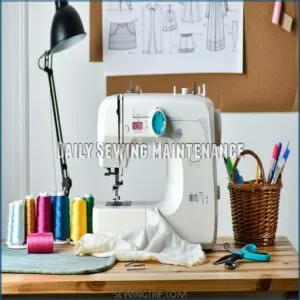
Daily: Grab a soft brush and banish lint from the needle plate and bobbin case.
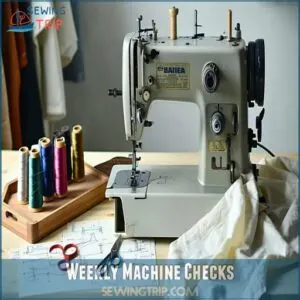
Weekly: Oil those moving parts and eyeball the power cord for wear.
Monthly: Do a deep clean with compressed air and white mineral oil.
Always adjust thread tension for picture-perfect stitches.
Listen for weird sounds—they’re your machine’s cry for help.
Catching small issues early prevents wallet-draining repairs.
Pro tip: Document everything and know when it’s time to call in the experts.
Your machine’s longevity depends on your TLC.
Table Of Contents
Key Takeaways
- You’ll supercharge your sewing machine’s performance by dedicating just minutes daily to cleaning, with a soft brush removing lint from the needle plate and bobbin case being your first line of defense.
- Your machine’s longevity depends on consistent maintenance: weekly oiling of moving parts, monthly deep cleaning with compressed air, and regular tension adjustments will prevent wallet-draining repairs.
- You’ll catch potential issues early by listening for weird sounds, inspecting your power cord weekly, and documenting any changes or concerns in your maintenance routine.
- Don’t wait for a breakdown – schedule professional servicing annually, which acts as a comprehensive health check that can identify and prevent major mechanical problems before they escalate.
Daily Sewing Maintenance
If you want your sewing machine to stay in top shape, daily maintenance is your secret weapon. By spending just a few minutes cleaning, removing lint, and organizing your workspace after each sewing session, you’ll prevent potential problems and keep your trusty machine running smoothly for years to come.
Cleaning Needle Plate
The needle plate is the heartbeat of smooth stitching. Carefully remove the presser foot and clean this key area with a soft brush, sweeping away accumulated lint and thread fragments.
Gently wipe the surface with a lint-free cloth, paying close attention to preventing debris buildup that could disrupt your machine’s precision and performance.
Removing Lint and Dust
After a sewing session, banish lint and dust like a pro. Use a soft lint brush to carefully sweep away debris from your machine’s delicate areas. Focus on the bobbin case, feed dogs, and needle plate.
Compressed air can help blast stubborn dust from hard-to-reach spots, ensuring your machine stays clean and performs smoothly.
Organizing Sewing Area
Every inch of your sewing space counts when organizing. Clear clutter from your workspace, arrange tools within easy reach, and create designated storage zones for fabric and supplies.
A tidy workspace isn’t just about looks—it’s a sewing machine maintenance strategy that boosts efficiency and protects your precious gear from dust and potential damage.
Cleaning Bobbin Case
Peek inside your bobbin case to achieve smooth stitching performance. Keeping this critical area clean prevents thread tension nightmares and machine hiccups.
- Gently brush away lint with a soft-bristled tool
- Inspect the bobbin case for hidden thread debris
- Wipe down surfaces carefully to prevent dust buildup
A clean bobbin case means precision sewing and fewer frustrating fabric snags. The bobbin case needs regular proper cleaning techniques to maintain peak performance.
Weekly Machine Checks
You’ll want to set aside a few minutes each week to keep your sewing machine in top shape.
By performing quick checks like oiling moving parts, inspecting the power cord, and adjusting tension, you’ll prevent bigger problems.
Maintain smooth, reliable stitching every time.
Oil Moving Parts
Grease those gears like a pro! When oiling moving parts, use a syringe with a thin needle to apply sewing machine oil drop by drop.
Some modern machines use plastic polymers and mightn’t need oiling. Always follow manufacturer guidelines—over-oiling can be as harmful as under-oiling.
Precision is key in machine maintenance. Regular maintenance also involves checking the sewing machine manual for specific guidance on lubrication and upkeep.
Check Power Cord
Once you’ve finished oiling those moving parts, it’s time for a quick safety check.
You’ll want to inspect your power cord weekly – it’s like giving your machine a mini health checkup!
Here’s your cord inspection checklist:
- Run your fingers along the full length of the cord, feeling for any frayed wires or cracks.
- Check where the cord meets the machine and foot pedal for loose connections.
- Look for any discoloration or wear that might signal electrical issues.
Adjust Tension
Thread tension is crucial for the success of your sewing project. Learning to adjust your machine’s tension can turn uneven stitches into professional-looking results.
Understanding proper tension settings is essential for achieving balanced stitches. Check your settings with this quick reference: proper tension settings.
| Symptom | Likely Cause | Solution |
|---|---|---|
| Loose Top Stitches | Upper Tension Too Low | Increase Tension |
| Tight Bottom Stitches | Bobbin Tension High | Loosen Bobbin Tension |
| Puckered Fabric | Unbalanced |
Lubricate Gears
After fine-tuning your thread tension, your sewing machine needs some TLC with proper lubrication.
Gears are the unsung heroes of smooth stitching, and keeping them well-oiled prevents wear and tear.
Here’s your gear maintenance game plan:
- Use clear white mineral oil
- Apply sparingly to moving parts
- Rotate handwheel to distribute
- Avoid over-lubricating
- Check manufacturer’s specific guidelines
Monthly Deep Cleaning
Once a month, your sewing machine deserves a thorough, systematic cleaning that goes beyond your daily quick wipe-down.
By dedicating time to a monthly deep clean, you’ll guarantee your machine runs smoothly, prevent potential mechanical issues, and extend its overall lifespan.
Clean Feed Dogs
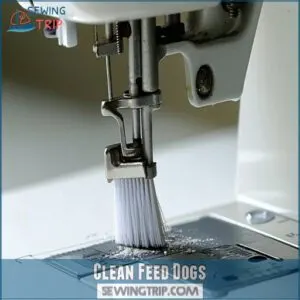
Those tiny metal teeth beneath your needle plate are feed dogs, and they’re magnets for lint and thread debris.
During monthly maintenance, gently brush away accumulated gunk using a soft-bristled brush or compressed air. Work carefully to remove trapped fibers without damaging the delicate mechanism, ensuring smooth fabric movement and preventing potential sewing machine performance issues.
Regular use of a dog feed brush is essential for maintaining feed dog health.
Lubricate Mechanisms
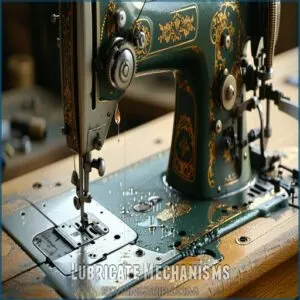
After clearing feed dogs of gunk, it’s time to show your machine some love with proper lubrication. Your sewing buddy needs smooth-running gears to perform its best.
Here’s why mechanism care matters:
- Prevents metal-on-metal grinding that kills machines
- Extends your machine’s lifespan exponentially
- Reduces friction and unexpected repair costs
Use clear white mineral oil sparingly, targeting key moving parts without overdoing it. A few strategic drops keep everything humming.
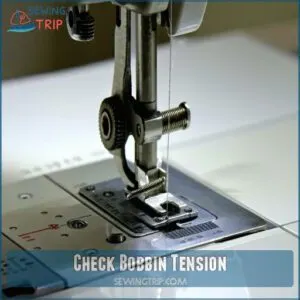
Check Bobbin Tension
How balanced is your bobbin tension? bobbin tension is crucial for maintaining smooth, professional-looking sewing machine upkeep.
Your monthly deep cleaning routine should include a careful bobbin tension check to prevent thread breakage and uneven sewing stitches.
Here’s a quick reference table for bobbin tension troubleshooting:
| Symptom | Possible Cause |
|---|---|
| Loose Stitches | Tension Too Low |
| Tight Stitches | Tension Too High |
| Thread Bunching | Misaligned Bobbin |
| Uneven Stitches | Incorrect Bobbin Adjustment |
| Thread Breakage | Tension Imbalance |
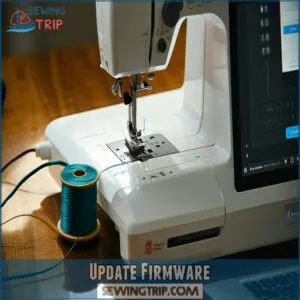
Update Firmware
At the heart of your sewing machine’s digital health, firmware updates guarantee smooth performance and resolve potential glitches.
Here’s how to tackle digital maintenance:
- Check manufacturer’s website for latest firmware
- Download compatible update package
- Follow precise installation instructions
- Restart machine after update completion
Regular machine maintenance checks are also vital for peak performance. Your tech support lifeline keeps your sewing companion running like a well-oiled digital dream.
Tension Adjustment Tips
When your stitches look wonky or uneven, it’s time to tackle your sewing machine’s tension settings like a pro.
Understanding how to adjust the tension dial can transform your sewing from frustrating to fabulous, ensuring your projects look polished and professional.
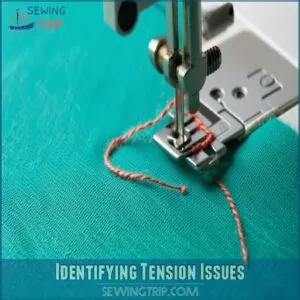
Identifying Tension Issues
After deep cleaning your machine, pay attention to tension problems that can wreak havoc on your sewing projects.
Look for telltale signs like loops on fabric’s top or bottom, which signal thread tension misalignment.
Skipped stitches or "eyelashes" on fabric’s back often indicate needle tension issues.
Identifying these tension problems early helps maintain stitch quality and prevents fabric puckering before they become major headaches.
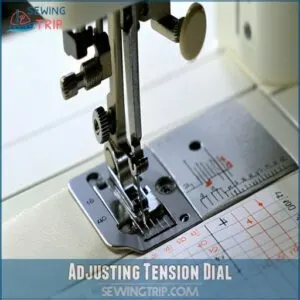
Adjusting Tension Dial
Most sewing machines feature a numbered tension dial that’s key to perfect stitches.
Start by setting your dial to 4 – it’s the sweet spot for medium-weight fabrics.
When adjusting tension settings, make tiny quarter-turn changes and test on scrap fabric.
Watch how your stitches form: if top threads show underneath, increase the number; if bobbin threads peek above, decrease it.
Keep notes of successful dial calibrations for different fabrics.
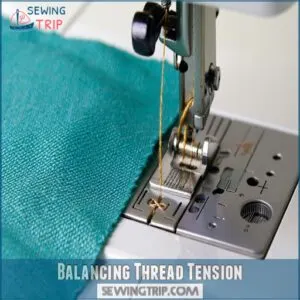
Balancing Thread Tension
Now that you’ve adjusted your tension dial, let’s get that perfect thread balance.
Your stitches tell the whole story – if they’re looping underneath or bunching up top, your tension needs fine-tuning.
Here’s what to check for ideal stitch quality:
- Test different tension settings on scrap fabric first
- Look for balanced stitches where top and bottom threads meet in the middle
- Match thread weight to your fabric type
- Make sure bobbin tension isn’t too loose or tight
- Clean tension discs regularly for smooth thread flow
Proper tension adjustment techniques are essential for achieving perfect stitches.
Professional Servicing Needs
You’ll need professional servicing when your sewing machine makes unusual noises or shows persistent stitch problems that basic maintenance can’t fix.
Taking your machine to a qualified technician once a year helps prevent major issues and keeps your sewing projects running smoothly.
Signs of Needed Service
Three key signs tell you it’s time for professional service: unusual machine noises like clicking or grinding, persistent thread breakage despite adjustments, and inconsistent stitch quality that won’t improve with tension tweaks.
If your motor struggles to maintain speed or you notice faulty parts during your maintenance checklist checks, don’t wait – these issues need expert attention to prevent bigger problems.
Finding Qualified Technician
When mysterious machine hiccups signal trouble, your next move is finding a qualified technician.
Check manufacturer websites for certified service centers or tap into local quilting groups for trusted repair shop recommendations.
Compare free estimates, verify technician certifications, and prioritize factory-trained experts who know your machine’s quirks inside and out.
Utilizing a reliable technician finder tool can also help streamline the process of locating a qualified professional.
Preparing Machine Service
Once you’ve located a qualified technician, prepare your machine for service by documenting its issues.
Gather maintenance records and note any unusual sounds, stitch problems, or performance hiccups.
Take clear photos of specific concerns.
Compile a sewing machine maintenance checklist highlighting recent repairs, thread tension changes, and firmware updates to help the technician diagnose problems efficiently.
Post-Service Maintenance
A well-serviced sewing machine is your creative companion, ready to stitch dreams into reality.
After professional maintenance, your next steps are essential for long-term performance:
- Carefully inspect each component for alignment and smooth movement
- Apply a light layer of machine oil to recommended parts
- Test stitch quality on scrap fabric using different thread weights
- Record maintenance details in your sewing machine maintenance tracker
Regular maintenance also involves understanding servicing needs to keep your machine running smoothly.
Frequently Asked Questions (FAQs)
Why do you need a sewing machine maintenance checklist?
Pristine performance prevents problems! You’ll safeguard your sewing machine’s longevity, prevent costly repairs, and guarantee smooth stitching by systematically tracking maintenance tasks through a detailed, easy-to-follow checklist.
How do you maintain a sewing machine?
You’ll keep your sewing machine running smoothly by cleaning it regularly, oiling moving parts, changing needles, checking tension, and scheduling annual professional servicing.
Prevent wear and catch potential issues early by following these maintenance steps.
Catch potential issues early by scheduling annual professional servicing.
What is the basic maintenance of a sewing machine?
Your sewing machine’s heartbeat depends on tender loving care.
Dust it after each use.
Oil its moving parts monthly.
Replace needles regularly.
Schedule professional check-ups yearly to maintain smooth, reliable stitching through every creative journey.
How often should a sewing machine be serviced?
You’ll want to have your machine professionally serviced once a year.
For heavy users, twice annually keeps everything running smoothly.
Regular check-ups prevent costly repairs and assure your machine’s longevity and superior performance.
What are the basics of sewing machine repair?
You’ll tackle basic sewing machine repairs by regularly cleaning, oiling moving parts, replacing needles, checking tension, and addressing minor issues.
When problems persist, don’t hesitate to consult a professional technician for expert assistance.
How long does it take to clean a sewing machine?
Experts estimate cleaning a sewing machine takes 15-30 minutes.
You’ll breeze through it by gathering supplies, removing lint with a soft brush, wiping surfaces, and checking critical components for smooth performance.
What maintenance does a sewing machine need?
You’ll need to clean, oil, and check your machine regularly.
Replace needles between projects, adjust tension, and get professional servicing yearly.
Keep it covered and debris-free for peak performance and longevity.
How do I make a machine maintenance checklist?
Create a clear, step-by-step maintenance checklist with daily, weekly, and monthly tasks.
Include cleaning, oiling, needle replacement, and tension checks.
Customize the list to your machine’s specific requirements and manufacturer’s recommendations.
What is the most common problem of the sewing machine?
Thread tension problems are a common issue for most sewing machines.
You’ll notice uneven stitches, puckered fabric, or thread bunching.
Quick adjustments to your tension dial can usually resolve these frustrating issues and get you back to smooth sewing.
What is the correct order of the steps in sewing machine maintenance?
If you’ve got a sewing machine, you’ll want to dance through maintenance: clean daily, oil weekly, check tension, replace needles regularly, and schedule professional servicing annually.
To keep your stitching smooth and machine humming, follow these essential care routines.
Conclusion
Ironically, your sewing machine’s lifespan isn’t about fancy gadgets, but diligent care.
With this maintenance checklist printable, you’ll evolve from a casual hobbyist to a precision craftsperson.
Regular cleaning, strategic oiling, and timely tension adjustments aren’t just tasks—they’re investments in your machine’s performance.
By dedicating just minutes weekly, you’ll prevent costly repairs and guarantee your trusty companion delivers flawless stitches for years.
Your machine’s health? Totally in your hands.
- https://whip-stitch.com/sewing-machine-maintenance-a-sample-schedule/
- https://www.moodfabrics.com/blog/sewing-machine-care-and-maintenance/
- https://pubs.nmsu.edu/_c/C102/index.html
- https://www.getmaintainx.com/procedures/d/miGt4wZWiSk/a-sewing-machine-technician%E2%80%99s-checklist
- https://ohyoucraftygal.blogspot.com/2013/10/sewing-lesson-10-how-to-fix-tension-on.html

