This site is supported by our readers. We may earn a commission, at no cost to you, if you purchase through links.
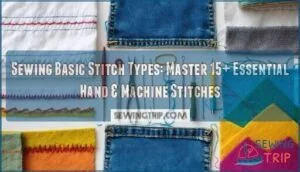
Start with simple hand stitches using quality thread and sharp needles – think of them as your sewing alphabet. Machine stitches like straight and zigzag expand your possibilities exponentially.
Practice makes perfect, but don’t stress over wobbly first attempts – even seasoned seamsters started somewhere. These building blocks reveal everything from quick repairs to custom garments.
Once you’ve got the basics down, you’ll discover some surprising shortcuts that professional tailors use, and with time, you’ll become proficient in using them to create your own designs, making you a seasoned seamster with the ability to make quick repairs.
Table Of Contents
Key Takeaways
- Start with essential hand stitches – You’ll master the running stitch for basic seams, the backstitch for strength, and the slip stitch for invisible hems as your foundation before moving to machine work.
- Practice makes perfect, even with wobbly attempts – Don’t stress over imperfect first tries, since even seasoned seamsters started somewhere, and consistent practice builds the muscle memory you need.
- Quality tools matter for success – You’ll need the right needle for your fabric type, matching thread weight, and proper tension settings to avoid frustrating snags and breaks.
- Build from basics to advanced techniques – Once you’ve got the fundamental stitches down, you can tackle professional skills like zipper installation, buttonholes, and decorative edges that transform simple projects into polished pieces.
Basic Sewing Stitches
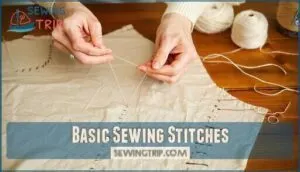
You’ll master five essential hand stitches that form the backbone of every sewing project, from quick repairs to detailed embroidery work.
These fundamental techniques—running, back, basting, slip, and catch stitches—unlock endless creative possibilities once you’ve got the hang of threading your needle and maintaining even tension, which are essential for every sewing task.
Running Stitch Technique
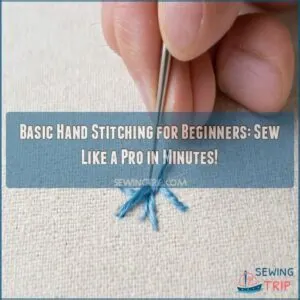
Running stitch serves as your hand sewing techniques foundation—think of it as the alphabet of basic stitches tutorial. You’ll create even, forward-moving stitches that look like a dotted line across fabric.
Running Stitch History spans over 20,000 years, making it humanity’s oldest stitch. Running Stitch Variations include Running Stitch Embroidery for decorative work and Gathering with Running for creating fabric fullness. Running Stitch Repairs work perfectly for quick mends.
- Master consistent 1/8 to 1/4 inch spacing for professional results
- Practice the rhythmic needle motion—up, forward, down, repeat
- Use this versatile stitch for basting, gathering, and temporary holds
- Build confidence through repetition on scrap fabric before tackling projects
Back Stitch Application
Backstitch delivers unbeatable stitch durability for seam reinforcement and mending techniques.
Work left to right, inserting your needle at the previous stitch’s end point. This hand sewing technique conquers curved seams with ease, creating strong connections that outlast machine stitching.
Museums showcase its historical use in garments from centuries past. You’ll love this reliable beginner sewing stitch for repairs.
Basting Stitch Usage
Basting stitch acts like your fabric’s personal assistant—keeping everything perfectly aligned before the real work begins.
You’ll use longer stitch length (1/4 to 1/2 inch) for temporary holds during fitting purposes. This hand sewing technique provides seam elasticity while maintaining fabric alignment.
Perfect for beginner sewing stitches, these loose hand sewing techniques remove easily once you’ve completed permanent seaming.
For complex projects, consider securing seams temporarily with basting.
Slip Stitch Method
Mastering slip stitch transforms your hand sewing game—this invisible technique makes delicate repairs disappear completely. Perfect fabric matching and gentle stitch tension create seamless results on curved edges.
- Thread needle with matching thread for perfect invisible hems
- Catch only 1-2 fabric threads to maintain stealth
- Keep stitches loose yet secure for natural drape
- Work right to left for smoother hand sewing techniques
Catch Stitch Process
When you’re working with curved hems and need flexible seams, the catch stitch becomes your best friend for hand sewing.
This sewing technique creates slanted X-patterns that move with your fabric.
Work left to right, keeping tension control loose so seams stay flexible.
Perfect for stitch variations across different fabric types, this versatile hand sewing stitch among essential sewing stitches handles binding beautifully while adding decorative flair.
Essential Sewing Tools
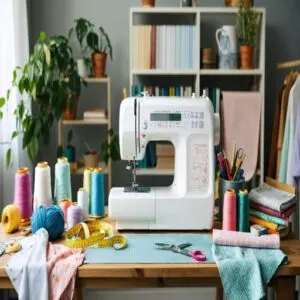
Before you can master those beautiful stitches, you’ll need the right tools in your sewing kit.
Think of these essentials as your trusty sidekicks – the right needle, thread, tape measure, and machine settings can make the difference between a frustrating afternoon and a satisfying project that actually looks professional.
The right tools are crucial for achieving a professional look, and having them in your sewing kit will help you complete your projects efficiently.
Choosing Right Needle
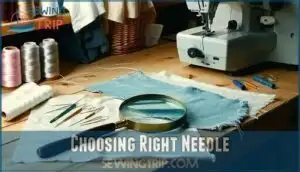
Your needle choice makes or breaks your project—literally! Like matching keys to locks, fabric compatibility requires the right needle sizes and point types for smooth sailing.
Choose the right needle – your fabric depends on it!
Here’s your needle selection game plan:
- Universal needles (80/12-90/14) handle most woven fabrics and light knits
- Ballpoint needles slide through stretchy materials without preventing damage
- Sharp needles pierce dense fabrics like silk and microfiber precisely
Sewing machine needle brands like Schmetz and Organ offer reliable options. Knowing the anatomy of needles can help you choose the right one. Remember, wrong needles cause skipped stitches and fabric tears—mastering sewing basics starts here!
Selecting Right Thread
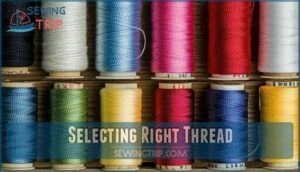
Now you’re looking at your thread collection, wondering which spool will make your project shine. Thread material plays matchmaker with your fabric’s fiber content – cotton threads love natural fabrics, while polyester handles everything else like a champ.
Think of thread weight as your project’s backbone: lighter weights (around 50) work great for delicate fabrics, while heavier ones (30-40) tackle tough jobs. Smart thread choices boost stitch durability and help with tension minimization.
Your sewing machine will thank you for picking quality thread that won’t snap mid-seam. For multicolored fabrics, selecting thread based on the dominant color works.
- Match thread material to fabric – cotton with cotton, polyester with synthetics for best results
- Consider thread weight carefully – fine threads for delicate work, heavy for upholstery projects
- Quality matters most – cheap thread breaks easily and creates frustrating tangles during sewing
Remember, slightly darker thread colors blend better than lighter ones in your finished sewing stitches.
Using Tape Measure
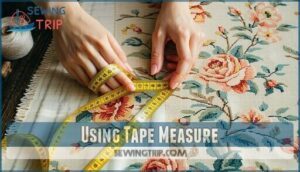
Precision is your secret weapon in sewing success. Accurate measurements prevent frustrating do-overs and wasted fabric.
Your tape measure handles body measurements, seam allowance checks, and pattern adjustments with ease. These sewing basics save time and money.
A sewing tape’s versatility is unmatched for various tasks.
| Measurement Type | Common Uses | Pro Tips |
|---|---|---|
| Body Measurements | Bust, waist, hip sizing | Take over fitted clothing |
| Seam Allowance | Edge-to-stitch distance | Standard is 5/8 inch |
| Fabric Width | Material planning | Check before cutting |
| Pattern Adjustments | Custom fitting | Mark changes clearly |
Master these sewing fundamentals and you’ll tackle any project confidently!
Sewing Machine Operations
With your tape measure tucked away, you’re ready to fire up that sewing machine and make some magic happen. Sewing machine operations might seem intimidating at first, but they’re just like riding a bike – once you get the hang of it, you’ll wonder what took so long.
Start with these sewing machine basics:
- Tension Adjustment – Find that sweet spot where threads dance together perfectly
- Stitch Length controls determine how your fabric moves forward
- Needle Types match your project like choosing the right shoes for weather
- Machine Maintenance keeps everything humming like a well-tuned engine
- Speed Control lets you crawl or cruise depending on your comfort level
These sewing machine techniques transform intimidating contraptions into trusty creative companions that’ll serve you for years. Regular care guarantees optimal machine performance.
Sewing Machine Stitches
You’ll use your sewing machine’s built-in stitches to handle most of your projects, from basic seams to decorative touches.
Mastering straight stitches, zigzag patterns, buttonholes, and blind hems gives you the foundation to tackle everything from simple repairs to complete garments.
Straight Stitch Practice
Perfect your straight stitch with these simple steps. Start with medium Stitch Length and practice Tension Control on different Fabric Types. This foundation makes all other sewing stitches easier to master.
Your practice plan:
- Mark Seam Allowance lines on scrap fabric for guided sewing practice
- Focus on steady speed control while maintaining straight lines
- Master Cornering Techniques by stopping with needle down, lifting presser foot, and pivoting fabric
These sewing basics turn beginner sewing into confident crafting.
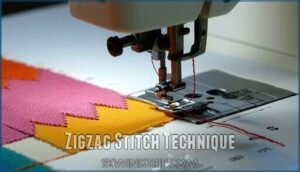
Zigzag Stitch Technique
While straight stitching builds your foundation, the zigzag stitch transforms your sewing game completely.
This powerhouse handles Edge Finishing on raw seams and conquers Stretch Fabrics like a champion.
You’ll master Appliqué Sewing and create stunning Decorative Effects by adjusting width and length settings.
Regularly checking the machine’s tension is essential for achieving perfect zigzag stitches.
| Fabric Type | Stitch Width | Best Use |
|---|---|---|
| Cotton/Linen | 2-3mm | Edge finishing, seam reinforcement |
| Knits/Jersey | 3-4mm | Stretch seams, hemming activewear |
| Denim/Canvas | 1-2mm | Topstitching, heavy-duty repairs |
| Silk/Chiffon | 1-2mm | Delicate edge finishing, rolled hems |
| Fleece/Wool | 4-5mm | Blanket edges, decorative borders |
This versatile sewing stitch prevents fraying while adding flexibility your garments need.
Practice Stitch Variations on scraps—you’ll discover endless possibilities for both functional and decorative sewing techniques.
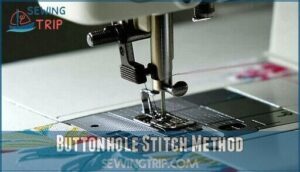
Buttonhole Stitch Method
Moving from zigzag stitches, you’ll find buttonhole stitches create the strongest reinforcement for fabric edges.
Your sewing machine’s specialized buttonhole foot automatically produces dense, uniform stitches that won’t fray.
Key buttonhole stitch techniques:
- Mark precise buttonhole placement before stitching
- Test corded buttonholes on scrap fabric first
- Use reinforcement techniques like interfacing for lightweight materials
- Adjust stitch density based on fabric weight
- Practice various stitch variations for different projects
This hand sewing stitches foundation transfers beautifully to machine work, giving you professional results every time.
Blind Hem Stitch Process
The blind hem stitch creates professional invisible hems that save you tons of time.
Start with proper Fabric Preparation by folding and pressing edges carefully. Thread Choice matters—match your fabric weight perfectly.
- Adjust Stitch Settings for fabric thickness
- Install the blind hem Presser Foot correctly
- Test on fabric scraps first
- Use Practice Techniques for consistent results
This sewing technique beats hand sewing stitches every time!
Hand Sewing Fundamentals
You’ll master the backbone of all sewing projects when you learn these five essential hand stitches that every beginner needs to know.
Hand sewing gives you complete control over your stitches and works perfectly when your machine isn’t available or when delicate work requires a gentle touch.
Running Stitch Application
Now it’s time for hands-on hand sewing practice! The running stitch might look simple, but it’s your Swiss Army knife for countless projects. Think of it as the foundation that supports everything else you’ll learn in basic stitches.
This versatile technique shines in several key areas:
- Fabric gathering creates beautiful ruffles and pleats with controlled bunching
- Seam elasticity allows up to 20% stretch, perfect for lightweight materials
- Decorative stitching adds charm to quilts and embroidery projects
- Historical use spans over 20,000 years, proving its reliability
Master your stitch length—shorter for strength, longer for speed. Hand sewing basics don’t get more fundamental than this simple hand stitch.
Basting Stitch Technique
You’ve conquered running stitches—now let’s master basting stitch technique. Think of basting as your sewing safety net, holding fabric pieces perfectly in place.
Aspect Pro Tips
Fabric Prep Pin layers, mark alignment points
Stitch Length Use 1/4 to 1/2 inch stitches for easy removal
Basting Tips Keep loose tension, contrast thread color helps
Perfect for temporary holds and fitting purposes before permanent seams!
Catch Stitch Method
Catch stitch uses flexible hand sewing for curved edges and hem application.
Work left to right, creating small X-patterns between fabric layers. Keep stitch tension loose so hems move with you.
This stitching direction prevents puckering on curved seams. Take tiny bites of fabric above and below the hem, alternating sides.
Perfect for knit fabrics and anywhere you need stretch without snap.
Back Stitch Process
Back stitch creates the strongest hand stitch for mending clothes and curved seams.
Insert your needle one stitch-length behind where the thread emerges, then bring it up one stitch-length ahead.
This overlapping technique provides excellent seam reinforcement – it’s why historic textiles still survive today!
Perfect for repairs requiring serious stitch strength.
Blanket Stitch Usage
Beyond basic edge finishing, the blanket stitch transforms your hand sewing projects into decorative masterpieces.
This versatile technique excels in appliqué techniques and felt projects where durability meets beauty.
Master cornering methods by pivoting at fabric intersections, creating clean angles.
Explore decorative variations by adjusting stitch spacing and thread colors.
This essential sewing stitch type among fundamental sewing stitches elevates ordinary sewing techniques into professional-looking finishes that’ll make your projects shine.
Advanced Sewing Techniques
Once you’ve mastered basic stitches, you’re ready to tackle advanced techniques that’ll make your projects look professionally finished.
These skills—from installing zippers to creating perfect buttonholes—transform simple fabric pieces into polished, functional garments that’ll impress everyone who sees your handiwork.
Sewing Zippers
Precision with zipper installation elevates your sewing from amateur to accomplished craftsmanship.
- Select proper zipper types – coil zippers for beginners, invisible zippers for polished finishes
- Use zipper foot attachment for accurate stitching close to teeth without damage
- Master centered zipper placement with even seam allowances and careful alignment
- Apply zipper troubleshooting techniques to fix puckering, misalignment, or sticking issues
To achieve a seamless look, pre-treating fabric properly is essential.
Sewing Buttons
Your button-sewing skills can make or break a garment’s longevity.
Match sewing thread colors precisely to your fabric and select appropriate needle sizes for different button types.
Position buttons carefully, then stitch through holes using doubled thread for strength.
For shank buttons, create extra space by wrapping thread around the button’s stem before securing with tight knots underneath.
Here’s your button mastery checklist:
- Practice proper button placement using measuring tools for even spacing
- Master secure knots that won’t unravel after repeated washing cycles
- Learn different techniques for flat versus shank button attachment methods
- Build confidence with essential sewing skills through consistent sewing tutorials practice
This fundamental technique transforms loose buttons into permanent fixtures, making your sewing basics knowledge truly shine in everyday repairs.
Invisible Zipper Technique
While installing invisible zippers seems tricky, you’ll master it with patience.
Start by choosing your fabric choice carefully—lightweight materials work best for sewing for beginners.
Practice proper foot selection using your zipper foot for alignment accuracy.
Focus on seam finishing first, then measure zipper length precisely.
These sewing techniques and sewing basics will elevate your sewing skills through this essential sewing tutorial.
Sewing Scalloped Edges
Scalloped edges create elegant waves that bring personality to any project. You’ll love how this decorative technique transforms basic hems into eye-catching details perfect for skirts, pillowcases, and tablecloths.
Start with your scallop design by creating a cardboard template. Mark gentle curves along your fabric edge, spacing them evenly.
Here’s what you need to know:
- Pattern Transfer: Use washable fabric markers to trace your template onto the right side of fabric
- Fabric Choice: Pick lightweight cottons or linens that won’t bulk up when folded and stitched
- Trimming Techniques: Clip seam allowances at curve points to prevent puckering when you turn edges
Stitch slowly along marked lines using small, even stitches. This sewing technique requires patience, but the results showcase your growing skills with advanced sewing methods.
Gathering Fabric Method
You’ll create gorgeous ruffles using simple gathering techniques that work like magic.
Start with basic stitches – hand sewing works great for delicate fabrics, while machine basting handles heavier materials.
Fabric density affects your approach: lightweight cotton needs gentle elastic thread, while denim requires corded gathering.
Adjust ruffle density by spacing your sewing stitches closer together.
These sewing techniques create stunning shirring effects that’ll make your projects look professionally finished.
Method Look Best For Tool Difficulty
Frequently Asked Questions (FAQs)
What are the 7 types of stitches?
You’ll master seven essential stitches: running stitch for basic seams, backstitch for strength, blanket stitch for edges, slip stitch for invisible hems, basting for temporary holds, catch stitch for flexible hems, and zigzag for stretch fabrics.
What are the five basic stitches?
Like building blocks in a toolbox, five basic stitches form your sewing foundation: running stitch for quick seams, backstitch for strength, blanket stitch for edges, slip stitch for invisible hems, and basting stitch for temporary holds.
How to do stitches for beginners?
Start with the running stitch – just weave your needle up and down through fabric in even spaces. Practice backstitch next for stronger seams, then try basting for temporary holds.
What are the basic rules of stitching?
Perfect stitching isn’t rocket science, but consistency makes all the difference!
Keep even spacing, maintain steady tension, choose the right needle for your fabric.
Always secure your thread ends properly.
What are the different types of stitches in sewing for beginners?
You’ll need six essential stitches: running stitch for basic seams, backstitch for strong repairs.
Basting is for temporary holds, slip stitch is for invisible hems, blanket stitch is for decorative edges.
Zigzag is for stretch fabrics.
Why should you learn how to stitch?
Museums show running stitch dates back 20,000 years.
You’ll save money on repairs, customize clothes perfectly, and create unique pieces.
Stitching builds patience, improves focus, and gives you practical skills for life.
What stitches do you learn on a sewing machine?
When you’re learning machine sewing, you’ll master straight stitches for seams, zigzag stitches for edges and stretch fabrics, buttonholes for closures, and blind hems for invisible finishes.
How do I learn sewing techniques?
Start with basic hand stitches like running and backstitch on practice fabric.
Use a sewing machine for straight and zigzag stitches.
Take classes, watch tutorials, and practice regularly to build muscle memory and confidence.
What are essential stitches?
Back in medieval times, seamsters wielded needles like magic wands.
You’ll master five essential stitches: running stitch for basic seams, backstitch for strength, blanket stitch for edges, slip stitch for invisible hems, and basting for temporary holds.
What are the 7 basic sewing stitches?
Running stitch, backstitch, basting stitch, slip stitch, blanket stitch, catch stitch, and zigzag stitch form your essential toolkit. You’ll use these seven stitches for most projects, from hemming to repairs.
Conclusion
Mastering these stitches isn’t just about technique—it’s about discovering your creative potential.
You’ve now got the foundation to tackle everything from emergency repairs to ambitious projects.
Learning fundamental sewing stitches takes practice, but each wobbly attempt builds muscle memory.
Start with simple projects and gradually challenge yourself.
Remember, every expert seamster began exactly where you’re now, and your needle and thread are waiting—what will you create first?

