This site is supported by our readers. We may earn a commission, at no cost to you, if you purchase through links.
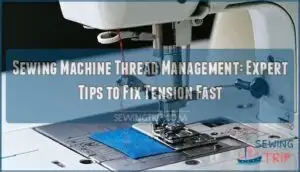
You’ll need to follow your machine’s threading path precisely, engaging every guide and tension disc.
Check your needle size matches your thread weight—a size 14 needle works well for most cotton threads.
Keep your bobbin properly wound and seated correctly in its case.
When tension feels off, start by rethreading both upper and lower threads before adjusting dials.
Clean lint from your tension discs regularly, and replace worn needles every 8-10 hours of sewing.
Quality thread makes a huge difference—cheap thread causes more headaches than it’s worth.
Master these fundamentals and you’ll gain smoother stitching techniques that transform challenging fabrics into manageable projects.
Table Of Contents
Key Takeaways
- Follow your machine’s threading path precisely – You’ll prevent most tension issues by threading through every guide and tension disc with the presser foot raised, then test on scrap fabric before starting your project.
- Match needle size to thread weight consistently – You’ll achieve smoother stitches by using size 14 needles for cotton threads, replacing needles every 8-10 hours, and adjusting both when switching fabric types.
- Start troubleshooting with rethreading, not adjustments – You’ll save time by completely rethreading both upper and bobbin threads before touching tension dials, as improper threading causes 90% of tension problems.
- Invest in quality thread and maintain your machine regularly – You’ll prevent breakage and skipped stitches by choosing premium threads over cheap alternatives and cleaning lint from tension discs after every few projects.
Thread Tension Basics
Thread tension acts as the invisible foundation of every stitch you create, determining whether your seams lie flat or pucker uncontrollably.
Master perfect stitches by understanding thread tension—your machine’s most crucial invisible skill.
When upper and bobbin threads balance perfectly, you’ll achieve smooth, professional results that make your sewing projects shine.
Importance of Balanced Tension
Balanced thread tension guarantees perfect stitch quality by preventing thread breakage and fabric puckering.
When upper thread and bobbin work in harmony, your machine calibration produces consistent results.
Poor tension control creates loops, skipped stitches, or bunching fabric. Thread flow must match fabric density requirements.
Master tension adjustment techniques to achieve professional seams every time you sew, ensuring perfect stitch quality.
Factors Affecting Thread Tension
Understanding thread tension control requires recognizing multiple variables that affect your machine’s performance.
Your success depends on mastering these key factors:
- Thread Weight: Heavier threads need increased tension, while lighter threads require gentler settings
- Fabric Density: Dense materials demand tighter upper tension; delicate fabrics need looser adjustment
- Stitch Length: Longer stitches reduce tension requirements compared to shorter, compact stitches
- Thread Quality: Premium threads flow smoothly, while poor-quality options create tension issues.
Thread tension adjustment becomes intuitive once you understand these relationships.
Monitor for thread breakage when switching between materials, as each combination demands specific tension control settings.
Identifying Tension Issues
Several tension signs reveal stitch quality problems before they ruin your project.
Your machine whispers warnings through every stitch—listen before it’s too late.
Your machine speaks through these symptoms:
- Looping stitches underneath – loose upper thread tension needs tightening
- Fabric puckering along seams – excessive tension crushing delicate materials
- Thread breakage mid-stitch – over-tightened settings causing stress fractures
- Uneven stitch formation – imbalanced thread tension control disrupting rhythm
Monitor these breakage causes closely.
Thread tension adjustment fixes most issues when you catch tension problems early through careful thread monitoring.
Threading Machine Correctly
Proper threading forms the foundation of successful sewing and prevents most tension-related problems before they start.
You’ll save hours of frustration by taking a few extra minutes to thread your machine correctly using your manual’s specific instructions.
This approach will help you avoid issues and ensure a smooth sewing experience with successful sewing.
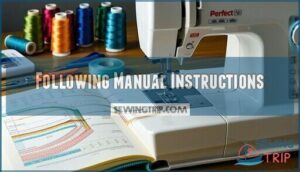
Following Manual Instructions
Your sewing machine manual contains the exact threading sequence for your specific model. Following these instructions prevents tension problems and guarantees proper machine setup. Each manufacturer designs unique thread paths for maximum tension control.
| Manual Section | Key Information |
|---|---|
| Threading Diagram | Shows exact thread path sequence |
| Tension Settings | Provides baseline adjustment numbers |
| Needle Guide | Matches needle size to fabric type |
| Bobbin Instructions | Details proper bobbin installation |
| Troubleshooting | Lists common sewing machine thread management issues |
Skip steps at your own risk—manual guidance saves time and frustration during sewing basics setup.
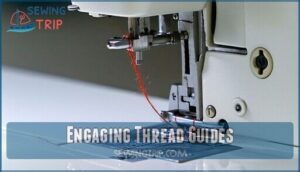
Engaging Thread Guides
During proper machine setup, thread guides act as critical checkpoints that control thread alignment and prevent costly tension problems.
Missing even one guide disrupts the entire thread flow system.
Follow this essential guide adjustment process:
- Verify each guide engagement – Double-check that thread sits securely in every guide slot to maintain proper thread alignment
- Keep presser foot raised – This disengages tension discs and allows easier thread guide navigation during bobbin setup
- Test thread flow – Gently pull thread to ensure smooth movement through the complete thread guide systems
Proper thread preparation through these guide systems guarantees effective tension control throughout your sewing project.
Understanding thread guide systems is vital for maintaining superior sewing performance.
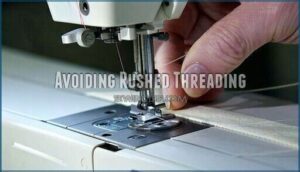
Avoiding Rushed Threading
Threading patience pays off when you follow threading tips and maintain steady sewing speed during machine prep. Rushing creates tension problems that disrupt thread flow and compromise tension control.
| Threading Phase | Time Investment |
|---|---|
| Initial Setup | 2-3 minutes |
| Guide Engagement | 30-45 seconds |
| Final Checks | 15-30 seconds |
Smart thread management techniques prevent thread break detection issues. Take time for proper thread selection and methodical threading. Your thread tension stays balanced when you don’t rush the process, saving frustration later.
Top 5 Thread Management Tools
Having the right thread management tools transforms your sewing experience from frustrating to flawless.
These five essential tools will help you maintain consistent thread tension and prevent common sewing problems that plague even experienced sewers, ensuring a flawless sewing experience.
1. Sewing Machine Needles Assorted Sizes

With assorted sewing machine needles, you’ll handle any project confidently.
Different needle sizes match various fabric density requirements, preventing needle breakage and ensuring smooth sewing speed.
Proper needle selection eliminates threading frustrations and maintains precise needle alignment.
This variety pack supports multiple thread types, making needle threading effortless across projects.
Machine calibration becomes simpler when you’ve got the right needle for each task.
Understanding the needle size chart is essential for superior performance.
Best For: Sewing enthusiasts and professionals who work with various fabrics and techniques, and need a versatile set of needles to achieve professional-looking results.
2. Home Sewing Machine Needles Variety Pack Size 9 18
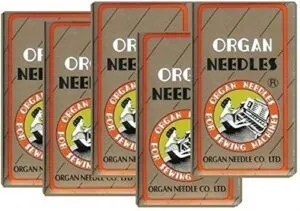
Having multiple needle sizes at your fingertips transforms your sewing experience from frustrating guesswork into confident precision.
A variety pack spanning sizes 9-18 covers everything from delicate silks to heavy denims, eliminating mid-project trips to the store.
Size 9 needles handle lightweight fabrics like chiffon and silk, while size 18 tackles thick materials like canvas and leather.
The middle range (sizes 11-14) works perfectly for everyday cottons and polyester blends.
Smart thread compatibility becomes effortless when you match thinner threads with smaller needles and heavier threads with larger ones.
This variety pack directly impacts thread tension stability.
Wrong needle sizes cause thread shredding, skipped stitches, and tension headaches.
The right needle creates proper thread flow, reducing machine settings adjustments and improving stitch quality.
Keep different sizes readily available for seamless fabric shifts.
Best For: Home sewists and crafters who work with various fabric types and need versatile needle selection for different projects.
3. brother sewing machine bobbins size a
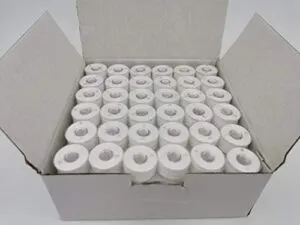
Brother Size A bobbins facilitate seamless thread tension control for your projects.
These SA156 Bobbin Types work perfectly with Babylock, Brother, Janome, and Singer machines, eliminating compatibility headaches.
You’ll appreciate their clear plastic construction – no more guessing about remaining thread.
The 10-pack quantity keeps you prepared for sewing machine maintenance without constant restocking trips.
Bobbin Sizes matter more than you’d think.
These brother sewing machine bobbins handle Thread Weights from 50 Weight to Tex 20 thread beautifully.
They’re engineered for newer Brother models without tension adjustment screws, which streamlines your sewing machine thread management.
Machine Tips: Pair these with embroidery and quilting projects on Ellisimo Gold or Destiny 2 machines.
The consistent bobbin tension prevents those frustrating thread bunching issues.
Sewing Hints: Stock multiple pre-wound bobbins in different thread colors for quick project switches.
4. Thread Spool Organizer Set Pieces

Smart thread spool organization transforms chaotic craft rooms into efficient workspaces. After selecting quality bobbins, you’ll need proper thread storage solutions to maintain your investment.
A thread spool organizer set keeps spools and bobbins paired perfectly. These compact units typically accommodate Types A, A/15, and L spools while fitting standard Sewing Baskets and Craft Boxes. The 3.27 x 2.24 x 1.22-inch dimensions maximize workspace efficiency without cluttering your area.
Most sets include Thread Wraps to prevent unwinding during storage. They work well as Yarn Organizers for mixed-media projects too. The color-coded options help you match threads instantly, speeding up thread management tasks.
However, these organizers won’t accommodate larger embroidery cones or specialty thread spool winding equipment. Consider your specific needs before purchasing.
Best For: Quilters and general sewers wanting organized thread spool organization that keeps matching threads and bobbins together in compact storage.
5. Sewing Machine Bobbin Thread Holders
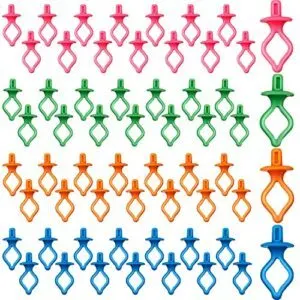
While thread spool organizer sets keep your workspace tidy, sewing machine bobbin thread holders take organization to the next level by maintaining perfect thread-to-bobbin parity. These silicone accessories snap directly onto thread spools, ensuring you’ll never lose track of matching combinations again.
Most holders accommodate standard bobbin types including A, L, and M sizes, making them compatible with various sewing machines. The durable silicone construction withstands frequent handling and cleans easily with soap and water.
Key benefits include:
- Instant thread matching eliminates guesswork during project shifts
- Compact storage maximizes workspace efficiency in small sewing areas
- Universal compatibility works with most standard thread spool sizes
While wooden peg racks won’t accommodate these holders, they’re ideal for plastic and cardboard spools. Bobbin tension control becomes simpler when you can quickly identify matching thread weights. This bobbin storage solution transforms chaotic thread collections into organized systems, supporting effective bobbin thread management across quilting, embroidery, and general sewing projects.
Adjusting Thread Tension
Adjusting your sewing machine’s thread tension properly transforms messy stitches into professional-looking seams.
You’ll master this critical skill by understanding how upper thread, bobbin tension, and fabric type work together to create balanced stitches, which is a critical skill.
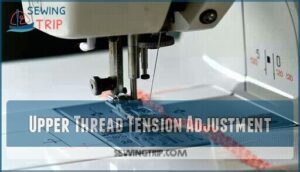
Upper Thread Tension Adjustment
Testing your upper thread tension adjustment begins with scrap fabric experimentation.
When loops appear on your fabric’s top surface, decrease the tension control setting.
Conversely, underneath loops require increased upper tension.
Monitor thread flow carefully as you adjust the dial – proper thread tension creates identical stitches on both fabric sides.
This stitch balance indicates ideal fabric tension harmony.
Tension adjustment success depends on gradual changes and consistent testing.
Your upper thread tension directly affects seam quality, so patience during thread tension adjustment prevents frustration later.
Bobbin Tension Modification
After setting your upper thread tension, bobbin tension modification becomes your next checkpoint for achieving perfect sewing balance. Your bobbin case holds the key to smooth thread flow throughout every project.
Proper bobbin adjustment prevents loops, puckering, and weak seams that plague many sewers. Check your bobbin’s performance before starting each new project or switching thread weights.
Here’s your tension control process:
- Insert bobbin so it unwinds clockwise when thread is pulled
- Test by holding the bobbin case – thread should release with gentle tugging
- Turn the small screw clockwise to tighten, counterclockwise to loosen (quarter-turns only)
Remember, upper bobbin tensions must work together harmoniously. Thread tension management requires patience, but mastering bobbin tension gives you complete control over stitch quality and fabric tension behavior. Understanding proper thread tension is essential for achieving professional sewing results.
Fabric Type Considerations
Different fabric types require specific tension adjustments for ideal stitch quality.
Fabric density and weave patterns directly influence your thread weight selection and tension settings.
Heavy materials like denim need higher tension (6-8), while delicate fabrics require lower settings (2-4).
Material choice affects stitch length too – stretchy knits perform best with reduced tension to prevent puckering and maintain elasticity.
Understanding the correct stitch length settings is essential for achieving professional-looking seams.
Preventing Tension Problems
Prevention is your best defense against thread tension headaches—consistent maintenance and smart thread choices stop problems before they start.
You’ll save hours of frustration by establishing simple routines that keep your machine running smoothly and your stitches perfectly balanced.
Regular Machine Maintenance
Your machine needs consistent care to maintain proper thread tension and prevent costly repairs. Machine Cleaning weekly removes lint that clogs tension discs, while monthly Oil Checks keep mechanisms smooth.
Follow this regular machine maintenance routine:
- Dust Removal from tension areas and feed dogs
- Lubrication Checks on all moving parts
- Part Replacement for worn needles and bobbins
- Clean bobbin case and threading paths
- Professional servicing annually for sewing machine cleaning
Proper thread organization systems complement maintenance efforts, ensuring your sewing machine thread management stays flawless.
Proper Thread Selection
Choosing the right thread type transforms your sewing experience from frustrating to flawless.
Match fiber types perfectly—cotton threads for natural fabrics, polyester for synthetics. Thread weight matters enormously; fine threads suit delicate materials while heavier weights handle denim.
Quality thread material selection prevents breakage and reduces machine wear by 30%. Consider colorfastness for washable items and examine thread finish for smoothness.
High-quality threads with consistent thickness eliminate skipped stitches and guarantee reliable results. For superior sewing performance, understanding thread selection basics is essential to achieve professional-looking projects.
Troubleshooting Common Issues
Tension issues stem from improper threading, needle problems, or mechanical malfunctions.
Quick diagnosis prevents sewing errors and fabric problems. Start with these systematic checks:
- Thread breakage – Examine needle size, thread tension settings, and threading path alignment
- Thread bunching – Verify bobbin placement, clean tension discs, and check tension control balance
- Machine malfunctions – Inspect for lint buildup, oil levels, and worn components affecting stitch quality
Thread Breakage Solutions
Thread breakage can turn your sewing project into a frustrating puzzle, but the solution often lies in three key areas you can quickly address.
Understanding how reverse sewing, thick fabrics, and needle selection impact thread integrity will help you troubleshoot breakage issues before they derail your work.
Reverse Sewing Issues
When reverse stitching goes wrong, you’re stuck with tangled threads and fabric distortion.
Sewing backwards requires finesse—rushing creates backstitch issues and thread locking problems that’ll make you want to toss your machine out the window.
tension issues thread tension dial
Thread breakage and thread shredding happen when you force the process.
Instead, hold your fabric steady and let the machine do its work.
Keep consistent speed whether you’re moving forward or backward—your threads will thank you for the gentler approach during reverse sewing.
Thick Fabric Considerations
Working with thick fabrics requires tension control adjustments and strategic planning.
Increase your thread weight to accommodate heavy materials like denim or canvas.
Fabric density demands higher upper thread tension settings to prevent loops underneath. Adjust stitch length to 3-4mm for better penetration through multiple layers.
Use quality thread tension compatible with your fabric’s thickness. When thread breakage occurs, reduce sewing speed and check your tension setting guidelines match the material requirements for ideal thread management.
Needle Selection
Perfect needle selection prevents thread breakage and guarantees smooth stitching performance.
Your fabric density determines needle sizes—use 9-11 for delicate materials, 14-16 for heavy fabrics like denim.
- Match needle types to thread compatibility—universal needles work for most projects, while ballpoint needles suit knits
- Replace worn needles every 6-8 sewing hours—dull points cause thread shredding and skipped stitches
- Test needle threading ease—if threading becomes difficult, your needle needs replacement immediately
Incorrect needles create tension problems regardless of your machine’s settings.
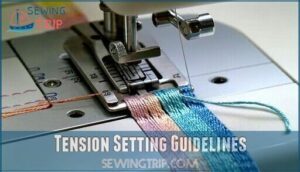
Tension Setting Guidelines
Getting your thread tension settings right doesn’t have to be a guessing game.
You’ll master these guidelines by understanding how different threads and fabrics work together, then testing small adjustments until your stitches look perfect on both sides.
Uneven Tension Causes
Several factors create uneven tension that disrupts your stitching quality.
Thread weight mismatches between upper and bobbin threads cause imbalanced stitches. Fabric density variations require different tension control settings – dense materials need tighter tension than lightweight fabrics.
Incorrect stitch length affects thread consumption, creating tension issues.
Dirty tension discs prevent smooth thread flow, while bobbin friction from improper insertion causes thread breakage.
Regular cleaning prevents these problems.
Thread and Fabric Choice
Smart thread and fabric pairing eliminates tension headaches before they start. Your fabric type determines thread compatibility—cotton threads bond with natural fibers while polyester handles synthetics and stretch materials perfectly.
- Fabric Types: Match cotton thread with cotton/linen, polyester with synthetics/knits
- Thread Weights: Use 60-80 weight for delicates, 30-40 weight for denim/canvas
- Color Matching: Choose thread one shade darker than fabric for invisible seams
- Fiber Selection: Cotton-wrapped polyester offers versatility across mixed fabric projects
- Texture Choices: Smooth threads prevent snags on delicate fabrics, textured threads grip heavy materials
Proper thread tension settings are essential for achieving balanced stitches, and understanding thread tension basics is essential for successful sewing projects.
Determining Correct Tension
Identifying correct thread tension requires checking specific visual indicators on your finished stitches. Look at the fabric surface and stitch formation to spot problems before they become major headaches.
Here’s how to determine proper tension control:
- Check stitch appearance – Balanced stitches show no loops on top or bottom fabric surfaces
- Test thread balance – Both needle and bobbin threads should interlock evenly within the fabric layers
- Examine fabric tension – No puckering, pulling, or distortion should appear along seam lines
- Verify machine calibration – Consistent stitch formation indicates proper sewing tension adjustment throughout your project
Common Thread Issues
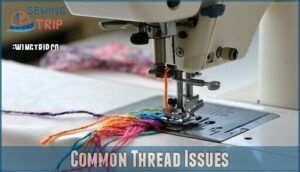
Thread issues can derail your sewing project faster than you’d expect, but most problems stem from just three main culprits.
Understanding these common thread troubles will save you hours of frustration and help you get back to creating beautiful stitches.
Thread Bunching Causes
Thread bunching stems from several culprits that’ll make your sewing sessions frustrating. Thread tension imbalances between upper and bobbin threads create the most common bunching issues. When thread weight mismatches occur or fabric density changes without tension adjustments, you’ll see looping underneath your project.
| Cause | Symptom | Quick Fix |
|---|---|---|
| Loose upper tension | Thread bunching below | Increase tension dial |
| Tight bobbin tension | Puckering on top | Loosen bobbin screw |
| Wrong stitch length | Thread fray and tangles | Match settings to fabric |
Improper threading through tension discs or skipped guides disrupts thread flow, causing thread breakage and nesting. Tension issues also arise from using different thread weights in needle and bobbin positions.
Thread Jams and Removal
Beyond bunching issues, thread jams can completely halt your sewing progress. When your machine seizes up, don’t panic or force anything.
Here’s your jam removal action plan:
- Turn off your machine immediately to prevent motor damage
- Raise the presser foot and needle to release tension
- Cut threads near the fabric, never yank or pull forcefully
- Remove the needle plate and clean out thread snags carefully
- Check for thread shredding around the bobbin area before restarting
To prevent future issues, understanding thread tension problems is essential for smooth operation.
Thread Shredding and Repair
While thread jams frustrate you, thread shredding can completely derail your project.
Frayed threads weaken seams and create unsightly fabric tears.
Here’s how to tackle thread shredding and implement effective thread repair:
- Check needle condition – Dull or damaged needles cause thread fraying and fabric damage
- Adjust thread tension – Excessive tension leads to thread breakage and shredding issues
- Clean threading path – Remove lint buildup that catches and damages thread fibers
- Match thread weight – Wrong thread weight for your fabric creates stress and fraying
- Use quality thread – Cheap thread lacks durability and shreds easily during sewing
These sewing hacks prevent most thread shredding problems.
Proper sewing machine thread management saves time and materials while ensuring professional results.
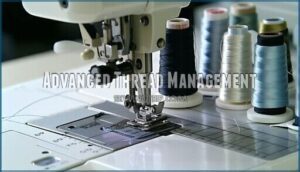
Advanced Thread Management
Advanced thread management goes beyond basic tension adjustments to encompass professional-grade material selection and knowing when expert help becomes necessary.
You’ll learn to choose threads based on fiber content, weight specifications, and project requirements while recognizing complex issues that require professional intervention.
Thread Material Selection
Beyond fixing immediate thread problems, material selection determines your project’s long-term success.
Choose thread types based on fiber types – cotton for natural fabrics, polyester for durability.
Consider thread weight (higher numbers mean thinner threads), colorfastness for wash resistance, and thread finish for sheen.
Match thread material choice to fabric weight and purpose for superior thread quality.
Understanding the various sewing threads available is essential for making informed decisions about thread material.
Finding Qualified Technicians
When your machine acts up despite following all thread management protocols, you’ll need professional intervention.
Finding qualified technicians requires strategic research to avoid costly mistakes. Start by verifying Technician Certification through manufacturer websites. Factory-authorized training guarantees proper knowledge of your specific model.
Compare Repair Costs from multiple providers before committing to service.
Check these critical factors when finding qualified technicians:
- Specialist Reviews from recent customers on Google and Yelp
- Technician Training documentation and certifications displayed
- Maintenance Schedules offered for preventive care programs
- Professional sewing help experience with your machine brand.
Choose technicians who communicate clearly about repairs and provide detailed estimates upfront.
Professional Help Signs
Several key indicators tell you when to call in professional help for your sewing machine troubles.
| Warning Sign | When It Occurs | Action Needed |
|---|---|---|
| Repair Costs exceed 50% of machine value | Multiple expensive breakdowns | Seek technician certification verification |
| Persistent thread tension issues despite adjustments | After trying all troubleshooting common issues | Schedule machine inspection |
| Complex error diagnosis beyond basic fixes | Internal mechanical problems | Contact qualified technicians immediately |
Professional maintenance scheduling prevents costly breakdowns and extends machine life substantially.
Frequently Asked Questions (FAQs)
Is the higher the number, the tighter the tension.?
Imagine your favorite shirt shrinking in the wash—that’s what happens when tension numbers climb too high.
No, higher numbers don’t mean tighter tension, you’ll actually loosen your thread as numbers increase, giving you more control and preventing fabric damage, which is a key concept to understand to avoid damage.
What is the most common mistake when threading a sewing machine?
You’ll likely thread your machine with the presser foot down, preventing proper tension engagement. This simple oversight causes loops, puckering, and frustrating stitching problems that’ll drive you crazy.
What number should tension be on a sewing machine?
Start with a tension setting between 4-5 on most machines, then adjust based on your fabric.
Test on scraps first—you’ll likely need tighter tension for heavy fabrics, looser for delicate ones.
Why does my sewing machine keep jamming underneath?
Your machine’s jamming underneath because lint buildup, incorrect threading, or tangled bobbin thread creates blockages. Clean the bobbin area, rethread properly, and check your bobbin’s spinning freely.
How do you arrange a sewing machine thread?
Thread arrangement follows your machine’s specific path: place thread spool on pin, guide through tension discs with presser foot raised, thread take-up lever, then needle eye from front to back.
How to tell if thread tension is correct?
Check your test stitches on scrap fabric. You’ll see balanced tension when the top and bottom threads interlock evenly within the fabric layers, creating symmetrical stitches without loops or puckering.
What causes thread to twist during sewing?
Like a telegraph operator managing multiple wires, you’ll find twisted thread stems from improper spool placement, incorrect threading paths, or using low-quality thread that lacks proper twist balance during manufacturing.
How often should I clean my sewing machine?
You’ll want to clean your machine after every 8-10 hours of sewing or monthly, whichever comes first. Regular maintenance prevents lint buildup and keeps tension consistent for professional results.
Can I use old threads on new machines?
Old thread can work on modern machines, but you’ll face potential issues.
Vintage thread may have degraded strength, inconsistent tension, and poor colorfastness that’ll cause breakage, skipped stitches, and fabric staining.
Test first on scraps to avoid potential issues.
Do thread colors affect sewing machine performance?
Thread colors don’t directly affect your sewing machine’s performance.
The dye process creates slight thickness variations, but they’re minimal.
What matters more is thread quality, weight, and fiber content—these factors control tension and stitch formation better than color alone, with fiber content being a crucial aspect.
Conclusion
Like a well-tuned instrument that produces beautiful music, mastering sewing machine thread management transforms your stitching from frustrating to flawless.
You’ve learned the fundamentals: proper threading, tension adjustment, and troubleshooting techniques that prevent common problems.
Remember to match your needle size to thread weight, maintain clean tension discs, and invest in quality thread materials.
When issues arise, start with rethreading before adjusting settings, and recall that regular maintenance will keep your projects running smoothly and your creativity flowing freely.
- https://www.sewingpartsonline.com/blogs/education/ultimate-thread-reference-guide-2
- https://www.threadsmagazine.com/2008/11/02/understanding-thread-tension
- https://www.coats.com/en-us/info-hub/solving-your-sewing-problems/
- https://www.reddit.com/r/sewhelp/comments/khpfur/what_are_sewing_best_practices_that_shouldnt_be/
- https://www.mh-chine.com/blog/products/thread-usage

