This site is supported by our readers. We may earn a commission, at no cost to you, if you purchase through links.
When your stitches look wonky, it’s time to take control. Start by turning your tension dial down slowly—a quarter turn at a time.
Check your test fabric, looking for balanced stitches where neither the top nor bottom thread shows through. Different fabrics need different settings, so experiment carefully.
Your machine’s sweet spot is where top and bottom threads meet in the middle, creating perfect, smooth stitches. If you’re battling puckered seams or loose loops, tension adjustment is your secret weapon.
Want to transform your sewing from frustrating to fantastic?
Table Of Contents
- Key Takeaways
- Sewing Machine Tension Basics
- How Tension Works
- Tension Adjustment Techniques
- Lower Thread Tension Issues
- Troubleshooting Tension Problems
- Bobbin Tension Adjustment
- Thread Tension and Fabric Type
- Sewing Machine Tension Components
- Maintaining Optimal Tension
- Advanced Tension Adjustment
- Frequently Asked Questions (FAQs)
- Conclusion
Key Takeaways
- You’ll master thread tension by making incremental adjustments, turning your tension dial slowly and testing on scrap fabric until you achieve balanced stitches where neither top nor bottom thread shows through.
- Your sewing machine’s tension depends on fabric type, so you’ll need to adjust settings carefully for different materials—lighter fabrics require looser tension, while thicker fabrics demand tighter thread control.
- Don’t ignore tension problems, as they can lead to serious issues like thread breakage, fabric puckering, and uneven seams that’ll make your project look amateurish and potentially damage your machine.
- You’ll transform your sewing from frustrating to professional by understanding how tension discs, thread guides, and bobbin tension work together, treating your machine’s tension system like a precision dance team that controls thread flow.
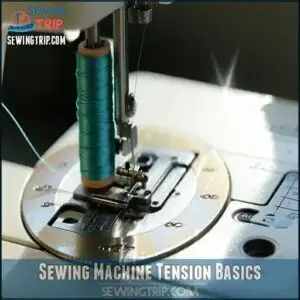
Sewing Machine Tension Basics
You’ll find that thread tension can make or break your sewing project, turning perfect fabric into a bunched-up mess or a professional-looking masterpiece.
Understanding how your sewing machine’s tension works is key to creating smooth, even stitches that’ll have you feeling like a pro in no time.
Thread Tension Definition
Thread tension is the invisible tug-of-war controlling your stitch quality in sewing machine dynamics.
It’s how tightly threads are pulled through fabric, determining whether your stitches look professional or like a tangled mess.
Your machine’s thread tension controls the delicate balance between upper and lower threads, ensuring each stitch sits perfectly across different fabric interactions.
Proper thread tension settings are essential for achieving balanced stitches and preventing common sewing issues, which is crucial for maintaining professional results and avoiding a tangled mess.
Importance of Balanced Tension
Your sewing machine’s heartbeat lies in tension balance, dictating whether you’ll achieve sewing precision or fabric frustration.
Mastering thread tension control means understanding how top and bottom threads interact, creating flawless stitches across different fabrics.
By maintaining balanced tension, you’ll liberate your sewing potential, ensuring consistent stitch quality that transforms ordinary projects into professional masterpieces.
Effects of Imbalanced Tension
Almost every sewing mishap stems from tension issues that can unravel your entire project.
Imbalanced tension wreaks havoc on stitch quality, causing unsightly thread breakage, fabric puckering, and frustrating sewing errors.
Your machine’s delicate thread tension settings directly impact the precision of your work, transforming potential disasters into smooth, professional-looking seams that’ll make you proud, with a focus on achieving professional-looking seams.
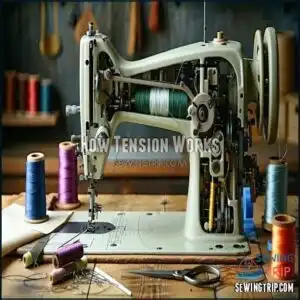
How Tension Works
You’re about to master the science of sewing machine tension, where two threads dance together to create perfect stitches.
Understanding how tension works is your secret weapon for transforming potential fabric frustrations into professional-looking projects that’ll make even seasoned sewists take notice, by utilizing the science of sewing machine tension.
Top Thread Tension Control
Mastering your top thread tension control transforms stitching from frustrating to fabulous.
Your sewing machine’s upper tension system regulates thread flow through precision-engineered tension discs. By understanding these tension settings, you’ll discover smoother thread balance and impeccable stitch quality.
Adjust the dial carefully, watching how each incremental change impacts your fabric’s final appearance.
Proper thread tension control is essential for achieving consistent results in sewing projects, and it is key to impeccable stitch quality with smoother thread balance.
Bobbin Thread Tension Control
When you’ve conquered top thread tension, it’s time to tackle the bobbin’s hidden power.
Your bobbin tension is the unsung hero of thread balance, typically factory-set to perfection.
It’s the quiet commander controlling your lower thread’s behavior.
A well-adjusted bobbin guarantees your stitches appear seamless, keeping thread control tight and your fabric looking professionally finished.
Tension Discs and Springs
Deep inside your sewing machine, tension discs and springs work like a precision dance team to control thread flow.
Here’s how they partner up:
- Disc springs regulate thread pressure
- Tension regulators fine-tune thread movement
- Adjustment mechanisms guarantee consistent stitch quality
Your thread tension control system transforms those tiny metal components into a powerful mechanism for perfect stitching every single time, ensuring a consistent stitch quality.
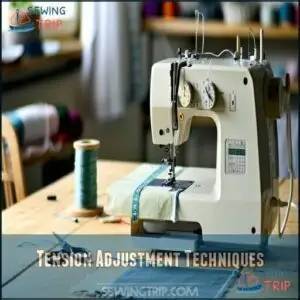
Tension Adjustment Techniques
You’ll master thread tension with precision by understanding how to adjust your sewing machine’s top and bobbin thread settings.
Learn these essential techniques to transform your stitching from frustrating to flawless, ensuring every project looks professionally finished.
Adjusting Top Thread Tension
Your thread tension gauge is your secret weapon for perfect stitches.
When adjusting top thread tension, turn the numbered dial clockwise to tighten or counterclockwise to loosen, making incremental changes. Watch your needle tension closely—each half-turn impacts thread flow dramatically.
Test on scrap fabric with contrasting thread colors, aiming for balanced stitches where no thread peeks through to the wrong side.
Remember, thread balance is key: small adjustments can transform your sewing machine tension settings from frustrating to fantastic.
Practice makes perfect, so don’t fear experimenting with tension adjustment. Achieving proper thread tension settings is essential for smooth stitching and even fabric flow, and you can find more information on thread tension settings.
Adjusting Bobbin Thread Tension
Only a few sewing enthusiasts know the secret to perfect bobbins tension control.
When you’re ready to tackle lower tension stitch problems, start by locating your machine’s bobbins case.
Gently test the current bobbins tension by holding the thread—it should drop a few inches with slight resistance.
Use a small screwdriver to make quarter-turn adjustments on the tension screw, turning right to tighten and left to loosen.
Always retest after each tiny adjustment, remembering that thread tension perfection is key to seamless stitching, so take your time and make incremental changes.
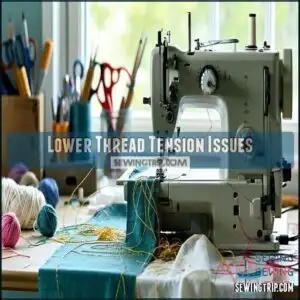
Lower Thread Tension Issues
Are your stitches looking more like a tangled mess than a professional seam?
Lower thread tension can turn your sewing project into a frustrating experience, causing loose stitches, thread bunching, and uneven fabric that’ll make you want to toss your machine out the window, due to thread tension issues.
Causes of Lower Thread Tension
After mastering tension adjustments, you’ll now uncover the root causes of lower thread tension.
Beware of sneaky culprits that can throw your stitching off track:
- Lint-clogged tension discs blocking smooth thread flow
- Mismatched thread weight and needle size
- Damaged machine parts interrupting thread path
- Incorrect threading creating unexpected resistance
These hidden challenges can sabotage your sewing precision, demanding careful investigation and strategic solutions.
Symptoms of Lower Thread Tension
Watch out for five telltale signs of lower thread tension: loose stitches that look like they’re barely hanging on, unexpected thread breakage disrupting your flow, fabric puckering that makes your project look amateurish, uneven seams zigzagging across your fabric, and visible thread loops dancing on the wrong side.
These tension issues can turn your sewing dreams into a frustrating nightmare.
Understanding thread tension settings is essential to resolving these common problems and achieving professional-looking results.
Consequences of Ignoring Lower Thread Tension
Ignore lower thread tension at your own risk.
Those seemingly minor stitch irregularities? They’re warning signs of impending sewing machine disaster.
Unaddressed tension problems snowball into fabric puckering, thread breakage, and costly repairs.
Your beautiful project could unravel—literally—from one overlooked tension imbalance.
Stay sharp, adjust early, and save your fabric from threading trauma.
Troubleshooting Tension Problems
Are you struggling with thread tension troubles that leave your sewing projects looking less than perfect?
Understanding how to troubleshoot tension problems will help you master your machine and create professional-quality stitches every time.
Thread Breakage and Tension
When thread breakage strikes, your sewing machine’s tension becomes the prime suspect. Understanding the root causes can save you from fabric tears and frustration.
Here’s what you need to know about thread tension and breakage:
- Inspect your thread path for snags or rough spots
- Check needle condition and compatibility with thread weight
- Verify tension gauge settings match your fabric type
- Examine bobbin winding for consistent tension
Thread snap often results from misaligned tension discs or improper threading. By systematically troubleshooting these elements, you’ll prevent unexpected thread breakage and maintain exceptional stitch quality, turning potential sewing disasters into smooth, professional results.
Tension Adjustment for Different Fabrics
Almost every fabric demands its own tension dance, and you’ll need to adjust your sewing machine’s settings accordingly.
Different materials require unique thread balance strategies to achieve perfect stitch quality.
Lightweight fabrics like silk need gentler tension settings, while denim and canvas demand higher thread tension adjustments.
Your machine’s tension dial becomes your precision tool for material compatibility.
Experiment with scrap fabric pieces to find the sweet spot between tight and loose stitches.
Test small incremental changes, watching how different sewing machine tension settings transform your fabric’s final appearance.
Remember: patience is your greatest ally in tension mastery.
Bobbin Tension Adjustment
Fine-tuning your bobbins tension is the secret to perfect stitches that’ll transform your sewing projects from amateur to professional.
By understanding how to adjust the tiny tension screw on your bobbin case, you’ll master the art of creating smooth, even stitches that’ll make your fabric look flawless.
When to Adjust Bobbin Tension
Done unraveling your sewing machine’s thread tension mysteries.
When odd stitching emerges, you’ll know it’s time to peek at bobbins tension. Usually, these warning signs—like uneven stitches, thread bunching, or unexpected fabric puckering—signal a need for bobbins tension troubleshooting.
Your machine’s harmony depends on catching these subtle thread tension cues before they become major sewing headaches.
How to Adjust Bobbin Tension
Let’s discover the secret to your bobbin’s hidden potential.
Your sewing machine’s bobbin tension control lies in a tiny, powerful screw. Gently turn it clockwise to tighten or counterclockwise to loosen, making tiny 1/8 turn adjustments.
Master these precise thread tension adjustments, and you’ll transform those tricky sewing machine tension problems into perfectly balanced stitches.
Proper bobbin tension control is essential for achieving consistent results and unlocking your machine’s full potential with perfectly balanced stitches.
Tips for Adjusting Bobbin Tension
You’ve mastered basic bobbin tension adjustments, so now it’s time to refine your technique.
Here are four game-changing tips for bobbin tension control:
- Always test on scrap fabric first
- Make microscopic quarter-turn adjustments
- Use a small screwdriver for precision
- Check thread drop resistance carefully
Smooth, controlled movements prevent thread tension problems and keep your sewing machine performing like a well-oiled professional tool, ensuring professional results.
Thread Tension and Fabric Type
Your sewing machine’s thread tension isn’t a one-size-fits-all setting—it changes dramatically depending on the fabric you’re working with.
Fabric-driven tension is the secret sauce of professional-quality sewing — master it, and your seams will sing!
Whether you’re stitching delicate silk or heavy denim, you’ll need to adjust your tension settings to achieve those perfect, professional-looking seams.
Tension Settings for Different Fabrics
Your sewing machine’s thread tension varies with fabric thickness, demanding a strategic approach.
Different material types—from delicate silks to heavy denim—require specific tension settings.
Matching thread weights to fabric, adjusting sewing speed, and selecting appropriate stitch length are key to achieving perfect tension balance.
Test settings on scrap fabric before diving into your main project to ensure the best results with specific tension settings.
Adjusting Tension for Thick or Thin Fabrics
When you’ve conquered fabric selection, adjusting tension becomes your secret weapon.
Master your machine’s tension, and transform ordinary fabric into extraordinary creations.
Thick fabrics demand looser thread tension, while thin materials require tighter settings.
Match your thread weight to fabric thickness, incrementally tweaking tension dial to maintain stitch quality.
Your sewing machine tension adjustments are the bridge between material selection and perfect seams.
Tension Considerations for Stretchy Fabrics
Enter stretchy fabric territory by fine-tuning your sewing machine tension with precision.
Lighter thread weights and elastic stitches demand careful tension balance.
Reduce tension settings to prevent thread breakage, and use slower sewing speeds for better control.
Tension gauges help you navigate the delicate dance of fabric stretch, ensuring smooth, flexible seams that move with your material, and creating a delicate dance of fabric stretch.
Sewing Machine Tension Components
Understanding your sewing machine’s tension components is key to mastering perfect stitches every time.
You’ll learn how tension discs, thread guides, and tension assemblies work together to control thread pressure and create professional-looking seams.
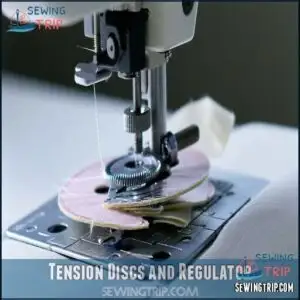
Tension Discs and Regulator
After conquering fabric-specific tensions, you’ll want to understand your machine’s tension discs and regulator.
These metal maestros control thread flow like traffic controllers, managing your stitch’s smooth journey.
The tension disc assembly, featuring strategically positioned discs and a spring-loaded regulator, determines how tightly your thread travels, ensuring perfect tension balance with each pass.
Understanding proper tension disc systems is essential for superior sewing performance.
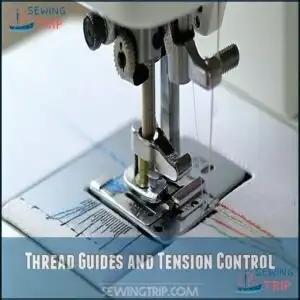
Thread Guides and Tension Control
After mastering tension discs, you’ll discover the magic of thread guides – your sewing machine’s unsung heroes.
These metal guardians choreograph your thread’s journey, ensuring smooth tension control.
- Regulate thread flow with precision
- Navigate complex thread paths effortlessly
- Distribute tension evenly across fabric
- Prevent tangles before they start
Thread guides are your tension control allies, transforming chaotic thread movement into a synchronized dance of perfect stitches.
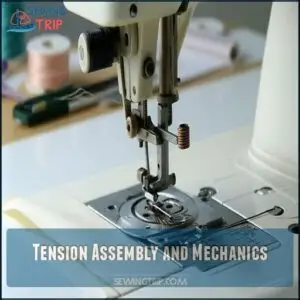
Tension Assembly and Mechanics
Let’s break down your tension assembly like a mechanic fine-tuning an engine!
Thread guides and tension discs work together in a precision dance, controlling your machine’s thread path with spring mechanics.
Here’s a quick visual guide to understanding your tension regulator:
| Component | Function | Impact |
|---|---|---|
| Tension Discs | Control Thread Pressure | Stitch Quality |
| Spring Mechanism | Regulate Thread Tension | Consistent Stitches |
| Thread Guides | Direct Thread Flow | Smooth Sewing |
| Tension Regulator | Fine-tune Pressure | Fabric Performance |
These mechanical maestros guarantee your lower tension stays perfectly balanced!
The components work together to ensure consistent stitches, smooth sewing, and fabric performance.
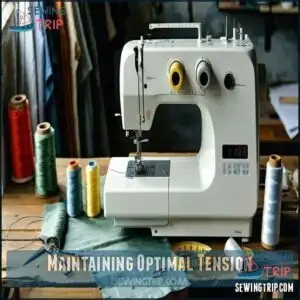
Maintaining Optimal Tension
You’ll want to master maintaining ideal tension to achieve professional-looking stitches that’ll make your sewing projects shine.
By understanding how to check, adjust, and monitor your machine’s thread tension, you’ll prevent common sewing mishaps and guarantee consistent, high-quality results every time.
Regular Tension Checks
When tension components settle into their groove, your sewing machine demands regular check-ups.
Perform weekly tension tests by stitching on scrap fabric, monitoring thread alignment and stitch quality.
Watch for subtle signs like thread loops or uneven stitching.
Quick fabric prep and consistent sewing checks prevent lower tension issues before they become machine headaches, which can be mitigated by regular tension tests and weekly monitoring.
Tension Adjustment for New Machines
When you unbox a new sewing machine, machine calibration becomes your first priority.
Thread monitoring helps you navigate initial tension adjustments. Start by testing stitch quality on scrap fabric, gradually tweaking tension settings.
Use light-colored threads to easily spot inconsistencies. Your goal is achieving smooth, balanced stitches that’ll make your fabric sing with precision.
Tips for Maintaining Consistent Tension
Five key strategies will transform your sewing machine tension maintenance into a seamless process. Thread tension isn’t just a setting—it’s an art form that demands precision and care.
- Regularly inspect thread paths for smooth, unobstructed movement
- Calibrate tension settings after each fabric type change
- Clean tension discs and thread guides monthly to prevent buildup
Your machine’s stitch quality depends on consistent thread control and proactive maintenance.
Advanced Tension Adjustment
When you’re ready to elevate your sewing skills beyond basic tension adjustments, advanced tension techniques will transform your stitching from good to professional-grade.
You’ll learn to master tension for specialty threads, heavy-duty projects, and precise stitches that make your work look truly exceptional.
Adjusting Tension for Specialty Threads
After mastering consistent tension, you’ll want to conquer specialty threads like metallic and elastic yarns.
Adjust your sewing machine tension by matching thread weight and fiber types carefully. Lower machine tension incrementally when working with delicate or unique threads.
Experiment on scrap fabric, watching stitch quality. Remember: yarn tension balance trumps one-size-fits-all settings.
To achieve successful results, understanding thread tension basics is vital for successful sewing projects.
Tension Considerations for Heavy-Duty Sewing
When wrestling with heavy-duty fabrics, your sewing machine needs a customized approach.
Boost your sewing machine tension for thick materials by using a size 14/90 needle and adjusting thread weights carefully.
Increase tension settings to 4 or 5 for medium to medium-heavy fabrics like linen and twill.
Test on scrap material first to guarantee superior stitch quality and prevent thread breakage, ensuring a successful outcome with your sewing machine.
Fine-Tuning Tension for Precise Stitches
After taming heavy-duty sewing challenges, you’ll want to sharpen your sewing machine tension skills for precision.
Think of thread tension like a dance partner—each movement must be synchronized.
Adjust your machine’s tension dial in tiny increments, watching how threads interact with different fabrics.
Your goal? Achieve thread balance that creates flawless stitches without breaking thread or compromising fabric integrity, which is crucial for maintaining fabric integrity.
Frequently Asked Questions (FAQs)
How do I fix persistent bobbin thread tension problems?
Unravel bobbin thread chaos by first checking your machine’s threading path.
Gently clean the bobbin case, verify correct bobbin installation, and adjust tension screw in tiny increments.
Test on scrap fabric until stitches sing with perfection.
Can lower tension damage my sewing machine?
Lowering tension improperly can strain your machine’s delicate mechanisms. While occasional adjustments are fine, extreme or persistent low tension might cause thread bunching, uneven stitching, and potential internal mechanism stress.
What causes unpredictable lower thread tension variations?
Bobbin case debris, thread inconsistencies, worn-out tension springs, incorrect threading, and fabric thickness variations can unpredictably affect your lower thread tension.
Regular maintenance and careful setup help stabilize your machine’s performance, which includes addressing issues like bobbin case debris and thread inconsistencies to ensure optimal functioning.
Why does lower thread tension fluctuate unexpectedly?
Your thread tension might fluctuate due to worn-out bobbin springs, incorrect threading, inconsistent thread quality, damaged tension discs, or a misaligned bobbin case.
Regular machine maintenance helps prevent these unpredictable variations, and it is essential to address issues such as incorrect threading to ensure consistent performance.
When should I replace my bobbin case?
Like a worn-out soldier retiring from battle, your bobbin case signals its end when you notice persistent tension problems, fraying threads, or visible wear.
Replace it to restore your machine’s precision and performance.
Conclusion
Ultimately, mastering lower thread tension isn’t rocket science—it’s an art you’ll perfect with practice.
Don’t let wonky stitches discourage you; each adjustment brings you closer to sewing machine nirvana.
Whether you’re battling puckered seams or uneven stitching, remember: patience and precision are your best friends.
Experiment boldly, trust your instincts, and soon you’ll transform those tension troubles into seamless, professional-looking projects that’ll make even seasoned sewists jealous.

