This site is supported by our readers. We may earn a commission, at no cost to you, if you purchase through links.
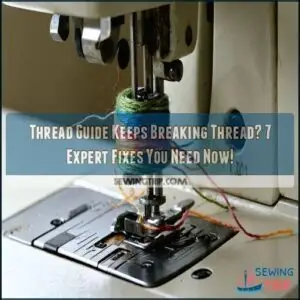 When your thread guide keeps breaking thread, you’re likely facing one of several fixable issues.
Check for rough spots or burrs on the guide itself – even tiny nicks can shred thread like cheese through a grater. Your tension might be too tight, forcing the thread against the guide with excessive pressure.
Old or poor-quality thread breaks more easily, so invest in fresh, quality materials. Clean your machine regularly to remove lint buildup that creates friction.
Slow down your sewing speed to reduce stress on delicate threads. The right combination of needle size and thread weight makes a world of difference in preventing those frustrating mid-project breaks, by using the correct thread to minimize issues.
Table Of Contents
Key Takeaways
- Check your thread guide for burrs or nicks—even tiny imperfections can shred your thread like a cheese grater, causing frustrating breaks in the middle of your projects.
- Maintain proper tension settings on your machine—too much tension turns your thread into a ticking time bomb that’s bound to snap, while the right balance creates smooth, consistent stitches.
- Don’t underestimate the importance of using fresh, high-quality thread—old or poor-quality thread becomes brittle over time, with darker colors like black and red being particularly prone to breakage.
- Match your needle size to your thread weight—this critical compatibility prevents excess friction that frays and snaps threads, transforming your sewing experience from constant interruptions to peaceful creating.
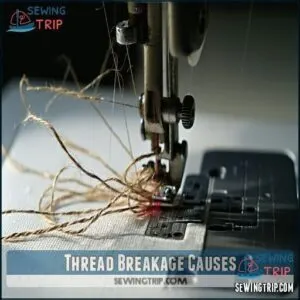
Thread Breakage Causes
You’re probably facing thread breakage due to improper threading, excessive tension, worn-out thread, or running your machine too fast.
Understanding these common culprits will help you troubleshoot quickly and get back to your sewing project without those frustrating stops every few minutes, which can be very frustrating.
Improper Machine Threading
The number one culprit behind those frustrating thread breaks? Improper machine threading.
When you skip a thread guide or miss the take-up lever, you’re basically setting yourself up for disaster.
Your sewing machine needs threads to follow the correct thread path in the exact threading order specified in your manual.
Review your manual’s threading diagram—what seems like a minor deviation can completely throw off your tension balance.
Excessive Tension Settings
Too much tension is like a guitar string wound too tight—it’s bound to snap.
Excessive tension turns thread into a ticking time bomb—snap, and your project comes to an abrupt halt.
Your thread guide and tension settings work together to control thread flow.
When tension’s too high, you’ll experience thread snapping and inconsistent stitching.
Check your sewing machine’s tension dial and adjust gradually.
Potential dial problems can also contribute to these issues.
Finding the perfect tension balance prevents breaks and creates smooth stitches across different fabric types, which is crucial for achieving consistent stitching and preventing thread snapping, and it requires careful adjustment of the sewing machine’s tension dial.
Old or Poor-Quality Thread
You’re battling thread breaks because that spool sitting in your drawer for years isn’t doing you any favors.
Old thread deteriorates over time, becoming brittle and prone to snapping. Low-quality thread compounds these risks, lacking the strength needed for consistent stitching.
Proper thread storage away from sunlight and heat prevents premature thread deterioration. Always check thread composition—100% polyester typically offers better longevity than cotton blends, making it a key factor in preventing thread breaks due to premature deterioration.
Incorrect Machine Speed
Beyond thread quality, it’s your machine speed that might be causing those frustrating thread breaks.
Running your sewing machine too fast doesn’t give the thread enough time to form proper stitches.
Consider these speed-related factors:
- Heavier fabrics need slower speeds to prevent thread stress
- Complex stitch patterns require gentle pacing
- Thread tension increases at higher speeds
- Different thread types have ideal speed ranges
- Speed adjustments improve overall stitch quality
Slow down for better results! Speed adjustments can make a significant difference, and understanding thread tension is key to achieving professional-looking stitches.
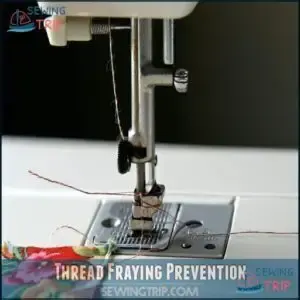
Thread Fraying Prevention
You’ll prevent most thread fraying issues by regularly checking for hidden burrs in your machine’s thread path and using the correct needle size for your project.
Those tiny nicks in the thread guide can turn your peaceful sewing session into a frustrating thread-breaking marathon faster than you can say "not again!
Burrs and Nicks in Thread Path
Thread breaks often stem from hidden enemies in your thread path. Those smooth-looking metal guides might harbor microscopic burrs and nicks that slice thread fibers with each pass.
Regular thread path inspection prevents these microscopic troublemakers from sabotaging your projects.
| Thread Path Issue | Detection Method | Impact on Thread | Burr Removal Method |
|---|---|---|---|
| Metal Guide Burrs | Floss Test | Gradual Fraying | Fine Emery Cloth |
| Bobbin Case Nicks | Fingernail Check | Sudden Breaks | Polishing Cloth |
| Hook Assembly Damage | Visual Inspection | Consistent Breaking | Replacement Parts |
| Take-up Lever Issues | Thread Path Test | Tension Problems | Fine-grit Sandpaper |
The table outlines common thread path issues, their detection methods, the impact on the thread, and the appropriate burr removal methods. By understanding and addressing these issues, you can prevent thread breaks and ensure smoother project execution, ultimately leading to better results and reduced frustration.
Damaged or Incorrect Needle Size
While checking for burrs along the thread path, don’t overlook your needle – it’s often the culprit behind mysterious thread breaks. Your needle size must match your thread weight; using one too small creates excess friction that frays and snaps threads.
A proper selection guarantees superior stitch quality, so consider needle size compatibility.
- Replace needles every 8 hours of sewing time, even if they look fine
- Choose Superior Topstitch needles for their larger eyes and deeper grooves
- Check for bent needles by rolling them on a flat surface
- Consult a Needle Size Guide to match thread thickness properly
Pressure Foot Issues
After switching to the right needle, don’t forget your pressure foot.
Nicks, scratches, or misalignment in your pressure foot can shred thread like cheese through a grater.
Check for foot damage regularly and adjust pressure according to fabric thickness.
Too much pressure can snap threads, while too little causes uneven fabric feed.
Specialty feet designed for specific tasks often solve persistent thread guide issues and prevent breaks.
Rough or Abrasive Backing Materials
Just like your presser foot, the backing materials you’re using can be thread villains too.
Rough or low-quality fabric stabilizers create excessive friction that frays and eventually snaps your thread.
When thread breaks repeatedly, check your embroidery backing for abrasive edges.
Smoother adhesive backings and proper topping materials reduce thread stress.
Try switching to higher-grade backing alternatives specifically designed for your fabric weight and thread quality.
Regular lubrication can help prevent machine malfunction.
Machine Maintenance Tips
You’ll need to regularly clean and lubricate your machine’s critical components to prevent thread breakage, especially around the bobbins case where lint loves to hide.
Maintaining proper machine timing and using high-quality thread will substantially reduce those frustrating mid-project thread snaps that always seem to happen right when you’re in the zone.
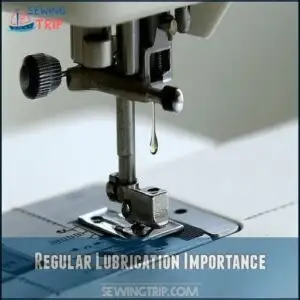
Regular Lubrication Importance
Just as a car engine needs oil, your sewing machine requires regular lubrication to prevent thread breaks.
Without proper oiling, friction between metal parts causes heat and resistance in the thread path.
For preventative maintenance that guarantees machine longevity:
- Apply oil to all moving parts monthly
- Use manufacturer-recommended lubricants only
- Wipe excess oil to prevent component damage
This simple routine guarantees smooth operation and dramatically reduces tension problems. Regular use of specialized machine lubricant is highly recommended for smooth operation.
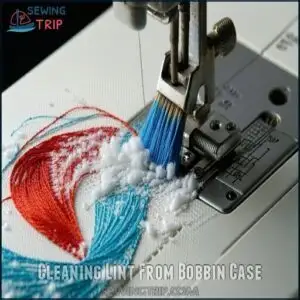
Cleaning Lint From Bobbin Case
While proper lubrication keeps your machine running smoothly, lint buildup in your bobbin case is often the hidden culprit behind thread snapping.
Your thread breaks cause might be as simple as fuzzy debris interfering with tension.
Clean your bobbin case weekly with a small brush or compressed air. Remove the bobbin, gently clear the tension spring, and wipe surfaces before reassembly.
This simple sewing machine maintenance prevents costly repairs later.
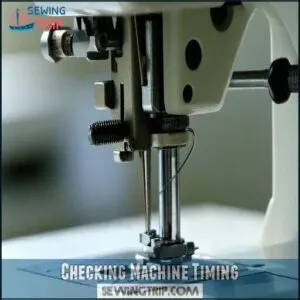
Checking Machine Timing
Many thread breaks can be traced to poor machine timing.
Check if your hook synchronization aligns properly with needle movement.
When timing is off, the looper alignment fails to catch the thread loop, causing thread snapping.
Inspect gear wear signs, which affect stitch formation.
For a thread breaks solution, consult your manual or a technician to restore proper machine timing and prevent future frustrations, ensuring proper machine timing.
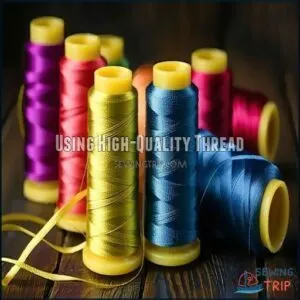
Using High-Quality Thread
Now that your machine’s timing is spot-on, let’s talk thread quality. You wouldn’t fuel a sports car with watered-down gas, so don’t compromise your machine with cheap thread!
Quality threads reduce breakage and deliver consistent stitch results.
- Polyester threads like Robison-Anton’s Super Brite offer superior thread integrity
- Store spools away from sunlight to maintain colorfast threads
- Higher thread quality standards mean fewer interruptions and long-term savings
- Different thread types affect compatibility with your specific machine and project
Needle and Thread Compatibility
You’ll save yourself countless headaches by matching your needle size to your thread thickness, as using the wrong combination is like trying to thread a camel through the eye of a needle.
The right needle-thread partnership creates smooth stitches without breaks, while the wrong one leads to frustrating snaps and frays that’ll have you questioning your life choices, ultimately affecting the overall quality of your work with frustrating snaps.
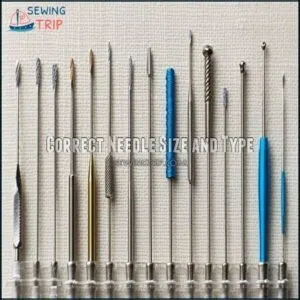
Correct Needle Size and Type
While regular maintenance keeps your machine happy, the needle itself could be your thread’s worst enemy.
Choosing the right needle size and type is like matchmaking—they need to be compatible with your thread thickness and fabric type.
A Thread Weight and Needle Size Guide can save you headaches!
Too small a needle will shred thick thread, while too large a needle can damage delicate fabrics.
Different Needle Point styles serve specific purposes.
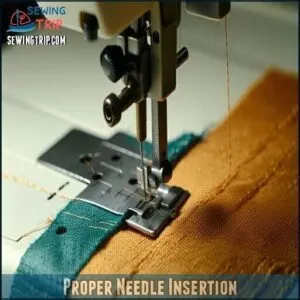
Proper Needle Insertion
Even the right needle size won’t help if it’s not inserted correctly.
Always check your needle’s eye direction—it should face forward, with the scarf orientation toward the back of the machine.
Verify secure insertion by tightening the needle clamp fully.
Bent needles are thread-killers, so replace them immediately.
Needle size impacts sewing outcomes, so make certain you’re using the correct one for your fabric.
Double-check your needle depth; too high or low creates tension issues that snap threads faster than you can say "not again!
This ensures a smooth sewing process with minimal interruptions, making it essential to follow these guidelines carefully to achieve the best sewing outcomes.
Needle-Friendly Adhesives
Now that you’ve properly seated your needle, let’s tackle another common culprit of broken thread: the adhesives you use.
Eco-Stick Adhesive Stabilizer offers a needle-friendly option that minimizes gummy buildup on your sewing machine.
This 1.5 oz biodegradable stabilizer works wonders for delicate fabrics like velvet and leather while preventing those frustrating thread frays and breaks.
For best results, pair it with titanium needles and reduce your machine speed to achieve optimal performance with delicate fabrics.
Recommended Needle Brands
While using needle-friendly adhesives helps prevent buildup, your choice of needle brand matters just as much.
Here are three top needle brands professionals swear by:
- SCHMETZ Needles – Internationally recognized for smooth, even stitches in both home and industrial settings
- Klassé Needles – Professional-quality with specialized options for every project
- Tulip Needles – Known for smooth fabric piercing and large eyes for easy threading
Your needle lifespan averages just 8 hours of sewing time, so don’t skimp on quality.
You can find a wide variety online.
Bobbin and Threading Solutions
You’ll stop fighting with broken threads when you master proper bobbin installation and balance bobbin thread weight with your top thread.
Checking your bobbin case for smooth rotation and ensuring it’s wound evenly can transform your sewing experience from frustrating thread breaks to peaceful, uninterrupted stitching.
Proper Bobbin Winding and Installation
Your bobbin’s proper winding and installation is the cornerstone of trouble-free sewing.
Verify consistent bobbin fill with even tension—not too tight or loose. Bobbin type matters; always use the correct size for your machine.
Check that bobbin rotation direction is clockwise during unwinding. For beginners, prewound bobbins offer advantages with their factory-perfect tension.
When threading your bobbin case, follow your manual’s exact path to avoid nagging bobbin issues, ensuring a trouble-free sewing experience.
Balancing Bobbin Thread Weight
With your bobbin properly installed, you’ll now need to match your bobbin thread weight with your top thread for balanced stitches. Mismatched threads are like a tug-of-war that ends in breakage.
For perfect thread balance, consider the following guidelines:
- Use 60-weight bobbin thread with 40-weight top thread
- Choose prewound bobbins for consistent tension
- Match thread types (polyester with polyester)
- Adjust bobbin tension with small, incremental changes
This balance prevents tension issues and guarantees smooth, consistent stitch quality.
Adjusting Hooping Tension
The right balance between bobbin and top thread weight creates harmony in your stitching.
Now, let’s tackle hooping tension – a hidden culprit behind those frustrating thread breaks.
Your fabric should be drum-tight but not stretched to its limits.
Too loose? Your embroidery machine creates distortion. Too tight? You’re inviting thread breaks.
For perfect tension balance, choose the appropriate hoop size and use quality stabilizer. Remember, fabric stability prevents tension issues during embroidery troubleshooting.
Ensuring Correct Bobbin Fit
Just as fabric tension affects your thread, the perfect bobbin fit is your machine’s best friend.
Verify you’re using the correct bobbin size and type for your specific machine model. Metal or plastic bobbin material matters – using the wrong one causes erratic bobbin tension.
When bobbin issues arise, check that your bobbin sits properly in its case without wiggling. Loose-fitting bobbins create inconsistent thread tension and inevitable breakage.
Inspect the bobbin case for any sharp edges that might be causing problems, leading to a need for proper adjustment.
Frequently Asked Questions (FAQs)
Can thread guide material affect breakage frequency?
Yes, thread guide material absolutely affects breakage frequency.
Metal guides with burrs or rough spots can fray your thread, while smooth ceramic or polished guides will reduce friction and help your thread glide effortlessly through your machine, which can also involve ceramic guides.
How does humidity impact thread performance?
Like a thirsty plant, your thread craves balance.
Too low humidity (below 40%) makes fibers brittle and prone to breaking.
Too high (above 60%) creates excess tension.
You’ll achieve ideal performance at 45-55% humidity.
Do certain thread colors break more easily?
Darker dyed threads, especially black and red, can break more easily due to additional processing chemicals.
You’ll notice these colors often require gentler tension settings compared to natural or lighter-colored threads.
Can improper machine placement cause thread breakage?
Your machine’s placement can absolutely cause thread breakage. If it’s on an uneven surface, you’ll experience vibration that stresses the thread path, increasing tension and causing breaks during operation.
Does thread break-in period reduce breakage issues?
There’s no real "break-in period" for thread.
Quality thread works properly from the start.
You’ll reduce breakage by using proper tension settings and compatible needle sizes rather than waiting for thread to adjust.
Conclusion
Isn’t it ironic that such a tiny part can cause such massive frustration?
When your thread guide keeps breaking thread, you’re not alone.
By following these seven expert fixes—checking for burrs, adjusting tension, using quality thread, maintaining proper speed, ensuring needle compatibility, cleaning regularly, and balancing bobbin tension—you’ll transform your sewing experience.
Don’t let thread breakage derail your projects anymore.
With these practical solutions, you’ll be back to seamless creating in no time, and by applying these fixes, you can ensure a more frustration-free sewing process.

