This site is supported by our readers. We may earn a commission, at no cost to you, if you purchase through links.
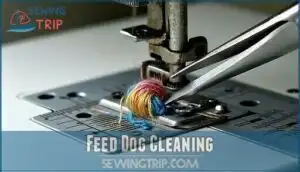
Start by unplugging your machine and removing the throat plate to access the feed dogs. Use tweezers to carefully extract visible lint and thread fragments from around the metal teeth.
A small brush or compressed air helps remove stubborn debris from tight spaces. Clean gently—these mechanisms are precise and delicate.
After cleaning, apply one small drop of sewing machine oil to the feed dog pivot points, then reassemble everything. This simple maintenance prevents costly repairs and keeps your stitches looking professional.
Table Of Contents
Key Takeaways
- Unplug your machine first – Always disconnect power before cleaning to prevent accidental starts that could injure you or damage the equipment.
- Remove lint weekly with tweezers – Extract visible debris from around the metal teeth using tweezers and a small brush to prevent skipped stitches and fabric bunching.
- Use one drop of oil monthly – Apply minimal sewing machine oil to pivot points after cleaning, as excess oil attracts more lint and creates sticky buildup.
- Clean gently with proper tools – Use compressed air, soft brushes, and mild soap to remove stubborn debris without damaging the delicate feed dog mechanisms.
Feed Dog Basics
Your sewing machine’s feed dogs are the toothed metal bars beneath the needle plate that grip and pull fabric through each stitch.
Understanding how these mechanical workhorses function will help you troubleshoot common sewing problems and keep your stitches running smoothly.
Feed Dog Functionality
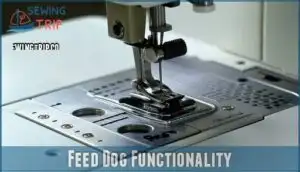
Your sewing machine’s feed dog functionality relies on precise elliptical motion to move fabric smoothly. These toothed metal bars work beneath the needle plate, creating synchronized movement with your needle for perfect stitch creation.
Here’s how feed dogs master fabric gripping:
- Rise up to grip fabric with diagonal teeth
- Move forward to advance material through machine
- Drop down to release fabric for next cycle
- Maintain consistent timing for preventing jams.
Understanding feed dog functionality helps you troubleshoot issues like fabric bunching or skipped stitches. When fabric feeding goes wrong, it’s often because this elliptical motion gets disrupted. Proper feed dog adjustment guarantees smooth operation every time.
Feed Dog Terminology
You’ll encounter the term "feed dog" throughout sewing machine literature, but understanding this engineering terminology helps you master your machine.
Engineering dogs are mechanical parts that grip and move materials through physical engagement. The canine analogy fits perfectly—these metal teeth bite and pull fabric like a dog’s grip.
Early terms included "feed bar" and "feed points" before the Singer handbook standardized "feed dog" by 1915, making feed dog adjustment and feed dog cleaning easier to discuss.
Feed Dog History
Early Feed Mechanisms in sewing machines evolved from simple push systems to sophisticated gripping devices.
The engineering term "dogs" comes from mechanical parts that engage and move materials.
Here’s how terminology developed:
- 1800s origins: Manufacturers called them "feed bars" and "feed points"
- Dogs analogy: Sharp teeth grip fabric like canine teeth bite objects
- Singer Handbook Appearance: "Feed dog" first appeared in 1915’s Singer No. 115 manual
This terminology evolution reflects improved fabric feeding technology addressing fabric movement and feed dog height challenges.
Feed Dog Troubleshooting
When your sewing machine starts acting up, feed dog problems are often the culprit behind fabric bunching, skipped stitches, and uneven feeding.
You’ll need to check four main areas: thick fabric overwhelming your feed dogs, incorrect height settings, stitch length problems, or feed dogs stuck in the wrong position.
Thick Fabric Issues
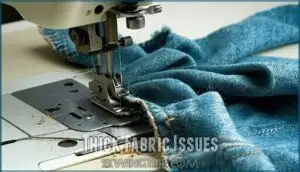
Thick fabrics can overwhelm your feed dogs, preventing proper fabric feeding through your sewing machine.
When Fabric Thickness Limits are exceeded, the dogs can’t grip adequately, causing bunching and skipped stitches.
Combat this by ensuring proper Needle Size Matters – use heavy-duty needles for thick materials.
Consider Walking Foot Use for multiple layers, as it assists the feed dogs’ grip.
Adjust Tension Adjustments and tackle Layered Seams carefully to prevent fabric feeding issues and lint buildup.
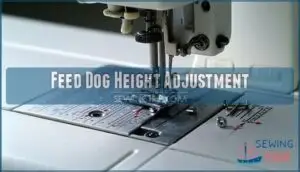
Feed Dog Height Adjustment
Proper feed dog height acts like a goldilocks zone—not too high, not too low, but just right for smooth fabric feeding.
You’ll need adjustment tools like screwdrivers to calibrate feed dogs between 0.8-1.2mm above the needle plate.
Check your feed dog switch is in the raised position first, and troubleshooting height issues prevents fabric thickness problems and advanced techniques require precise measurements for ideal feeding performance.
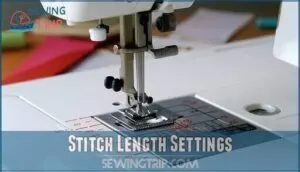
Stitch Length Settings
Your machine won’t feed fabric when you’ve set the stitch length to zero – it’s like putting your car in park.
Zero stitch length completely stops feed dog movement, preventing fabric advancement during sewing machine cleaning and maintenance routines.
- Check your Stitch Length Guide – make certain it’s set above zero for normal sewing
- Adjust for Fabric Thickness – thicker materials need longer stitches
- Use proper settings for Specialty Stitches – Quilting Stitches and Decorative Stitching require specific lengths
- Clean feed dog teeth regularly to maintain proper stitch length accuracy
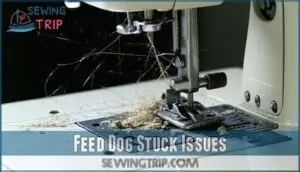
Feed Dog Stuck Issues
When you turn the handwheel and feed dog teeth stay hidden, they’re likely stuck in the dropped position.
Check the feed dog switch first—it might be accidentally set to "down."
Lint obstruction around the mechanism can also freeze movement.
Thread entanglement beneath the throat plate creates similar problems.
Turn off your machine and clear any debris blocking the feed dog teeth before testing again to resolve the issue with feed dog teeth.
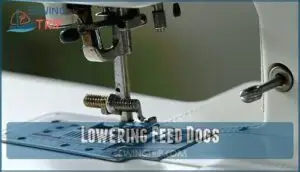
Lowering Feed Dogs
Knowing where your feed dog switch is located saves you time and prevents frustration when you need to drop the dogs for free-motion quilting or embroidery work.
You’ll typically find this switch on the back or side of your machine, though some models hide it under a removable panel or integrate it into the stitch selection dial.
Locating Feed Dog Switch
Looking under different parts of your machine can feel like a treasure hunt, but the feed dog switch is typically found on the back or side of most sewing machine models.
Check your manual diagrams first—they’ll show the exact location and switch symbol for your specific model.
Some machines have hidden switches near the stitch selector or beneath removable panels, and different switch types exist, from simple toggle switches to lever-style controls.
This knowledge makes sewing machine maintenance and cleaning easier once you know where to look.
Raising Feed Dogs
When engaging feed dogs back into their working position, you’ll restore your machine’s fabric gripping power for proper stitch formation.
Follow these steps for proper alignment:
- Locate the feed dog lever – Usually found on the machine’s back or side panel
- Move switch to "raised" position – This activates the feed bar mechanism
- Turn handwheel manually – Verify feed points are moving up and down correctly
- Check fabric gripping action – Test on scrap material to guarantee preventing slippage
- Complete sewing machine cleaning – Remove any remaining lint that could affect operation
This simple process restores normal sewing machine maintenance functionality.
Dropping Feed Dogs
When switching to the dropped position, you’ll disable your feed bar for specialized techniques like free-motion quilting and darning techniques.
This position enables button sewing, fabric painting, and specialty stitches requiring manual fabric control. Simply move the feed dog switch to "dropped" – you’ll see triangular symbols under your needle plate confirming the change.
| Technique | Feed Dogs Position | Control Method |
|---|---|---|
| Free-motion quilting | Dropped | Manual movement |
| Button sewing | Dropped | Hand positioning |
| Darning techniques | Dropped | Hoop guidance |
| Fabric painting | Dropped | Steady hand control |
Feed Dog Cleaning
Clean feed dogs prevent fabric feeding problems that cause skipped stitches and bunching.
You’ll need tweezers, mild soap, and a lint brush to remove debris that accumulates in these toothed metal bars during regular sewing.
Removing Lint and Debris
With your feed dogs lowered, you can now tackle the lint buildup that’s been sabotaging your stitches.
Start this sewing machine cleaning guide by gathering your lint removal tools and accessing hard-to-reach lint systematically.
Deep cleaning methods for ideal results:
- Tiny brush technique – Use a small stiff brush to sweep lint away from feed dog teeth, working from center outward
- Compressed air blasts – Direct air straight down to dislodge packed debris without pushing it deeper into mechanisms
- Cotton swab precision – Navigate tight spaces around feed dogs to capture stubborn sewing machine lint buildup
Best cleaning frequency depends on usage, but weekly maintenance prevents major accumulations.
Consider using a compressed air duster for effective cleaning.
These debris prevention tips keep your machine running smoothly.
Using Tweezers and Soap
When stubborn debris clings to your feed dogs, precision-tip tweezers become your best friend for delicate extraction.
Use stainless steel tweezers to pluck lint from tight crevices without scratching metal surfaces.
Apply diluted dishwashing soap with a soft brush for residue removal, especially after heavy sewing sessions.
This tweezers technique works perfectly on delicate fabrics’ remnants and prevents lint buildup from compromising your machine’s performance.
Regular cleaning can prevent feed dog problems.
Reassembling Feed Dogs
After cleaning, carefully align each sewing machine part according to your manual’s component order diagram.
Check that feed dogs sit flush with the throat plate before screw tightening. Proper alignment verification prevents future sewing machine troubleshooting headaches.
Test functionality by running a few stitches on scrap fabric. This final step confirms your sewing machine mechanism works smoothly after reassembly, ensuring that it is ready for use and will operate with minimal risk of headaches.
Feed Dog Maintenance
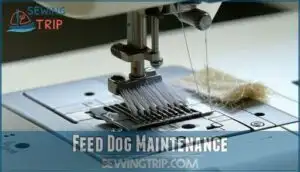
Proper feed dog maintenance keeps your sewing machine running smoothly and prevents costly repairs down the line.
You’ll need to lubricate these metal components regularly, inspect their teeth for wear, and take steps to prevent rust from forming in humid conditions.
Regular Lubrication
Proper sewing machine lubrication keeps your feed dogs running smoothly and extends their lifespan substantially.
Apply 1-2 drops of low-viscosity sewing machine oil at designated points beneath the needle plate monthly for home use, weekly for heavy sewing.
Rotate the handwheel twice after application to distribute oil evenly.
Avoid over-oiling—excess attracts lint and creates messy buildup that hampers performance, as it can lead to a significant decrease in your machine’s efficiency and require more frequent maintenance.
Checking Feed Dog Teeth
With over a decade of experience under your fingertips, you’ll want to inspect those tiny metal warriors regularly.
Check tooth sharpness by running your finger gently across the surface—dull teeth can’t grip fabric effectively.
Look for chips, cracks, or bent points that signal damage assessment needs, and test grip effectiveness on different materials to verify material compatibility.
If teeth appear worn or fabric slips during stitching, replacement timing has arrived for superior sewing machine maintenance.
Preventing Rust and Corrosion
Your feed dogs need protection from moisture and contaminants that cause rust. Regular lubrication creates a barrier against corrosion while proper storage keeps them dry.
One common issue is unclean feed dogs, which can hinder fabric grip.
Follow these rust prevention steps:
- Lubrication Types – Apply clear sewing machine oil monthly to metal surfaces
- Storage Solutions – Cover your machine when not in use to block dust
- Humidity Control – Keep machines in dry areas below 50% humidity
- Material Selection – Use lint-free cloths for cleaning tools maintenance
Common Feed Dog Problems
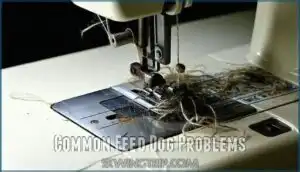
When your feed dogs aren’t working properly, you’ll notice three telltale signs that can turn your sewing project into a frustrating mess.
When problems strike, your sewing project transforms from creative joy into pure frustration.
Fabric bunching, skipped stitches, and uneven feeding are clear indicators that your feed dogs need attention before your next stitch.
Fabric Bunching Issues
When fabric bunches under your presser foot, it’s like watching a traffic jam in slow motion.
This frustrating sewing machine problem often stems from mismatched needle size and fabric type combinations.
Check your stitch settings first—improper tension problems can cause bunching.
Your fabric grip might be too aggressive for delicate materials, or your presser foot pressure needs adjustment for different fabric types during sewing machine troubleshooting sessions.
Skipped Stitches
When skipped stitches plague your project, dirty feed dogs often share the blame with needle timing and thread tension issues.
Lint buildup prevents proper fabric advancement, disrupting hook alignment and creating gaps in your stitchwork.
Clean feed dogs guarantee consistent fabric movement, allowing your needle size and thread to work harmoniously with different fabric types during sewing machine troubleshooting sessions.
Uneven Feeding
When your machine produces uneven stitches, it’s often feeding fabric inconsistently.
Fabric slippage and feed dog wear create irregular stitch spacing that’ll drive you crazy during sewing machine troubleshooting.
Here’s what causes uneven feeding:
- Feed Dog Wear – Worn teeth can’t grip fabric properly, causing irregular movement
- Tension Imbalance – Poor thread quality or incorrect settings affect fabric advancement
- Needle Plate Issues – Scratched or damaged plates interfere with smooth feeding
- Pressure Problems – Wrong presser foot pressure allows fabric to slip unpredictably
Regular sewing machine maintenance prevents these headaches before they ruin your projects.
Incorrect tension can cause uneven fabric feed.
Feed Dog Adjustment
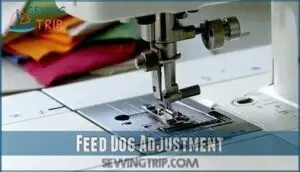
When your feed dogs aren’t moving fabric properly, adjusting their height and pressure settings can solve most feeding problems.
You’ll also need to match your presser foot to the fabric type for the best results.
Adjusting Feed Dog Height
Proper height calibration transforms your sewing experience from frustrating to flawless.
You’ll need basic adjustment tools to access the set screw beneath your needle plate. Ideal height positions feed dog teeth just above the plate surface at their highest point.
Different fabric thickness requires fine-tuning through your troubleshooting guide. Fabric puckering can be resolved with adjustments.
This sewing machine maintenance step prevents costly sewing machine repair needs later, ensuring a flawless sewing experience with proper height calibration.
Adjusting Presser Foot Pressure
Beyond height adjustments, you’ll need to dial in your presser foot pressure for ideal fabric feeding.
Think of it as finding the sweet spot between too tight and too loose – your fabric should glide smoothly without slipping or bunching.
- Light pressure works best for delicate fabrics like silk or chiffon
- Medium pressure handles most cotton and linen projects perfectly
- Heavy pressure tackles thick materials like denim or canvas
- Test sewing on scraps helps you find the right setting quickly
- Pressure settings affect how feed dogs grip different fabric thickness levels
When troubleshooting pressure issues with slippery fabrics, start with lighter settings and gradually increase.
Your sewing machine maintenance routine should include checking these adjustments regularly.
Proper presser foot pressure keeps your sewing machine cleaning efforts worthwhile by preventing fabric damage and ensuring smooth operation.
Using Walking Foot
When thick fabrics challenge your feed dogs, a walking foot becomes your secret weapon.
This specialized sewing machine part features its own set of feed dogs that work with your machine’s built-in system for Even Fabric Feeding.
Walking Foot Basics involve dual feeding mechanisms that prevent layers from shifting during stitching.
For Quilting Applications and multi-layer projects, this attachment guarantees Fabric Grip Enhancement while Preventing Slippage, making sewing machine maintenance easier by reducing strain on internal sewing machine parts.
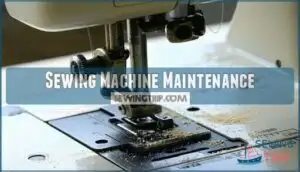
Sewing Machine Maintenance
Beyond your feed dogs, you’ll need to maintain other key components that work together to create smooth, even stitches.
Regular cleaning of your bobbins case, roller, and bobbin spool prevents lint buildup that can interfere with your machine’s overall performance and stitch quality.
Cleaning Bobbin Case
Remove your bobbin case for thorough sewing machine maintenance by first unplugging the machine.
Wipe away dirt and debris, then use compressed air for stubborn lint removal.
Clean tension disc components with a dampened toothbrush and diluted soap. Focus on case lubrication points and shuttle hook cleaning.
Proper case reassembly tips guarantee smooth operation.
Cleaning Roller
How does your roller keep everything moving smoothly?
Start by removing your machine’s housing to access this essential component. Use cotton swabs and an artist brush for thorough roller cleaning around all surfaces.
Check roller material for wear signs that could affect sewing machine performance.
Proper roller lubrication prevents grinding noises during operation.
Regular roller inspection catches alignment issues early, preventing costly sewing machine problems and ensuring superior sewing machine care through consistent maintenance routines and sewing machine performance.
Cleaning Bobbin Spool
After cleaning the roller, move to the bobbin spool. Unplug your machine and remove the cover plate to access the bobbin spool area.
Use compressed air to blow away thread residue and lint buildup from the spool mechanism. Clean the tension disc thoroughly with a thread cleaner, removing any stubborn debris.
Inspect the spool for wear or damage. Reassemble carefully and test functionality.
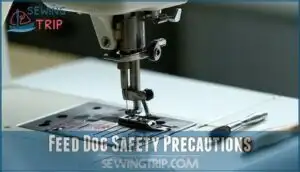
Feed Dog Safety Precautions
Before you start cleaning your sewing machine’s feed dogs, you’ll need to take proper safety precautions to protect both yourself and your equipment.
Unplugging your machine prevents accidental starts that could cause injury, while using gentle cleaning techniques keeps your feed dogs working smoothly for years to come, and this is crucial for maintaining your equipment and ensuring safety.
Unplugging Machine
Before any machine maintenance, always disconnect your sewing machine from its power source.
Safety comes first – electrical safety prevents accidents that could injure you or damage your equipment.
Check your cord condition and inspect the outlet before starting any sewing machine cleaning or troubleshooting.
This simple step protects you during sewing machine repair and maintenance procedures.
Avoiding Excess Oil
With your machine safely unplugged, you’ll need to approach oil application carefully.
Excess oil creates sticky residue that attracts more lint and debris. Use only two to three drops of sewing machine oil where specified in your manual. Too much lubricant transforms helpful maintenance into a messy problem that compromises feed dog performance.
Here’s what excess oil can cost you:
- Sticky buildup – Oil residue traps lint faster than you can clean it
- Ruined fabric – Excess oil seeps through material, creating permanent stains
- Sluggish performance – Too much lubrication actually slows down moving parts
- Expensive repairs – Oil overflow damages internal components over time
- Wasted time – You’ll spend more hours cleaning than sewing
Apply oil sparingly using the applicator tip. Wipe away any excess immediately with a lint-free cloth for ideal sewing machine maintenance.
Using Gentle Cleaning Techniques
Treat your sewing machine’s feed dogs like delicate materials that demand respect.
Use soft brush cleaning techniques with gentle, outward strokes to avoid damage during lint removal.
Skip harsh solvents – mild soap works better as solvent alternatives.
When using compressed air for sewing machine cleaning, direct it straight down to prevent debris from settling deeper.
These sewing machine cleaning tools and gentle techniques guarantee proper sewing machine maintenance without harming delicate components.
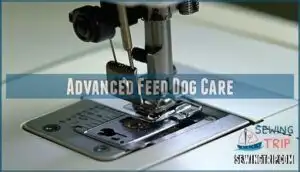
Advanced Feed Dog Care
When standard cleaning methods aren’t enough, you’ll need advanced techniques to tackle stubborn debris and maintain peak feed dog performance.
These specialized approaches guarantee your machine delivers flawless stitches for years to come.
Using Compressed Air
Compressed air transforms stubborn lint removal from tedious to swift. Direct the air nozzle straight down into feed dog crevices, using 30-40 PSI to avoid damaging delicate components. Control debris direction carefully—you’ll push lint deeper if you’re careless with angles.
For best cleaning, consider the various duster options.
- Air nozzle types: Use precision tips for targeted cleaning around feed dog teeth
- PSI considerations: Keep pressure between 30-40 PSI to prevent interior damage risk
- Debris direction: Always blow lint away from gears and internal mechanisms
- Alternative methods: Consider mini-vacuums when compressed air isn’t available
- Preventive maintenance: Regular air cleaning extends your sewing machine’s lifespan
Using Pipe Cleaners and Brushes
When tackling stubborn lint in tight spaces, pipe cleaners become your secret weapon for crevice cleaning.
These flexible tools bend around feed dog teeth while cosmetic brushes reach packed debris.
For effective lint removal, choose soft-bristled sewing machine brushes to protect delicate parts.
You can find a variety of pipe cleaner options online.
Always practice tool safety by keeping brush types gentle and avoiding excessive pressure during your sewing machine maintenance routine.
Replacing Feed Dogs
Sometimes worn-out feed dogs need complete replacement when teeth become damaged beyond repair.
Start by unplugging your machine and removing the needle plate to access the feed dog assembly.
Carefully unscrew the old unit, noting its alignment position. Install the new feed dog types with proper alignment importance, ensuring teeth point upward.
Test post-replacement functionality on scrap fabric to verify smooth operation.
Frequently Asked Questions (FAQs)
How do you clean a sewing machine feed dog?
Like untangling a knot of fishing line, cleaning feed dogs requires patience and the right approach.
Unplug your machine, remove the needle plate, and use tweezers to extract lint buildup.
Wipe teeth gently with a damp cloth from center outward, this is a crucial step for maintaining your machine, and it requires care.
What is a feed dog in a sewing machine?
A feed dog is a toothed metal bar beneath your sewing machine‘s needle plate that grips and pulls fabric forward as you sew, creating each stitch through synchronized movement.
What if my sewing machine doesn’t have a feed dog?
Most modern sewing machines have feed dogs built-in, but if yours truly doesn’t, you’re dealing with a straight-stitch only machine that requires manual fabric guidance for each stitch.
How do you adjust a sewing machine’s feed dog?
Locate your feed dog lever (usually on the back or side). Move it to "raised" for regular sewing or "dropped" for free-motion work. Check your manual for exact location.
How do I know if my sewing machine has a feed dog?
Every sewing machine is like a well-oiled team player—you’ll spot toothed metal bars beneath the needle plate that grip and pull fabric through.
These feed dogs move up-and-down while stitching happens.
Can a feed dog Snag on a sewing machine?
Yes, feed dogs can snag on delicate fabrics like silk or chiffon.
Their diagonal teeth grip material effectively but may catch thin or loosely woven fabrics, causing pulls or tears in your project.
How to clean a feed dog sewing machine?
Unplug your machine first, then remove the needle plate.
Use tweezers to extract lint from around the feed dogs.
Wipe teeth with a damp cloth, moving outward from center to avoid damage.
What do the feed dogs do to the fabric while you’re sewing?
Feed dogs grip your fabric with their metal teeth and move in an elliptical motion.
They rise up, grab the material, pull it forward toward you, then drop down to release it for the next stitch cycle.
Why would you drop the feed dog on a sewing machine?
You drop feed dogs for free-motion sewing, quilting, embroidery, or when handling extremely thick or delicate fabrics that need manual control instead of automatic feeding.
How often should feed dogs be replaced completely?
Surprisingly, you’ll rarely need to replace feed dogs completely – they’re built to last decades with proper maintenance. Most sewists never replace them unless severely damaged or rusted beyond repair.
Conclusion
Studies show that 80% of sewing machine problems stem from inadequate maintenance, making proper sewing machine feed dog cleaning essential for peak performance.
You’ve now mastered the techniques to keep your feed dogs functioning smoothly. Remember to clean them monthly, use minimal oil, and handle components gently.
Regular sewing machine feed dog cleaning prevents costly repairs and guarantees consistent, professional-quality stitches. Your machine will reward this attention with years of reliable service.

