This site is supported by our readers. We may earn a commission, at no cost to you, if you purchase through links.
 Start your sewing project by matching complexity to your skill level—don’t attempt a custom blazer when you’re still mastering straight seams. Break projects into manageable tasks and set realistic deadlines to avoid that familiar mid-project panic. Create a dedicated workspace with proper lighting and organize your tools beforehand.
Choose fabrics that complement your pattern and practice fundamental stitches like backstitching on scrap material first. Keep a sewing journal to track modifications and progress. Remember, even seasoned seamsters once struggled with threading needles.
The secret lies in systematic preparation and patience with yourself. Smart shortcuts and troubleshooting techniques can transform any ambitious project into your proudest creation.
Table Of Contents
- Key Takeaways
- Planning Your Sewing Project Step-by-Step
- Setting Up an Efficient Sewing Workspace
- Selecting The Right Sewing Pattern
- Choosing Fabrics for Your Project
- Essential Sewing Tools and Supplies
- Mastering Fundamental Sewing Techniques
- Organizing and Tracking Sewing Projects
- Managing Time and Staying Motivated
- Troubleshooting and Improving Sewing Skills
- Frequently Asked Questions (FAQs)
- Conclusion
Key Takeaways
- Match your project complexity to your skill level – You’ll avoid frustration and costly mistakes by choosing patterns that align with your current abilities rather than attempting advanced techniques before you’re ready.
- Set up an organized workspace with proper tools – You’ll work more efficiently when you create a dedicated sewing area with good lighting, organized storage, and essential tools like quality scissors, measuring devices, and appropriate needles for your fabric type.
- Plan thoroughly before you start cutting – You’ll save time and materials by calculating fabric requirements accurately, reading pattern instructions completely, and breaking your project into manageable tasks with realistic deadlines.
- Practice fundamental techniques consistently – You’ll build confidence and improve results by mastering basic stitches on scrap fabric first, maintaining your sewing machine properly, and keeping detailed records of modifications for future reference.
Planning Your Sewing Project Step-by-Step
You’ll achieve better results when you match your project’s complexity to your current skill level and establish realistic timelines.
Breaking down each sewing project into manageable tasks helps you maintain consistent progress while avoiding overwhelm and frustration.
Matching Project Complexity to Skill Level
Start your sewing journey by honestly evaluating your current abilities through skill mapping. Choose projects that stretch your sewing techniques without overwhelming your sewing readiness.
Beginner complexity levels include simple tote bags or pillowcases, while intermediate sewers can tackle button-down shirts.
This skill assessment ensures sewing success through proper project scaling and thoughtful sewing project planning that matches your skill level.
Setting Realistic Goals and Deadlines
Your sewing project’s success hinges on realistic Goal Setting and smart Deadline Management. Calculate Time Estimates by adding 25% buffer time to your initial projections—fabric mishaps happen.
Use Project Planning Pages to map milestones and track Progress Tracking weekly. Break complex projects into smaller deadlines rather than one overwhelming target date for better Time Estimation accuracy.
Breaking Down Tasks for Efficiency
Once you’ve set your timeline, divide your sewing project into bite-sized pieces. This approach transforms overwhelming projects into manageable steps through effective task prioritization and time blocking.
- Pre-cutting phase: Pattern layout, fabric preparation, and cutting all pieces
- Construction sequence: Sewing techniques in logical order, from darts to seams
- Finishing tasks: Hemming, buttonholes, and final pressing
- Quality checkpoints: Fitting sessions and detail reviews between major steps
Your sewing project planner becomes your roadmap. These efficiency tips and productivity hacks keep you moving forward without burnout, making sewing schedules actually work.
Setting Up an Efficient Sewing Workspace
You’ll create your best work when you establish a dedicated sewing space with proper lighting, organized storage, and a sturdy work surface.
A well-planned workspace prevents fatigue, reduces mistakes, and keeps your tools within easy reach throughout every project.
Choosing The Best Location
Location shapes your sewing success. Choose a well-ventilated room with natural lighting near a window for accurate fabric color matching.
Your sewing table should sit away from high-traffic areas to minimize distractions. Make certain adequate space planning around your sewing machine for comfortable movement.
Consider room layout for ergonomic setup—you’ll spend hours here perfecting your craft.
Organizing Tools and Materials
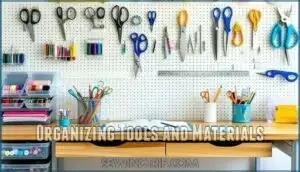
Organization transforms chaos into creative flow. You’ll need strategic Tool Storage solutions like pegboards and drawer dividers for scissors, rulers, and rotary cutters. Material Sorting by project type keeps fabric cuts accessible.
Supply Management systems with labeled containers prevent hunting for notions mid-seam. Workspace Optimization means everything within arm’s reach.
Inventory Control through your sewing planner tracks supplies and prevents duplicate purchases, making sewing project organization seamless.
Ensuring Proper Lighting and Safety
Good lighting transforms your sewing space from a struggle into a sanctuary. You’ll need proper lighting that mimics daylight for accurate color matching and prevents eye strain during detailed work.
- Install LED fixtures providing 5000K-6500K color temperature for true fabric colors
- Position task lamps to eliminate shadows on your work surface and prevent squinting
Workspace ergonomics matter—your neck and back will thank you for investing in quality illumination that promotes proper posture and accident prevention. Follow sewing safety guidelines by keeping walkways clear and maintaining equipment regularly.
To create an ideal workspace, consider optimizing your sewing space setup for maximum efficiency and comfort.
Selecting The Right Sewing Pattern
You’ll achieve the best results when your pattern matches both your current skill level and your project goals. Choose patterns with clear instructions and appropriate construction techniques that align with your sewing experience and desired garment style.
Pattern Choices for Skill Levels
Your workspace is ready—now choose patterns that match your abilities. Pattern selection starts with an honest skill level assessment. Beginners should pick simple designs with fewer pieces and basic construction methods.
| Skill Level | Best Pattern Types | Avoid These Features |
|---|---|---|
| Beginner | Straight skirts, basic tops, simple bags | Zippers, buttonholes, fitted sleeves |
| Intermediate | A-line dresses, blouses, jackets | Complex tailoring, multiple fittings |
| Expert | Fitted blazers, coats, structured garments | None—experiment freely |
| Expert | Couture techniques, complex draping | Time constraints only |
| All Levels | Practice projects, scraps testing | Expensive fabric mistakes |
Start with envelope patterns marked "easy" or "beginner." These include clear instructions and forgiving construction methods. As your sewing skills grow, you’ll tackle more challenging designs with confidence.
Considering Garment Fit and Style
Two factors determine sewing success: understanding your body measurements and choosing patterns that complement your style preferences. Proper garment fit starts with accurate measurements and realistic expectations about fabric drape behavior.
- Take body measurements wearing fitted undergarments for accuracy in pattern fitting
- Choose garment silhouettes that flatter your body shape and align with personal style preferences
- Consider fabric drape characteristics when selecting patterns – stiff fabrics won’t work for flowing designs
- Plan for fit adjustments by choosing patterns with clear alteration guidelines and seam allowances
- Practice sewing techniques on scraps before making permanent changes to your garment pieces
Choosing Fabrics for Your Project
Your fabric choice determines your project’s success more than any other single decision. You’ll need to match fabric weight, drape, and stretch properties to your pattern’s requirements while calculating proper yardage to avoid costly mistakes.
Your fabric choice determines your project’s success more than any other single decision
Understanding Fabric Types and Properties
Understanding fabric types transforms your sewing projects from guesswork to mastery. Natural fibers like cotton and linen offer breathability but require careful handling, while synthetic blends provide durability and easy care. Fabric weaves, thread counts, and fiber blends determine drape behavior and project success. Choosing the right fabric involves considering the natural fiber benefits to guarantee the best results for your sewing projects.
| Natural Fibers | Synthetic Fibers |
|---|---|
| Cotton: breathable, adaptable | Polyester: wrinkle-resistant |
| Linen: strong, softens with washing | Rayon: absorbent, frays easily |
| Silk: luxurious, delicate care | Tencel: eco-friendly blend |
| Wool: insulating, temperature regulation | Nylon: durable, low moisture |
Matching Fabrics to Patterns
Before you fall in love with that gorgeous silk, check if it matches your pattern’s personality. Smart fabric selection means reading your pattern envelope like a roadmap—it tells you exactly which textiles will work best.
- Match fabric weight to pattern requirements – lightweight patterns need flowing fabrics, structured garments need stable weaves
- Consider fabric drape and stretch – knits for fitted designs, wovens for formal pieces
- Apply color theory principles – choose hues that complement your design vision while working with the pattern’s lines
Your sewing patterns aren’t just suggestions—they’re your blueprint for success.
Calculating Fabric Requirements
Accurate fabric estimation prevents costly mistakes and ensures project success. Always add 10-15% extra yardage for shrinkage and cutting errors. Check pattern requirements, then calculate additional fabric for grain alignment and selvage management.
Your sewing planner should include fabric requirement calculations for future reference. Smart fabric selection starts with proper yardage calculation during sewing project planning.
Essential Sewing Tools and Supplies
You’ll need specific tools and supplies to execute your sewing projects with precision and efficiency. Having the right equipment from the start prevents frustration and ensures professional-quality results that match your skill development goals.
Must-Have Tools for Beginners
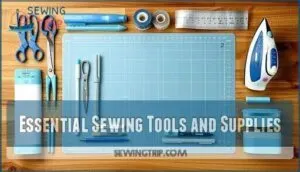
Starting your sewing journey requires the right foundation tools. Quality equipment makes every sewing project smoother and builds essential sewing skills faster. These sewing supplies transform your sewing machine work from frustrating to fulfilling:
- Essential Scissors – Fabric shears and small snips for clean cuts
- Measuring Tools – Tape measure, rulers, and gauges for accuracy
- Seam Rippers – Your best friend for fixing mistakes quickly
- Marking Tools – Chalk, pens, and pins for precise placement
Choosing The Right Needles and Threads
Three factors determine perfect needle selection: fabric weight, thread type, and desired stitch quality. Match universal needles for cotton, ballpoint for knits, and denim needles for heavy fabrics. Thread tension affects fabric compatibility—polyester works universally while cotton suits natural fibers. Quality thread control prevents breakage and improves your sewing machine performance across all sewing techniques.
| Fabric Type | Recommended Needle |
|---|---|
| Lightweight cotton | Size 70/10 Universal |
| Medium-weight knits | Size 80/12 Ballpoint |
| Heavy denim | Size 100/16 Denim |
| Delicate silk | Size 60/8 Sharp |
Creating a Project Kit
Why scatter supplies across your workspace when you can create organized project kits? Kit preparation starts with fabric sorting by project type and color coordination.
Gather your pattern selection, notion organization essentials, and supply gathering materials into labeled containers.
This sewing project planning approach transforms chaotic fabric selection into efficient project kit creation, letting you grab everything needed for focused stitching sessions.
Mastering Fundamental Sewing Techniques
You’ll build confidence through consistent practice of fundamental stitches like straight seams, backstitching, and finishing techniques that form the foundation of quality construction. Mastering these core methods—from basic garment assembly to specialty techniques like quilting and applique—creates the technical skills you need for successful project completion.
Practicing Basic Stitches
Master fundamental stitches before tackling complex sewing project planning. Consistent needle control and proper stitch tension create the foundation for sophisticated sewing techniques. Focus on these essentials:
- Thread selection – Match weight to fabric type
- Fabric preparation – Press and stabilize before stitching
- Sewing speed – Start slow, build muscle memory gradually
Perfect these basics in your sewing space first.
Sewing Techniques for Garment Construction
Garment Construction transforms fabric into wearable art through precise Sewing Techniques. You’ll master Seam Finishing methods like French seams and serged edges. Garment Interfacing adds structure to collars and cuffs.
Pattern Alterations guarantee perfect Garment Fitting. Essential Sewing Notions include bias tape and stay tape. Fabric Manipulation techniques create darts and pleats.
Sewing Technique Mastery develops through consistent sewing project planning and practice.
Specialty Methods Like Quilting and Applique
Specialty sewing techniques transform basic projects into stunning masterpieces. These methods require patience and practice, but reveal creative possibilities beyond standard garment construction.
- Quilting Basics: Layer batting between fabric pieces, then stitch decorative patterns for warmth and texture
- Applique Techniques: Attach fabric shapes onto base material using zigzag or blanket stitches for dimensional designs
- Embroidery Designs: Add decorative stitching by hand or machine to personalize any sewing project
- Patchwork Methods: Join fabric pieces in geometric patterns, perfect for quilts and decorative panels
- Sewing Embellishments: Incorporate beads, ribbons, or trim to enhance ordinary projects into remarkable creations
Organizing and Tracking Sewing Projects
You’ll transform chaos into control when you establish a systematic approach to tracking your sewing projects.
Maintaining detailed records of fabric purchases, pattern modifications, and project timelines prevents costly mistakes and helps you build on previous successes.
Using a Sewing Planner or Calendar
Three smart moves transform chaotic sewing into organized bliss. **First, use time blocking to schedule dedicated sewing sessions.
Second, implement habit tracking to monitor your progress consistently.
** Your sewing planner becomes your project scheduling command center, helping you set realistic goals while managing multiple projects simultaneously.
| Planning Element | Best Practice |
|---|---|
| Project Scheduling | Block 2-3 hour sessions weekly |
| Goal Setting | Break projects into daily tasks |
| Progress Monitoring | Update completion percentages |
| Time Blocking | Reserve consistent sewing hours |
| Habit Tracking | Mark daily sewing activities |
Documenting Project Details and Modifications
Keep detailed modification logs in your sewing project planner to track every change you make. Record pattern adjustments, fabric substitutions, and construction tweaks with dates and reasons.
This sewing journal becomes your personal reference guide, helping you repeat successful modifications and avoid past mistakes. Progress monitoring through error recording creates a valuable learning resource for future projects.
Creating Fabric and Measurement Records
Building on project documentation, you’ll want reliable Fabric Tracking systems and measurement records. Digital Fabric Calculators help determine yardage needs while Record Keeping tracks your fabric inventory.
Use Sewing Logs to record body measurements, fabric selection details, and requirements for each project. Store measurement tools consistently and update your Sewing Project Planning records after each fitting.
Managing Time and Staying Motivated
You’ll maintain consistent progress when you establish regular work sessions and recognize warning signs of project fatigue.
Strategic scheduling paired with intentional breaks prevents the frustration that derails even experienced sewers from completing their handmade goals.
Scheduling Work Sessions
Time blocking transforms your sewing project process from chaotic to controlled. Set specific session planning windows using your project planner, estimating realistic timeframes for each task.
Prioritize complex construction first when you’re fresh. Track productivity by noting actual versus estimated completion times.
Smart goal setting means scheduling shorter sessions for intricate work, longer blocks for simple seams. This systematic approach keeps sewing projects moving forward consistently.
Taking Breaks and Practicing Self-Care
Your sewing space organization affects your body and mind more than you think. Mindful sewing includes recognizing when fatigue creeps in—usually after two hours of concentrated work.
Self care tips like stretching your shoulders, rolling your neck, and walking away from your machine prevent strain. Break management means setting timers for every 45 minutes.
This stress reduction approach transforms sewing project planning from marathon sessions into a sustainable practice, supporting long-term sewing success through fatigue prevention strategies.
Tips for Avoiding Fatigue and Frustration
Smart sewing project planning prevents burnout before it starts. You’ll master Sewing Pace Management by setting Project Realism expectations and implementing Fatigue Prevention strategies. Mindful Sewing Practices transform your sewing space into a sanctuary where sewing success flows naturally.
- Set a timer for 45-minute focused sessions—your hands and eyes need regular breaks
- Keep a water bottle and healthy snacks nearby to maintain steady energy levels
- Listen to your favorite podcast or music to make repetitive tasks feel less tedious
- Remember that "good enough" beats perfect when you’re learning new techniques
Following sewing safety guidelines and Self Care Strategies ensures your sewing project management stays enjoyable rather than overwhelming.
Troubleshooting and Improving Sewing Skills
When you encounter sewing problems, you’ll solve them faster by adjusting tension settings, checking needle compatibility, and practicing unfamiliar techniques on scrap fabric first.
Regular machine maintenance and systematic troubleshooting methods help you build skills while preventing costly mistakes on your main project.
Solving Common Sewing Problems
Even experienced sewers hit snags that can derail sewing project planning. Thread tension problems create uneven stitches, while fabric fraying ruins clean edges. Poor stitch quality often stems from wrong needle sizes or bobbin issues.
| Problem | Cause | Solution |
|---|---|---|
| Thread Tension | Incorrect settings | Adjust upper/lower tension gradually |
| Fabric Fraying | Raw edges exposed | Use serger or zigzag finishing |
| Seam Repair | Broken stitches | Backstitch over damaged areas |
| Bobbin Issues | Wrong threading | Rewind and thread correctly |
| Stitch Quality | Dull needle | Replace with fabric-appropriate needle |
Following sewing safety guidelines prevents most issues before they start.
Maintaining Sewing Machines and Tools
Regular sewing machine maintenance keeps your equipment running smoothly and extends its lifespan. Follow these core practices:
- Oiling mechanisms according to manufacturer guidelines prevents mechanical wear
- Needle replacement after every project ensures clean stitches and fabric protection
- Tension adjustment and lint removal maintain consistent stitch quality
- Storage solutions protect machines from dust and environmental damage
Proper sewing machine maintenance transforms your sewing space organization and backs sewing safety guidelines for every sewing project.
Practicing New Techniques on Scrap Fabric
Before diving into your sewing project planning with expensive fabric choices, test unfamiliar techniques on scrap fabric first. These sewing skill drills prevent costly mistakes while building technique mastery.
Practice precision stitching on muslin or remnants before tackling your main sewing patterns. Fabric waste reduction starts with smart testing—you’ll master complex methods without risking your project materials.
Frequently Asked Questions (FAQs)
How do I plan a sewing project?
Start by choosing a pattern that matches your skill level. **Select appropriate fabric, calculate yardage plus extra for mistakes.
** Gather all materials, set up proper workspace, and break the project into manageable steps.
Why is a sew project plan important?
Without a bulletproof plan, you’ll waste countless hours, materials, and sanity!
You’ll avoid costly mistakes, manage time efficiently, select appropriate fabrics, and guarantee your finished garment fits perfectly every single time.
Do you need a fabric guide for a sewing project?
You’ll need a fabric guide to match your pattern’s requirements and skill level. It prevents costly mistakes, ensures proper drape, and helps you choose compatible materials for lasting, professional-looking results.
Do you need a plan for a sewing project?
Picture chaos versus control—you absolutely need a plan. It’ll save time, prevent costly mistakes, and guide fabric choices. Break projects into manageable steps with realistic timelines for success.
How do I choose a sewing project?
Choose projects matching your skill level—beginners tackle simple bags or pillows, while experienced sewers can attempt fitted garments. Consider available time, budget, and personal interests when selecting patterns.
How do you Keep Your sewing project planning on track?
Studies show only 5% of companies complete 100% of their projects successfully.
You’ll stay on track by breaking tasks into bite-sized chunks and setting weekly deadlines. Use a dedicated sewing planner to track your progress.
How do you fix skipped stitches mid-project?
Stop and rethread your machine with a fresh needle. Check tension settings, then test on scrap fabric. Most skipped stitches stem from dull needles or incorrect thread tension.
What causes fabric to pucker during sewing?
Like a stubborn wrinkle that won’t iron out, fabric puckers when tension’s off-balance. **You’re likely pulling too tight or using wrong settings.
Check your thread tension, needle size, and stitch length.
How do you alter patterns for different sizes?
Measure yourself first, then compare to pattern measurements. You’ll grade between sizes by drawing smooth lines connecting size points. Blend curves naturally and adjust length proportionally for proper fit.
When should you replace your sewing machine needle?
Fresh needles aren’t forever—unlike diamonds! Replace yours every 6-8 hours of sewing or after 8 projects to avoid skipped stitches, thread breaks, and fabric puckering that’ll drive you crazy.
Conclusion
Successfully completing your sewing project guidance requires dedication to proper planning and systematic execution. You’ll achieve better results when you match projects to your skill level and maintain organized workspace habits.
Remember that effective sewing project guidance combines realistic goal-setting with consistent practice of fundamental techniques. Don’t rush through complex construction methods—quality workmanship develops through patient attention to detail.
Your investment in proper preparation, tool organization, and technique mastery will transform challenging projects into rewarding creative accomplishments.
- https://www.awilson.co.uk/how-to-plan-sewing-project/
- https://www.seamwork.com/sewing-tutorials/how-to-sew-clothes-first-garment
- https://garmentsmerchandising.com/8-sewing-faults-with-causes-and-remedies/
- https://quiltlizzyayden.com/blogs/quilt-lizzy-ayden-blog/common-sewing-mistakes-and-how-to-avoid-them
- https://www.mygoldenthimble.com/12-sewing-mistakes-you-dont-know-you-are-making-and-how-to-fix-them/


