This site is supported by our readers. We may earn a commission, at no cost to you, if you purchase through links.
Your first straight cut can make or break a quilt block. Slide the fabric a hair off the ruler’s edge, and that "perfect" square turns into a trapezoid three strips later. It happens to every quilter, even ones who’ve been at it for years.
Here’s the good news: rotary cutters and quilting rulers work as a team, not two separate tools you happen to use together. Once you know how to hold the ruler, angle the blade, and square up as you go, those crooked cuts disappear for good.
Grab your mat, and let’s get your fabric cutting straight, safe, and square from the very first slice.
Table Of Contents
- Key Takeaways
- Prepare Fabric and Workspace
- Square Fabric Before Cutting
- Cut With Ruler Accuracy
- Avoid Slips and Cutting Mistakes
- Top 9 Rotary Cutting Tools
- 1. Olfa rotary cutter and blade set
- 2. Olfa self healing rotary cutting mat
- 3. Omnigrid rectangle quilting and sewing ruler
- 4. Omnigrid Rectangle Quilting Sewing Ruler
- 5. Dritz Omnigrid Rotary Blade Sharpener
- 6. Rotary cutting and quilting techniques book
- 7. Rotary Cutting and Speed Piecing Guide
- 8. Faultless Premium Luxe Spray Starch
- 9. Mary Ellen Best Press Starch Alternative
- Frequently Asked Questions (FAQs)
- Conclusion
Key Takeaways
- Prep your fabric and workspace first by pressing it flat, starching limp fabric, securing a stable mat, and aligning selvages before making any cuts.
- Square up your fabric with an accurate fold, proper grid alignment, and a verified 90-degree angle to prevent crooked strips down the line.
- Cut with steady technique by holding the ruler firmly with finger pads, keeping the blade vertical, and pushing away from your body in one smooth motion.
- Protect your fingers and cutting accuracy by wearing a cut-resistant glove, replacing dull blades, and resquaring your fabric every few strips to stop errors from stacking up.
Prepare Fabric and Workspace
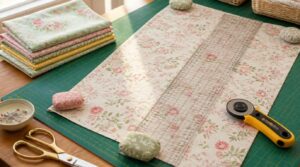
Before you make a single cut, your fabric and workspace need to be ready. A little prep work now saves you from crooked lines and wasted material later. Here’s exactly what to check first.
If you’re tackling a classroom assignment, browsing these sewing patterns for school projects first can help you choose fabric that’s actually suited to the design.
Press Fabric Flat
Press before you cut — every time, no exceptions. Wrinkled quilting cotton throws off your measurements fast.
Work from the center outward with your iron, using even pressure so you don’t create puckers. Let the fabric cool flat before it touches your ruler; this fabric stabilization step prevents warping. Skipping the cool-down means your fabric relaxes back into wrinkles right when you need precision most.
Starch Flimsy Fabric
Got a limp, drifty piece of quilting cotton on your hands? Starch is your fix.
Spray starch coats the fibers and dries into a semi-rigid film, locking them in place so the weave holds its shape.
- Adds body without stiffening your hands
- Keeps edges crisp during precision cutting
- Improves fabric stabilization for accurate strips
Lightly starch, then iron for a smooth, cut-ready surface.
Set Mat Securely
A wobbly mat ruins accuracy fast. Lay your self-healing mat on a hard, flat surface, smooth away any bubbles, and check its grid line alignment against the table edge.
| Problem | Fix |
|---|---|
| Mat shifting | Non-slip backing |
| Surface bubbles | Press flat, retape |
| Uneven table | Add cushioned pad |
Stable footing keeps your baseline cuts honest before fabric even touches the mat.
Align Fabric Selvages
With your mat locked down, turn to the fabric itself. Line up those selvage edges parallel to the mat’s grid lines to keep fabric grain consistent and avoid bias cutting errors down the road. Make sure the pattern grainline arrow is placed parallel to the selvage edge for accuracy.
- Check for selvage warping before cutting
- Smooth wrinkles near the edge
- Confirm straight lines with your acrylic ruler
- Watch grainline orientation stays true
- Minimize fabric waste through careful layout
Choose Cutter Size
Three blade sizes cover almost every quilting job, so match yours to the fabric. A 45mm rotary cutter is your all-purpose workhorse for up to four layers. Go smaller (18-24mm) for curves, larger (60mm) for thick stacks.
This is basic Cutter Precision Balance: bigger blades add extra power for heavy layer count management, smaller ones boost cutting accuracy on delicate quilting supplies.
Square Fabric Before Cutting
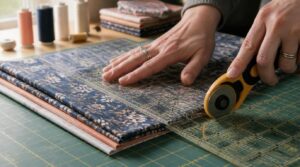
Before you make a single cut, you need a straight, square edge to work from. Skipping this step is how crooked strips and wonky blocks happen. Here’s how to square up your fabric the right way.
Fold Fabric Accurately
A crisp fold is the backbone of every straight cut. Smooth the fabric flat with your hand, top to bottom, to prevent fiber snagging.
Fold along an existing seam or edge for a crisp fold line, then pinch gently to set the crease without stretching.
Check that the fold sits perpendicular to your ruler edge before you re-press it.
Align Fold to Mat
Line up your crease with the mat’s main grid line, keeping the fold flat and true. Grid line alignment gives you a fixed baseline for measuring both sides evenly.
Press out any bumps with your palm. The crease should melt flat, not ridge up, when the mat’s fully opened.
Double-check the fold sits parallel to the mat’s bottom edge before you reach for that ruler.
Place Ruler at Edge
Here’s your alignment check: grab a clear acrylic ruler so you can actually see the fold line beneath it. Set the ruler’s edge flush against the crease, square to the fold.
Press down firmly to prevent ruler drift, and smooth away any fabric curl with your palm first. A slightly beveled edge helps keep that blade riding true and vertical.
Cut a Straight Baseline
Every great strip starts with one clean line. With your ruler locked against the fold, cut in one smooth, continuous motion—no stopping, no sawing. Push away from your body, keeping the blade upright to avoid drift.
Measure twice before you commit; this baseline sets the tone for every cut after it, so accuracy here saves fabric waste down the road.
Check The 90-degree Angle
That little square symbol you learned in geometry class actually matters here. Before cutting, verify perpendicular edges using a square tool or protractor—line up the baseline, check the reading hits exactly 90 degrees.
- Tilted blades create skewed cuts
- Fabric bias distorts what looks straight
- Loose rulers shift mid-cut
- Wrong-side cuts misalign everything
Recheck often. Measurement accuracy now prevents wonky strips later.
Cut With Ruler Accuracy
Your fabric is squared up and ready to go. Now comes the part where accuracy really counts: the actual cut. Here are five habits that keep every line straight, safe, and exactly where you want it.
Use Ruler Markings

Trust the ruler, not the mat, for every strip you cut. Mat lines can shift with wear, but rotary cutting rulers hold their fractional accuracy.
| Marking | Use |
|---|---|
| 1/8" line | Fine trims |
| 1/4" line | Seam allowance |
| 1" bold line | Quick reference |
| Metric mm | International patterns |
| Zero edge | Starting point |
Good lighting helps you catch tick marks clearly for true measurement accuracy.
Hold Ruler Firmly
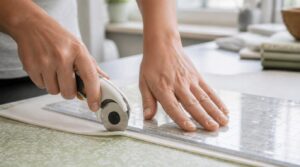
Rest your guide hand’s finger pads lightly across the ruler instead of gripping with your thumb tucked under—that tucked grip adds torque and causes skew.
Distribute pressure from elbow through shoulder, not just fingers.
Add grip strips or a magnetic ruler base to your clear acrylic ruler for extra stability.
If it shifts, reset your stance rather than regripping mid-cut.
Keep Blade Vertical
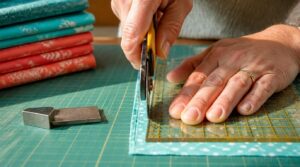
Once your grip feels steady, check your blade angle. A tilted blade skews your cut and ruins fabric precision.
- Keep the blade perpendicular to the mat
- Apply straight-down pressure, not angled
- Watch for wrist rotation—it causes tilt
- Use a small square guide to verify vertical alignment
- Retract the blade if it drifts mid-cut
Push Cutter Away

Push, don’t pull. Pulling the cutter toward you invites blade drift and wobble, especially through layered fabric. Pushing away keeps the blade tracking straight against your quilting ruler for better fabric precision.
Use a relaxed wrist (no twisting!), let your fingers stay clear behind the ruler, and manage fabric tension evenly. Slower pushes suit heavier fabrics—a small habit that pays off in sewing safety and clean edges.
Make One Smooth Cut
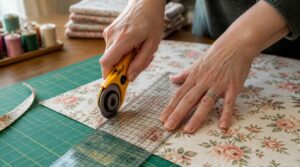
One continuous motion is the secret here. Start your rotary cutter at the near edge of the mat and glide forward past the fabric’s end—no stopping halfway.
Lock your wrist, apply steady pressure, and keep the blade vertical against your quilting ruler. Mid-cut pauses cause jagged edges. Smooth, confident cuts give you clean, straight lines every time.
Avoid Slips and Cutting Mistakes
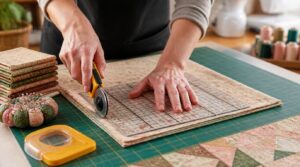
Even with great technique, small slips can still happen if you’re not careful. A few smart habits will keep your fingers safe and your cuts clean every time. Let’s walk through the five things you should always keep in mind.
Keep Fingers Clear
Your fingers are the last line of defense between a clean cut and a trip to the ER. Curve your cutting-hand fingers away from the blade’s edge, and press your guiding hand flat against the ruler’s outside edge, never over the line.
Curve your cutting-hand fingers from the blade and keep your guiding hand flat, never over the line
Use full finger pads, not tips, for steady pressure. This simple habit prevents blade drift and keeps every rotary cutter session accident-free.
Wear a Safety Glove
Slide a cut-resistant Kevlar glove onto your non-dominant hand before every session. It blocks blade slips without killing your grip.
Look for ANSI or EN cut-resistant ratings when shopping, and choose a snug fit for tactile control. Avoid loose cuffs that snag your rotary cutter or quilting ruler.
Wash it often. Good crafting safety habits protect fingers for years.
Retract Blade Immediately
Ease up on pressure, and a squeeze-handle rotary cutter snaps its blade back in under half a second flat.
That automatic safety feature relies on a spring mechanism, tucking the blade safely into its housing.
Train your hand to release fully after each cut—it’s the fastest way to dodge accidental nicks during sewing.
- Faster reflexes
- Fewer slips
- Safer pauses
- Protected blades
- Real peace of mind
Replace Dull Blades
A dull blade fights you on every cut, raising cutting force by 25 to 60 percent. Watch for microchips, skewed cuts, or matte edges—these are your blade wear indicators. Replace immediately if chips exceed 0.2mm. If you catch these warning signs early, our step-by-step rotary cutter blade sharpening guide can help you restore the edge before reaching for a replacement.
Keep spare replacement blades on hand, log each swap for maintenance tracking, and drop worn ones straight into a dedicated container for safe disposal.
Resquare Between Strips
Cut a few strips and small errors sneak in and stack up fast—that’s cumulative error.
Every fourth strip or so, resquare: lay your ruler’s squaring arm against the edge, checking for zero lateral play and true alignment with fiber orientation. This quick calibration keeps strip width consistent and your cuts genuinely straight, not just close enough.
Top 9 Rotary Cutting Tools
Good technique only gets you so far without the right gear backing you up. Now that you know the moves, let’s talk about what belongs in your sewing room. Here are nine tools worth adding to your cutting station.
1. Olfa rotary cutter and blade set
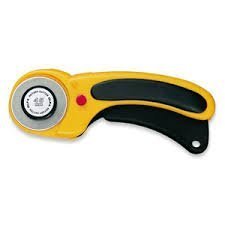
One tool that does it all, the Olfa rotary cutter and blade set covers most quilting jobs with its 45mm to 60mm cutting head. You get one tungsten steel blade plus a protective cover right out of the box, and the ergonomic grip works whether you’re right- or left-handed.
Need a new blade down the road? Olfa sells replacements in standard and heavy-duty options, so you can match blade to fabric. The quick-change mechanism makes swaps painless, no extra tools required.
| Best For | This rotary cutter and blade set is best for quilters and sewers tackling medium- to heavy-duty fabric projects that require cutting through multiple layers at once. |
|---|---|
| Category | Rotary Cutter |
| Material | Alloy Steel |
| Model Number | 156B / RB-45-1 |
| Dimensions | 4.4 in handle |
| Primary Use | Fabric Cutting |
| Skill Level | Beginner-Friendly |
| Additional Features |
|
- Ergonomic comfort-grip handle suits both right- and left-handed users
- Automatic blade self-retraction adds a built-in safety feature
- Durable tungsten steel blade cuts through up to six layers of fabric at a time
- Only compatible with 45 mm rotary blades, limiting flexibility for other cutting sizes
- Set includes just one replacement blade, so extras will need to be purchased separately
- Handle length of 4.4 inches may feel short for users with larger hands
2. Olfa self healing rotary cutting mat
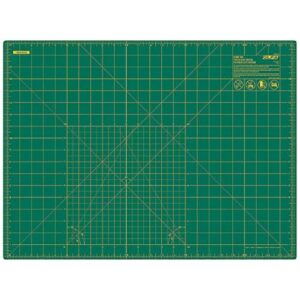
A sharp blade needs a good surface to land on, and that’s where this mat earns its keep. The triple-layer, heat-welded construction seals cuts fast, so your grid stays smooth cut after cut.
At roughly 1.5mm thick, it resists warping and keeps blades sharper, longer. One side gives you yellow measurement lines in inches and metric; flip it over for solid green, no-grid cutting.
| Best For | crafters, quilters, and hobbyists who need a reliable double-sided surface for measuring and cutting on a variety of everyday projects. |
|---|---|
| Category | Cutting Mat |
| Material | Plastic |
| Model Number | RM-SG |
| Dimensions | 18 x 18 x 0.06 in |
| Primary Use | Cutting Surface Protection |
| Skill Level | All Levels |
| Additional Features |
|
- Self-healing surface keeps the mat smooth and usable cut after cut
- Double-sided design offers both a gridded side for precise measuring and a solid green side for general cutting
- Compact 18 x 18 inch size fits easily on most tables or work surfaces
- Thin 0.06 inch profile may feel less sturdy than heavier-duty mats
- Plastic construction can develop deep gouges under heavy-duty blades
- Listed dimensions vary between sources (18×18 vs. 18×24), so it’s worth confirming size before buying
3. Omnigrid rectangle quilting and sewing ruler
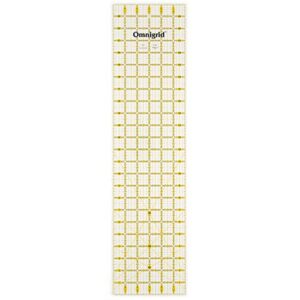
A great mat deserves a great guide, and Omnigrid’s rectangle ruler fits that bill nicely. Its black and yellow double line grid shows up clearly on both light and dark fabrics, so you always know where you’re cutting.
Laser cut edges keep your line smooth through multiple layers, while 30, 45, and 60 degree markings simplify angled cuts. Built from clear acrylic and sized 6 x 24 inches, it’s ambidextrous, too. Left-handed or right-handed, you’ll cut with confidence.
| Best For | Quilters and crafters who want precise, angled cuts across multiple fabric layers, no matter which hand they cut with. |
|---|---|
| Category | Quilting Ruler |
| Material | Acrylic Plastic |
| Model Number | N/A |
| Dimensions | 6 x 24 in |
| Primary Use | Precision Cutting Guide |
| Skill Level | Intermediate |
| Additional Features |
|
- High-contrast black and yellow grid makes lines easy to read on both light and dark fabrics
- Laser cut edges glide smoothly through multiple fabric layers for cleaner cuts
- Marked 30, 45, and 60 degree lines make angled cuts and alignment much easier
- Requires a separate rotary cutter to actually use it
- Acrylic material can scratch over time if not handled carefully
- At 6 x 24 inches, it may be too large for smaller or more detailed projects
4. Omnigrid Rectangle Quilting Sewing Ruler
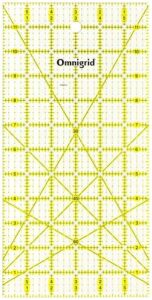
If you’ll be squaring up quilt blocks or trimming borders, this is your workhorse. It comes in sizes like 6×24 and 9×24 inches, with metric and imperial markings for whatever pattern you’re following.
Diagonal lines make triangle cutting painless, and the laser-cut edges keep your rotary blade gliding smoothly. Best part? The grid aligns with common block sizes—2.5", 4.5", 9.5"—so you’re not doing math mid-project. It just works.
| Best For | This ruler is best for quilters and sewists who need precise, accurate cuts on both light and dark fabrics, especially when working with Fat Quarters or secondary strip cuts. |
|---|---|
| Category | Quilting Ruler |
| Material | Optical-grade Acrylic |
| Model Number | R12 |
| Dimensions | 6 x 12 in |
| Primary Use | Precision Cutting Guide |
| Skill Level | Intermediate |
| Additional Features |
|
- Double-sight lines make it easy to see markings clearly on any fabric color, light or dark
- Dual numbering and angle systems support both left- and right-handed users
- Built-in 30, 45, and 60 degree angle lines simplify common quilting cuts
- Fixed at 6 x 12 inches, so it won’t suit larger cutting or squaring tasks
- Designed only for rotary cutters and craft knives, limiting its use with other tools
- Acrylic construction means it can chip or crack if dropped or mishandled
5. Dritz Omnigrid Rotary Blade Sharpener
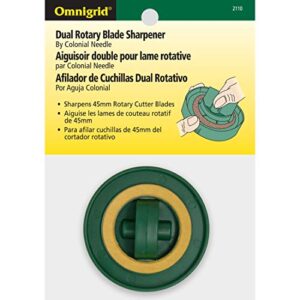
A dull blade turns clean cuts into ragged, skipped ones fast. This little sharpener fixes that — twist the blade in, spin, and it’s ready again.
Compatible with 45mm blades only, so check your cutter size first. It’s made in the USA, weighs practically nothing, and beats buying new blades every few projects.
Every 10-20 uses, add a drop of fine oil to keep things smooth. Simple, cheap insurance for tools you already own.
| Best For | Quilters and fabric crafters who rely on 45mm rotary cutters and want a cheap, easy way to keep blades cutting cleanly instead of replacing them. |
|---|---|
| Category | Blade Sharpener |
| Material | Metal and Plastic |
| Model Number | OG2110 |
| Dimensions | 6.25 x 3.88 x 1.25 in |
| Primary Use | Blade Maintenance |
| Skill Level | All Levels |
| Additional Features |
|
- Twist-and-sharpen design makes blade maintenance quick and hassle-free
- Compact and lightweight, so it’s easy to keep right next to your cutting station
- Durable metal-and-plastic build made in the USA
- Only works with 45mm blades, so it won’t help with other sizes
- Needs a drop of fine oil every 10-20 uses to keep performing well
- Small size means it could be easy to misplace in a busy sewing space
6. Rotary cutting and quilting techniques book
Sometimes you need more than a gadget — you need someone walking you through the whole process. This 212-page guide from Rodale Press covers cutting station setup, blade angle diagrams, and ruler alignment tricks for square, accurate cuts.
Beyond cutting, it dives into pressing, finishing, and twelve full quilting projects to practice on. Published in 1998, the techniques hold up fine, though some product references feel dated. Still, it’s a solid shelf reference for building real skill.
| Best For | quilters who want structured, in-depth instruction rather than just quick tips, especially those ready to work through full projects to build real skill. |
|---|---|
| Category | Instructional Book |
| Material | Paper |
| Model Number | N/A |
| Dimensions | 9 x 0.75 x 11.25 in |
| Primary Use | Skill Instruction |
| Skill Level | Beginner-Friendly |
| Additional Features |
|
- Clear guidance on rotary cutting, blade angles, and ruler alignment for precise cuts
- Twelve full projects included, so you can practice techniques hands-on
- Covers pressing and finishing methods that go beyond just piecing
- Published in 1998, so some product references and tools feel outdated
- At 2.13 pounds, it’s a bit bulky to keep flipping through at a sewing table
- Only available in English, which may limit accessibility for some readers
7. Rotary Cutting and Speed Piecing Guide
Want a whole weekend saved? This Rodale Books guide (128 pages, 2000) packs in 230+ color photos showing exactly how to cut and piece faster without sacrificing accuracy.
You’ll learn shortcuts for cutting dozens of triangle squares, tackling odd shapes without templates, and piecing miniature quilts. It’s built for finishing bed-size projects fast. Some references feel dated now, but the essential cutting techniques still hold up beautifully for beginners and experienced quilters alike.
| Best For | Quilters of any skill level who want to speed up piecing and cutting to finish bed-size projects in a fraction of the usual time. |
|---|---|
| Category | Instructional Book |
| Material | Paper |
| Model Number | N/A |
| Dimensions | 8.75 x 0.5 x 11.25 in |
| Primary Use | Skill Instruction |
| Skill Level | All Levels |
| Additional Features |
|
- Over 230 color photos make each technique easy to follow
- Clever shortcuts for triangle squares, odd shapes, and miniature quilts save serious time
- Works well for both beginners and experienced quilters looking to boost precision
- Published in 2000, so some tools and products mentioned are outdated
- Doesn’t cover digital design software, focusing only on manual techniques
- Assumes some basic quilting knowledge to get the most out of advanced tips
8. Faultless Premium Luxe Spray Starch
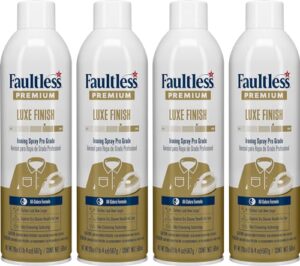
Crisp fabric cuts start before the blade even touches your quilt top. Faultless Premium Luxe Spray Starch adds body to cottons and linens, so your rotary cutter glides through instead of dragging or shifting the weave.
Spray from about eight inches away, then iron as usual. The non-clogging aerosol won’t flake on darker fabrics, and Fibrefresher tech keeps things smelling fresh. One 20 oz can from this 4-pack lasts through plenty of projects, giving you dry-cleaner crispness for accurate, confident cuts every time.
| Best For | Quilters, sewers, and crafters who want stiffer, easier-to-cut fabric along with home sewists looking for a crisp, professional finish on everyday ironing. |
|---|---|
| Category | Fabric Spray |
| Material | Aerosol Liquid |
| Model Number | 017500209420-4pk |
| Dimensions | 10.47 x 9.41 x 2.99 in |
| Primary Use | Ironing Aid |
| Skill Level | All Levels |
| Additional Features |
|
- Adds body to fabric, making cutting and sewing more precise
- Non-clogging spray won’t flake, even on darker fabrics
- Fibrefresher technology leaves clothing and linens smelling fresh
- Aerosol application may not suit those who prefer pump or liquid starches
- Must be sprayed from a distance and ironed properly for best results
- Not for use near high heat, punctures, or open flame, so care in storage is needed
9. Mary Ellen Best Press Starch Alternative

Sensitive to fragrances but still want crisp seams? This scent-free spray gives you a clear starch alternative with soil guard technology built right in.
At 16.9 oz, it’s easy to mist lightly, iron, and cut clean edges without gumming up your blade. No stiff residue, no sneeze attacks—just smooth fabric that holds its shape under the ruler. For quilters piecing cotton blends, that stability makes every strip cut land exactly where you want it.
| Best For | quilters and sewists who are sensitive to fragrances but still want crisp, stable fabric for precise cutting and ironing. |
|---|---|
| Category | Fabric Spray |
| Material | Aerosol Liquid |
| Model Number | 85806 |
| Dimensions | N/A |
| Primary Use | Ironing Aid |
| Skill Level | All Levels |
| Additional Features |
|
- Scent-free formula won’t trigger fragrance sensitivities
- Soil guard technology helps protect clothing from buildup
- Reduces wrinkles and simplifies the ironing process
- Sold as a single unit only
- Aerosol form needs careful handling and storage
- Shatterproof bottle adds bulk compared to standard spray cans
Frequently Asked Questions (FAQs)
How often should I replace my cutting mat?
With light hobby use, expect 2–3 years of life. Heavy daily quilting wears mats faster, sometimes needing replacement every 1–3 years. Watch for deep grooves, warping, or dull-looking grid lines—that’s your cue it’s time for a new one.
Can rotary cutters cut through vinyl or leather?
Yes, but with limits. Thin vinyl (up to 5mm) cuts cleanly, while leather asks more of your blade. Anything past 5mm needs a heavy-duty blade, slower passes, and a little patience.
What causes rotary cutter blades to wobble?
Wobble usually comes from dull or damaged blades, loose arbor nuts, debris trapped between blade and flange, or a worn cutting mat. Rushed, choppy strokes make it worse. Keep your blade fresh, your hardware snug, and your motion smooth and steady.
Is it safe to cut curves with rulers?
Cutting curves with a ruler is like dancing with a partner who keeps changing direction—it works with practice. Use a low-profile, non-slip ruler, move slowly in short segments, and keep your blade vertical for safe, accurate curved cuts.
How should I store rotary cutters safely?
Store your cutter in a rigid-shell case with the blade retracted and locked. Keep it dry, away from sunlight and heat, and stash spare blades in labeled, secured pockets to prevent accidental contact.
Conclusion
A student once trimmed ten strips before noticing her ruler had drifted a whisker off true—every seam after fought her for it.
That’s the real lesson in how to use a rotary cutter with a quilting ruler: small habits decide big outcomes.
Square up often, keep your fingers clear, and let the blade do the work, not your wrist.
Master this rhythm, and crooked strips become a rare surprise instead of a Tuesday-night headache.
Your blocks will finally lie flat, corners meeting like they were always meant to.
- https://love-sew.com/blogs/blog/how-to-use-a-rotary-cutter
- https://www.loandbeholdstitchery.com/blogs/lo-and-behold/safety-for-quilters-13-ways-to-protect-yourself-and-your-projects
- https://mrsquilty.com/blogs/news/how-to-use-a-rotary-cutter-safely
- https://www.handmadiya.com/2023/06/how-to-use-rotary-cutter.html
- https://www.stringandstory.com/blog/rotarycutter